 ROS2 robot-localization配置方案

来源:古月居
robot-localization
robot_localization是一个ROS的包,基于卡尔曼滤波,对多种传感器进行数据融合,进而完成机器人的定位。近期确实遇到了需要实现更高精度定位的问题,在多方考虑下其中一部分优化方法就是引入了robot-localization库,这个库的引入还是比较简单的,但是实际上的操作方式还是和大家分享一下。
硬件平台
此处硬件平台其实并不局限,这里以OriginBot为例好了
OriginBot(导航版)
Ubuntu 20.04
使用方式
安装robot-localization
基本有两种方式了。
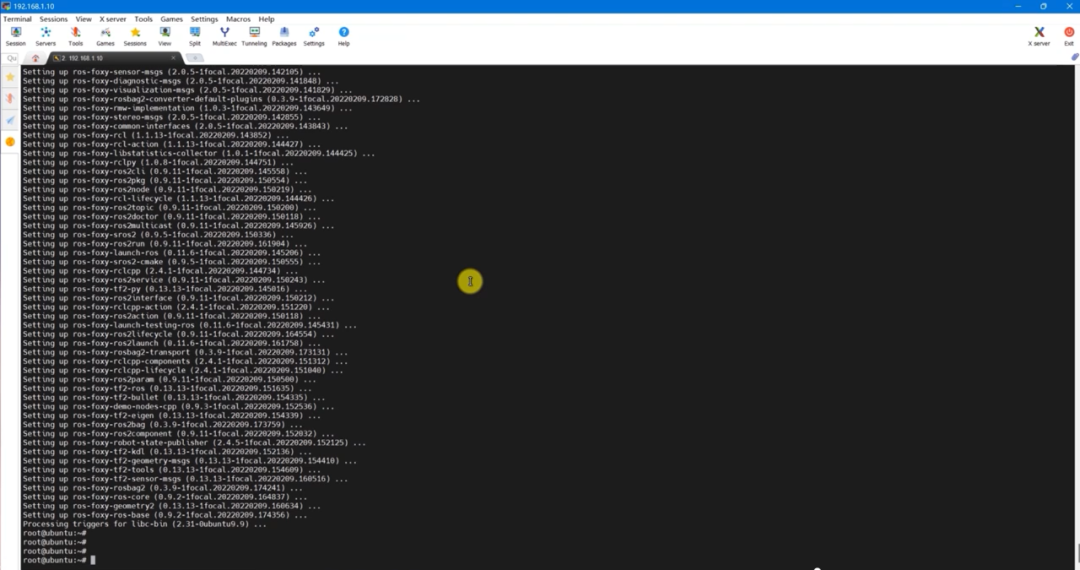
一种是使用二进制方式下载
sudo apt install ros-foxy-robot-localization
这种方式可以直接把包拿来使用,比较方便而且也是最快上手的方式了
第二种是直接拉源码包出来用。
这里需要说明的是,类似这种官方源码包如果在不熟悉的情况下取改动的话出错的概率还是很大的,所以推荐第一种使用方式。
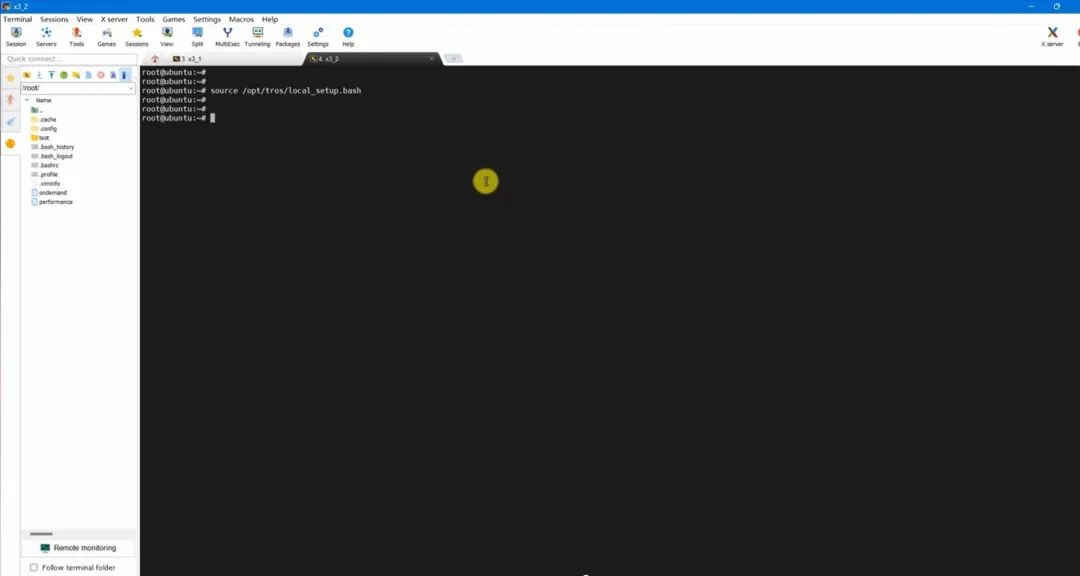
下载完成之后无论如何请执行养成良好的工程习惯
source /opt/ros/foxy/setup.bash
配置robot-localization
说起配置,其实是一件很简单的事情了。说回来robot-localization,本质上拿到的是两组数据,一组为odom(里程计数据)、一组为IMU(陀螺仪数据),然后将两组数据利用卡尔曼滤波的方式去预测当前真实的位置。
如何去配置呢?一般的工科做法当然是尽可能使用配置文件来做。所以就有了ekf.yaml文件,ekf翻译过来就是扩展卡尔曼滤波。【如果按照我的理解,扩展卡尔曼滤波相对于卡尔曼滤波的差别就是可以进一步处理非线性的数据】
ekf.yaml文件的内容如下:
  ###ekf配置文件###ekf_filter_node: ros__parameters:


  # The frequency, in Hz, at which the filter will output a position estimate. Note that the filter will not begin


  # computation until it receives at least one message from one of the inputs. It will then run continuously at the


  # frequency specified here, regardless of whether it receives more measurements. Defaults to 30 if unspecified.


  # 滤波器输出位置估计的频率,单位为Hz。请注意,过滤器在从其中一个输入接收到至少一条消息之前不会开始计算。


  # 然后,无论是否接收到更多的测量值,它都将以此处指定的频率连续运行。如果未指定,则默认为30。


      frequency: 30.0


  # The period, in seconds, after which we consider a sensor to have timed out. In this event, we carry out a predict


  # cycle on the EKF without correcting it. This parameter can be thought of as the minimum frequency with which the


  # filter will generate new output. Defaults to 1 / frequency if not specified.


  # 我们认为传感器超时的时间段(以秒为单位)。在这种情况下,我们在EKF上执行一个预测周期,而不进行校正。


  # 这个参数可以被认为是滤波器产生新输出的最小频率。如果未指定,则默认为1/频率。


      sensor_timeout: 0.1


  # ekf_localization_node and ukf_localization_node both use a 3D omnidirectional motion model. If this parameter is


  # set to true, no 3D information will be used in your state estimate. Use this if you are operating in a planar


  # environment and want to ignore the effect of small variations in the ground plane that might otherwise be detected


  # by, for example, an IMU. Defaults to false if unspecified.


  # ekf_localization_node and ukf_localization_node都使用3D全向运动模型。


  # 如果此参数设置为true,则不会在状态估计中使用任何三维信息。


  # 如果您在平面环境中操作,并且希望忽略地平面中可能检测到的微小变化的影响,请使用此选项


  # 例如通过IMU。如果未指定,则默认为false。


      two_d_mode: true


  # Use this parameter to provide an offset to the transform generated by ekf_localization_node. This can be used for


  # future dating the transform, which is required for interaction with some other packages. Defaults to 0.0 if


  # unspecified.


  # 使用此参数可以为ekf_location_node生成的变换提供偏移。这可以用于未来的日期转换,这是与其他一些包交互所必需的。


  # 如果未指定,则默认为0.0。


      transform_time_offset: 0.0


  # Use this parameter to provide specify how long the tf listener should wait for a transform to become available.


  # Defaults to 0.0 if unspecified.


  #使用此参数可以指定tf侦听器应等待转换可用的时间。#如果未指定,则默认为0.0。 transform_timeout: 0.0


  # If you're having trouble, try setting this to true, and then echo the /diagnostics_agg topic to see if the node is


  # unhappy with any settings or data.


  #如果遇到问题,请尝试将其设置为true,然后echo the /diagnostics_agg主题,查看节点是否对任何设置或数据不满意 print_diagnostics: true


  # Debug settings. Not for the faint of heart. Outputs a ludicrous amount of information to the file specified by


  # debug_out_file. I hope you like matrices! Please note that setting this to true will have strongly deleterious


  # effects on the performance of the node. Defaults to false if unspecified.


  # 调试设置。不适合胆小的人。向debug_out_file指定的文件输出数量惊人的信息。我希望你喜欢矩阵!


  # 请注意,将此设置为true将对节点的性能产生严重的有害影响。如果未指定,则默认为false。


      debug: false


  # Defaults to "robot_localization_debug.txt" if unspecified. Please specify the full path.


  #如果未指定,则默认为“robot_location_debug.txt”。请指定完整路径。 debug_out_file: /path/to/debug/file.txt


  # Whether we'll allow old measurements to cause a re-publication of the updated state


  # 我们是否允许旧的测量结果导致更新状态的重新发布


      permit_corrected_publication: false


  # Whether to publish the acceleration state. Defaults to false if unspecified.


  #是否发布加速状态。如果未指定,则默认为false。 publish_acceleration: false


  # Whether to broadcast the transformation over the /tf topic. Defaults to true if unspecified.


  #是否在/tf主题上广播转换。如果未指定,则默认为true。 publish_tf: false


  # REP-105 (http://www.ros.org/reps/rep-0105.html) specifies four principal coordinate frames: base_link, odom, map, and


  # earth. base_link is the coordinate frame that is affixed to the robot. Both odom and map are world-fixed frames.


  # The robot's position in the odom frame will drift over time, but is accurate in the short term and should be


  # continuous. The odom frame is therefore the best frame for executing local motion plans. The map frame, like the odom


  # frame, is a world-fixed coordinate frame, and while it contains the most globally accurate position estimate for your


  # robot, it is subject to discrete jumps, e.g., due to the fusion of GPS data or a correction from a map-based


  # localization node. The earth frame is used to relate multiple map frames by giving them a common reference frame.


  # ekf_localization_node and ukf_localization_node are not concerned with the earth frame.


  # Here is how to use the following settings:


  # REP-105(http://www.ros.org/reps/rep-0105.html)指定四个主要坐标系:base_link、odom、map和earth。


  # base_link是固定在机器人上的坐标系。odom和map都是world-fixed frames。


  # 机器人在odom框架中的位置会随着时间的推移而漂移,但在短期内是准确的,应该是连续的。因此,odom帧是用于执行局部运动计划的最佳帧。


  # 与odom框架一样,map框架是一个世界固定的坐标框架,虽然它包含了机器人最全局准确的位置估计,但它会受到离散跳跃的影响,


  # 例如,由于GPS数据的融合或基于地图的定位节点的校正。地球坐标系用于通过给多个地图坐标系提供一个公共参考坐标系来关联它们。


  # ekf_location_node和ukf_localization_node与map帧无关。


  #以下是如何使用以下设置:


  # 1. Set the map_frame, odom_frame, and base_link frames to the appropriate frame names for your system.


  # 1a. If your system does not have a map_frame, just remove it, and make sure "world_frame" is set to the value of


  # odom_frame.


  # 1.将map_frame、odom_frame和base_link帧设置为系统的适当帧名称。


  # 1a. 如果您的系统没有map_frame,只需将其删除,并确保“world_frame”设置为odom_frame的值。


  # 2. If you are fusing continuous position data such as wheel encoder odometry, visual odometry, or IMU data, set


  # "world_frame" to your odom_frame value. This is the default behavior for robot_localization's state estimation nodes.


  # 2. 如果要融合连续位置数据,如车轮编码器里程计、视觉里程计或IMU数据,请将“world_frame”设置为odom_frame值。这是robot_location的状态估计节点的默认行为。


  # 3. If you are fusing global absolute position data that is subject to discrete jumps (e.g., GPS or position updates


  # from landmark observations) then:


  # 3a. Set your "world_frame" to your map_frame value


  # 3b. MAKE SURE something else is generating the odom->base_link transform. Note that this can even be another state


  # estimation node from robot_localization! However, that instance should *not* fuse the global data.


  # 3. 如果您正在融合受离散跳跃影响的全球绝对位置数据(例如,GPS或地标的位置更新观察),然后:


  # 3a. 将“world_frame”设置为map_frame值


  # 3b. 确保其他东西正在生成odom->base_link变换。请注意,这甚至可以是robot_location的另一个状态估计节点!但是,该实例不应该融合全局数据。


      map_frame: map       # 如果未指定,则默认为“map”
      odom_frame: odom      # 如果未指定,则默认为"odom"
      base_link_frame: base_link # 如果未指定,则默认为"base_link"
      world_frame: odom      # 如果未指定,则默认为"odom"


  # The filter accepts an arbitrary number of inputs from each input message type (nav_msgs/Odometry,


  # geometry_msgs/PoseWithCovarianceStamped, geometry_msgs/TwistWithCovarianceStamped,


  # sensor_msgs/Imu). To add an input, simply append the next number in the sequence to its "base" name, e.g., odom0,


  # odom1, twist0, twist1, imu0, imu1, imu2, etc. The value should be the topic name. These parameters obviously have no


  # default values, and must be specified.


  # 过滤器接受来自每个输入消息类型的任意数量的输入(nav_msgs/Odometry、geometry_msgs/PoseWithCovarianceStamped、


  # geometry_msgs/TwistWithCovariance Stamped,sensor_msgs/Imu)。


  #要添加输入,只需将序列中的下一个数字附加到其“base”名称,例如odom0、odom1、twist0、twist1、imu0、imu1、imu2等。#该值应为topic名称。这些参数显然没有默认值,必须指定。 odom0: /odom_diff


  # Each sensor reading updates some or all of the filter's state. These options give you greater control over which


  # values from each measurement are fed to the filter. For example, if you have an odometry message as input, but only


  # want to use its Z position value, then set the entire vector to false, except for the third entry. The order of the


  # values is x, y, z, roll, pitch, yaw, vx, vy, vz, vroll, vpitch, vyaw, ax, ay, az. Note that not some message types


  # do not provide some of the state variables estimated by the filter. For example, a TwistWithCovarianceStamped message


  # has no pose information, so the first six values would be meaningless in that case. Each vector defaults to all false


  # if unspecified, effectively making this parameter required for each sensor.


  # 每个传感器读数都会更新过滤器的部分或全部状态。这些选项使您能够更好地控制将每个测量值输入到过滤器的值。


  # 例如,如果您有里程计消息作为输入,但只想使用其Z位置值,则将整个矢量设置为false,第三个条目除外。


  # 值的顺序为x、y、z、roll、pitch、yaw、vx、vy、vz、vroll、vpitch、vyaw、ax、ay、az。


  # 请注意,并非某些消息类型不提供过滤器估计的某些状态变量。例如,TwistWithCovarianceStamped消息没有姿势信息,


  # 因此在这种情况下,前六个值将毫无意义。如果未指定,则每个向量默认为全假,从而有效地使每个传感器都需要此参数。


      odom0_config: [false, false, false, #x-y-z坐标系的坐标(机器人位置)
              false, false, false, #绕x/y/z轴的角度(机器人方向)、
              true, false, false, #沿x/y/z轴的线速度、
              false, false, true, #绕x/y/z轴的角速度、
              false, false, false] #沿x/y/z轴的加速度。


  # If you have high-frequency data or are running with a low frequency parameter value, then you may want to increase


  # the size of the subscription queue so that more measurements are fused.


  #如果您有高频数据或使用低频参数值运行,则可能需要增加订阅队列的大小,以便融合更多的测量值。 odom0_queue_size: 20


  # [ADVANCED] Large messages in ROS can exhibit strange behavior when they arrive at a high frequency. This is a result


  # of Nagle's algorithm. This option tells the ROS subscriber to use the tcpNoDelay option, which disables Nagle's


  # algorithm.


  # [高级]ROS中的大消息在高频到达时会表现出奇怪的行为。这是Nagle算法的结果。


  # 此选项告诉ROS订户使用tcpNoDelay选项,该选项禁用Nagle的算法。


      odom0_nodelay: false


  # [ADVANCED] When measuring one pose variable with two sensors, a situation can arise in which both sensors under-


  # report their covariances. This can lead to the filter rapidly jumping back and forth between each measurement as they


  # arrive. In these cases, it often makes sense to (a) correct the measurement covariances, or (b) if velocity is also


  # measured by one of the sensors, let one sensor measure pose, and the other velocity. However, doing (a) or (b) isn't


  # always feasible, and so we expose the differential parameter. When differential mode is enabled, all absolute pose


  # data is converted to velocity data by differentiating the absolute pose measurements. These velocities are then


  # integrated as usual. NOTE: this only applies to sensors that provide pose measurements; setting differential to true


  # for twist measurements has no effect.


  # [高级]当用两个传感器测量一个姿态变量时,可能会出现两个传感器都报告不足的情况。这可能导致滤波器在每次测量到达时快速来回跳跃。


  # 在这些情况下,(a)校正测量协变量,或者(b)如果其中一个传感器也测量速度,则让一个传感器测量姿态,而另一个传感器则测量速度,


  # 这通常是有意义的。然而,做(a)或(b)并不总是可行的,因此我们公开了微分参数。启用差分模式时,通过对绝对姿态测量值进行微分,


  # 将所有绝对姿态数据转换为速度数据。然后像往常一样对这些速度进行积分。注:这仅适用于提供姿态测量的传感器;


  # 将twist测量的微分设置为true没有效果。


      odom0_differential: false


  # [ADVANCED] When the node starts, if this parameter is true, then the first measurement is treated as a "zero point"


  # for all future measurements. While you can achieve the same effect with the differential paremeter, the key


  # difference is that the relative parameter doesn't cause the measurement to be converted to a velocity before


  # integrating it. If you simply want your measurements to start at 0 for a given sensor, set this to true.


  # [ADVANCED]当节点启动时,如果此参数为真,则第一次测量将被视为所有未来测量的“零点”。虽然你可以用微分参数计获得同样的效果,


  # 但关键的区别在于,相对参数不会导致测量在积分之前转换为速度。如果你只是想让给定传感器的测量从0开始,请将其设置为true。


      odom0_relative: false


  # [ADVANCED] If your data is subject to outliers, use these threshold settings, expressed as Mahalanobis distances, to


  # control how far away from the current vehicle state a sensor measurement is permitted to be. Each defaults to


  # numeric_limits::max() if unspecified. It is strongly recommended that these parameters be removed if not


  # required. Data is specified at the level of pose and twist variables, rather than for each variable in isolation.


  # For messages that have both pose and twist data, the parameter specifies to which part of the message we are applying


  # the thresholds.


  # [ADVANCED]如果您的数据存在异常值,请使用这些阈值设置(表示为Mahalanobis距离)来控制允许传感器测量距离当前车辆状态的距离。


  # 如果未指定,则每个阈值都默认为numeric_limits<double>::max()。如果不需要,强烈建议删除这些参数。


  # 数据是在姿势和扭曲变量级别指定的,而不是单独为每个变量指定的。对于同时具有姿势和扭曲数据的消息,


  # 该参数指定我们将阈值应用于消息的哪一部分。


      odom0_pose_rejection_threshold: 5.0
      odom0_twist_rejection_threshold: 1.0


  # Further input parameter examples


  # 进一步的输入参数示例


      # odom1: example/odom2
      # odom1_config: [false, false, true,
      #        false, false, false,
      #        false, false, false,
      #        false, false, true,
      #        false, false, false]
      # odom1_differential: false
      # odom1_relative: true
      # odom1_queue_size: 2
      # odom1_pose_rejection_threshold: 2.0
      # odom1_twist_rejection_threshold: 0.2
      # odom1_nodelay: false
      # pose0: example/pose
      # pose0_config: [true, true, false,
      #        false, false, false,
      #        false, false, false,
      #        false, false, false,
      #        false, false, false]
      # pose0_differential: true
      # pose0_relative: false
      # pose0_queue_size: 5
      # pose0_rejection_threshold: 2.0 # 注意参数名称的差异
      # pose0_nodelay: false


      # twist0: example/twist
      # twist0_config: [false, false, false,
      #         false, false, false,
      #         true, true, true,
      #         false, false, false,
      #         false, false, false]
      # twist0_queue_size: 3
      # twist0_rejection_threshold: 2.0
      # twist0_nodelay: false


      imu0: /imu_data


      imu0_config: [false, false, false,  #x-y-z坐标系的坐标(机器人位置)
             false, false, false, #绕x/y/z轴的角度(机器人方向)
             false, false, false,  #沿x/y/z轴的线速度
             false, false, true,   #绕x/y/z轴的角速度
             true, true, false]  #沿x/y/z轴的加速度
      imu0_nodelay: false
      imu0_differential: false
      imu0_relative: false
      imu0_queue_size: 20
      imu0_pose_rejection_threshold: 0.8         # 注意参数名称的差异
      imu0_twist_rejection_threshold: 0.8        #
      imu0_linear_acceleration_rejection_threshold: 0.8 #


  # [ADVANCED] Some IMUs automatically remove acceleration due to gravity, and others don't. If yours doesn't, please set


  # this to true, and *make sure* your data conforms to REP-103, specifically, that the data is in ENU frame.


  # [高级]一些IMU会自动消除重力造成的加速度,而另一些则不会。如果您的数据不符合,请将其设置为true,


  # 并*确保*您的数据符合REP-103,特别是数据在ENU框架中。


      imu0_remove_gravitational_acceleration: false


  # [ADVANCED] The EKF and UKF models follow a standard predict/correct cycle. During prediction, if there is no


  # acceleration reference, the velocity at time t+1 is simply predicted to be the same as the velocity at time t. During


  # correction, this predicted value is fused with the measured value to produce the new velocity estimate. This can be


  # problematic, as the final velocity will effectively be a weighted average of the old velocity and the new one. When


  # this velocity is the integrated into a new pose, the result can be sluggish covergence. This effect is especially


  # noticeable with LIDAR data during rotations. To get around it, users can try inflating the process_noise_covariance


  # for the velocity variable in question, or decrease the variance of the variable in question in the measurement


  # itself. In addition, users can also take advantage of the control command being issued to the robot at the time we


  # make the prediction. If control is used, it will get converted into an acceleration term, which will be used during


  # predicition. Note that if an acceleration measurement for the variable in question is available from one of the


  # inputs, the control term will be ignored.


  # Whether or not we use the control input during predicition. Defaults to false.


  # [高级]EKF和UKF模型遵循标准的预测/校正周期。在预测期间,如果没有加速度参考,则简单地将时间t+1处的速度预测为与时间t处的速度相同。


  # 在校正期间,将该预测值与测量值融合以产生新的速度估计。这可能是有问题的,因为最终速度实际上是旧速度和新速度的加权平均值。


  # 当这个速度被整合到一个新的姿势中时,结果可能是缓慢的隐蔽。这种效果在旋转过程中的激光雷达数据中尤为明显。为了解决这个问题,


  # 用户可以尝试为有问题的速度变量增加process_noise_covariance,或者在测量本身中减少有问题的变量的方差。


  # 此外,用户还可以利用在我们进行预测时向机器人发出的控制命令。如果使用控制,它将被转换为加速项,该加速项将在预测过程中使用。


  # 请注意,如果从其中一个输入中可以获得有关变量的加速度测量值,则控制项将被忽略。


  # 无论我们是否在预测期间使用控制输入。默认为false。


      use_control: false


  # Whether the input (assumed to be cmd_vel) is a geometry_msgs/Twist or geometry_msgs/TwistStamped message. Defaults to


  # false.


  #输入(假定为cmd_vel)是geometry_msgs/Twist还是geometry_msgs/TwistStamped消息。默认为false。 stamped_control: false


  # The last issued control command will be used in prediction for this period. Defaults to 0.2.


  #最后发布的控制命令将用于该时段的预测。默认值为0.2。 control_timeout: 0.2


  # Which velocities are being controlled. Order is vx, vy, vz, vroll, vpitch, vyaw.


  #正在控制哪些速度。顺序是vx、vy、vz、vroll、vpitch、vyaw。 control_config: [true, false, false, false, false, true]


  # Places limits on how large the acceleration term will be. Should match your robot's kinematics.


  # 限制加速度项的大小。应与机器人的运动学相匹配。


      acceleration_limits: [1.3, 0.0, 0.0, 0.0, 0.0, 3.4]


  # Acceleration and deceleration limits are not always the same for robots.


  #机器人的加速和减速限制并不总是相同的。 deceleration_limits: [1.3, 0.0, 0.0, 0.0, 0.0, 4.5]


  # If your robot cannot instantaneously reach its acceleration limit, the permitted change can be controlled with these


  # gains


  #如果你的机器人不能立即达到其加速度极限,那么可以通过这些增益来控制允许的变化 acceleration_gains: [0.8, 0.0, 0.0, 0.0, 0.0, 0.9]


  # If your robot cannot instantaneously reach its deceleration limit, the permitted change can be controlled with these


  # gains


  # 如果你的机器人不能立即达到减速极限,那么允许的变化可以用这些增益来控制


      deceleration_gains: [1.0, 0.0, 0.0, 0.0, 0.0, 1.0]


  # [ADVANCED] The process noise covariance matrix can be difficult to tune, and can vary for each application, so it is


  # exposed as a configuration parameter. This matrix represents the noise we add to the total error after each


  # prediction step. The better the omnidirectional motion model matches your system, the smaller these values can be.


  # However, if users find that a given variable is slow to converge, one approach is to increase the


  # process_noise_covariance diagonal value for the variable in question, which will cause the filter's predicted error


  # to be larger, which will cause the filter to trust the incoming measurement more during correction. The values are


  # ordered as x, y, z, roll, pitch, yaw, vx, vy, vz, vroll, vpitch, vyaw, ax, ay, az. Defaults to the matrix below if


  # unspecified.


  # [ADVANCED]过程噪声协方差矩阵可能很难调整,并且可能因每个应用而变化,因此它被公开为配置参数。


  # 这个矩阵表示我们在每个预测步骤之后添加到总误差中的噪声。全向运动模型与系统匹配得越好,这些值就越小。


  # 然而,如果用户发现给定的变量收敛较慢,一种方法是增加该变量的process_noise_covariance对角值,这将导致滤波器的预测误差更大,


  # 这将使得滤波器在校正期间更加信任传入的测量。值的顺序为x、y、z、滚转、俯仰、偏航、vx、vy、vz、vroll、vpitch、vyaw、ax、ay、az。


  # 如果未指定,则默认为以下矩阵。


      process_noise_covariance: [0.05, 0.0,  0.0,  0.0,  0.0,  0.0,  0.0,   0.0,   0.0,  0.0,  0.0,  0.0,  0.0,  0.0,  0.0,
                    0.0,  0.05, 0.0,  0.0,  0.0,  0.0,  0.0,   0.0,   0.0,  0.0,  0.0,  0.0,  0.0,  0.0,  0.0,
                    0.0,  0.0,  0.06, 0.0,  0.0,  0.0,  0.0,   0.0,   0.0,  0.0,  0.0,  0.0,  0.0,  0.0,  0.0,
                    0.0,  0.0,  0.0,  0.03, 0.0,  0.0,  0.0,   0.0,   0.0,  0.0,  0.0,  0.0,  0.0,  0.0,  0.0,
                    0.0,  0.0,  0.0,  0.0,  0.03, 0.0,  0.0,   0.0,   0.0,  0.0,  0.0,  0.0,  0.0,  0.0,  0.0,
                    0.0,  0.0,  0.0,  0.0,  0.0,  0.06, 0.0,   0.0,   0.0,  0.0,  0.0,  0.0,  0.0,  0.0,  0.0,
                    0.0,  0.0,  0.0,  0.0,  0.0,  0.0,  0.025, 0.0,   0.0,  0.0,  0.0,  0.0,  0.0,  0.0,  0.0,
                    0.0,  0.0,  0.0,  0.0,  0.0,  0.0,  0.0,   0.025, 0.0,  0.0,  0.0,  0.0,  0.0,  0.0,  0.0,
                    0.0,  0.0,  0.0,  0.0,  0.0,  0.0,  0.0,   0.0,   0.04, 0.0,  0.0,  0.0,  0.0,  0.0,  0.0,
                    0.0,  0.0,  0.0,  0.0,  0.0,  0.0,  0.0,   0.0,   0.0,  0.01, 0.0,  0.0,  0.0,  0.0,  0.0,
                    0.0,  0.0,  0.0,  0.0,  0.0,  0.0,  0.0,   0.0,   0.0,  0.0,  0.01, 0.0,  0.0,  0.0,  0.0,
                    0.0,  0.0,  0.0,  0.0,  0.0,  0.0,  0.0,   0.0,   0.0,  0.0,  0.0,  0.02, 0.0,  0.0,  0.0,
                    0.0,  0.0,  0.0,  0.0,  0.0,  0.0,  0.0,   0.0,   0.0,  0.0,  0.0,  0.0,  0.01, 0.0,  0.0,
                    0.0,  0.0,  0.0,  0.0,  0.0,  0.0,  0.0,   0.0,   0.0,  0.0,  0.0,  0.0,  0.0,  0.01, 0.0,
                    0.0,  0.0,  0.0,  0.0,  0.0,  0.0,  0.0,   0.0,   0.0,  0.0,  0.0,  0.0,  0.0,  0.0,  0.015]


  # [ADVANCED] This represents the initial value for the state estimate error covariance matrix. Setting a diagonal


  # value (variance) to a large value will result in rapid convergence for initial measurements of the variable in


  # question. Users should take care not to use large values for variables that will not be measured directly. The values


  # are ordered as x, y, z, roll, pitch, yaw, vx, vy, vz, vroll, vpitch, vyaw, ax, ay, az. Defaults to the matrix below


  #if unspecified.


  # [ADVANCED]这表示状态估计误差协方差矩阵的初始值。将对角线值(方差)设置为大值将导致所讨论变量的初始测量的快速收敛。


  # 用户应注意不要对不会直接测量的变量使用大值。


  # 用户应注意不要对不会直接测量的变量使用大值。


  # 值的顺序为x、y、z、滚转、俯仰、偏航、vx、vy、vz、vroll、vpitch、vyaw、ax、ay、az。


  # 如果未指定,则默认为以下矩阵。


      initial_estimate_covariance: [1e-9, 0.0,  0.0,  0.0,  0.0,  0.0,  0.0,  0.0,  0.0,  0.0,   0.0,   0.0,   0.0,  0.0,  0.0,
                     0.0,  1e-9, 0.0,  0.0,  0.0,  0.0,  0.0,  0.0,  0.0,  0.0,   0.0,   0.0,   0.0,  0.0,  0.0,
                     0.0,  0.0,  1e-9, 0.0,  0.0,  0.0,  0.0,  0.0,  0.0,  0.0,   0.0,   0.0,   0.0,  0.0,  0.0,
                     0.0,  0.0,  0.0,  1e-9, 0.0,  0.0,  0.0,  0.0,  0.0,  0.0,   0.0,   0.0,   0.0,  0.0,  0.0,
                     0.0,  0.0,  0.0,  0.0,  1e-9, 0.0,  0.0,  0.0,  0.0,  0.0,   0.0,   0.0,   0.0,  0.0,  0.0,
                     0.0,  0.0,  0.0,  0.0,  0.0,  1e-9, 0.0,  0.0,  0.0,  0.0,   0.0,   0.0,   0.0,  0.0,  0.0,
                     0.0,  0.0,  0.0,  0.0,  0.0,  0.0,  1e-9, 0.0,  0.0,  0.0,   0.0,   0.0,   0.0,  0.0,  0.0,
                     0.0,  0.0,  0.0,  0.0,  0.0,  0.0,  0.0,  1e-9, 0.0,  0.0,   0.0,   0.0,   0.0,  0.0,  0.0,
                     0.0,  0.0,  0.0,  0.0,  0.0,  0.0,  0.0,  0.0,  1e-9, 0.0,   0.0,   0.0,   0.0,  0.0,  0.0,
                     0.0,  0.0,  0.0,  0.0,  0.0,  0.0,  0.0,  0.0,  0.0,  1e-9, 0.0,   0.0,   0.0,  0.0,  0.0,
                     0.0,  0.0,  0.0,  0.0,  0.0,  0.0,  0.0,  0.0,  0.0,  0.0,   1e-9, 0.0,   0.0,  0.0,  0.0,
                     0.0,  0.0,  0.0,  0.0,  0.0,  0.0,  0.0,  0.0,  0.0,  0.0,   0.0,   1e-9, 0.0,  0.0,  0.0,
                     0.0,  0.0,  0.0,  0.0,  0.0,  0.0,  0.0,  0.0,  0.0,  0.0,   0.0,   0.0,   1e-9, 0.0,  0.0,
                     0.0,  0.0,  0.0,  0.0,  0.0,  0.0,  0.0,  0.0,  0.0,  0.0,   0.0,   0.0,   0.0,  1e-9, 0.0,
                     0.0,  0.0,  0.0,  0.0,  0.0,  0.0,  0.0,  0.0,  0.0,  0.0,   0.0,   0.0,   0.0,  0.0,  1e-9]
可选项很多,但是需要配置的内容其实围绕在odom0和imu0上了,大家可以根据内容做出一些修改。这里大家就会发现odom似乎有点奇怪,我们一般在base程序中会发布一个odom话题,此外还有一个odom坐标系,那么和这里有什么关系呢?其实这里的意思是,大家可以不用在base中去tf广播odom了,直接发布odom的数据即可,那个数据会来到ekf中,有ekf来释放一个新的融合的odom数据。
启用robot-localization
这里需要写一个launch文件了,其实比较简单,本身咱们二进制下载robot-localization之后就有一个ekf.launch.py了,如果没有做过多更改就可以直接使用了。但是为了匹配修改后的ekf.yaml文件,一般还是会copy一份出来另外处理。
    from launch import LaunchDescription
    from ament_index_python.packages
    import get_package_share_directory
    import launch_ros.actionsimport os
    import yaml
    from launch.substitutions import EnvironmentVariable
    import pathlib
    import launch.actions
    from launch.actions import DeclareLaunchArgument


    def generate_launch_description():
      return LaunchDescription([ launch_ros.actions.Node( package='robot_localization',
      executable='ekf_node', name='ekf_filter_node', output='screen', parameters=
      [os.path.join(get_package_share_directory("robot_localization"), 'params', 'ekf.yaml')], ),])
简要总结
robot-localization确实是一个比较好用的技术,可以比较好的去优化机器人的定位,因为它融合了多个传感器的输入。对于使用者而言还是需要在ekf.yaml中去配置一下你希望它分别融合odom/imu的哪些数据,比如你的里程计很好,那么完全可以把位置信息都融合上等等。
当然如果想要真正做到好的定位robot-localziation还是不够的,因为本质上还是依赖了传感器,那么如何更好的去处理定位呢。是不是可以考虑加上视觉里程计/传感器校准等。甚至把ekf出来的odom数据给到类似cartographer算法增加激光雷达的一些处理都可以进一步优化定位。
总的来说robot-localization可以当作最后的输出,也可以当作定位的中间一环,看我们怎么去使用了。
审核编辑:汤梓红
-
传感器
+关注
关注
2578文章
55567浏览量
794164 -
机器人
+关注
关注
213文章
31494浏览量
223809 -
ROS
+关注
关注
1文章
296浏览量
18884 -
高精度定位
+关注
关注
0文章
80浏览量
4164
原文标题:ROS2 robot-localization配置
文章出处:【微信号:vision263com,微信公众号:新机器视觉】欢迎添加关注!文章转载请注明出处。
发布评论请先 登录
系统镜像Ubuntu_ROS2中ROS2是什么意思,带有ROS2开发环境吗?
ROS2 SLAM建图与导航实战--基于米尔RK3576开发板
如何在ROS2中运行小乌龟呢
基于无线wifi网络的X3派和PC虚拟机通过ROS2实现跨设备通信
imx8mp安装ros2失败的原因?
【昉·星光 2 高性能RISC-V单板计算机体验】四:在 VisionFive2 上安装 ROS2 humble
【昉·星光 2 高性能RISC-V单板计算机体验】五:在 VisionFive2 上体验 ROS2 humble
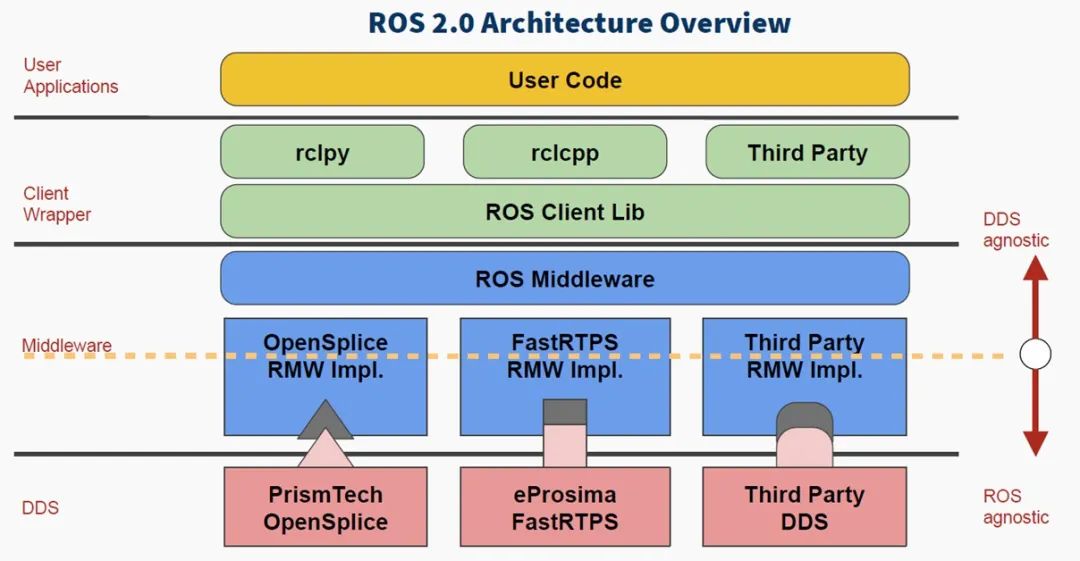
DDS在ROS2中的应用
ROS2中自带例程测试
在TogetherROS中如何安装ROS2功能包
初识ros2 功能包建立与可执行文件的配置
开发必看,RK3576基于Ubuntu22.04安装 测试ROS2机器人系统


评论