【上海晶珩睿莓 1 单板计算机】人脸识别
本文介绍了上海晶珩睿莓 1 单板计算机结合 OpenCV 内置 YuNet 算法和 SFace 模型实现人脸识别的项目设计,包括环境部署、预训练模型获取
2026-01-04 20:22:01
近日,奕斯伟计算与全球开源操作系统领军企业Canonical签署授权许可协议, 奕斯伟计算EBC77系列硬件产品——SBC单板计算机、Mini-DTX主板, 正式获得Ubuntu操作系统安装许可
2025-12-26 09:10:21 607
607 
12月5日,由中国图象图形学学会青年工作委员会(下简称“青工委”)、上海市计算机学会计算机视觉专委会(下简称“专委会”)联合主办,上海西井科技股份有限公司、江苏路街道商会承办的“上海计算机视觉企业行—走进西井科技”学术沙龙,在西井科技武夷路上海总部顺利举行。
2025-12-16 15:39:30385 电子发烧友网报道(文/吴子鹏)日前,中国首个规模化专用光量子计算机制造工厂在深圳南山智城正式启用,我国量子计算产业迎来了历史性时刻——这不仅是国内首个光量子计算机规模化制造基地的诞生,更标志着中国在
2025-11-28 08:21:007421 据央视新闻报道;在24日;深圳南山区国内首个光量子计算机制造工厂正式进入小规模生产阶段,据悉该工厂是隶属于玻色量子;总面积约5000平方米,集研发、制造、测试于一体,用于实现光量子计算机的工程化、标准化和规模化生产。第一台计算能力达到1000个量子比特的光量子计算机在这里生产。
2025-11-25 17:17:371871 在工业自动化和智能制造领域,计算机设备作为核心控制单元,其选择直接影响整个系统的稳定性与可靠性。工控机与普通计算机虽同属计算设备,但其设计目标、性能侧重和应用场景存在根本性差异。准确理解这些差异,是进行正确设备选型的基础。
2025-11-25 14:45:531553 
电子发烧友网综合报道 2025年11月14日,中国电信量子研究院正式宣布,搭载“祖冲之三号”同款芯片的超导量子计算机“天衍-287”完成搭建。这一突破标志着我国首个具备“量子计算优越性”的量子计算云
2025-11-18 08:40:008334 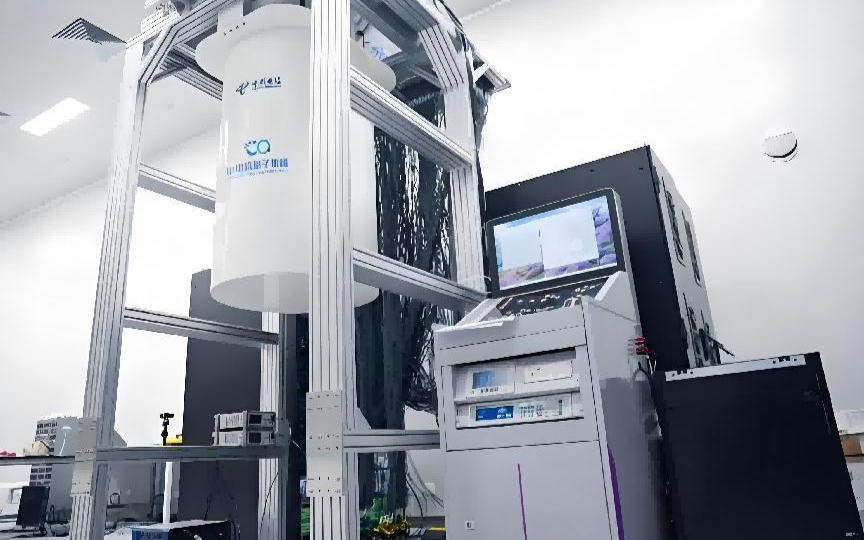
不同客户对高性能信创嵌入式计算机的多样化需求。
[]()
BPI - 2K3000可应用于企业办公、个人微型计算机、高性能工业计算机,以及教育、医疗、金融、边缘计算等领域。它具有高性能计算、便携、低能耗和易
2025-11-15 11:43:19
2025年11月8日,由教育部计算机类专业系统能力课程群虚拟教研室指导、北京航空航天大学计算机学院主办的龙架构计算机系统能力核心课程教学研讨会在京举行。
2025-11-14 13:52:01516 近日,2025中国工业计算机大会(CCF ICCC 2025)在云南昆明召开。本次大会由中国计算机学会主办,中国计算机学会工业控制计算机专委会、国家工业控制机及系统工程技术研究中心和昆明
2025-11-10 17:35:57561 贸泽电子开售全新Arduino UNO Q单板计算机。Arduino UNO Q单板计算机(SBC)将高性能计算与实时控制结合,提供理想的创新平台。
2025-11-08 09:50:051146 近日,备受瞩目的第22届中国计算机大会(CNCC2025)在哈尔滨开幕。本届大会注册人数突破1.2万人,汇聚了来自全球计算机领域的顶尖学者、产业领袖、青年学子及国际组织代表。大会以“数智赋能、无限可能”为主题,旨在深度探讨数字智能技术的前沿进展与未来趋势,为推动计算技术与经济社会深度融合贡献智慧。
2025-11-02 09:29:53499 10月23日至25日,第二十二届中国计算机大会(CNCC2025)在哈尔滨成功举办。大会以“数智赋能,无限可能”为主题,汇聚了来自全球计算机领域的顶尖学者、产业领袖、青年学子及国际组织代表,共同探讨
2025-10-27 17:46:36796 在导航系统中,嵌入式计算机的核心作用是实时处理多种传感器的数据,运行复杂的导航算法,最终计算出载体的精确位置、姿态、速度和时间信息。
2025-09-26 16:52:15899 DGX Spark 现已开启预订!丽台科技作为 NVIDIA 授权分销商,提供从产品到服务的一站式解决方案,助力轻松部署桌面 AI 计算机。
2025-09-23 17:20:501060 
全国产化导航计算机子卡是实现在国防、航天等国家关键领域技术自主的重要一环。
2025-09-16 18:02:30698 
Gateworks采用u-blox GNSS RTK、校正服务和蓝牙模块,为应用开发者提供可应对恶劣环境的可靠精准定位与通信能力。
2025-09-15 14:09:38616 千兆以太网端口用于充电的USB-C接口我很喜欢在较小的单板计算机(SBC)上看到以太网端口,因为这使它们作为瘦客户端更有用,而且对于这种尺寸的单板计算机来说,充裕的
2025-09-12 13:44:26897 
MUSE Pi Pro 单板计算机将 RISC-V 八核处理器、存储硬盘、通用接口部件和扩展接口布置在同一块电路板上,支持 UEFI 启动以及多种操作系统和应用的运行,是一款完整的计算机系统产品
2025-09-11 10:01:46
北斗卫星同步时钟系统:水电新能源计算机监控系统
2025-09-10 15:00:51540 
赛昉科技VisionFive 2单板计算机开发板测评作品合集
产品介绍:
昉·星光 2是全球首款集成了3D GPU的高性能量产RISC-V单板计算机,搭载昉·惊鸿-7110(型号:JH-7110
2025-09-04 09:08:26
8月26日,elexcon2025深圳国际电子展在深圳会展中心隆重开幕。在全球知名新品引入(NPI)代理商贸泽电子(Mouser Electronics) 展台(1号馆1Q30),DFRobot展示了其LattePanda Sigma单板计算机与Qwen3大语言模型的融合应用。
2025-08-30 10:51:06896 Banana Pi BPI-R4 Lite 现已上市。具体来说,这款单板计算机在 Youyeetoo 上的售价约为 86 美元,但客户在下单前请务必查看运输条款和费用。这是一款单板计算机,有望成为
2025-08-26 16:46:281189 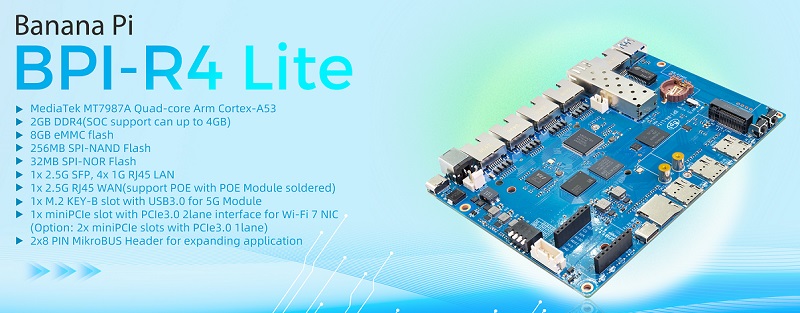
加固计算机是一种专门为复杂环境和特殊行业应用设计的高性能设备。它不仅具备常规电脑的数据处理和运算功能,更在结构设计、防护等级和硬件配置方面做了全面优化。例如,它的外壳通常采用镁铝合金或高强度复合材料
2025-08-22 09:55:50463 全志科技合作伙伴瑞莎计算机(Radxa) 今日发布基于全志 A733处理器平台的单板计算机—— Cubie A7A。该产品将高性能计算、AI 加速能力与灵活的接口扩展相结合,面向边缘计算、人工智能
2025-08-20 11:37:362209 2025重磅消息!今年9月,树莓派团队将首次亮相上海工博会(CIIF)。届时,现场将展示超多硬核科技:从树莓派单板计算机(最高至RaspberryPi500)、RaspberryPiPico系列,到基于RP2350的解决方案,还有AI产品、摄像头和前沿工业设备ComputeModule5
2025-08-15 19:36:55892 
创建init
创建init.sh文件,并设置权限为root
sudo chown root init.sh
sudo chgrp root init.sh
init.sh文件中写入
#!/bin/bash
echo \"系统于
$(date) 开机\" >> /var/log/myscript.log
cd /home/user/01_LCD/
python3 LCD_demo.py
配置启动服务
在 /etc/systemd/system/ 目录下创建一个 .service 文件(如 my.service)
并写入下述代码
[Unit]
Description=My Custom Script
After=network.target
[Service]
Type=simple
ExecStart=/home/user/init.sh
User=root
[Install]
WantedBy=multi-user.target
添加服务
# 重新加载systemd配置
sudo systemctl daemon-reload
# 设置开机自启
sudo systemctl enable my.service
# 手动测试服务是否正常运行
sudo systemctl start my.service
验证是否生成
cat /var/log/myscript.log# 查看日志是否生成
然后重启设备就可以看到开机就会自动显示时间和图片了
2025-08-14 22:04:29
倘若计算的未来并非被专有架构所垄断,那会怎样?想象一下这样一个世界:开发者和业余爱好者都能利用开源硬件的力量自由地构建、创新和实验。现在,让我们走进RISC-V单板计算机(SBC)的世界——一个正在
2025-08-14 13:37:51869 
小结
电子相册功能已完成,附带一个日历效果。
可以通过同局域网samba实现手机或者电脑直接将图片传到vf2中,并在代码中设定轮流播放的时间。
记录生活照片或者做成文物日历。
基础功能暂时告一段落。
使用感受:
vf2提供了python控制gpio接口,简化了驱动的实现。
vf2的python实现很方便,直接调用库实现图片的等比放大,转成想要的色深等等。
后续完全可以结合i2c等实现对应传感器数据的显示,我就不在这里更新了。
此外还有一些遗憾
缺少wifi,始终需要使用网口
测试下来,使用python将一张图解析出来转色深到lcd上,需要3s以上,之后我再基于同版参数和其他的开发板做评估吧。
本打算实现音频接口功能,由于时间有限,加上刷机有点没弄明白,不是一次性刷到sd卡中,所以音频的部分只能搁置。
人脸识别的部分以后再做吧,可以结合led灯阵做成寄存柜,之后项目再更新。
#!/usr/bin/python
\"\"\"
Please make sure the 2.4inch LCD Moudle is connected to the correct pins.
The following table describes how to connect the 2.4inch LCD Module to the 40-pin header.
-------------------------------------------------
__2.4inch LCD Module___Pin Number_____Pin Name
VCC173.3 V Power
GND39 GND
DIN19SPI MOSI
CLK23SPI SCLK
CS 13GPIO43y
DC 11GPIO42y-
RST07GPIO55y-
BL 15GPIO47y
-------------------------------------------------
\"\"\"
import os
import sys
import time
import logging
from PIL import Image
from datetime import datetime
sys.path.append(\"..\")
import VisionFive.boardtype as board_t
# from lib import LCD2inch4_lib
from lib import LCD_ST7735_lib
from lib import LCD_GC9306_lib
from lib import LCD_ILI9488_lib
\"\"\"
--------------------------------------------------------------- {
Init
\"\"\"
WHITE = 0xffffff
# WHITE = 0x0000
BLUE = 0xFF0000
lcd_num = 3
# 1 st7735, 2 gc9306, 3 ili9488
pin_res = 7
pin_dc = 11
# 初始化lcd
# Determining cpu Type: 1 means visionfive1; 2 means visionfive 2
vf_t = board_t.boardtype()
print(\"vf_t \",vf_t)
if vf_t == 1:
SPI_DEVICE = \"/dev/spidev0.0\"
elif vf_t == 2:
SPI_DEVICE = \"/dev/spidev1.0\"
else:
print(\"This module can only be run on a VisionFive board!\")
\"\"\"The initialization settings of 2inch and 2.4inch are distinguished\"\"\"
# pin_res, pin_dc
match lcd_num:
case 1:
print(\"lcd st7735\")
disp = LCD_ST7735_lib.LCD_ST7735(7, 11, SPI_DEVICE)
disp.lcd_init_st7735()
case 2:
print(\"lcd gc9306\")
disp = LCD_GC9306_lib.LCD_GC9306(7, 11, SPI_DEVICE)
disp.lcd_init_gc9306()
case 3:
print(\"lcd ili9488\")
disp = LCD_ILI9488_lib.LCD_ILI9488(7, 11, SPI_DEVICE)
disp.lcd_init_ili9488()
case _:
print(\"unknown lcd\")
# 获取文件夹中图片名称
folder_path = \"./picture\"
# folder_path = \"./picture_column\"
# folder_path = \"./tmp\"
items = os.listdir(folder_path)
file_paths = []
for item in items:
item_path = os.path.join(folder_path, item)
if os.path.isfile(item_path) and \"._\" not in item and \".DS_Store\" not in item:
# if os.path.isfile(item_path):# 只保留文件
file_paths.append(item_path)
\"\"\"
} ---------------------------------------------------------------
\"\"\"
def show_img(image_path):
time_start = time.time()
# print(time.time(),\"show img\")
print(image_path)
disp.lcd_ShowImage(image_path, 0, 50)
time_end = time.time()
print(\"cost time:\",time_end-time_start)
# time.sleep(2)
# def show_img(image_path):
#time_start = time.time()
## print(time.time(),\"show img\")
#image = Image.open(image_path)
#disp.lcd_ShowImage(image, 0, 50)
#image.close()
#time_end = time.time()
#print(\"cost time:\",time_end-time_start)
## time.sleep(2)
def test_clear():
# print(\"clear write\")
# time.sleep(2)
print(\"clear screen -- White\")
disp.lcd_clear(WHITE)
time.sleep(2)
print(\"clear screen -- Blue\")
if lcd_num == 3:
# Blue=0x03F0000
# Blue=0xFC0000
# Blue=0x3F0000
Blue=0x03F000
else:
Blue=0x001f
disp.lcd_clear(Blue)
time.sleep(2)
def get_time():
times = time.time()
# print(times)
local_times = time.localtime(times)
local_time_asctimes = time.asctime(local_times)
# print(local_time_asctimes)
return local_time_asctimes
def get_time2():
now = datetime.now()
formatted_time = now.strftime(\"%Y年%m月%d日 %H时%M分%S秒\")
latinFileName= formatted_time.encode(\"utf-8\").decode(\"latin1\")
return latinFileName
def get_file_list():
file_nummax = 0
# 获取文件夹中图片名称
folder_path = \"./picture\"
# folder_path = \"./picture_column\"
# folder_path = \"./tmp\"
items = os.listdir(folder_path)
file_paths = []
for item in items:
item_path = os.path.join(folder_path, item)
if os.path.isfile(item_path) and \"._\" not in item and \".DS_Store\" not in item:
# if os.path.isfile(item_path):# 只保留文件
file_paths.append(item_path)
file_nummax += 1
print(\"file max\",file_nummax)
return file_paths,file_nummax
def is_12h():
time_hour = datetime.now().hour
if time_hour == 24 & flag_update == True:
print(\"12点了\")
flag_update = False
return True
else:
flag_update = True
print(time_hour)
return False
def is_sec(sec=0):
time_second = datetime.now().second
if time_second % sec == 0 :
return True
# else:
# print(time_second)
return False
def main():
print(\"-----------lcd demo-------------\")
disp.lcd_clear(WHITE)
# test_clear()
# test picture and lcd xy direction
# show_img(\"./tmp/line.jpg\")
# show_img(\"./tmp/line2.jpg\")
# show_img(\"./tmp/line320.jpg\")
# show_img(\"./tmp/line480.jpg\")
# show_img(\"./picture/parrot.bmp\")
# show_img(\"./picture_test/code.jpg\")
# show_img(\"./picture_test/IMG_4512.jpeg\")
# show_img(\"./picture_test/IMG_4529.jpeg\")
# show_img(\"./picture/visionfive2.png\")
# show_img(\"./picture_column/IMG_5415.jpeg\")
print(get_time(),\"show text\")
disp.display_text(get_time())
show_img(\"./picture_column/a.png\")
file_num = 1
(file_list, file_num_max) = get_file_list()
print(file_list[file_num], file_num_max)
show_img(file_list[file_num])
flag_update = False
print(get_time(),\"start\")
while 1:
disp.display_text(get_time())
# print(time.time())
# print(time.time()%5)
if is_sec(10) == True:
if flag_update == True:
file_num += 1
if file_num == file_num_max:
file_num = 0
print(\"\\\\n= \",get_time())
show_img(file_list[file_num])
flag_update = False
else:
flag_update = True
# is_12h()
# if int(time.time()) % 20 == 0 :
#file_num += 1
#show_img(file_list[file_num])
# show_img(\"./picture/IMG_3278.jpeg\")
# disp.lcd_clear_range(WHITE,0,0,0,40)
# for path in file_paths:
#print(time.strftime(\"%Y-%m-%d %H:%M:%S\", time.localtime(time.time())))
#path_tmp = path
#print(path_tmp)
#show_img(path_tmp)
#time.sleep(2)
# except KeyboardInterrupt:
#break
print(\"Exit demo!\")
if __name__ == \'__main__\':
main()
import os
import sys
import time
import logging
import VisionFive.spi as spi
import VisionFive.gpio as gpio
import numpy as np
from PIL import Image, ImageDraw, ImageFont
class LCD_ILI9488:
width = 320
height = 480
rotate = 180
WHITE = 0xffffff
def __init__(self, rst_pin, dc_pin, dev):
gpio.setmode(gpio.BOARD)
self.pin_rst = rst_pin
self.pin_dc = dc_pin
self.pin_bl = 15
self.spidev = dev
spi.getdev(self.spidev)
\"\"\"Reset the maximum clock frequency of communication\"\"\"
\"\"\"The display speed of the picture is positively correlated with the clock frequency\"\"\"
# spi.setmode(500000, 0, 8)
spi.setmode(40000000, 0, 8)
gpio.setup(self.pin_rst, gpio.OUT)
gpio.setup(self.pin_dc, gpio.OUT)
gpio.setup(self.pin_bl, gpio.OUT)
def __del__(self):
spi.freedev()
\"\"\"add a short delay for each change of electrical level\"\"\"
def lcd_reset(self):
gpio.output(self.pin_bl, gpio.HIGH)
# time.sleep(0.120)
# gpio.output(self.pin_rst, gpio.HIGH)
# time.sleep(0.20)
gpio.output(self.pin_rst, gpio.LOW)
time.sleep(0.100)
gpio.output(self.pin_rst, gpio.HIGH)
time.sleep(0.100)
gpio.output(self.pin_bl, gpio.HIGH)
# self.lcd_sendcmd(0x01)
def lcd_spisend(self, data):
spi.transfer(data)
def lcd_sendcmd(self, cmd):
gpio.output(self.pin_dc, gpio.LOW)
spi.transfer(cmd)
def lcd_senddata(self, data):
gpio.output(self.pin_dc, gpio.HIGH)
spi.transfer(data)
\"\"\"write multiple bytes\"\"\"
def lcd_sendnbytes(self, data):
gpio.output(self.pin_dc, gpio.HIGH)
spi.write(data)
\"\"\"common registers\' initialization of 2.4inch LCD module\"\"\"
def lcd_init_ili9488(self):
self.lcd_reset()
# self.lcd_sendcmd(0x11)
# self.lcd_senddata(0x00)
# time.sleep(0.200)
self.lcd_sendcmd(0xE0)
self.lcd_senddata(0x00)
self.lcd_senddata(0x03)
self.lcd_senddata(0x09)
self.lcd_senddata(0x08)
self.lcd_senddata(0x16)
self.lcd_senddata(0x0A)
self.lcd_senddata(0x3F)
self.lcd_senddata(0x78)
self.lcd_senddata(0x4C)
self.lcd_senddata(0x09)
self.lcd_senddata(0x0A)
self.lcd_senddata(0x08)
self.lcd_senddata(0x16)
self.lcd_senddata(0x1A)
self.lcd_senddata(0x0F)
self.lcd_sendcmd(0xE1)
self.lcd_senddata(0x00)
self.lcd_senddata(0x16)
self.lcd_senddata(0x19)
self.lcd_senddata(0x03)
self.lcd_senddata(0x0F)
self.lcd_senddata(0x05)
self.lcd_senddata(0x32)
self.lcd_senddata(0x45)
self.lcd_senddata(0x46)
self.lcd_senddata(0x04)
self.lcd_senddata(0x0E)
self.lcd_senddata(0x0D)
self.lcd_senddata(0x35)
self.lcd_senddata(0x37)
self.lcd_senddata(0x0F)
self.lcd_sendcmd(0xC0)
self.lcd_sendcmd(0x17)
self.lcd_senddata(0x15)
self.lcd_sendcmd(0xC1)
self.lcd_senddata(0x41)
self.lcd_sendcmd(0xC5)
self.lcd_sendcmd(0x00)
self.lcd_senddata(0x12)
self.lcd_senddata(0x80)
self.lcd_sendcmd(0x36)
# self.lcd_sendcmd(0x48)
# self.lcd_sendcmd(0x40)
# self.lcd_sendcmd(0x88)
# self.lcd_sendcmd(0x28)
self.lcd_sendcmd(0x88)
self.lcd_sendcmd(0x3A)
self.lcd_senddata(0x66) # color bit : 0x66 18bit, 0x77 24bit, 0x55 16bit
self.lcd_sendcmd(0xC8)
self.lcd_senddata(0xB1)
self.lcd_sendcmd(0xB0)
self.lcd_sendcmd(0x80)
self.lcd_sendcmd(0xB1)
self.lcd_sendcmd(0x80)
# SDA_EN = 0, DIN and SDO pins are used for 3/4 wire serial interface.
# SDA_EN = 1, DIN/SDA pin is used for 3/4 wire serial interface and SDO pin is not used.
self.lcd_sendcmd(0xB4)
self.lcd_sendcmd(0x02)
self.lcd_sendcmd(0xB6)
self.lcd_sendcmd(0x02)
self.lcd_senddata(0x02)
self.lcd_sendcmd(0xE9)
self.lcd_senddata(0x00)
self.lcd_sendcmd(0x53)
self.lcd_senddata(0x28)
self.lcd_sendcmd(0x51)
self.lcd_senddata(0x7F)
self.lcd_sendcmd(0xF7)
self.lcd_senddata(0xA9)
self.lcd_senddata(0x51)
self.lcd_senddata(0x2C)
self.lcd_senddata(0x02)
self.lcd_sendcmd(0x11)
# self.lcd_senddata(0x00)
time.sleep(0.100)
self.lcd_sendcmd(0x29)
def lcd_set_rotate():
match self.rotate:
case 0:
self.lcd_sendcmd(0x36)
self.lcd_sendcmd(0x88)
case 90:
self.lcd_sendcmd(0x36)
self.lcd_sendcmd(0x28)
case 180:
self.lcd_sendcmd(0x36)
self.lcd_sendcmd(0x48)
case 270:
self.lcd_sendcmd(0x36)
self.lcd_sendcmd(0xE8)
case _:
self.lcd_sendcmd(0x36)
self.lcd_sendcmd(0x88)
def lcd_setPos(self, Xstart, Ystart, Xend, Yend):
self.lcd_sendcmd(0x2A)
self.lcd_senddata(Xstart >> 8)
self.lcd_senddata(Xstart & 0xFF)
self.lcd_senddata((Xend - 1) >> 8)
self.lcd_senddata((Xend - 1) & 0xFF)
self.lcd_sendcmd(0x2B)
self.lcd_senddata(Ystart >> 8)
self.lcd_senddata(Ystart & 0xFF)
self.lcd_senddata((Yend - 1) >> 8)
self.lcd_senddata((Yend - 1) & 0xFF)
self.lcd_sendcmd(0x2C)
def lcd_clear(self, color):
\"\"\"Clear contents of image buffer\"\"\"
_buffer = [color] * (self.width * self.height * 3)# * 3
print(_buffer[0],_buffer[1],_buffer[2])
# self.lcd_setPos(0, 0, self.width, self.height)
self.lcd_setPos(0, 0, self.width, self.height)
gpio.output(self.pin_dc, gpio.HIGH)
\"\"\"modify the original single byte write to multi byte write\"\"\"
# for i in range(0,len(_buffer)):
# self.lcd_spisend(_buffer[i])
self.lcd_sendnbytes(_buffer)
# self.lcd_sendcmd(0x29)
def lcd_clear_range(self, color, x_start, y_start, x_end, y_end):
\"\"\"Clear contents of image buffer\"\"\"
_buffer = [color] * (self.width * self.height * 3)# * 3
print(_buffer[0],_buffer[1],_buffer[2])
# self.lcd_setPos(0, 0, self.width, self.height)
self.lcd_setPos(x_start, y_start, x_end, y_end)
gpio.output(self.pin_dc, gpio.HIGH)
\"\"\"modify the original single byte write to multi byte write\"\"\"
# for i in range(0,len(_buffer)):
# self.lcd_spisend(_buffer[i])
self.lcd_sendnbytes(_buffer)
# self.lcd_sendcmd(0x29)
def Image_to_RGB565(self, Image):
img = np.asarray(Image)
pix = np.zeros((self.width, self.height, 3), dtype=np.uint8)
# RGB888 >> RGB565
pix[..., [0]] = np.add(
np.bitwise_and(img[..., [0]], 0xF8), np.right_shift(img[..., [1]], 5)
)
pix[..., [1]] = np.add(
np.bitwise_and(np.left_shift(img[..., [1]], 3), 0xE0),
np.right_shift(img[..., [2]], 3),
)
pix = pix.flatten().tolist()
# return pix.flatten().tolist()
return pix
def Image_to_RGB666(self, Image):
# 将RGB888转换为RGB666
img = np.asarray(Image)
# 创建一个(宽度, 高度, 3)的数组,每个通道6位,用uint8存储
pix = np.zeros((self.width, self.height, 3), dtype=np.uint8)
# RGB888 >> RGB666转换
# 每个通道保留高6位(右移2位丢弃最低2位)
pix[..., 0] = np.right_shift(img[..., 0], 2)# 红色通道(6位)
pix[..., 1] = np.right_shift(img[..., 1], 2)# 绿色通道(6位)
pix[..., 2] = np.right_shift(img[..., 2], 2)# 蓝色通道(6位)
return pix
def Image_RGB888_to_RGB666(self, Image):
img = np.asarray(Image)
pix = np.zeros((self.height, self.width, 3), dtype=np.uint8)
pix[..., [0]] = np.left_shift(np.left_shift(img[..., [0]], 2), 2)
pix[..., [1]] = np.left_shift(np.left_shift(img[..., [1]], 2), 2)
pix[..., [2]] = np.left_shift(np.left_shift(img[..., [2]], 2), 2)
return pix.flatten().tolist()
def display_text(self, text, font_size=30, x=0, y=10, color=(0,0,0)):
# self.lcd_clear(self.WHITE)
# 创建与屏幕尺寸相同的图像
font_width = 320
font_height = 50
image = Image.new(\'RGB\', (font_width, font_height), color=(255, 255, 255))# 黑色背景
draw = ImageDraw.Draw(image)
# 加载字体 (使用系统字体或自定义字体文件)
try:
# 尝试加载系统字体
font = ImageFont.truetype(\'/usr/01_LCD/lib/DejaVuSans.ttf\', font_size)
# print(\"find ttf\")
except IOError:
#fallback到默认字体
font = ImageFont.load_default()
# print(\"not find ttf\")
# 在图像上绘制文字
draw.text((x, y), text, font=font, fill=color)
img_array = np.asarray(image, dtype=np.uint8)# 形状为 (height, width, 3),值范围[0,255]
# 创建存储6位数据的数组
pix = np.zeros((self.height, self.width, 3), dtype=np.uint8)
# 比例缩放:将8位值[0,255]映射到6位值[0,63]
# 公式:6位值 = 8位值 × (63/255),四舍五入取整
scale_factor = 63 * 4 / 255# 缩放因子
pix = np.round(img_array * scale_factor).astype(np.uint8)
pix = pix.flatten().tolist()
self.lcd_sendcmd(0x36)
# self.lcd_senddata(0xC8)
self.lcd_senddata(0x48)
self.lcd_setPos(0, 0, font_width, font_height)
gpio.output(self.pin_dc, gpio.HIGH)
# 显示图像到屏幕
# display.display(image)
self.lcd_sendnbytes(pix)
def lcd_ShowImage(self, image_path, Xstart, Ystart):
\"\"\"Set buffer to value of Python Imaging Library Image_show.\"\"\"
\"\"\"Write display buffer to physical display\"\"\"
Image_show = Image.open(image_path)
# print(\"Image_show.mode\", Image_show.mode)
tmp_width, tmp_height = Image_show.size
# print(\"sss\",tmp_width,tmp_height)
if tmp_width > tmp_height:
width_ratio = self.width / tmp_height
height_ratio = self.height / tmp_width
else:
width_ratio = self.width / tmp_width
height_ratio = self.height / tmp_height
scale_ratio = min(width_ratio, height_ratio)
new_width = int(tmp_width * scale_ratio)
new_height = int(tmp_height * scale_ratio)
# print(\"scale_ratio\",tmp_width,tmp_height)
# if tmp_width > tmp_height:
#print(\"change width to height\")
#new_size = (new_height, new_width)
# else:
new_size = (new_width, new_height)
# Image_show = Image_show.resize(new_size, Image_show.Resampling.LANCZOS)
Image_show = Image_show.resize(new_size, 1)
# ValueError: Unknown resampling filter (Image_show.Resampling.NEAREST). Use Image_show.Resampling.NEAREST (0), Image_show.Resampling.LANCZOS (1), Image_show.Resampling.BILINEAR (2), Image_show.Resampling.BICUBIC (3), Image_show.Resampling.BOX (4) or Image_show.Resampling.HAMMING (5)
# print(\"new_size\",new_size)
imwidth, imheight = Image_show.size
# print(\"Image_show: width = \", imwidth, \", height = \", imheight)
if Image_show.mode == \"RGBA\":
Image_show = Image_show.convert(\"RGB\")
# if imwidth == self.height and imheight == self.width:
if imwidth > imheight:
img_array = np.asarray(Image_show, dtype=np.uint8)# 形状为 (height, width, 3),值范围[0,255]
# 创建存储6位数据的数组
pix = np.zeros((self.width, self.height, 3), dtype=np.uint8)
# 比例缩放:将8位值[0,255]映射到6位值[0,63]
# 公式:6位值 = 8位值 × (63/255),四舍五入取整
scale_factor = 63 * 4 / 255# 缩放因子
pix = np.round(img_array * scale_factor).astype(np.uint8)
pix = pix.flatten().tolist()
self.lcd_sendcmd(
0x36
)# define read/write scanning direction of frame memory
self.lcd_senddata(0x28)
math_x = imwidth+Ystart
# if math_x < self.height:
#print(\"picture is oversize.\")
self.lcd_setPos(Ystart, 0, math_x, self.width)
# self.lcd_setPos(Ystart, 0, imwidth+Ystart, imheight)
# self.lcd_setPos(0, 0, self.height, self.width)
gpio.output(self.pin_dc, gpio.HIGH)
\"\"\"modify the original single byte write to multi byte write\"\"\"
# for i in range(0,len(pix),1):
#self.lcd_spisend(pix[i])
self.lcd_sendnbytes(pix)
else:
print(\"same direction\")
img_array = np.asarray(Image_show, dtype=np.uint8)# 形状为 (height, width, 3),值范围[0,255]
# 创建存储6位数据的数组
pix = np.zeros((self.height, self.width, 3), dtype=np.uint8)
# 比例缩放:将8位值[0,255]映射到6位值[0,63]
# 公式:6位值 = 8位值 × (63/255),四舍五入取整
scale_factor = 63 * 4 / 255# 缩放因子
pix = np.round(img_array * scale_factor).astype(np.uint8)
pix = pix.flatten().tolist()
self.lcd_sendcmd(0x36)
# self.lcd_senddata(0xC8)
self.lcd_senddata(0x48)
self.lcd_setPos(0, Ystart, self.width, self.height)
gpio.output(self.pin_dc, gpio.HIGH)
\"\"\"modify the original single byte write to multi byte write\"\"\"
# for i in range(0,len(pix)):
# self.lcd_spisend(pix[i])
self.lcd_sendnbytes(pix)
Image_show.close()
# def lcd_ShowImage(self, Image, Xstart, Ystart):
#\"\"\"Set buffer to value of Python Imaging Library image.\"\"\"
#\"\"\"Write display buffer to physical display\"\"\"
## print(\"image.mode\", Image.mode)
#tmp_width, tmp_height = Image.size
## print(\"sss\",tmp_width,tmp_height)
#if tmp_width > tmp_height:
#width_ratio = self.width / tmp_height
#height_ratio = self.height / tmp_width
#else:
#width_ratio = self.width / tmp_width
#height_ratio = self.height / tmp_height
#scale_ratio = min(width_ratio, height_ratio)
#new_width = int(tmp_width * scale_ratio)
#new_height = int(tmp_height * scale_ratio)
## print(\"scale_ratio\",tmp_width,tmp_height)
## if tmp_width > tmp_height:
##print(\"change width to height\")
##new_size = (new_height, new_width)
## else:
#new_size = (new_width, new_height)
## Image = Image.resize(new_size, Image.Resampling.LANCZOS)
#Image = Image.resize(new_size, 1)
## ValueError: Unknown resampling filter (Image.Resampling.NEAREST). Use Image.Resampling.NEAREST (0), Image.Resampling.LANCZOS (1), Image.Resampling.BILINEAR (2), Image.Resampling.BICUBIC (3), Image.Resampling.BOX (4) or Image.Resampling.HAMMING (5)
## print(\"new_size\",new_size)
#imwidth, imheight = Image.size
## print(\"image: width = \", imwidth, \", height = \", imheight)
#if Image.mode == \"RGBA\":
#Image = Image.convert(\"RGB\")
## if imwidth == self.height and imheight == self.width:
#if imwidth > imheight:
#img_array = np.asarray(Image, dtype=np.uint8)# 形状为 (height, width, 3),值范围[0,255]
## 创建存储6位数据的数组
#pix = np.zeros((self.width, self.height, 3), dtype=np.uint8)
## 比例缩放:将8位值[0,255]映射到6位值[0,63]
## 公式:6位值 = 8位值 × (63/255),四舍五入取整
#scale_factor = 63 * 4 / 255# 缩放因子
#pix = np.round(img_array * scale_factor).astype(np.uint8)
#pix = pix.flatten().tolist()
#self.lcd_sendcmd(
# 0x36
#)# define read/write scanning direction of frame memory
#self.lcd_senddata(0x28)
#math_x = imwidth+Ystart
## if math_x < self.height:
##print(\"picture is oversize.\")
#self.lcd_setPos(Ystart, 0, math_x, self.width)
## self.lcd_setPos(Ystart, 0, imwidth+Ystart, imheight)
## self.lcd_setPos(0, 0, self.height, self.width)
#gpio.output(self.pin_dc, gpio.HIGH)
#\"\"\"modify the original single byte write to multi byte write\"\"\"
## for i in range(0,len(pix),1):
##self.lcd_spisend(pix[i])
#self.lcd_sendnbytes(pix)
#else:
#print(\"same direction\")
#img_array = np.asarray(Image, dtype=np.uint8)# 形状为 (height, width, 3),值范围[0,255]
## 创建存储6位数据的数组
#pix = np.zeros((self.height, self.width, 3), dtype=np.uint8)
## 比例缩放:将8位值[0,255]映射到6位值[0,63]
## 公式:6位值 = 8位值 × (63/255),四舍五入取整
#scale_factor = 63 * 4 / 255# 缩放因子
#pix = np.round(img_array * scale_factor).astype(np.uint8)
#pix = pix.flatten().tolist()
#self.lcd_sendcmd(0x36)
## self.lcd_senddata(0xC8)
#self.lcd_senddata(0x48)
#self.lcd_setPos(0, Ystart, self.width, self.height)
#gpio.output(self.pin_dc, gpio.HIGH)
#\"\"\"modify the original single byte write to multi byte write\"\"\"
## for i in range(0,len(pix)):
## self.lcd_spisend(pix[i])
#self.lcd_sendnbytes(pix)
# def lcd_ShowImage(self, Image, Xstart, Ystart):
#\"\"\"Set buffer to value of Python Imaging Library image.\"\"\"
#\"\"\"Write display buffer to physical display\"\"\"
#print(\"image.mode\", Image.mode)
#tmp_width, tmp_height = Image.size
#print(\"sss\",tmp_width,tmp_height)
#if tmp_width > tmp_height:
#print(\"change width to height\")
#new_size = (self.height, self.width)
#else:
#new_size = (self.width, self.height-Ystart)
#Image = Image.resize(new_size)
#print(\"new_size\",new_size)
#imwidth, imheight = Image.size
#print(\"image: width = \", imwidth, \", height = \", imheight)
#if Image.mode == \"RGBA\":
#Image = Image.convert(\"RGB\")
#if imwidth == self.height and imheight == self.width:
#img_array = np.asarray(Image, dtype=np.uint8)# 形状为 (height, width, 3),值范围[0,255]
## 创建存储6位数据的数组
#pix = np.zeros((self.width, self.height, 3), dtype=np.uint8)
## 比例缩放:将8位值[0,255]映射到6位值[0,63]
## 公式:6位值 = 8位值 × (63/255),四舍五入取整
#scale_factor = 63 * 4 / 255# 缩放因子
#pix = np.round(img_array * scale_factor).astype(np.uint8)
#pix = pix.flatten().tolist()
#self.lcd_sendcmd(
# 0x36
#)# define read/write scanning direction of frame memory
#self.lcd_senddata(0x28)
#self.lcd_setPos(0, 0, self.height, self.width)
#gpio.output(self.pin_dc, gpio.HIGH)
#\"\"\"modify the original single byte write to multi byte write\"\"\"
## for i in range(0,len(pix),1):
##self.lcd_spisend(pix[i])
#self.lcd_sendnbytes(pix)
#else:
#print(\"same direction\")
## self.lcd_clear_range(self.WHITE,0,0,0,Ystart)
#img_array = np.asarray(Image, dtype=np.uint8)# 形状为 (height, width, 3),值范围[0,255]
## 创建存储6位数据的数组
#pix = np.zeros((self.height, self.width, 3), dtype=np.uint8)
## 比例缩放:将8位值[0,255]映射到6位值[0,63]
## 公式:6位值 = 8位值 × (63/255),四舍五入取整
#scale_factor = 63 * 4 / 255# 缩放因子
#pix = np.round(img_array * scale_factor).astype(np.uint8)
#pix = pix.flatten().tolist()
#self.lcd_sendcmd(0x36)
## self.lcd_senddata(0xC8)
#self.lcd_senddata(0x48)
#self.lcd_setPos(0, Ystart, self.width, self.height)
#gpio.output(self.pin_dc, gpio.HIGH)
#\"\"\"modify the original single byte write to multi byte write\"\"\"
## for i in range(0,len(pix)):
## self.lcd_spisend(pix[i])
#self.lcd_sendnbytes(pix)
2025-08-12 23:56:27
让我们在树莓派单板计算机上解锁生物识别控制功能吧!生物识别技术利用每个人独有的、不易复制的生理或行为特征进行身份验证。地球上每个人的指纹都是独一无二的,让我们一起来探索指纹的奇妙用途吧!本文将介绍
2025-08-09 13:14:11722 一、引言
赛昉科技提供了许多参考性文档,其中不乏使用昉·星光 2测试在AI图像处理的应用场景。上期咱分享了二维码检测与解码效果,只要摄像头采集图像够清晰,扫描二维码与解析效率还是挺好的。今儿来分享一下,基于上期环境,再对摄像头应用进行展开,评估其在人脸识别、物体识别以及图像边缘检测上的应用。
二、人脸识别
(1)硬件搭建
准备一本封面印有人脸头像的杂志,以便后续测试检测效果。
固定uvc摄像机,然后调好焦距,使其图像采集清晰。
(2)代码实现
与上期的二维码检测实验一样,基于OpenCV模型去实现人脸图像检测、轮廓标注、置信度和识别。在人脸图像检测的同时,显示检测的置信度,置信度小于50%过滤掉。,因此需用到深度学习的检测模型,github上有提供开源的OpenCV DNN或FaceNet模型,可满足置信度显示需求。准备预训练模型文件
通过github上获取“deploy.prototxt.txt”与“res10_300x300_ssd_iter_140000.caffemodel”文件。*附件:deploy.prototxt.zip*附件:res10_300x300_ssd_iter_140000.zip
编写“face_detection.py”源代码,内容如下:
import cv2
import numpy as np
net = cv2.dnn.readNetFromCaffe(\"deploy.prototxt.txt\", \"res10_300x300_ssd_iter_140000.caffemodel\")
cap = cv2.VideoCapture(4, cv2.CAP_V4L2)
while True:
ret, frame = cap.read()
if not ret:
break
(h, w) = frame.shape[:2]
blob = cv2.dnn.blobFromImage(cv2.resize(frame, (300, 300)), 1.0,
(300, 300), (104.0, 177.0, 123.0))
net.setInput(blob)
detections = net.forward()
for i in range(detections.shape[2]):
confidence = detections[0, 0, i, 2]
if confidence < 0.5:
continue
box = detections[0, 0, i, 3:7] * np.array([w, h, w, h])
(startX, startY, endX, endY) = box.astype(\"int\")
cv2.rectangle(frame, (startX, startY), (endX, endY), (0, 255, 0), 2)
text = f\"Face: {confidence * 100:.2f}%\"
cv2.putText(frame, text, (startX, startY - 10),
cv2.FONT_HERSHEY_SIMPLEX, 0.5, (0, 255, 0), 2)
cv2.imshow(\"Face Detection with Confidence\", frame)
key = cv2.waitKey(1) & 0xFF
# if the `q` key was pressed, break from the loop
if key == ord(\"q\"):
break
cap.release()
cv2.destroyAllWindows()
将编写好的“face_detection.py”源文件与上述下载好的预训练模型文件放在同一文件夹下。
桌面方式登录后,然后终端中进到该文件夹下,普通用户身份执行“ python3 face_detection.py”,呈现的检测效果见底部视频。
三、物体识别
因为之前的二维码检测功能基本已实现,因此环境这块,相应的依赖软件包都已安装好了,这里调用YOLO-V3模型进行通用物体的识别。
基于yolo-v3模型的应用“object_detection.cpp”源代码如下:
#include <fstream>
#include <sstream>
#include <opencv2/dnn.hpp>
#include <opencv2/imgproc.hpp>
#include <opencv2/highgui.hpp>
#if defined(CV_CXX11) && defined(HAVE_THREADS)
#define USE_THREADS 1
#endif
#ifdef USE_THREADS
#include <mutex>
#include <thread>
#include <queue>
#endif
#include \"common.hpp\"
std::string keys =
\"{ helph| | Print help message. }\"
\"{ @Alias| | An alias name of model to extract preprocessing parameters from models.yml file. }\"
\"{ zoo| models.yml | An optional path to file with preprocessing parameters }\"
\"{ device|0 | camera device number. }\"
\"{ input i| | Path to input image or video file. Skip this argument to capture frames from a camera. }\"
\"{ framework f | | Optional name of an origin framework of the model. Detect it automatically if it does not set. }\"
\"{ classes| | Optional path to a text file with names of classes to label detected objects. }\"
\"{ thr| .5 | Confidence threshold. }\"
\"{ nms| .4 | Non-maximum suppression threshold. }\"
\"{ backend|0 | Choose one of computation backends: \"
\"0: automatically (by default), \"
\"1: Halide language (http://halide-lang.org/), \"
\"2: Intel\'s Deep Learning Inference Engine (https://software.intel.com/openvino-toolkit), \"
\"3: OpenCV implementation, \"
\"4: VKCOM, \"
\"5: CUDA }\"
\"{ target| 0 | Choose one of target computation devices: \"
\"0: CPU target (by default), \"
\"1: OpenCL, \"
\"2: OpenCL fp16 (half-float precision), \"
\"3: VPU, \"
\"4: Vulkan, \"
\"6: CUDA, \"
\"7: CUDA fp16 (half-float preprocess) }\"
\"{ async | 0 | Number of asynchronous forwards at the same time. \"
\"Choose 0 for synchronous mode }\";
using namespace cv;
using namespace dnn;
float confThreshold, nmsThreshold;
std::vector<std::string> classes;
inline void preprocess(const Mat& frame, Net& net, Size inpSize, float scale,
const Scalar& mean, bool swapRB);
void postprocess(Mat& frame, const std::vector<Mat>& out, Net& net, int backend);
void drawPred(int classId, float conf, int left, int top, int right, int bottom, Mat& frame);
void callback(int pos, void* userdata);
#ifdef USE_THREADS
template <typename T>
class QueueFPS : public std::queue<T>
{
public:
QueueFPS() : counter(0) {}
void push(const T& entry)
{
std::lock_guard<std::mutex> lock(mutex);
std::queue<T>::push(entry);
counter += 1;
if (counter == 1)
{
// Start counting from a second frame (warmup).
tm.reset();
tm.start();
}
}
T get()
{
std::lock_guard<std::mutex> lock(mutex);
T entry = this->front();
this->pop();
return entry;
}
float getFPS()
{
tm.stop();
double fps = counter / tm.getTimeSec();
tm.start();
return static_cast<float>(fps);
}
void clear()
{
std::lock_guard<std::mutex> lock(mutex);
while (!this->empty())
this->pop();
}
unsigned int counter;
private:
TickMeter tm;
std::mutex mutex;
};
#endif// USE_THREADS
int main(int argc, char** argv)
{
CommandLineParser parser(argc, argv, keys);
const std::string modelName = parser.get<String>(\"@alias\");
const std::string zooFile = parser.get<String>(\"zoo\");
keys += genPreprocArguments(modelName, zooFile);
parser = CommandLineParser(argc, argv, keys);
parser.about(\"Use this script to run object detection deep learning networks using OpenCV.\");
if (argc == 1 || parser.has(\"help\"))
{
parser.printMessage();
return 0;
}
confThreshold = parser.get<float>(\"thr\");
nmsThreshold = parser.get<float>(\"nms\");
float scale = parser.get<float>(\"scale\");
Scalar mean = parser.get<Scalar>(\"mean\");
bool swapRB = parser.get<bool>(\"rgb\");
int inpWidth = parser.get<int>(\"width\");
int inpHeight = parser.get<int>(\"height\");
size_t asyncNumReq = parser.get<int>(\"async\");
CV_Assert(parser.has(\"model\"));
std::string modelPath = findFile(parser.get<String>(\"model\"));
std::string configPath = findFile(parser.get<String>(\"config\"));
// Open file with classes names.
if (parser.has(\"classes\"))
{
std::string file = parser.get<String>(\"classes\");
std::ifstream ifs(file.c_str());
if (!ifs.is_open())
CV_Error(Error::StsError, \"File \" + file + \" not found\");
std::string line;
while (std::getline(ifs, line))
{
classes.push_back(line);
}
}
// Load a model.
Net net = readNet(modelPath, configPath, parser.get<String>(\"framework\"));
int backend = parser.get<int>(\"backend\");
net.setPreferableBackend(backend);
net.setPreferableTarget(parser.get<int>(\"target\"));
std::vector<String> outNames = net.getUnconnectedOutLayersNames();
// Create a window
static const std::string kWinName = \"Deep learning object detection in OpenCV\";
namedWindow(kWinName, WINDOW_NORMAL);
int initialConf = (int)(confThreshold * 100);
createTrackbar(\"Confidence threshold, %\", kWinName, &initialConf, 99, callback);
// Open a video file or an image file or a camera stream.
VideoCapture cap;
if (parser.has(\"input\"))
cap.open(parser.get<String>(\"input\"));
else
cap.open(parser.get<int>(\"device\"));
#ifdef USE_THREADS
bool process = true;
// Frames capturing thread
QueueFPS<Mat> framesQueue;
std::thread framesThread([&](){
Mat frame;
while (process)
{
cap >> frame;
if (!frame.empty())
framesQueue.push(frame.clone());
else
break;
}
});
// Frames processing thread
QueueFPS<Mat> processedFramesQueue;
QueueFPS<std::vector<Mat> > predictionsQueue;
std::thread processingThread([&](){
std::queue<AsyncArray> futureOutputs;
Mat blob;
while (process)
{
// Get a next frame
Mat frame;
{
if (!framesQueue.empty())
{
frame = framesQueue.get();
if (asyncNumReq)
{
if (futureOutputs.size() == asyncNumReq)
frame = Mat();
}
else
framesQueue.clear();// Skip the rest of frames
}
}
// Process the frame
if (!frame.empty())
{
preprocess(frame, net, Size(inpWidth, inpHeight), scale, mean, swapRB);
processedFramesQueue.push(frame);
if (asyncNumReq)
{
futureOutputs.push(net.forwardAsync());
}
else
{
std::vector<Mat> outs;
net.forward(outs, outNames);
predictionsQueue.push(outs);
}
}
while (!futureOutputs.empty() &&
futureOutputs.front().wait_for(std::chrono::seconds(0)))
{
AsyncArray async_out = futureOutputs.front();
futureOutputs.pop();
Mat out;
async_out.get(out);
predictionsQueue.push({out});
}
}
});
// Postprocessing and rendering loop
while (waitKey(1) < 0)
{
if (predictionsQueue.empty())
continue;
std::vector<Mat> outs = predictionsQueue.get();
Mat frame = processedFramesQueue.get();
postprocess(frame, outs, net, backend);
if (predictionsQueue.counter > 1)
{
std::string label = format(\"Camera: %.2f FPS\", framesQueue.getFPS());
putText(frame, label, Point(0, 15), FONT_HERSHEY_SIMPLEX, 0.5, Scalar(0, 255, 0));
label = format(\"Network: %.2f FPS\", predictionsQueue.getFPS());
putText(frame, label, Point(0, 30), FONT_HERSHEY_SIMPLEX, 0.5, Scalar(0, 255, 0));
label = format(\"Skipped frames: %d\", framesQueue.counter - predictionsQueue.counter);
putText(frame, label, Point(0, 45), FONT_HERSHEY_SIMPLEX, 0.5, Scalar(0, 255, 0));
}
imshow(kWinName, frame);
}
process = false;
framesThread.join();
processingThread.join();
#else// USE_THREADS
if (asyncNumReq)
CV_Error(Error::StsNotImplemented, \"Asynchronous forward is supported only with Inference Engine backend.\");
// Process frames.
Mat frame, blob;
while (waitKey(1) < 0)
{
cap >> frame;
if (frame.empty())
{
waitKey();
break;
}
preprocess(frame, net, Size(inpWidth, inpHeight), scale, mean, swapRB);
std::vector<Mat> outs;
net.forward(outs, outNames);
postprocess(frame, outs, net, backend);
// Put efficiency information.
std::vector<double> layersTimes;
double freq = getTickFrequency() / 1000;
double t = net.getPerfProfile(layersTimes) / freq;
std::string label = format(\"Inference time: %.2f ms\", t);
putText(frame, label, Point(0, 15), FONT_HERSHEY_SIMPLEX, 0.5, Scalar(0, 255, 0));
imshow(kWinName, frame);
}
#endif// USE_THREADS
return 0;
}
inline void preprocess(const Mat& frame, Net& net, Size inpSize, float scale,
const Scalar& mean, bool swapRB)
{
static Mat blob;
// Create a 4D blob from a frame.
if (inpSize.width <= 0) inpSize.width = frame.cols;
if (inpSize.height <= 0) inpSize.height = frame.rows;
blobFromImage(frame, blob, 1.0, inpSize, Scalar(), swapRB, false, CV_8U);
// Run a model.
net.setInput(blob, \"\", scale, mean);
if (net.getLayer(0)->outputNameToIndex(\"im_info\") != -1)// Faster-RCNN or R-FCN
{
resize(frame, frame, inpSize);
Mat imInfo = (Mat_<float>(1, 3) << inpSize.height, inpSize.width, 1.6f);
net.setInput(imInfo, \"im_info\");
}
}
void postprocess(Mat& frame, const std::vector<Mat>& outs, Net& net, int backend)
{
static std::vector<int> outLayers = net.getUnconnectedOutLayers();
static std::string outLayerType = net.getLayer(outLayers[0])->type;
std::vector<int> classIds;
std::vector<float> confidences;
std::vector<Rect> boxes;
if (outLayerType == \"DetectionOutput\")
{
// Network produces output blob with a shape 1x1xNx7 where N is a number of
// detections and an every detection is a vector of values
// [batchId, classId, confidence, left, top, right, bottom]
CV_Assert(outs.size() > 0);
for (size_t k = 0; k < outs.size(); k++)
{
float* data = (float*)outs[k].data;
for (size_t i = 0; i < outs[k].total(); i += 7)
{
float confidence = data[i + 2];
if (confidence > confThreshold)
{
int left= (int)data[i + 3];
int top = (int)data[i + 4];
int right= (int)data[i + 5];
int bottom = (int)data[i + 6];
int width= right - left + 1;
int height = bottom - top + 1;
if (width <= 2 || height <= 2)
{
left= (int)(data[i + 3] * frame.cols);
top = (int)(data[i + 4] * frame.rows);
right= (int)(data[i + 5] * frame.cols);
bottom = (int)(data[i + 6] * frame.rows);
width= right - left + 1;
height = bottom - top + 1;
}
classIds.push_back((int)(data[i + 1]) - 1);// Skip 0th background class id.
boxes.push_back(Rect(left, top, width, height));
confidences.push_back(confidence);
}
}
}
}
else if (outLayerType == \"Region\")
{
for (size_t i = 0; i < outs.size(); ++i)
{
// Network produces output blob with a shape NxC where N is a number of
// detected objects and C is a number of classes + 4 where the first 4
// numbers are [center_x, center_y, width, height]
float* data = (float*)outs.data;
for (int j = 0; j < outs.rows; ++j, data += outs.cols)
{
Mat scores = outs.row(j).colRange(5, outs.cols);
Point classIdPoint;
double confidence;
minMaxLoc(scores, 0, &confidence, 0, &classIdPoint);
if (confidence > confThreshold)
{
int centerX = (int)(data[0] * frame.cols);
int centerY = (int)(data[1] * frame.rows);
int width = (int)(data[2] * frame.cols);
int height = (int)(data[3] * frame.rows);
int left = centerX - width / 2;
int top = centerY - height / 2;
classIds.push_back(classIdPoint.x);
confidences.push_back((float)confidence);
boxes.push_back(Rect(left, top, width, height));
}
}
}
}
else
CV_Error(Error::StsNotImplemented, \"Unknown output layer type: \" + outLayerType);
// NMS is used inside Region layer only on DNN_BACKEND_OPENCV for another backends we need NMS in sample
// or NMS is required if number of outputs > 1
if (outLayers.size() > 1 || (outLayerType == \"Region\" && backend != DNN_BACKEND_OPENCV))
{
std::map<int, std::vector<size_t> > class2indices;
for (size_t i = 0; i < classIds.size(); i++)
{
if (confidences >= confThreshold)
{
class2indices[classIds].push_back(i);
}
}
std::vector<Rect> nmsBoxes;
std::vector<float> nmsConfidences;
std::vector<int> nmsClassIds;
for (std::map<int, std::vector<size_t> >::iterator it = class2indices.begin(); it != class2indices.end(); ++it)
{
std::vector<Rect> localBoxes;
std::vector<float> localConfidences;
std::vector<size_t> classIndices = it->second;
for (size_t i = 0; i < classIndices.size(); i++)
{
localBoxes.push_back(boxes[classIndices]);
localConfidences.push_back(confidences[classIndices]);
}
std::vector<int> nmsIndices;
NMSBoxes(localBoxes, localConfidences, confThreshold, nmsThreshold, nmsIndices);
for (size_t i = 0; i < nmsIndices.size(); i++)
{
size_t idx = nmsIndices;
nmsBoxes.push_back(localBoxes[idx]);
nmsConfidences.push_back(localConfidences[idx]);
nmsClassIds.push_back(it->first);
}
}
boxes = nmsBoxes;
classIds = nmsClassIds;
confidences = nmsConfidences;
}
for (size_t idx = 0; idx < boxes.size(); ++idx)
{
Rect box = boxes[idx];
drawPred(classIds[idx], confidences[idx], box.x, box.y,
box.x + box.width, box.y + box.height, frame);
}
}
void drawPred(int classId, float conf, int left, int top, int right, int bottom, Mat& frame)
{
rectangle(frame, Point(left, top), Point(right, bottom), Scalar(0, 255, 0));
std::string label = format(\"%.2f\", conf);
if (!classes.empty())
{
CV_Assert(classId < (int)classes.size());
label = classes[classId] + \": \" + label;
}
int baseLine;
Size labelSize = getTextSize(label, FONT_HERSHEY_SIMPLEX, 0.5, 1, &baseLine);
top = max(top, labelSize.height);
rectangle(frame, Point(left, top - labelSize.height),
Point(left + labelSize.width, top + baseLine), Scalar::all(255), FILLED);
putText(frame, label, Point(left, top), FONT_HERSHEY_SIMPLEX, 0.5, Scalar());
}
void callback(int pos, void*)
{
confThreshold = pos * 0.01f;
}
桌面方式登录后,终端中user身份直接运行“v4l2-ctl --list-device”指令,确认USB摄像机的ID号。然后再运行“example_dnn_object_detection --config=/usr/share/opencv4/yolo-v3/yolov3-tiny.cfg --model=/usr/share/opencv4/yolo-v3/yolov3-tiny.weights --classes=/usr/share/opencv4/yolo-v3/classes.txt --width=416--height=416--scale=0.00392--rgb --target=1--device=4”
四、图像边缘检测
这里调用OpenCV官方提供的“edge.py”源文件,内容如下:
#!/usr/bin/env python
\'\'\'
This sample demonstrates Canny edge detection.
Usage:
edge.py [<video source>]
Trackbars control edge thresholds.
\'\'\'
# Python 2/3 compatibility
from __future__ import print_function
import cv2 as cv
import numpy as np
# relative module
import video
# built-in module
import sys
def main():
try:
fn = sys.argv[1]
cam = int(fn)
except:
fn = 0
def nothing(*arg):
pass
cv.namedWindow(\'edge\', 0)
cv.resizeWindow(\'edge\', 640, 480)
cv.createTrackbar(\'thrs1\', \'edge\', 2000, 5000, nothing)
cv.createTrackbar(\'thrs2\', \'edge\', 4000, 5000, nothing)
cap = cv.VideoCapture(cam, cv.CAP_V4L2)
if cam == 1:
cap.set(cv.CAP_PROP_CONVERT_RGB, 0)
while True:
if cam == 1:
ret, img_origin = cap.read()
img = cv.cvtColor(img_origin, cv.COLOR_YUV2BGR_NV12)
else:
ret, img = cap.read()
gray = cv.cvtColor(img, cv.COLOR_BGR2GRAY)
thrs1 = cv.getTrackbarPos(\'thrs1\', \'edge\')
thrs2 = cv.getTrackbarPos(\'thrs2\', \'edge\')
edge = cv.Canny(gray, thrs1, thrs2, apertureSize=5)
vis = img.copy()
vis = np.uint8(vis/2.)
vis[edge != 0] = (0, 255, 0)
cv.imshow(\'edge\', vis)
ch = cv.waitKey(5)
if ch == 27:
break
print(\'Done\')
if __name__ == \'__main__\':
print(__doc__)
main()
cv.destroyAllWindows()
同样的,桌面方式登录后,终端中user身份直接运行“v4l2-ctl --list-device”指令,确认USB摄像机的ID号。然后再运行:
cd /usr/share/doc/opencv-doc/examples/python/
python3 edge.py 4
默认参数下运行效果如下:
调节thrs1、thrs2参数后,检测的图像边缘区分更明显。
五、小结
综上评测效果,昉·星光2连接一个通用的USB摄像机,即可高效实现基于OpenCV的人脸检测识别、通用物体识别、二维码检测与解析,图像边缘检测等功能,证实该开发板可以运用在AI智能终端产品设计上,赛昉科技也提供了诸多指导性文档,一个应用可通过多种模型来实现,有提供C++源代码方式的接口,也有python源代码。提供的参考例程很有代表性,足见该开发板应用的场景广泛,尤其是在边缘AI设计中,具有很好的市场竞争力。
2025-08-07 00:49:09
一、引言
上期借助官方提供的VisionFive.gpio包,实现了LED点阵屏内容的完善。这期来分享一下,使用VisionFive 2开发板连接通用的USB摄像机,抓拍二维码,并完成对二维码的内容进行解码。
二、搭建环境
使用PuTTY的ssh接口连接后开发板后,需要执行以下指令,以完成 StarFive Packages及其依赖的必要组件安装,下载安装时长比较久。
https://github.com/starfive-tech/Debian/releases/download/v0.8.0-engineering-release-wayland/install_package_and_dependencies.sh
chmod +x install_package_and_dependencies.sh
sudo ./install_package_and_dependencies.sh
前段时间烧录的系统是使用闪迪16GB的TF卡,在执行完脚本后,报安装vlc的libixml10与libupnp13组件下载安装失败,这可能跟网络状态、TF读写速度相关。
于是乎,笔者换了一张32GB的TF,重新烧写了202409版系统镜像,重新安装了vim、python3-pip、VisionFive.gpio包等。基于前期执行脚本的情况,在Linux中在线下载安装必备的组件包比较费时费劲,因此根据“install_package_and_dependencies.sh”脚本中的内容,将要下载的数据包,通过windows下的浏览器去下载,这样就高效多了。下载好的文件列表信息如下:
将windows中下载好的组件包文件,通过FileZilla的ssh接口,传输给VisionFive 2,保存到user目录下。然后在脚本中再对内容进行修改,以免执行指令时,按照脚本再去指定网址下下载。由于TF空间够大,为避免后续麻烦,因此将删除数据包的指令屏蔽掉。
#!/bin/sh
#LibreOffice Runtime Dependencies
DEBIAN_FRONTEND=noninteractive apt-get install libxslt1.1 openjdk-11-jdk -y
#QT Runtime Dependencies
DEBIAN_FRONTEND=noninteractive apt-get install libmd4c-dev libdouble-conversion-dev libc6-dev libpcre2-16-0 \"^libxcb.*\" libx11-xcb-dev libglu1-mesa-dev libxrender-dev libxi-dev libxkbcommon-x11-dev -y
#Firefox Runtime Dependencies
DEBIAN_FRONTEND=noninteractive apt-get install libevent-dev libdbus-glib-1-dev -y
#FFMPEG Runtime Dependencies
DEBIAN_FRONTEND=noninteractive apt-get install libopenal-dev libcdio-paranoia-dev libdc1394-dev libcaca-dev libv4l-dev libpocketsphinx-dev libbs2b-dev liblilv-0-0 librubberband-dev libmysofa-dev libflite1 libass-dev libvidstab-dev libzmq3-dev libzimg-dev libgme-dev libopenmpt-dev libchromaprint-dev librabbitmq-dev libssh-dev libsrt-openssl-devliba52-0.7.4-dev libhwy1 libjxl0.7 -y
#v4l2test Runtime Dependencies
DEBIAN_FRONTEND=noninteractive apt-get install libv4l-0 libv4l-dev v4l-utils libjpeg-dev libdrm-dev -y
#chromium Runtime Dependencies
DEBIAN_FRONTEND=noninteractive apt-get install libre2-9 libminizip-dev -y
#opencv Runtime Dependencies
DEBIAN_FRONTEND=noninteractive apt-get install fonts-mathjax libjs-mathjax libpython3.11-minimal libpython3.11-stdlib python3-numpy python3.11 python3.11-minimal python3-h5py libvtk9.1 libqt5test5 libqt5opengl5 libtesseract5 libgdcm-dev libgdal-dev -y
#cogl/cultter Runtime Dependencies
DEBIAN_FRONTEND=noninteractive apt-get install gstreamer1.0-clutter-3.0 -y
#vlc Runtime Dependencies
DEBIAN_FRONTEND=noninteractive apt-get install fonts-freefont-ttf libaribb24-0 libcddb2 libdvbpsi10 libebml5 libixml10 liblirc-client0 liblua5.2-0 libmad0 libmatroska7 libprotobuf-lite32 libqt5x11extras5 libresid-builder0c2a libsdl-image1.2 libsdl1.2debian libsidplay2 libspatialaudio0 libupnp13 libva-wayland2 libvncclient1 -y
#wget https://github.com/starfive-tech/Debian/releases/download/v0.8.0-engineering-release-wayland/firefox_105.0_202305_riscv64.deb
#wget https://github.com/starfive-tech/Debian/releases/download/v0.8.0-engineering-release-wayland/libreoffice_7.5_riscv64.deb
#wget https://github.com/starfive-tech/Debian/releases/download/v0.8.0-engineering-release-wayland/nodejs-18.0.0_riscv64.deb
#wget https://github.com/starfive-tech/Debian/releases/download/v0.8.0-engineering-release-wayland/nwjs_0.65.1-2_riscv64.deb
#wget https://github.com/starfive-tech/Debian/releases/download/v0.8.0-engineering-release-wayland/qt-5.15-2-wayland_riscv64.deb
#wget https://github.com/starfive-tech/Debian/releases/download/v0.8.0-engineering-release-wayland/v4l2test_riscv64.deb
#wget https://github.com/starfive-tech/Debian/releases/download/v0.8.0-engineering-release-wayland/v8-10.2.154.13_riscv64.deb
#wget https://github.com/starfive-tech/Debian/releases/download/v0.8.0-engineering-release-wayland/chromium-103.0.5060.114.deb
dpkg -i nodejs-18.0.0_riscv64.deb
dpkg -i v8-10.2.154.13_riscv64.deb
dpkg -i libreoffice_7.5_riscv64.deb
dpkg -i qt-5.15-2-wayland_riscv64.deb
dpkg -i firefox_105.0_202305_riscv64.deb
dpkg -i nwjs_0.65.1-2_riscv64.deb
dpkg -i v4l2test_riscv64.deb
dpkg -i chromium-103.0.5060.114.deb
#rm nodejs-18.0.0_riscv64.deb
#rm v8-10.2.154.13_riscv64.deb
#rm libreoffice_7.5_riscv64.deb
#rm qt-5.15-2-wayland_riscv64.deb
#rm firefox_105.0_202305_riscv64.deb
#rm nwjs_0.65.1-2_riscv64.deb
#rm v4l2test_riscv64.deb
#rm chromium-103.0.5060.114.deb
##### ffmpeg install ######
#wget https://github.com/starfive-tech/Debian/releases/download/v0.8.0-engineering-release-wayland/multimedia.tar.gz
tar -xvzf multimedia.tar.gz
cd $PWD/multimedia
dpkg --force-all -i *.deb
cd ..
#### opencv install #####
#wget https://github.com/starfive-tech/Debian/releases/download/v0.8.0-engineering-release-wayland/opencv-deb.tar.gz
tar -xvzf opencv-deb.tar.gz
cd $PWD/opencv-deb
dpkg --force-all -i *.deb
cd ..
#### cogl/clutter install #####
#wget https://github.com/starfive-tech/Debian/releases/download/v0.8.0-engineering-release-wayland/gst-cogl.tar.gz
tar -xvzf gst-cogl.tar.gz
cd $PWD/gst-cogl
dpkg --force-all -i *.deb
cd ..
### vlc-package install
#wget https://github.com/starfive-tech/Debian/releases/download/v0.8.0-engineering-release-wayland/vlc-packages.tar.gz
tar -xvzf vlc-packages.tar.gz
cd $PWD/vlc-packages
dpkg --force-all -i *.deb
cd ..
#rm -rf multimedia.tar.gz
#rm -rf opencv-deb.tar.gz
#rm -rf gst-cogl.tar.gz
#rm -rf vlc-packages.tar.gz
#rm -rf multimedia
#rm -rf opencv-deb
#rm -rf gst-cogl
#rm -rf vlc-packages
echo \"Install Success\"
这样处理后,再执行脚本就高效了,在线安装必备的依赖库文件后,直接本地解压并安装组件包。
三、USB摄像头
本次实验采用的是一个分辨率为2592*1944的uvc免驱工业摄像机。无自动聚焦功能,由于之前贴了滤光片,因此手动对焦,以及周围环境给光显得尤为重要。摄像头配无畸变镜头,实物如下:
摄像头需要在windows下使用“AMCap”工具,手机支架固定好位置,调好焦距,使采集的图片清晰明朗。
四、安装USB软件包
由于此次使用的USB摄像头,并没用到IMX219 CSI摄像头,因此需要安装关于USB的软件包。
sudo apt-get install usbutils
在user目录下执行上述指令,然后通过lsusb指令,可查询到接入USB接口的摄像头。
使用“v4l2-ctl --list-device”可查询当前挂载video设备
使用“v4l2-ctl --device=/dev/video4 --all”可查看挂载在video4的USB摄像头配置信息
五、执行实验代码
cd /usr/share/doc/opencv-doc/examples/python/
python3 qrcode.py --device=4
通过执行上述两步指令后,可启动二维码检测程序。然而执行后提示如下:
针对上述问题,需要安装好opencv的python依赖软件包
sudo apt-get install libopencv-dev python3-opencv
成功安装完成后,在ssh终端再次执行“python3 qrcode.py --device=4”指令,提示如下:
出现上述情况,需通过HDMI的桌面方式登录后,在系统终端中,进入到“/usr/share/doc/opencv-doc/examples/python/”路径下,再执行“qrcode.py”脚本程序。
摄像头聚焦良好,可以顺利检测到二维码并解析成功。
终端打印如下:
六、后记
正如上述,可以成功检测二维码并解析成功,但是次日,想录制视频发帖时,结果发现桌面方式无法登录了,不管是user身份还是root身份,密码也没改,怎么回事?使用Uart或者ssh方式,都可以正常连接登录。彻底懵了,因为搭建这个环境联网比较费时。
“Not listed?”也不知道是啥原因,联系赛昉FAE远程协助,也没查出bug所在,想通过拷贝TF镜像来分析问题,但是插入TF卡弹出三个盘,且三个盘都强制要求格式化才能访问,这样的话也没法通过Ubuntu虚拟机来挂载TF,使用dd命令将镜像压缩出来了。无奈只能重刷系统,重新构建环境了。
经过再次联网下载必备软件包后,运行指令后,桌面终端提示:
这说明摄像头检测到二维码并解析出结果了,但是由于不是以user身份运行指令,所以无法打开firefox浏览器,“python3 qrcode.py --device=4”命令需要以user身份运行,不用加sudo执行,这样就能顺利启动firefox,视频见底部。
后面正常关机后,再次通过HDMI桌面的方式登录系统,可以正常登录,没有复现到之前的情况。初步结论:
①、可能是由于多重身份运行后,导致文件丢失。当时使用ssh以root身份执行shutdown关机指令,而在桌面的终端以user身份运行着二维码检测程序。
②、摄像头挂载的device设备号不固定,非法访问到其它系统媒体设备号了,导致gdm3驱动异常。
好了,此次实验分享到此结束,以上经历仅供参考,遇到类似问题的坛友,欢迎留言共同讨论。
2025-07-30 01:01:39
工业计算机对某些行业至关重要。我们将在下面详细解释这些行业中的工业计算机应用。1.制造与工业自动化工业级计算机非常适合制造工厂,特别是那些想要自动化装配过程的工厂。在这样的环境中,工业计算机可用
2025-07-28 16:07:15442 
拿到VisionFive 2板子有段时间了,之前也写过几篇帖子了,今天来写一下刷写Ubuntu系统。
1。首先从ubunut官网下载VisionFive 2的固件,塞防已经做好了适配。
https://canonical-ubutu-boards.readthedocs-hosted.com/en/latst/how-to/starfive-visionfive-2/
2。下载下来后,解压出来
使用上面的固件,
3。打开烧录软件
选择固件
选择磁盘
烧录开始
等5分钟烧录完毕
还要验证一遍
最后烧录完毕
链接好板子和串口
打开putty
可以看到烧录正常,进入Ubuntu了
2025-07-23 13:17:27
一、引言
上期咱分享了环境搭建与GPIO点灯实验,今儿在此基础上,验证一下驱动8x8的LED点阵屏,由于之前的环境与VisionFive.gpio包已安装好,因此实验起来比较顺利。由参考的脚本可知,实验中需用到一个按键开关作为中断触发LED点阵屏显示。
二、硬件连接
上图为硬件实物连接情况,初始上电状态为全亮LED点阵屏。
咱连接点阵屏与按键模块,是通过连接板上40-Pin Header。
MAX7219串行点阵显示模块与板上40-Pin Header连接关系:
按键开关一端连接一个信号输入GPIO口,设定为低电平有效;另一端连接GND。
三、脚本修改
在官方提供的参考脚本上,扩展显示其它内容。
命令执行流程:
开发板上电后,串口输出显示待登录状态,说明网络已初始化完成,因此可使用PuTTY登录到开发板上。然后将普通用户变更为超级用户,然后进入到sample-code目录下,由于官方提供的参考脚本文件为只读属性,因此使用vim编辑是无效的,需要使用chmod命令将文件属性更新为可读可写。这样接下来可以使用vim编辑该脚本文件。命令执行步骤如下图所示:
edge_detection_with_LED_Matrix.py代码完善如下:
\"\"\"
Step 1:
Please make sure the LED Dot Matrix is connected to the correct pins.
The following table describes how to connect LED Dot Matrix to the 40-pin header.
-----------------------------------------
___MAX7219_______Pin Number_____Pin Name
VCC 25V Power
GND 34GND
DIN 40 GPIO44
CS38 GPIO61
CLK 36 GPIO36
Step 2:
Please make sure the button is connected to the correct pins.
The following table describes how to connect the button to the 40-pin header.
----------------------------------------
_______button____Pin Number_____Pin Name
one end 37 GPIO60
The other end39GND
-----------------------------------------
\"\"\"
import VisionFive.gpio as GPIO
import sys
import time
DIN = 40
CS = 38
CLK = 36
# Display logo data.
buffer = [
\"01111000\",
\"01000000\",
\"01111000\",
\"01001111\",
\"01111001\",
\"00001111\",
\"00000001\",
\"00001111\",
]
#Display arabic numeral 13.
buffer_13 = [
\"00001000\",
\"00001000\",
\"01111111\",
\"01001001\",
\"01001001\",
\"01111111\",
\"00001000\",
\"00001000\",
]
#Display arabic numeral 12.
buffer_12 = [
\"11111111\",
\"10111101\",
\"10010001\",
\"10111101\",
\"10010101\",
\"10111101\",
\"10000001\",
\"11111111\",
]
#Display arabic numeral 11.
buffer_11 = [
\"01111110\",
\"00100000\",
\"00100000\",
\"00111110\",
\"01000010\",
\"10000100\",
\"00010100\",
\"00001000\",
]
#Display arabic numeral 10.
buffer_10 = [
\"01001001\",
\"01111111\",
\"00001000\",
\"00011111\",
\"00100010\",
\"01011010\",
\"00000100\",
\"00001000\",
]
#Display arabic numeral 9.
buffer_9 = [
\"00111110\",
\"00100010\",
\"00100010\",
\"00111110\",
\"00000010\",
\"00000010\",
\"00000010\",
\"00111110\",
]
#Display arabic numeral 8.
buffer_8 = [
\"00111110\",
\"00100010\",
\"00100010\",
\"00111110\",
\"00100010\",
\"00100010\",
\"00100010\",
\"00111110\",
]
#Display arabic numeral 7.
buffer_7 = [
\"00111110\",
\"00000010\",
\"00000010\",
\"00000100\",
\"00000100\",
\"00000100\",
\"00001000\",
\"00001000\",
]
#Display arabic numeral 6.
buffer_6 = [
\"00111110\",
\"00100000\",
\"00100000\",
\"00111110\",
\"00100010\",
\"00100010\",
\"00100010\",
\"00111110\",
]
#Display arabic numeral 5.
buffer_5 = [
\"00011110\",
\"00010000\",
\"00010000\",
\"00011110\",
\"00000010\",
\"00000010\",
\"00000010\",
\"00011110\",
]
# Display arabic numeral 4.
buffer_4 = [
\"00000100\",
\"00001000\",
\"00010000\",
\"00100100\",
\"01000100\",
\"01111111\",
\"00000100\",
\"00000100\",
]
# Display arabic numeral 3.
buffer_3 = [
\"00011100\",
\"00100010\",
\"00000010\",
\"00011110\",
\"00000010\",
\"00100010\",
\"00011100\",
\"00000000\",
]
# Display arabic numeral 2.
buffer_2 = [
\"00011100\",
\"00100010\",
\"00000010\",
\"00000100\",
\"00001000\",
\"00010000\",
\"00111110\",
\"00000000\",
]
# Display arabic numeral 1.
buffer_1 = [
\"00001000\",
\"00011000\",
\"00001000\",
\"00001000\",
\"00001000\",
\"00001000\",
\"00001000\",
\"00011100\",
]
# LED turn off data.
buffer_off = [\"0\", \"0\", \"0\", \"0\", \"0\", \"0\", \"0\", \"0\"]
key_pin = 37
def sendbyte(bytedata):
for bit in range(0, 8):
if (bytedata << bit) & 0x80:
GPIO.output(DIN, GPIO.HIGH)
else:
GPIO.output(DIN, GPIO.LOW)
# Configure the voltage level of CLK as high.
GPIO.output(CLK, GPIO.HIGH)
# Configure the voltage level of CLK as low.
GPIO.output(CLK, GPIO.LOW)
def WriteToReg(regaddr, bytedata):
GPIO.output(CS, GPIO.HIGH)
GPIO.output(CS, GPIO.LOW)
GPIO.output(CLK, GPIO.LOW)
sendbyte(regaddr)
sendbyte(bytedata)
GPIO.output(CS, GPIO.HIGH)
def disp_clean():
time.sleep(0.1)
for i in range(0, 8):
# Write data to register address. Finally the LED matrix displays StarFive logo.
WriteToReg(i + 1, int(buffer_off[i], 2))
time.sleep(1)
def disp_numeral_13_to_1():
for id in range(13, 0, -1):
buffer_name = \"buffer_{}\".format(id)
list_buffer = eval(buffer_name)
for j in range(0, 8):
# Write data to the register address. Finally the LED matrix displays with numeral from 5 to 1.
WriteToReg(j + 1, int(list_buffer[j], 2))
time.sleep(1)
for j in range(0, 8):
# Write data to the register address. Finally turn off the LED matrix.
WriteToReg(j + 1, int(buffer_off[j], 2))
time.sleep(0.1)
def flash_logo():
for loop in range(0, 5):
for j in range(0, 8):
# Write data to the register address. Finally turn off the LED matrix.
WriteToReg(j + 1, int(buffer_off[j], 2))
time.sleep(0.1)
for j in range(0, 8):
# Write data to the register address. Finally the LED matrix displays with StarFive logo.
WriteToReg(j + 1, int(buffer[j], 2))
time.sleep(0.1)
def WriteALLReg():
# Clean screen
disp_clean()
# Display numeral from 5 to 1
disp_numeral_13_to_1()
# Flash starfive logo.
flash_logo()
def initData():
WriteToReg(0x09, 0x00)# Set the decode mode.
WriteToReg(0x0A, 0x03)# Set the brightness.
WriteToReg(0x0B, 0x07)# Set the scan limitation.
WriteToReg(0x0C, 0x01)# Set the power mode.
WriteToReg(0x0F, 0x00)
# the callback function for edge detection
def detect(pin, edge_type):
if edge_type == 1:
et = \"Rising\"
else:
et = \"Falling\"
if GPIO.getmode() == GPIO.BOARD:
print(\"{} edge was detected on pin:{}\".format(et, pin))
else:
print(\"{} edge was detected on GPIO:{}\".format(et, pin))
WriteALLReg()
global flag
flag = 1
def main():
global flag
flag = 0
# Set the gpio mode as \'BOARD\'.
GPIO.setmode(GPIO.BOARD)
# Configure the direction of DIN, CS, and CLK as output.
GPIO.setup(DIN, GPIO.OUT)
GPIO.setup(CS, GPIO.OUT)
GPIO.setup(CLK, GPIO.OUT)
# Configure the direction of key_pin as input.
GPIO.setup(key_pin, GPIO.IN)
# Both edge rising and falling can be detected, also set bouncetime(unit: millisecond) to avoid jitter
GPIO.add_event_detect(key_pin, GPIO.FALLING, callback=detect, bouncetime=2)
initData()
print(\"*------------------------------------------------------*\")
print(\"Please press the key on pin {} to launch !!!\".format(key_pin))
while True:
if flag == 1:
disp_clean()
GPIO.cleanup()
break
print(\"Exit demo.\")
if __name__ == \"__main__\":
sys.exit(main())
当然开发者也可以使用FileZilla拷贝工具,通过ssh来传递python脚本文件,但没有vim来的高效。
使用vim编写完,保存退出后,运行“python3 edge_detection_with_LED_Matrix.py”命令即可验证效果。
四、显示效果
开机后,第一次运行脚本程序,如顶部视频所示,由全屏点亮,通过按一下开关,触发点阵屏显示。显示内容有“中国万岁”,“9”~“1”数字倒计显示,接着闪烁显示赛防科技的logo后熄灭点阵屏。再次运行脚本程序,如底部视频所示,按键后可再次触发。
五、终端命令关机
昉·星光 2开机后,说实话CPU处的温度还是有点高的,用手指触碰感觉很烫手,后期会考虑添上一个16mm x 16mm的散热片。在终端中,root模式下运行shutdown指令,在没有连接串口调试工具前提下,可做到完全关断电源,体验不错。
2025-07-23 00:45:41
的里程碑
VisionFive 2凭借JH7110四核处理器 + Vulkan GPU突破了RISC-V平台游戏性能瓶颈。实测证明:
✅性价比突出 :单板成本<800元,性能持平树莓派4B游戏方案
✅生态
2025-07-22 20:58:22
测试板卡上声卡,播放mp3音乐。
一、声卡设备
1.1、查询板卡的声卡设备
板卡支持两个声卡,一个是自身声卡设备,一个是HDMI声卡。
user@starfive:~$ sudo aplay -l
1.2、查看系统默认的声卡
默认的声卡设备不是上面的两个声卡
1.3、修改默认的声卡设备
修改声卡配置文件user@starfive:~$ sudo vi /etc/asound.conf
添加内容
pcm.!default {
type hw
card 0
}
ctl.!default {
type hw
card 0
}
重启设备后,查看默认声卡为修改的设备
1.4、测试设备
二、安装播放器软件user@starfive:~$ sudo apt-get install sox libsox-fmt-all
三、播放音乐
播放复制到板卡上的音乐
user@starfive:~$ sudo play bzyy.mp3
2025-07-22 07:33:58
让我们讨论一下部署坚固的自动化计算机的一些好处。1.温度范围宽自动化计算机经过工程设计,配备了支持宽温度范围的组件,使自动化计算解决方案能够在各种不同的极端环境中运行。自动化计算机能够在温度达到
2025-07-21 16:44:20498 ARM一样,自己搭建环境自己编译吧。
今天第一篇,主要分享下怎么搭建riscv编译环境环境,用无线网卡链接wifi也需要编译内核,磨刀不误砍柴工嘛。
下面主要介绍RISC-V架构下GNU工具链
2025-07-20 23:59:40
一、概况
昉·星光 2是全球首款集成了GPU的高性能RISC-V单板计算机。与昉·星光相比,昉·星光 2全面升级,在处理器速度、多媒体处理能力、可扩展性等方面均有显著提升。性能卓越,价格亲民,昉
2025-07-20 22:55:46
。ED-SBC3300系列是一款基于RaspberryPiCM5的Mini-ITX工业单板计算机主板。根据不同的应用场景和用户需求,可选择不同规格的RAM和eMMC
2025-07-20 20:34:18883 1、ollama平台搭建
ollama可以快速地部署开源大模型,网址为https://ollama.com, 试用该平台,可以在多平台上部署 Deepseek-R1, Qwen3, Llama, Gemma等开源大模型。当然,一些闭源的(类似chatgpt, gemini)是不支持部署的。如下图:
在端侧部署大模型,个人认为最大的好处:是可以避免因文本或图片上传而造成的信息泄露,因为一切文本输入和推理都可以离线进行。
我们进到其github,发现其并没有提供risc-v架构的编译产物。
所以,我们需要下载源码来编译ollama。
Git clone https://github.com/ollama/ollama.git
需要先安装一下编译需要的库:
sudo apt install g++ build-essential cmake
解压ollama源码之后,按照ollama github里的build from source指导,进行编译,编译步骤如下图所示:
在调用go run . serve发现抱错:go指令不存在,这是因为VisionFive2板卡没有安装go,下面我们来安装一下go
2、go安装
进到go的官网https://go.dev/dl/,按照惯例,我们要找一下是否有risc-v的编译产物,如果没有的话,又得源码编译了。 不过,好在我们发现了已经有release的risc-v的编译产物了,如下图,把红框内的文件下载到visionfive2的板卡上。
解压文件,看到在go/bin/路径下,有一个go的可执行文件。
我们要把这个go可执行文件添加到环境变量,具体做法是:在~/.bashrc文件最后添加下图所示的内容
然后
source ~/.bashrc
执行
go version
检查一下,go是否能够正常运行。这里可以看到go的版本,以及编译的系统和芯片架构。
3、拉取/运行大语言模型
ollama的使用方法和docker很像。
返回到ollama的编译路径,找到ollama可执行文件
执行
./ollama run qwen3:0.6b
可以看到有个进度条在拉取0.6B的Qwen模型。当然也可以拉去deepseek的模型,如下:
./ollama run deepseek-r1:1.5b
可以选择不同的参数量版本,参数量越大,对算力的要求越高,模型表现越好。
我这里就使用最小的Qwen0.5b来试一下:
拉取完毕之后,就可以在命令行输入你想问的问题:
我让它帮我写一首诗,指定了主题和要表现的内容:
qwen0.6b的表现:这个参数量的表现只能说一般。“听蛙飞”,青蛙怎么会飞呢。
visionfive2的表现:
执行
./ollama ps
可以看到当前正在运行的大模型,以及运行方式:CPU。 如果有显卡的话,这里会显示GPU。Visionfive2的gpu应该是不支持推理的,所以这里用的是CPU。实测下来,运行0.6B的模型,自回归的速度大概是每2秒一个汉字。
2025-07-19 15:45:24
无所不在。得益于其强大的硬件和多功能性,树莓派被应用于各个行业。继续阅读,了解这款单板计算机如何应对全球挑战,来让我们惊叹。1.学生将树莓派送上太空让我们从最严苛的
2025-07-16 16:51:011170 
官网看到开发板可以安装测试openplc,下面来体验下openplc功能。
一、安装软件
1.1、安装软件包
root@starfive:~# sudo apt-get install -y curl git udev libxml2-dev autoconf automake autotools-dev icu-devtools libicu-dev libsigsegv2 m4 autoconf-archive gnu-standards libtool gettext m4 make cmake build-essential pkg-config bison flex libtool nodejs libbz2-dev sqlite3 libgdbm-dev openssl libexpat1-dev python${version}-dev python3 libxslt-dev libmodbus5 python3-venv libasio-dev
1.2、下载openplc软件包
下载地址:https://debian.starfivetech.com/
网盘路径:VisionFive2/Engineering Release/202409/debian-packs/openplc.zip
1.3、安装软件
下载安装包复制到开发板/home/user下,并解压
user@starfive:~$ unzip openplc.zip
user@starfive:~$ cd openplc
user@starfive:~/openplc$ sudo dpkg -i openplc-vf2.deb
1.4、创建环境
创建python虚拟环境并安装python包
user@starfive:~$ cd openplc_v3/
user@starfive:~/openplc_v3$ sudo python3 -m venv .venv
user@starfive:~/openplc_v3$ sudo .venv/bin/python3 -m pip install requests wget bs4 flask==2.3.3 werkzeug==2.3.7 flask-login==0.6.2 pyserial pymodbus==2.5.3
user@starfive:~/openplc_v3$ sudo .venv/bin/python3 -m pip install VisionFive.gpio-1.3.3-cp311-cp311-linux_riscv64.whl
需要准备文件VisionFive.gpio-1.3.3-cp311-cp311-linux_riscv64.whl
文件地址:https://pypi.org/project/VisionFive.gpio/1.3.3/
二、测试
2.1、下载及安装openplc编辑软件
软件下载地址:https://autonomylogic.com/download/
这里我下载windows版本测试,下载完成后,正常流程安装软件。
2.2、创建工程
2.2.1、创建梯形图工程
2.2.2、测试梯形图
2.2.3、生成st文件
2.3、打开OpenPLC HMI
浏览器输入板卡的IP:8080http://192.168.1.200:8080/login
输入用户名和密码:openplc,接入HMI界面
进入界面后,上传上步生成的.st文件
重新命令程序名称
上传程序后,编译出现错误
2025-07-15 23:30:57
工业自动化是指利用自动化计算机来控制工业环境中的流程、机器人和机械,以制造产品或其部件。工业自动化的目的是提高生产率、增加灵活性,并提升制造过程的质量。工业自动化在汽车制造中体现得最为明显,其中许多
2025-07-15 16:32:14602 
一、更新软件包
编译之前需要更新所需要的软件包
hui@hui-virtual-machine:~$ sudo apt-get update
hui@hui-virtual-machine:~$ sudo apt-get upgrade
hui@hui-virtual-machine:~$ sudo apt-get install build-essential automake libtool texinfo bison flex gawk g++ git xxd curl wget gdisk gperf cpio bc screen texinfo unzip libgmp-dev libmpfr-dev libmpc-dev libssl-dev libncurses-dev libglib2.0-dev libpixman-1-dev libyaml-dev patchutils python3-pip zlib1g-dev device-tree-compiler dosfstools mtools kpartx rsync
hui@hui-virtual-machine:~$ curl -s https://packagecloud.io/install/repositories/github/git-lfs/script.deb.sh | sudo bash
hui@hui-virtual-machine:~$ sudo apt-get install git-lfs
二、下载SDK源码
hui@hui-virtual-machine:~$ git clone https://github.com/starfive-tech/VisionFive2.git
hui@hui-virtual-machine:~$ cd VisionFive2/
hui@hui-virtual-machine:~/VisionFive2$ git checkout --track origin/JH7110_VisionFive2_devel
hui@hui-virtual-machine:~/VisionFive2$ git submodule update --init --recursive
hui@hui-virtual-machine:~/VisionFive2$ cd buildroot && git checkout --track origin/JH7110_VisionFive2_devel && cd ..
hui@hui-virtual-machine:~/VisionFive2$ cd linux && git branch JH7110_VisionFive2_devel origin/JH7110_Vision
hui@hui-virtual-machine:~/VisionFive2$ cd u-boot && git checkout --track origin/JH7110_VisionFive2_devel && cd ..
hui@hui-virtual-machine:~/VisionFive2$ cd opensbi && git checkout --track origin/JH7110_VisionFive2_devel && cd ..
hui@hui-virtual-machine:~/VisionFive2$ cd soft_3rdpart && git checkout JH7110_VisionFive2_devel && cd ..
三、构建指令
3.1、构建Buildroot、U-Boot、Linux内核和BusyBox
hui@hui-virtual-machine:~/VisionFive2$ make -j$(nproc)
编译完成
编译后生成的文件
3.2、生成TF卡镜像
hui@hui-virtual-machine:~/VisionFive2$ make buildroot_rootfs -j$(nproc)
hui@hui-virtual-machine:~/VisionFive2$ make img
编译完成后,生成的镜像文件
3.3、烧写系统到TF卡
执行下面命令,烧写系统到TF卡
hui@hui-virtual-machine:~/VisionFive2$ sudo dd if=work/sdcard.img of=/dev/sdc bs=4096
四、编译过程中遇到的错误
解决办法:
修改目录/VisionFive2/buildroot/package/mesa3d/mesa3d.mk
修改下载连接地址:
hui@hui-virtual-machine:~/VisionFive2/buildroot/package/mesa3d$ sudo vi mesa3d.mk
五、系统运行
将烧写的系统的TF卡插入板卡,上电启动。
2025-07-14 00:27:15
单板计算机,搭载昉·惊鸿-7110(型号:JH-7110)RISC-V应用处理器,拥有极强的计算能力和图形处理能力。开源的昉·星光 2具有强大的软件适配性,官方适配Debian操作系统,同时通过社区合作适配
2025-07-13 20:41:46
拿到赛昉科技的VisionFive 2开发板有段时间了,之前移植出差调试设备,任务比较繁忙,刚好现在周末有时间,就来写下测评帖子。
这是板子的包装,非常的高大上
下面是插电接入网线后的板子实物图
运行这块板子,需要自备一个容量>32G以上的SD卡,否则无法运行debian系统。
为此,我专门在淘宝上买了一个64G的SD卡。
首先为了使VisionFive 2板子运行起来,先要对SD进行OS烧录,
这个非常像给PC台式机安装操作系统,只不过现在是给VisionFive 2安装debian linux系统了,然后哪个SD卡就充当固态硬盘,安装了系统。
1。先烧录debian系统到SD卡
https://canonical-ubuntu-boards.readthedocs-hosted.com/en/latest/how-to/starfive-visionfive-2/
根据这个网盘地址下载烧录固件,然后解压得到下面的东西
打开balenaEtcher软件
加载这个固件烧录到SD中
上面是烧录,然后还有验证
强烈建议使用有USB3.0接口的电脑进行烧录,我的笔记本只有USB2.0,烧录一下5分钟。好慢
烧录完成后会显示上面的图像
然后将SD卡插入板子的卡槽
使用串口putty连接
输入用户名 root
密码 starfive
进入debian系统
输入lscpu指令查看
4核risv CPU
安装温度sensor
apt install lm-sensors
输入sensors查看板子温度
显示是51.5度,有点发烫
2。进行coremark跑分
先从github上下载coremark源码git clone https://github.com/eembc/coremark.git
使用上面的命令
然后cd coremark切换到coremark文件夹
运行make编译代码
然后输入
./coremark.exe
执行文件
可以看出最后coremark跑分为5041.477611分,很强的分数了,完爆所有STM32系列的MCU分数
2025-07-12 12:38:52
【开箱】
感谢 elecfans 和 赛昉半导体 的测评活动,收到了 VisionFive 2 开发板,先上图一睹为快。
【处理器介绍】
这款开发板搭载 28nm StarFive
2025-07-12 10:43:25
睿莓1是一款性能优异且极具性价比,专为多种应用场景设计的单板计算机。搭载Amlogic S905X4四核处理器,支持多种内存和存储配置,配备HDMI 2.1接口,支持4Kp75视频输出。它具备10
2025-07-11 16:48:41
工业计算机是一种专为工厂和工业环境设计的计算系统,具有高可靠性和稳定性,能够应对恶劣环境下的自动化、制造和机器人操作。其特点包括无风扇散热技术、无电缆连接和防尘防水设计,使其在各种工业自动化场景中
2025-07-10 16:36:44587 
适用场景 :RVspace防-星光2单板计算机(Debian11),SD卡根分区扩容
核心原理
三步操作流程 : graph LR
A[删除旧分区] --> B[重建分区-保持起始扇区
2025-07-09 20:50:19
一、环境搭建
相关命令来源:GitHub -
starfive-tech/VisionFive2
注意:整个环境搭建过程都需要vpn,否则ubuntu镜像无法下载,代码无法抓取,编译中间的工具无法抓取。
1.1 下载docker及镜像
docker pull ubuntu:20.04
cmd窗口执行命令抓取ubuntu镜像。
抓取好后在docker界面看到images栏新增了一个ubuntu的镜像
1.2 区分大小写
【很重要!!!设置区分大小写】
这个很重要,否则会导致编译buildroot_rootfs失败
失败提示“__lll_lock_wake_private”
参考:https://stackoverflow.com/questions/61059870/what-is-lll-lock-wait-private-and-what-can-cause-a-hang-while-malloc-consolida
创建一个文件夹存放docker项目D:\\\\docker_pro\\\\c_visionfive2,注意设置区分大小写
执行命令区分大小写
fsutil.exe file setCaseSensitiveInfo D:\\\\docker_pro\\\\c_visionfive2 enable
可以在D:\\\\docker_pro目录中,创建两个文件夹分别是a和A,如果都可以存在则表明设置成功。
1.3 生成容器
执行完后则进入容器
docker run --name c_visionfive2 -v //d/docker_pro/c_visionfive2:/home -it ubuntu:20.04 /bin/bash
解释:这里的//d/docker_pro/c_visionfive2是你要在windows中查看的文件路径,/home是这个文件映射在容器中的路径
docker container ls -a
docker exec -it c_visionfive2 /bin/bash
也可以用上述两个命令进入容器,先查看所有容器,然后输入容器名
docker exec -it<container_name> /bin/bash
PS:需要注意在docker中先把容器状态设置为运行。
1.4 更新工具
更新ubunut工具,如果不运行,git就没法用
apt update
下载依赖apt-get -y install build-essential automake libtool texinfo bison flex gawk g++ git xxd curl wget gdisk gperf cpio bc screen texinfo unzip libgmp-dev libmpfr-dev libmpc-dev libssl-dev libncurses-dev libglib2.0-dev libpixman-1-dev libyaml-dev patchutils python3-pip zlib1g-dev device-tree-compiler dosfstools mtools kpartx rsync
输入6和70选择时区
安装工具git-lfs
curl -s https://packagecloud.io/install/repositories/github/git-lfs/script.deb.sh | bash
apt-get install git-lfs
二、抓取代码
可以直接将如下代码块存成setup.sh文件,注意LF结尾
拷贝到/home目录下,直接运行./setup.sh
如果网络给力的话,可以一次性运行成功。
如果不行可以按步骤依次执行。
git clone https://github.com/starfive-tech/VisionFive2.git
cd VisionFive2
git checkout --track origin/JH7110_VisionFive2_devel
git submodule update --init --recursive
cd linux
git branch JH7110_VisionFive2_devel origin/JH7110_VisionFive2_devel
cd ../buildroot
git checkout --track origin/JH7110_VisionFive2_devel
cd ../u-boot
git checkout --track origin/JH7110_VisionFive2_devel
cd ../linux
git checkout --track origin/JH7110_VisionFive2_devel
cd ../opensbi
git checkout --track origin/JH7110_VisionFive2_devel
cd ../soft_3rdpart
git checkout JH7110_VisionFive2_devel
cd ..
make -j$(nproc)
三、编译结果
四、异常——不区分大小写导致
会遇到__lll_lock_wait_private的提示
如果没有事先把文件夹设置为区分大小写,后期想再设置就会失败。
五、刷机
暂时没找到直观的整编刷机教程,下期发布。
2025-07-08 23:07:14
2h........无奈)
参考文献:
全球首款集成3D GPU的高性能量产RISC-V 单板计算机,昉·星光 2 开发实践![全球首款集成3D GPU的高性能量产RISC-V 单板计算机,昉·星光 2 开发实践
2025-07-06 23:28:57
使用opencv测试USB摄像头。
一、检测USB摄像头
插入USB摄像头,执行命令,提示没有找到命令
root@starfive:~# lsusb
安装软件包
root@starfive:~# sudo apt install usbutils
再次执行,找到USB摄像头设备
二、检测摄像头参数
2.1、安装v4l2-ctl工具,查看视频设备
root@starfive:~# sudo apt install v4l-utils
root@starfive:~# v4l2-ctl --list-device
2.2、查看指定视频设备参数信息
root@starfive:~# v4l2-ctl --device=/dev/video4 --all
三、测试图像
3.1、安装依赖软件包
root@starfive:/opt# sudo apt-get install python3-pip
root@starfive:/opt# sudo apt-get install libopencv-dev python3-opencv
3.2、测试代码
import cv2
cap = cv2.VideoCapture(4)
while True:
ret, frame = cap.read()
cv2.imshow(\"Camera\", frame)
if cv2.waitKey(1) & 0xFF == ord(\'q\'):
break
cap.release()
cv2.destroyAllWindows()
3.3、显示图像
2025-07-06 23:14:24
测试远程访问开发板界面
一、安装vncserver软件
user@starfive:~$ sudo apt install xfce4 xfce4-goodies
user@starfive:~$ sudo apt install tightvncserver
二、运行软件
2.1、创建登录密码
user@starfive:~$ vncserver
2.2、修改xstartup文件
user@starfive:~$ vi .vnc/xstartup
在文件最后增加startxfce4 &
三、远程桌面登录
3.1、选择VNC方式登录
3.2、输入创建的密码
3.3、登录后的界面
3.4、修改分辨率
默认显示分辨率有点低,登录时可以设置显示的分辨率
关闭掉上次打开的进程
user@starfive:~$ vncserver -kill :1
以1920*1080分辨率打开
user@starfive:~$ vncserver -geometry 1920x1080
2025-07-06 08:47:55
官方有VisionFive.gpio,尝试下移植libgpiod到开发板。
一、安装GPIO库
1.1、下载源码
执行命令:
root@starfive:~# wget https://git.kernel.org/pub/scm/libs/libgpiod/libgpiod.git/snapshot/libgpiod-2.0.tar.gz
root@starfive:~# tar xvf libgpiod-2.0.tar.gz
root@starfive:~# apt-get install build-essential pkg-config m4 automake autoconf libtool autoconf-archive
root@starfive:~# apt-get install gcc g++
root@starfive:~# export CC=gcc
root@starfive:~# export CXX=g++
1.2、安装
root@starfive:~/libgpiod-2.0# ./autogen.sh --enable-tools=yes --prefix=/root/starfive/mylib_local
root@starfive:~/libgpiod-2.0# make
root@starfive:~/libgpiod-2.0# make install
安装完成后,生成的文件
二、测试
2.1、gpio.c
//#gpio.c
#include<stdio.h>
#include<unistd.h>
#include<gpiod.h>
#define PIN_IO2_4646//LD0
#define PIN_IO2_4444//LD1
#define PIN_IO2_6161//LD2
#define PIN_IO2_6363//ld3
#define PIN_IO2_4242//K2
int main()
{
struct gpiod_chip *gchip;
struct gpiod_line_info *glinein, *glineout;
struct gpiod_line_settings *gline_settings_in, *gline_settings_out;
struct gpiod_line_config*gline_config_in, *gline_config_out;
struct gpiod_request_config *gline_request_config_in, *gline_request_config_out;
struct gpiod_line_request*gline_request_in, *gline_request_out;
int offset_in[1] = {PIN_IO2_42};
int offset_out[4] = {PIN_IO2_44, PIN_IO2_46, PIN_IO2_61, PIN_IO2_63};
int value;
if ((gchip=gpiod_chip_open(\"/dev/gpiochip0\")) == NULL)
{
perror(\"gpiod_chip_open\");
return 1;
}
gline_settings_in = gpiod_line_settings_new();
if ((value=gpiod_line_settings_set_direction(gline_settings_in, GPIOD_LINE_DIRECTION_INPUT)) != 0)
{
perror(\"gpiod_line_settings_set_direction\");
}
gline_config_in = gpiod_line_config_new();
value=gpiod_line_config_add_line_settings(gline_config_in, offset_in, 1, gline_settings_in);
gline_request_config_in = gpiod_request_config_new();
gline_request_in = gpiod_chip_request_lines(gchip, gline_request_config_in, gline_config_in);
gline_settings_out = gpiod_line_settings_new();
if (gpiod_line_settings_set_direction(gline_settings_out, GPIOD_LINE_DIRECTION_OUTPUT) != 0)
{
perror(\"gpiod_line_settings_set_direction\");
}
gline_config_out = gpiod_line_config_new();
gpiod_line_config_add_line_settings(gline_config_out, offset_out, 4, gline_settings_out);
gline_request_config_out = gpiod_request_config_new();
gline_request_out = gpiod_chip_request_lines(gchip, gline_request_config_out, gline_config_out);
value=gpiod_line_request_set_value(gline_request_out, PIN_IO2_46, 0);
value=gpiod_line_request_set_value(gline_request_out, PIN_IO2_44, 1);
value=gpiod_line_request_set_value(gline_request_out, PIN_IO2_61, 0);
value=gpiod_line_request_set_value(gline_request_out, PIN_IO2_63, 1);
sleep(1);
for (int i = 0; i < 50; i++) {
//value=gpiod_line_request_get_value(gline_request_in, PIN_IO2_42);
//printf(\"PIN_IO2_42 = %d\\\\\\\\n\", value);
gpiod_line_request_set_value(gline_request_out, PIN_IO2_46, 1);
gpiod_line_request_set_value(gline_request_out, PIN_IO2_44, 0);
gpiod_line_request_set_value(gline_request_out, PIN_IO2_61, 1);
gpiod_line_request_set_value(gline_request_out, PIN_IO2_63, 0);
sleep(1);
gpiod_line_request_set_value(gline_request_out, PIN_IO2_46, 0);
gpiod_line_request_set_value(gline_request_out, PIN_IO2_44, 1);
gpiod_line_request_set_value(gline_request_out, PIN_IO2_61, 0);
gpiod_line_request_set_value(gline_request_out, PIN_IO2_63, 1);
sleep(1);
}
gpiod_chip_close(gchip);
return 0;
}
2.2、编译代码
在gpio.c所在的目录下编译
命令:root@starfive:~# gcc-I/root/starfive/mylib_local/include -L/root/starfive/mylib_local/lib -o gpio gpio.c -lgpiod
2.3、设置路径
root@starfive:~# export LD_LIBRARY_PATH=/root/starfive/mylib_local/lib:$LD_LIBRARY_PATH
root@starfive:~# export PATH=/root/starfive/mylib_local/bin:$PATH
三、运行结果
运行命令:root@starfive:~# ./gpio
2025-07-02 07:16:36
如果计算的未来不是被锁定在专有架构上,那会怎样?想象一下,在这个世界上,开发人员和业余爱好者都可以利用开源硬件的强大功能自由构建、创新和实验。进入RISC-V单板计算机(SBC)领域——一个新兴
2025-06-30 13:35:591020 
测试板卡GPIO口点亮LED灯。
一、搭建环境
1.1、文档
按照官方的应用文档搭建测试环境GPIO点亮LED
1.2、在Debain系统上安装piproot@starfive:~# apt-get install python3-pip
1.3、安装VisionFive.gpio包
1.3.1、安装依赖包
apt install libxml2-dev libxslt-dev
python3 -m pip install requests wget bs4
安装过程中遇到点问题
报错:error: externally-managed-environment
执行命令apt install python3-requests python3-wget python3-bs4 -y
正常安装
1.3.2、运行安装脚本
下载最新的VisionFive.gpio
下载地址:VisionFive.gpio
该版本有三个下载链接
根据系统安装的python版本来选择,选择系统版本对应的python 3.11
执行下载命令:
wget https://files.pythonhosted.org/packages/2e/00/16326e8e01a268ce997b72e70240d7249a550222af82955d9b4a52f8a320/VisionFive.gpio-1.3.3-cp311-cp311-any.whl
修改文件名:mv VisionFive.gpio-1.3.3-cp311-cp311-any.whl VisionFive.gpio-1.3.3-cp311-cp311-linux_riscv64.whl
安装python3 -m pip install VisionFive.gpio-1.3.3-cp311-cp311-linux_riscv64.whl --break-system-packages
二、测试
找到测试代码的位置
2.1、查看VisionFive.gpio安装的目录pip show VisionFive.gpio
进入目录
cd /usr/local/lib/python3.11/dist-packages/
cd VisionFive/sample-code/
找到led.py
2.2、修改测试代码
根据测试的硬件修改对应的端口
这里测试使用GPIO44端口,对用引脚号为40
修改led.py
\"\"\"
Please make sure the LED is connected to the correct pins.
The following table describes how to connect the LED to the 40-pin header.
-----------------------------------------
_______LED_________Pin Number_____Pin Name
Positive 22 GPIO50
Negative 6GND
-----------------------------------------
\"\"\"
import VisionFive.gpio as GPIO
import time
led_pin = 40
# Set the gpio mode as \'BOARD\'.
GPIO.setmode(GPIO.BOARD)
# Configure the direction of led_pin as output.
GPIO.setup(led_pin, GPIO.OUT)
def light(delay):
# Configure the voltage level of led_pin as high.
GPIO.output(led_pin, GPIO.HIGH)
time.sleep(delay)
# Configure the voltage level of led_pin as low.
GPIO.output(led_pin, GPIO.LOW)
time.sleep(delay)
if __name__ == \"__main__\":
try:
delay_s = input(\"Enter delay(seconds): \")
delay = float(delay_s)
while True:
try:
light(delay)
except KeyboardInterrupt:
break
finally:
GPIO.cleanup()
2.3、运行
执行命令:python3 led.py提示输入延时时间
2.4、运行结果
运行后,LED灯闪烁
2025-06-30 07:31:21
板卡上默认是没有系统,需要将系统烧写到TF卡、EMMC或M2硬盘上。
一、固件下载
下载地址:https://debian.starfivetech.com/
选址最新发布的版本
二、格式化TF卡
使用软件SD Formatter格式化TF卡*附件:SD Formatter.zip
三、安装镜像
3.1、下载软件balenaEtcher
使用balenaEtcher软件安装系统镜像
软件下载地址:balenaEtcher
3.2、安装镜像
下载的系统,使用SD目录下的镜像文件
解压镜像文件
烧录镜像
四、启动系统
4.1、设置启动模式
将烧写完成的TF卡插入开发板,设置为SD方式启动。
4.2、启动运行
启动后,输入用户名:user密码:starfive ,进入系统。
2025-06-29 22:36:47
收到开发板了,开箱开始了解开发板。
一、开箱
开发板包装很精致,外面一层塑料膜。
内部是塑料盒
里面是开发板
二、板卡资料
地址:链接
板卡上没有FLASH存储器,上电后也没有反应。
2025-06-29 19:07:15
在x86与ARM架构主导的单板计算机市场,中国团队打造的VisionFive 2(防星光2)如同一颗新星,凭借开源开放的RISC-V架构和成熟的桌面体验,为开发者与极客提供了全新的选择。经过
2025-06-27 09:06:10
现代高性能计算不仅使得更快的计算成为可能,它正驱动着 AI 系统解锁更多领域的科学突破。 高性能计算经历了多次迭代,每一次都源于对技术的创造性再利用。例如,早期的超级计算机使用现成的组件制造。后来
2025-06-26 19:39:001083 
烧录系统
下载img,解压出来的img文件大约4G。
用Rufus,把img文件烧录到TF卡中
这一步可以使用的软件很多,大家都可以试试,不行就换一个官方手册用的。
开箱
特性
VisionFive (初代)
VisionFive 2
SoC
StarFive JH7100
StarFive JH7110
CPU
双核 SiFive U74 @ 1.5GHz
四核 SiFive U74 @ 1.5GHz
GPU
无独立 GPU
Imagination PowerVR GPU
AI 加速
无
0.5 TOPS NPU
内存
2GB/4GB LPDDR4
2GB/4GB/8GB LPDDR4
存储
MicroSD, SPI Flash
eMMC 插槽 + MicroSD + SPI Flash
视频输出
HDMI 1.4 (1080p)
HDMI 2.0 (4K@30fps)
网络
千兆以太网
双千兆以太网
无线
Wi-Fi 5 + 蓝牙 5.2
无
VisionFive 2 相比第一代全面升级,只是烧录WiFi模块,但是双千兆网口,USB3.0可以外接无线网卡。
启动
外接了显示器 鼠标 键盘 千兆以太网
gnome的桌面 Wayland显示。
同时打开4个应用,CPU占用也不高。所以瓶颈在TF卡的读写速度。cpu还是挺强的。
高性能板卡整体发热还是很明显的,推荐增加散热片,或者风扇主动散热,最好2者都加上。
2025-06-26 18:20:40
欢迎的单板计算机之一。你可能已经拥有一台了,不是吗?Android是世界上最流行的操作系统,拥有各种各样的应用程序可供选择。这种流行度,再加上树莓派日益增强的性能,为在树莓派上
2025-06-18 17:20:37588 德国莱布尼茨超算中心(LRZ)将迎来全新超级计算机 Blue Lion,其算力比该中心现有的 SuperMUC-NG 高性能计算机提升了约 30 倍。这台新的超级计算机将在 NVIDIA Vera Rubin 架构上运行。
2025-06-12 15:39:45924 NVIDIA 宣布,搭载 NVIDIA Grace Hopper 平台的 JUPITER 超级计算机成为欧洲最快超级计算机,其运行 HPC 和 AI 工作负载的速度是第二名的两倍以上。
2025-06-12 15:33:361207 感谢海内外开发者的使用反馈和建议,进迭时空针对MUSEPi进行了全面升级,推出全新1.8寸单板计算机--MUSEPiPro(以下简称PiPro)。升级后的PiPro将RISC-VAICPU芯片K1
2025-06-06 16:55:421099 
环旭电子作为全球电子设计与制造服务领导厂商,近年来透过联合设计制造服务模式(Joint Design Manufacturing,JDM),协助知名品牌客户开发出兼具强固性与高效能的自行车计算机,以满足全世界自行车计算机市场日益成长的需求。
2025-06-04 18:17:45797 如果你是搞工业自动化、医疗设备、交通控制,甚至是军事装备的,那你大概率已经听过“模块化计算机”这个词。要是你还没了解,那这篇文章就是为你写的。作为一个在工业计算领域摸爬滚打十多年的从业者,我可以很负责任地说:模块化计算机不是未来趋势,它就是现在现实。
2025-06-04 11:00:08843 
机器人设计是一个跨学科的领域,涉及机械工程、电子工程、计算机科学、人工智能、材料科学等多个学科。主要电子与控制系统核心控制器:微控制器(Arduino、STM32)、单板计算机
2025-05-22 11:41:30578 
NVIDIA 宣布将开设量子-AI 技术商业应用全球研发中心(G-QuAT),该中心部署了全球最大量子计算研究专用超级计算机 ABCI-Q。
2025-05-22 09:44:15756 工业计算机是为挑战消费级系统耐用性的环境而构建的。在制造业、运输业、国防和采矿业等领域,计算机面临着持续的冲击、振动和其他物理压力。设计这些系统以在这种条件下保持可靠需要卓越的工程和创新技术。本文
2025-05-19 15:27:59397 
IVA的好处、实际部署应用程序以及工业计算机如何实现这些解决方案。一、什么是智能视频分析(IVA)?智能视频分析(IVA)集成了复杂的计算机视觉,通常与卷积神经网
2025-05-16 14:37:14695 工业计算机尺寸的关键差异化因素工业计算机的尺寸因应用要求、环境限制和性能能力而异。以下是区分它们的关键因素:物理尺寸(宽度、深度和高度):确定系统是否适合空间受限的机柜、控制面板或机架。可扩展性
2025-04-27 12:10:45558 一项艰巨的任务。本博客将指导您了解关键的工业计算机尺寸、使用案例。关键工业计算机外形要素及其使用案例一、工业微型PC尺寸范围:宽度:100毫米-180毫米深度:10
2025-04-24 13:35:25871 
计算机网络是指将地理位置不同且具有独立功能的多台计算机及其外部设备,通过通信线路连接起来,在网络操作系统、网络管理软件及网络通信协议的管理和协调下,实现资源共享和信息传递的计算机系统。
2025-04-22 14:29:551952 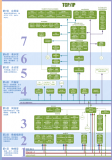
OrangePi和RaspberryPi介绍RaspberryPi:现代单板计算机的先驱RaspberryPi是由英国RaspberryPi基金会开发的一款单板计算机,自2012年发布以来,其目标
2025-04-10 15:52:381002 产品介绍龙芯3A6000信创台式计算机,型号:HJ910L华颉科技提供的国产龙芯3A6000信创台式计算机,搭载龙芯3A6000处理器的国产化主板,配套国产BIOS、国产桌面操作系统、应用软件,实现
2025-03-31 15:32:19
产品介绍 兆芯KX-6000信创台式计算机,型号:HJ910Z华颉科技提供的国产兆芯KX-6000信创台式计算机,搭载兆芯KX-U6780A处理器的国产化主板,配套国产BIOS、国产桌面
2025-03-31 15:28:26
产品介绍海光3350信创台式计算机,型号:HJ910H华颉科技提供的国产海光3350信创台式计算机,搭载海光3350处理器的国产化主板,配套国产BIOS、国产桌面操作系统、应用软件,实现国产化
2025-03-31 15:23:37
产品介绍飞腾D2000信创台式计算机,型号:HJ910F华颉科技提供的国产飞腾D2000信创台式计算机,搭载飞腾D2000处理器的国产化主板,配套国产BIOS、国产桌面操作系统、应用软件,实现国产化
2025-03-31 15:18:55
观看下方视频,详细了解RaspberryPi运行LLM的效果(作为编程助手),以及RaspberryPi5与内置NPU的单板计算机(如RadxaRock5C)的性能
2025-03-27 15:44:37602 RaspberryPi是一款超级实惠的单板计算机(SBC),可用于各种不同的项目。RaspberryPi的一些最流行用途包括将其变成媒体播放器或模拟机器。鉴于该系统的多功能性,有人想知道它是否可以
2025-03-25 09:43:581065 上海晶珩的ED-IPC3100系列是基于新型RaspberryPiCM5(计算模块5)的四款DIN导轨安装式工业计算机,配有两个以太网端口,以及各种RS232或RS485COM端口选项,具体取决于
2025-03-25 09:33:15897 注意:可以点击文章底部的阅读原文来查看原文章作为最突出的单板计算机(SBC)系列,RaspberryPi系列兼容众多操作系统。诸如KaliLinux、Ubuntu、Debian和功能强大
2025-03-25 09:29:201157 如果你需要一台小型且经济实惠的电脑来完成个人项目,那么现在正是最佳时机。单板计算机市场价值30亿美元,预计未来十年将持续增长。这意味着有很多选择,但除非你有非常具体的需求,否则在考虑其他选项之前,有
2025-03-25 09:27:52646 凯泽斯劳滕理工大学通过引入先进的德思特任意波形发生器(AWG)新DDS固件选件,显著加速了量子计算机的开发进程。德思特带您了解AWG全新DDS固件如何提升量子计算机的开发效率。
2025-03-21 16:50:58646 
台式超级计算机由 NVIDIA Grace Blackwell 驱动,为开发者、研究人员和数据科学家提供加速 AI 功能;系统由头部计算机制造商(包括华硕、Dell Technologies、HP
2025-03-19 09:59:29536 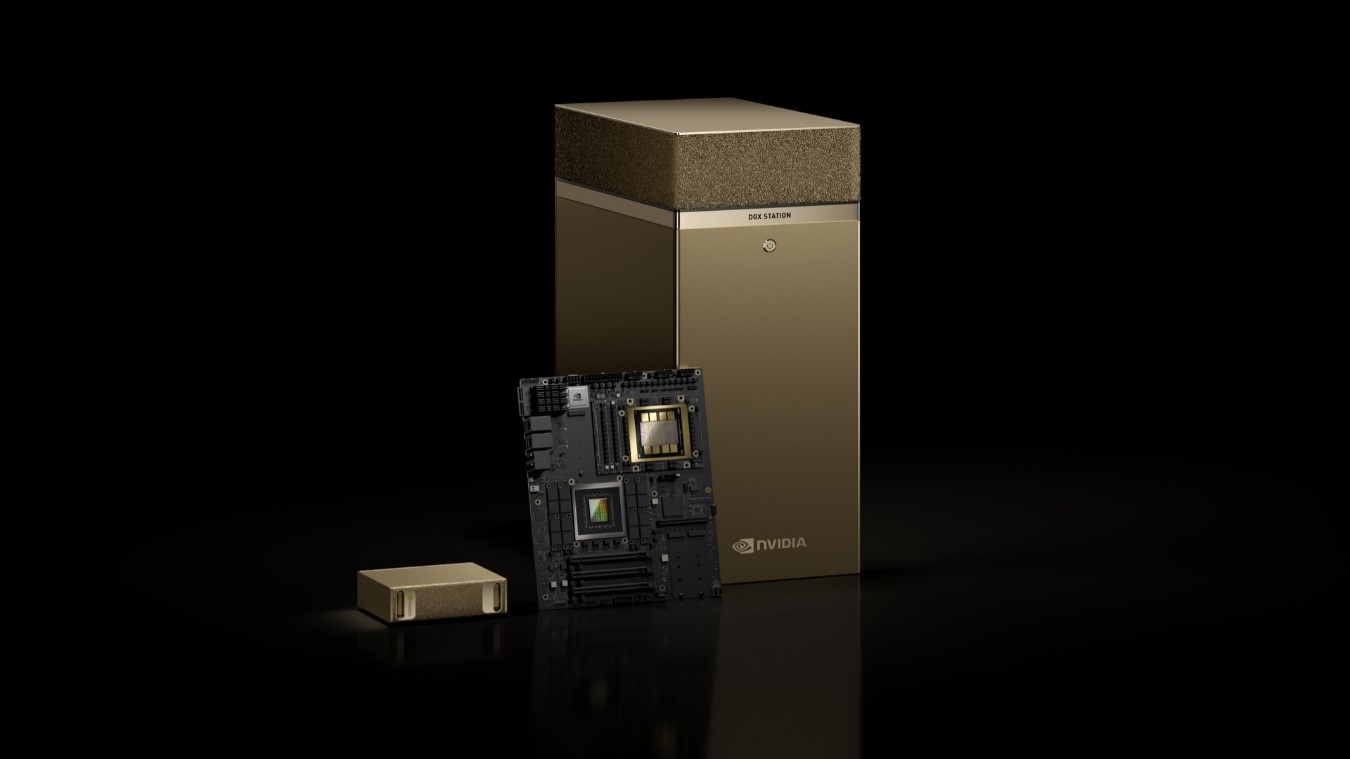
行业聚焦深圳计算机协会走进杰和2025年2月28日,深圳市计算机行业协会在杰和科技召开会长办公(扩大)会议及领导干部知识产权培训会。会议汇聚党支部、理事会、监事会及行业领军企业等40余代表,共同研判
2025-03-05 10:04:53660 
在特殊的工业环境中,实现快速生产离不开各类工业计算机的强大支持。杰和科技工业计算机AF208,作为核心控制单元,凭借其坚固可靠的外壳、先进的散热技术以及紧凑灵活的部署特点,发挥着关键作用。硬实力外壳
2025-03-03 11:04:12649 日前,全球知名科技媒体How-toGeek评选2025年最佳单板计算机,该媒体共评选出5款最佳单板计算机,香橙派占据其中两个席位,入选的产品是:OrangePi5Plus、OrangePi5。此外
2025-02-28 13:38:041796 
DFRobotLattePandaMu被全球知名科技媒体How-toGeek评选为2025年最佳Windows单板计算机。单板计算机(SBC)为有创意的用户和爱好者提供了一个绝佳的方式,可以让他们
2025-02-21 16:57:311447 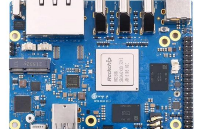
近日,东京——全球领先的集成量子计算公司Quantinuum与日本顶尖的综合研究机构RIKEN共同宣布,Quantinuum的“Reimei”量子计算机已在RIKEN Wako园区(位于日本埼玉县
2025-02-17 10:21:32856 BU-67121W实验室航空电子接口计算机North HillsNorth Hills的航空电子接口计算机(AIC),即BU-67121W,是一个高效能、可扩展且便携的平台,专为通过以太网开发并测试
2025-02-11 09:26:19
):计算机视觉引领混合现实体验增强现实(AR)和虚拟现实(VR)正在彻底改变我们与外部世界的互动方式。即便是在引人入胜的沉浸式
2025-02-08 14:29:512260 
近日,据报道,日本国立产业技术综合研究所(AIST)与全球芯片巨头英特尔公司正携手合作,致力于开发下一代量子计算机。这一举措预示着量子计算领域将迎来新的突破。 据了解,此次合作将充分利用英特尔在芯片
2025-02-07 14:26:02834 2025年1月8日,深圳市计算机行业协会举办了2024年度会员大会暨高峰论坛。杰和科技应邀出席会议,与行业精英、专家代表等共同探讨2025年计算机行业未来趋势。本次大会现场发布多项行业权威榜单与奖项
2025-02-05 17:48:39853 加州理工学院的研究人员取得重大突破,开发出一款能实现超过100GHz时钟速度的全光计算机。 长期以来,电子计算机时钟频率在近20年停滞于5GHz左右。 而此次推出的全光计算机,通过基于端到端和全光学
2025-01-23 10:32:49821 近日,英伟达在北京举办了答谢迎春会,英伟达创始人兼CEO黄仁勋亲临现场并发表了致辞。在致辞中,他透露了一个令人振奋的消息:“我们正处于一个新时代的开端,一个重新发明计算机的时代。” 黄仁勋表示
2025-01-21 10:08:15716
 电子发烧友App


 工商网监
工商网监
评论