


 Spring Boot的注解原理是什么

首先,先看SpringBoot的主配置类:
@SpringBootApplicationpublic class StartEurekaApplication
{
public static void main(String[] args)
{
SpringApplication.run(StartEurekaApplication.class, args);
}
}
点进@SpringBootApplication来看,发现@SpringBootApplication是一个组合注解。
@Target(ElementType.TYPE)
@Retention(RetentionPolicy.RUNTIME)
@Documented@Inherited@SpringBootConfiguration@EnableAutoConfiguration@ComponentScan(excludeFilters = {
@Filter(type = FilterType.CUSTOM, classes = TypeExcludeFilter.class),
@Filter(type = FilterType.CUSTOM, classes = AutoConfigurationExcludeFilter.class) })
public @interface SpringBootApplication {
}
首先我们先来看 @SpringBootConfiguration:
@Target({ElementType.TYPE})
@Retention(RetentionPolicy.RUNTIME)
@Documented@Configurationpublic @interface SpringBootConfiguration {
}
可以看到这个注解除了元注解以外,就只有一个@Configuration,那也就是说这个注解相当于@Configuration,所以这两个注解作用是一样的,它让我们能够去注册一些额外的Bean,并且导入一些额外的配置。
那@Configuration还有一个作用就是把该类变成一个配置类,不需要额外的XML进行配置。所以@SpringBootConfiguration就相当于@Configuration。进入@Configuration,发现@Configuration核心是@Component,说明Spring的配置类也是Spring的一个组件。
@Target({ElementType.TYPE})
@Retention(RetentionPolicy.RUNTIME)
@Documented@Componentpublic @interface Configuration {
@AliasFor(
annotation = Component.class
)
String value() default “”;
}
继续来看下一个@EnableAutoConfiguration,这个注解是开启自动配置的功能。
@Target({ElementType.TYPE})
@Retention(RetentionPolicy.RUNTIME)
@Documented@Inherited@AutoConfigurationPackage@Import({AutoConfigurationImportSelector.class})
public @interface EnableAutoConfiguration {
String ENABLED_OVERRIDE_PROPERTY = “spring.boot.enableautoconfiguration”;
Class《?》[] exclude() default {};
String[] excludeName() default {};
}
可以看到它是由 @AutoConfigurationPackage,@Import(EnableAutoConfigurationImportSelector.class)这两个而组成的,我们先说@AutoConfigurationPackage,他是说:让包中的类以及子包中的类能够被自动扫描到spring容器中。
@Target({ElementType.TYPE})
@Retention(RetentionPolicy.RUNTIME)
@Documented@Inherited@Import({Registrar.class})
public @interface AutoConfigurationPackage {
}
使用@Import来给Spring容器中导入一个组件 ,这里导入的是Registrar.class。来看下这个Registrar:
static class Registrar implements ImportBeanDefinitionRegistrar, DeterminableImports {
Registrar() {
}
public void registerBeanDefinitions(AnnotationMetadata metadata, BeanDefinitionRegistry registry) {
AutoConfigurationPackages.register(registry, (new AutoConfigurationPackages.PackageImport(metadata)).getPackageName());
}
public Set《Object》 determineImports(AnnotationMetadata metadata) {
return Collections.singleton(new AutoConfigurationPackages.PackageImport(metadata));
}
}
就是通过以上这个方法获取扫描的包路径,可以debug查看具体的值:
那metadata是什么呢,可以看到是标注在@SpringBootApplication注解上的DemosbApplication,也就是我们的主配置类Application:
其实就是将主配置类(即@SpringBootApplication标注的类)的所在包及子包里面所有组件扫描加载到Spring容器。因此我们要把DemoApplication放在项目的最高级中(最外层目录)。
看看注解@Import(AutoConfigurationImportSelector.class),@Import注解就是给Spring容器中导入一些组件,这里传入了一个组件的选择器:AutoConfigurationImportSelector。
可以从图中看出AutoConfigurationImportSelector 继承了 DeferredImportSelector 继承了 ImportSelector,ImportSelector有一个方法为:selectImports。将所有需要导入的组件以全类名的方式返回,这些组件就会被添加到容器中。
public String[] selectImports(AnnotationMetadata annotationMetadata) {
if (!this.isEnabled(annotationMetadata)) {
return NO_IMPORTS;
} else {
AutoConfigurationMetadata autoConfigurationMetadata = AutoConfigurationMetadataLoader.loadMetadata(this.beanClassLoader);
AutoConfigurationImportSelector.AutoConfigurationEntry autoConfigurationEntry =
this.getAutoConfigurationEntry(autoConfigurationMetadata, annotationMetadata);
return StringUtils.toStringArray(autoConfigurationEntry.getConfigurations());
}
}
会给容器中导入非常多的自动配置类(xxxAutoConfiguration);就是给容器中导入这个场景需要的所有组件,并配置好这些组件。
有了自动配置类,免去了我们手动编写配置注入功能组件等的工作。那是如何获取到这些配置类的呢,看看下面这个方法:
protected AutoConfigurationImportSelector.AutoConfigurationEntry
getAutoConfigurationEntry(AutoConfigurationMetadata autoConfigurationMetadata, AnnotationMetadata annotationMetadata) {
if (!this.isEnabled(annotationMetadata)) {
return EMPTY_ENTRY;
} else {
AnnotationAttributes attributes = this.getAttributes(annotationMetadata);
List《String》 configurations = this.getCandidateConfigurations(annotationMetadata, attributes);
configurations = this.removeDuplicates(configurations);
Set《String》 exclusions = this.getExclusions(annotationMetadata, attributes);
this.checkExcludedClasses(configurations, exclusions);
configurations.removeAll(exclusions);
configurations = this.filter(configurations, autoConfigurationMetadata);
this.fireAutoConfigurationImportEvents(configurations, exclusions);
return new AutoConfigurationImportSelector.AutoConfigurationEntry(configurations, exclusions);
}
}
我们可以看到getCandidateConfigurations()这个方法,他的作用就是引入系统已经加载好的一些类,到底是那些类呢:
protected List《String》 getCandidateConfigurations(AnnotationMetadata metadata, AnnotationAttributes attributes) {
List《String》 configurations = SpringFactoriesLoader.loadFactoryNames(this.getSpringFactoriesLoaderFactoryClass(), this.getBeanClassLoader());
Assert.notEmpty(configurations,
“No auto configuration classes found in META-INF/spring.factories. If you are using a custom packaging, make sure that file is correct.”);
return configurations;
}
public static List《String》 loadFactoryNames(Class《?》 factoryClass, @Nullable ClassLoader classLoader) {
String factoryClassName = factoryClass.getName();
return (List)loadSpringFactories(classLoader).getOrDefault(factoryClassName, Collections.emptyList());
}
会从META-INF/spring.factories中获取资源,然后通过Properties加载资源:
private static Map《String, List《String》》 loadSpringFactories(@Nullable ClassLoader classLoader) {
MultiValueMap《String, String》 result = (MultiValueMap)cache.get(classLoader);
if (result != null) {
return result;
} else {
try {
Enumeration《URL》 urls = classLoader !=
null ? classLoader.getResources(“META-INF/spring.factories”) : ClassLoader.getSystemResources(“META-INF/spring.factories”);
LinkedMultiValueMap result = new LinkedMultiValueMap();
while(urls.hasMoreElements()) {
URL url = (URL)urls.nextElement();
UrlResource resource = new UrlResource(url);
Properties properties = PropertiesLoaderUtils.loadProperties(resource);
Iterator var6 = properties.entrySet().iterator();
while(var6.hasNext()) {
Map.Entry《?, ?》 entry = (Map.Entry)var6.next();
String factoryClassName = ((String)entry.getKey()).trim();
String[] var9 = StringUtils.commaDelimitedListToStringArray((String)entry.getValue());
int var10 = var9.length;
for(int var11 = 0; var11 《 var10; ++var11) {
String factoryName = var9[var11];
result.add(factoryClassName, factoryName.trim());
}
}
}
cache.put(classLoader, result);
return result;
} catch (IOException var13) {
throw new IllegalArgumentException(“Unable to load factories from location [META-INF/spring.factories]”, var13);
}
}
}
可以知道SpringBoot在启动的时候从类路径下的META-INF/spring.factories中获取EnableAutoConfiguration指定的值,将这些值作为自动配置类导入到容器中,自动配置类就生效,帮我们进行自动配置工作。以前我们需要自己配置的东西,自动配置类都帮我们完成了。如下图可以发现Spring常见的一些类已经自动导入。
接下来看@ComponentScan注解,@ComponentScan(excludeFilters = { @Filter(type = FilterType.CUSTOM, classes = TypeExcludeFilter.class), @Filter(type = FilterType.CUSTOM, classes = AutoConfigurationExcludeFilter.class) }),这个注解就是扫描包,然后放入spring容器。
@ComponentScan(excludeFilters = {
@Filter(type = FilterType.CUSTOM,classes = {TypeExcludeFilter.class}),
@Filter(type = FilterType.CUSTOM,classes = {AutoConfigurationExcludeFilter.class})})
public @interface SpringBootApplication {}
总结下@SpringbootApplication:就是说,他已经把很多东西准备好,具体是否使用取决于我们的程序或者说配置。
接下来继续看run方法:
public static void main(String[] args) {
SpringApplication.run(Application.class, args);
}
来看下在执行run方法到底有没有用到哪些自动配置的东西,我们点进run:
public ConfigurableApplicationContext run(String.。. args) {
//计时器
StopWatch stopWatch = new StopWatch();
stopWatch.start();
ConfigurableApplicationContext context = null;
Collection《SpringBootExceptionReporter》 exceptionReporters = new ArrayList();
this.configureHeadlessProperty();
//监听器
SpringApplicationRunListeners listeners = this.getRunListeners(args);
listeners.starting();
Collection exceptionReporters;
try {
ApplicationArguments applicationArguments = new DefaultApplicationArguments(args);
ConfigurableEnvironment environment = this.prepareEnvironment(listeners, applicationArguments);
this.configureIgnoreBeanInfo(environment);
Banner printedBanner = this.printBanner(environment);
//准备上下文
context = this.createApplicationContext();
exceptionReporters = this.getSpringFactoriesInstances(SpringBootExceptionReporter.class, new Class[]{ConfigurableApplicationContext.class}, context);
//预刷新context
this.prepareContext(context, environment, listeners, applicationArguments, printedBanner);
//刷新context
this.refreshContext(context);
//刷新之后的context
this.afterRefresh(context, applicationArguments);
stopWatch.stop();
if (this.logStartupInfo) {
(new StartupInfoLogger(this.mainApplicationClass)).logStarted(this.getApplicationLog(), stopWatch);
}
listeners.started(context);
this.callRunners(context, applicationArguments);
} catch (Throwable var10) {
this.handleRunFailure(context, var10, exceptionReporters, listeners);
throw new IllegalStateException(var10);
}
try {
listeners.running(context);
return context;
} catch (Throwable var9) {
this.handleRunFailure(context, var9, exceptionReporters, (SpringApplicationRunListeners)null);
throw new IllegalStateException(var9);
}
}
那我们关注的就是 refreshContext(context); 刷新context,我们点进来看。
private void refreshContext(ConfigurableApplicationContext context) {
refresh(context);
if (this.registerShutdownHook) {
try {
context.registerShutdownHook();
}
catch (AccessControlException ex) {
// Not allowed in some environments.
}
}
}
我们继续点进refresh(context);
protected void refresh(ApplicationContext applicationContext) {
Assert.isInstanceOf(AbstractApplicationContext.class, applicationContext);
((AbstractApplicationContext) applicationContext).refresh();
}
他会调用 ((AbstractApplicationContext) applicationContext).refresh();方法,我们点进来看:
public void refresh() throws BeansException, IllegalStateException {
synchronized (this.startupShutdownMonitor) {
// Prepare this context for refreshing.
prepareRefresh();
// Tell the subclass to refresh the internal bean factory.
ConfigurableListableBeanFactory beanFactory = obtainFreshBeanFactory();
// Prepare the bean factory for use in this context.
prepareBeanFactory(beanFactory);
try {
// Allows post-processing of the bean factory in context subclasses.
postProcessBeanFactory(beanFactory);
// Invoke factory processors registered as beans in the context.
invokeBeanFactoryPostProcessors(beanFactory);
// Register bean processors that intercept bean creation.
registerBeanPostProcessors(beanFactory);
// Initialize message source for this context.
initMessageSource();
// Initialize event multicaster for this context.
initApplicationEventMulticaster();
// Initialize other special beans in specific context subclasses.
onRefresh();
// Check for listener beans and register them.
registerListeners();
// Instantiate all remaining (non-lazy-init) singletons.
finishBeanFactoryInitialization(beanFactory);
// Last step: publish corresponding event.
finishRefresh();
}catch (BeansException ex) {
if (logger.isWarnEnabled()) {
logger.warn(“Exception encountered during context initialization - ” +
“cancelling refresh attempt: ” + ex);
}
// Destroy already created singletons to avoid dangling resources.
destroyBeans();
// Reset ‘active’ flag.
cancelRefresh(ex);
// Propagate exception to caller.
throw ex;
}finally {
// Reset common introspection caches in Spring‘s core, since we
// might not ever need metadata for singleton beans anymore.。.
resetCommonCaches();
}
}
}
由此可知,就是一个spring的bean的加载过程。继续来看一个方法叫做 onRefresh():
protected void onRefresh() throws BeansException {
// For subclasses: do nothing by default.
}
他在这里并没有直接实现,但是我们找他的具体实现:
比如Tomcat跟web有关,我们可以看到有个ServletWebServerApplicationContext:
@Overrideprotected void onRefresh() {
super.onRefresh();
try {
createWebServer();
}
catch (Throwable ex) {
throw new ApplicationContextException(“Unable to start web server”, ex);
}
}
可以看到有一个createWebServer();方法他是创建web容器的,而Tomcat不就是web容器,那是如何创建的呢,我们继续看:
private void createWebServer() {
WebServer webServer = this.webServer;
ServletContext servletContext = getServletContext();
if (webServer == null && servletContext == null) {
ServletWebServerFactory factory = getWebServerFactory();
this.webServer = factory.getWebServer(getSelfInitializer());
}
else if (servletContext != null) {
try {
getSelfInitializer().onStartup(servletContext);
}
catch (ServletException ex) {
throw new ApplicationContextException(“Cannot initialize servlet context”,
ex);
}
}
initPropertySources();
}
factory.getWebServer(getSelfInitializer());他是通过工厂的方式创建的。
public interface ServletWebServerFactory {
WebServer getWebServer(ServletContextInitializer.。. initializers);
}
可以看到 它是一个接口,为什么会是接口。因为我们不止是Tomcat一种web容器。
我们看到还有Jetty,那我们来看TomcatServletWebServerFactory:
@Overridepublic WebServer getWebServer(ServletContextInitializer.。. initializers) {
Tomcat tomcat = new Tomcat();
File baseDir = (this.baseDirectory != null) ? this.baseDirectory
: createTempDir(“tomcat”);
tomcat.setBaseDir(baseDir.getAbsolutePath());
Connector connector = new Connector(this.protocol);
tomcat.getService().addConnector(connector);
customizeConnector(connector);
tomcat.setConnector(connector);
tomcat.getHost().setAutoDeploy(false);
configureEngine(tomcat.getEngine());
for (Connector additionalConnector : this.additionalTomcatConnectors) {
tomcat.getService().addConnector(additionalConnector);
}
prepareContext(tomcat.getHost(), initializers);
return getTomcatWebServer(tomcat);
}
那这块代码,就是我们要寻找的内置Tomcat,在这个过程当中,我们可以看到创建Tomcat的一个流程。
如果不明白的话, 我们在用另一种方式来理解下,大家要应该都知道stater举点例子。
《dependency》
《groupId》org.springframework.boot《/groupId》
《artifactId》spring-boot-starter-data-redis《/artifactId》《/dependency》《dependency》
《groupId》org.springframework.boot《/groupId》
《artifactId》spring-boot-starter-freemarker《/artifactId》《/dependency》
首先自定义一个stater。
《parent》
《groupId》org.springframework.boot《/groupId》
《artifactId》spring-boot-starter-parent《/artifactId》
《version》2.1.4.RELEASE《/version》
《relativePath/》《/parent》《groupId》com.zgw《/groupId》《artifactId》gw-spring-boot-starter《/artifactId》《version》1.0-SNAPSHOT《/version》《dependencies》
《dependency》
《groupId》org.springframework.boot《/groupId》
《artifactId》spring-boot-autoconfigure《/artifactId》
《/dependency》《/dependencies》
我们先来看maven配置写入版本号,如果自定义一个stater的话必须依赖spring-boot-autoconfigure这个包,我们先看下项目目录。
public class GwServiceImpl implements GwService{
@Autowired
GwProperties properties;
@Override
public void Hello()
{
String name=properties.getName();
System.out.println(name+“说:你们好啊”);
}
}
我们做的就是通过配置文件来定制name这个是具体实现。
@Component@ConfigurationProperties(prefix = “spring.gwname”)
public class GwProperties {
String name=“zgw”;
public String getName() {
return name;
}
public void setName(String name) {
this.name = name;
}
}
这个类可以通过@ConfigurationProperties读取配置文件。
@Configuration@ConditionalOnClass(GwService.class) //扫描类
@EnableConfigurationProperties(GwProperties.class) //让配置类生效
public class GwAutoConfiguration {
/**
* 功能描述 托管给spring
* @author zgw
* @return
*/
@Bean
@ConditionalOnMissingBean
public GwService gwService()
{
return new GwServiceImpl();
}
}
这个为配置类,为什么这么写因为,spring-boot的stater都是这么写的,我们可以参照他仿写stater,以达到自动配置的目的,然后我们在通过spring.factories也来进行配置。
org.springframework.boot.autoconfigure.EnableAutoConfiguration=com.gw.GwAutoConfiguration
然后这样一个简单的stater就完成了,然后可以进行maven的打包,在其他项目引入就可以使用。
链接:cnblogs.com/cmt/p/14553189.html
责任编辑:haq
-
spring
+关注
关注
0文章
345浏览量
16095 -
Boot
+关注
关注
0文章
154浏览量
37986
原文标题:10000 字讲清楚 Spring Boot 注解原理
文章出处:【微信号:harmonyos_developer,微信公众号:harmonyos_developer】欢迎添加关注!文章转载请注明出处。
发布评论请先 登录
从现象到本质,彻底搞懂U-Boot env存储机制
Japan IT Week Spring 2026 | 广和通携AIoT方案闪耀亮相

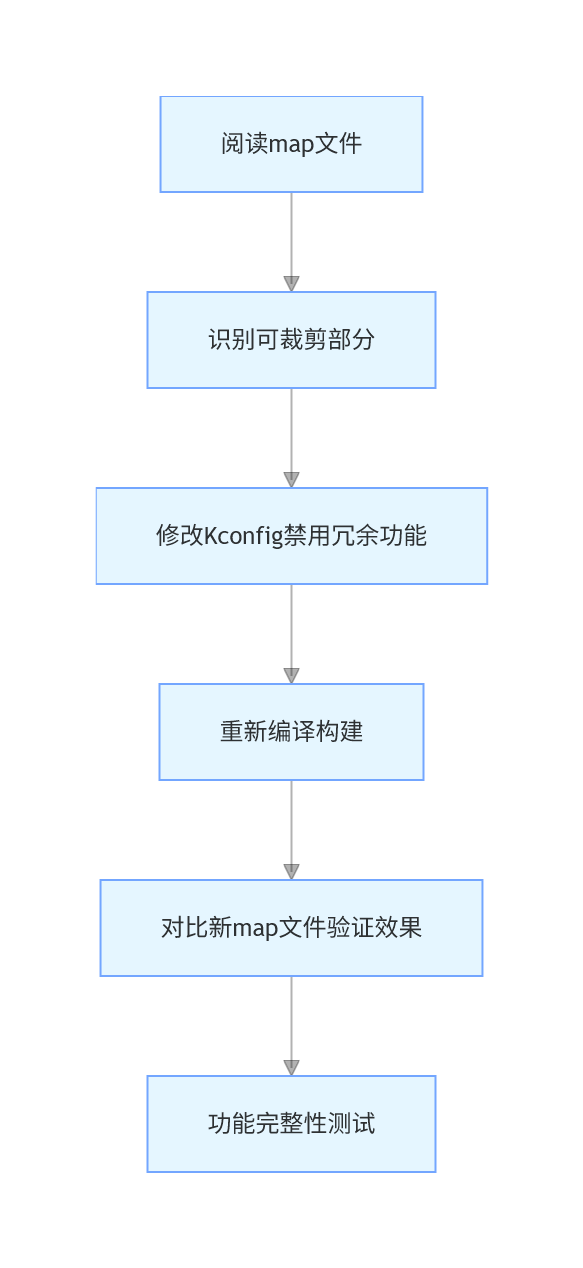
吃透RK3576 U-Boot.map文件!嵌入式开发调试、性能优化、代码裁剪全攻略
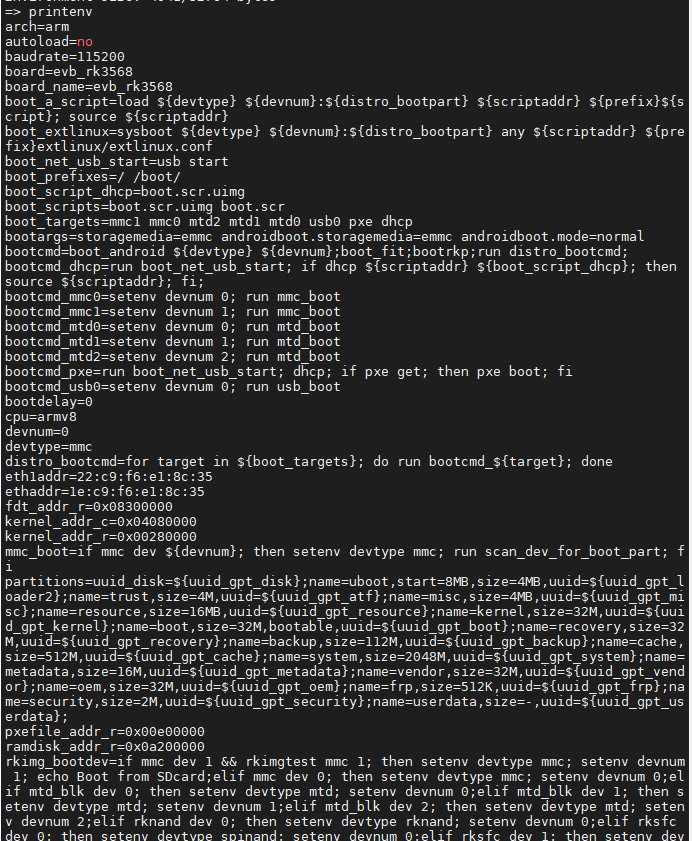
深度解析 RK 平台 U-Boot 环境变量(env):原理、配置与实战

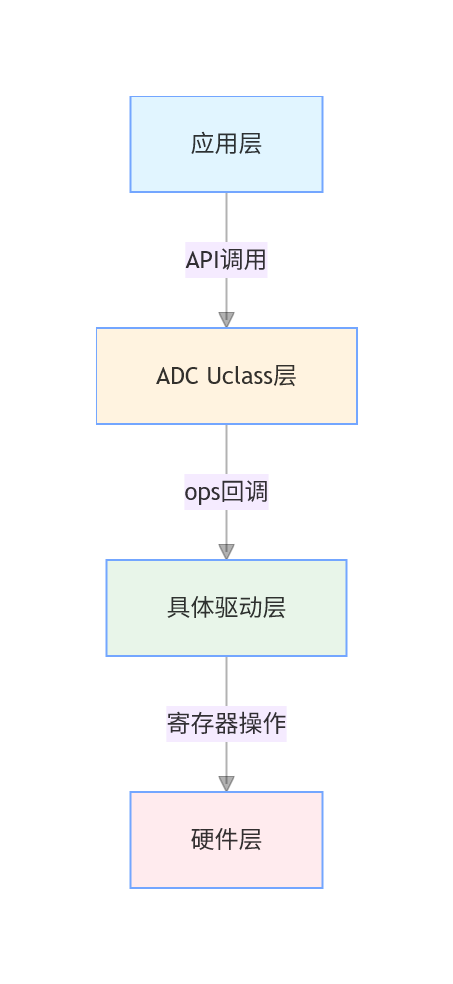
深度剖析U-Boot ADC Uclass:从架构到实战的全维度解析
更新 U-boot 时出现的问题求解
更新固件后 U-boot 不运行怎么解决?
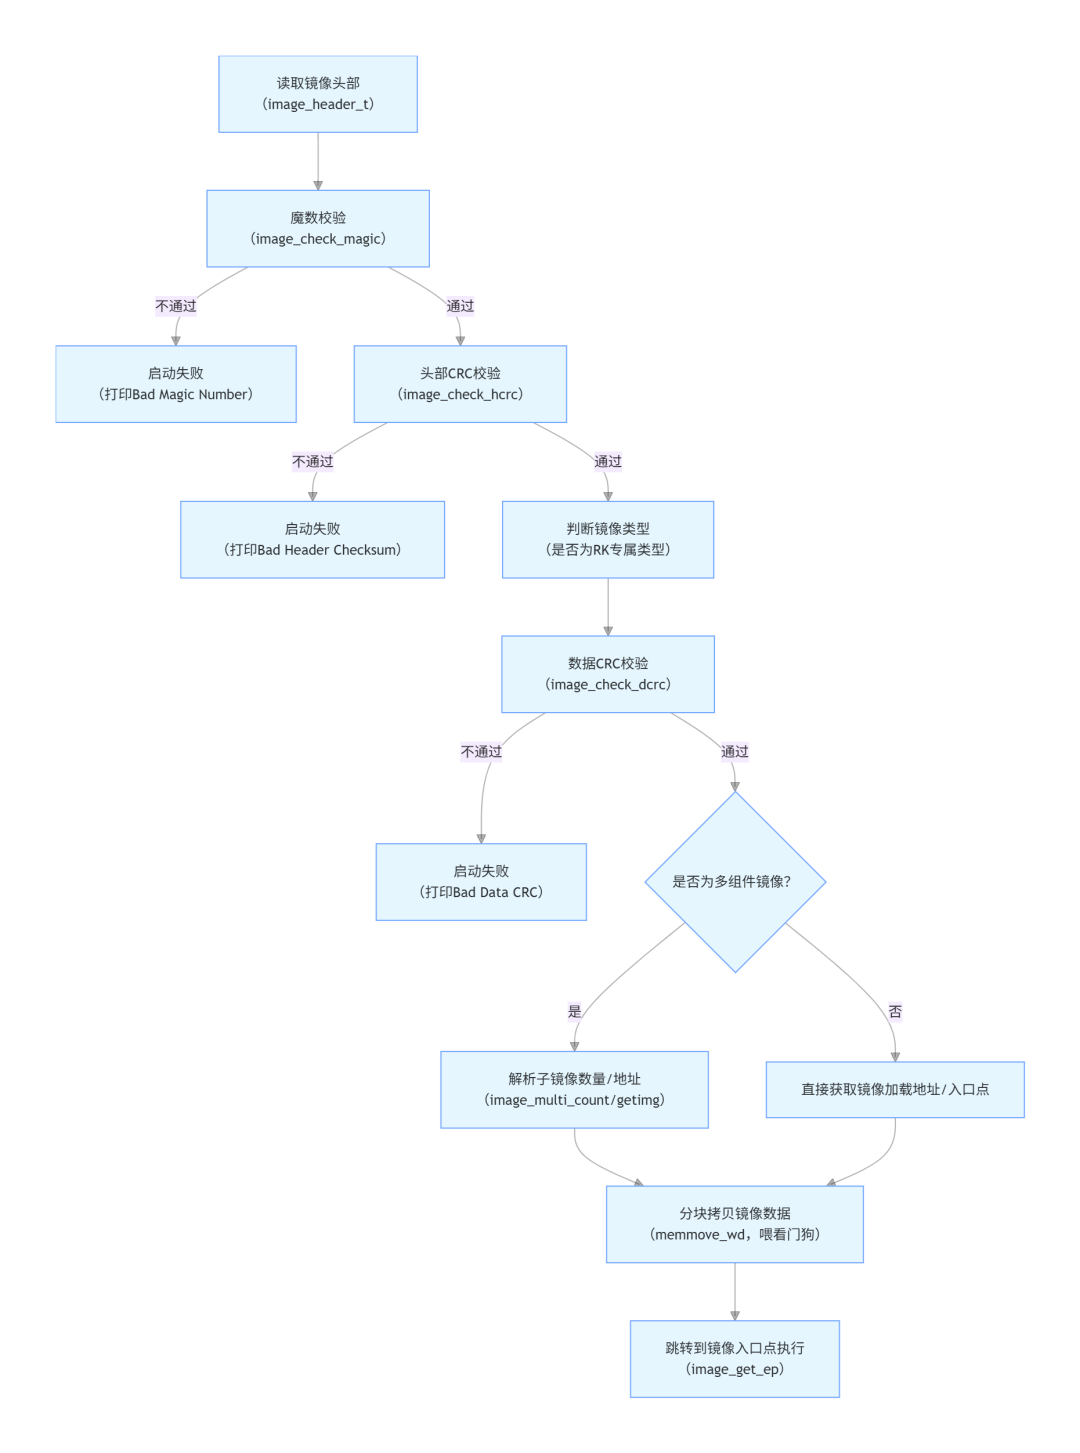
深入解析U-Boot image.c:RK平台镜像处理核心逻辑
深入解析U-Boot命令处理核心文件:功能、调试与开发价值
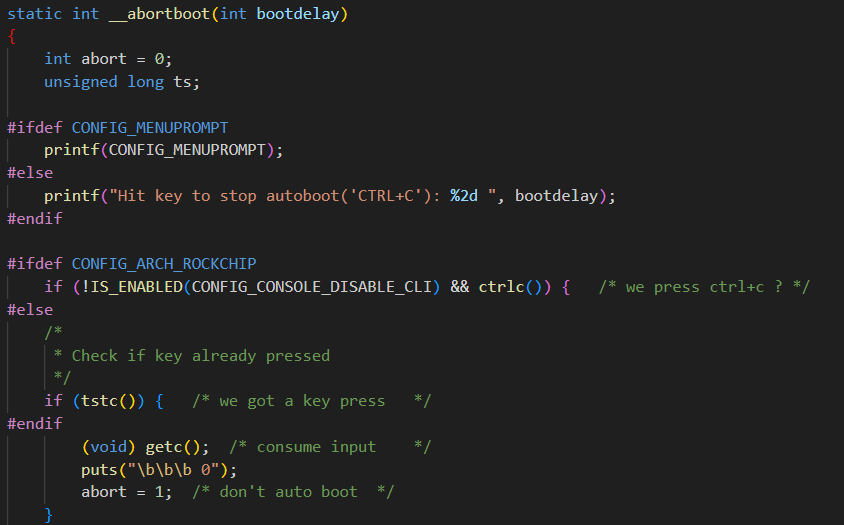
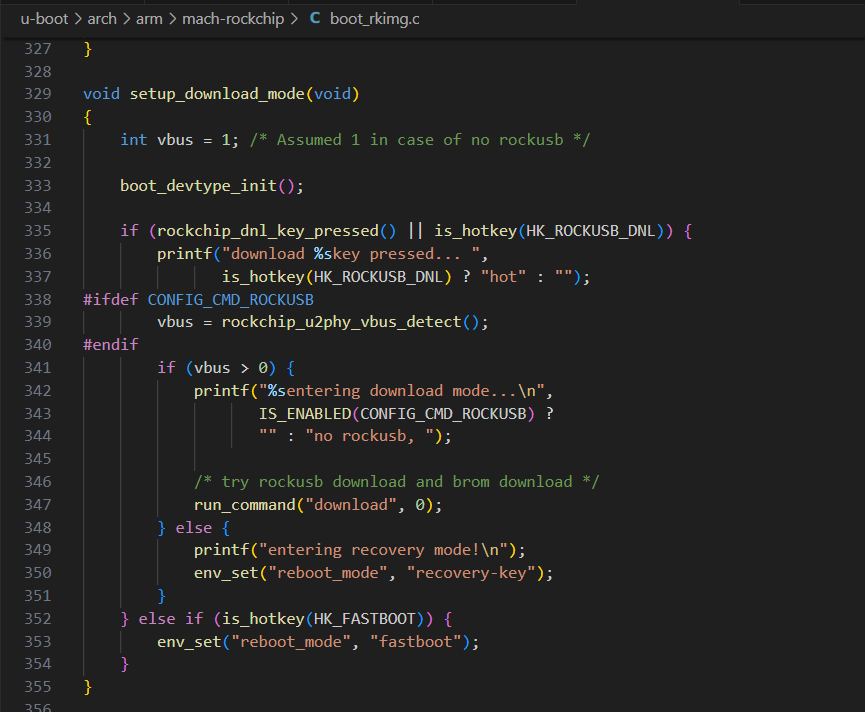
解析Rockchip平台U-Boot核心文件:boot_rkimg.c到底做了什么?
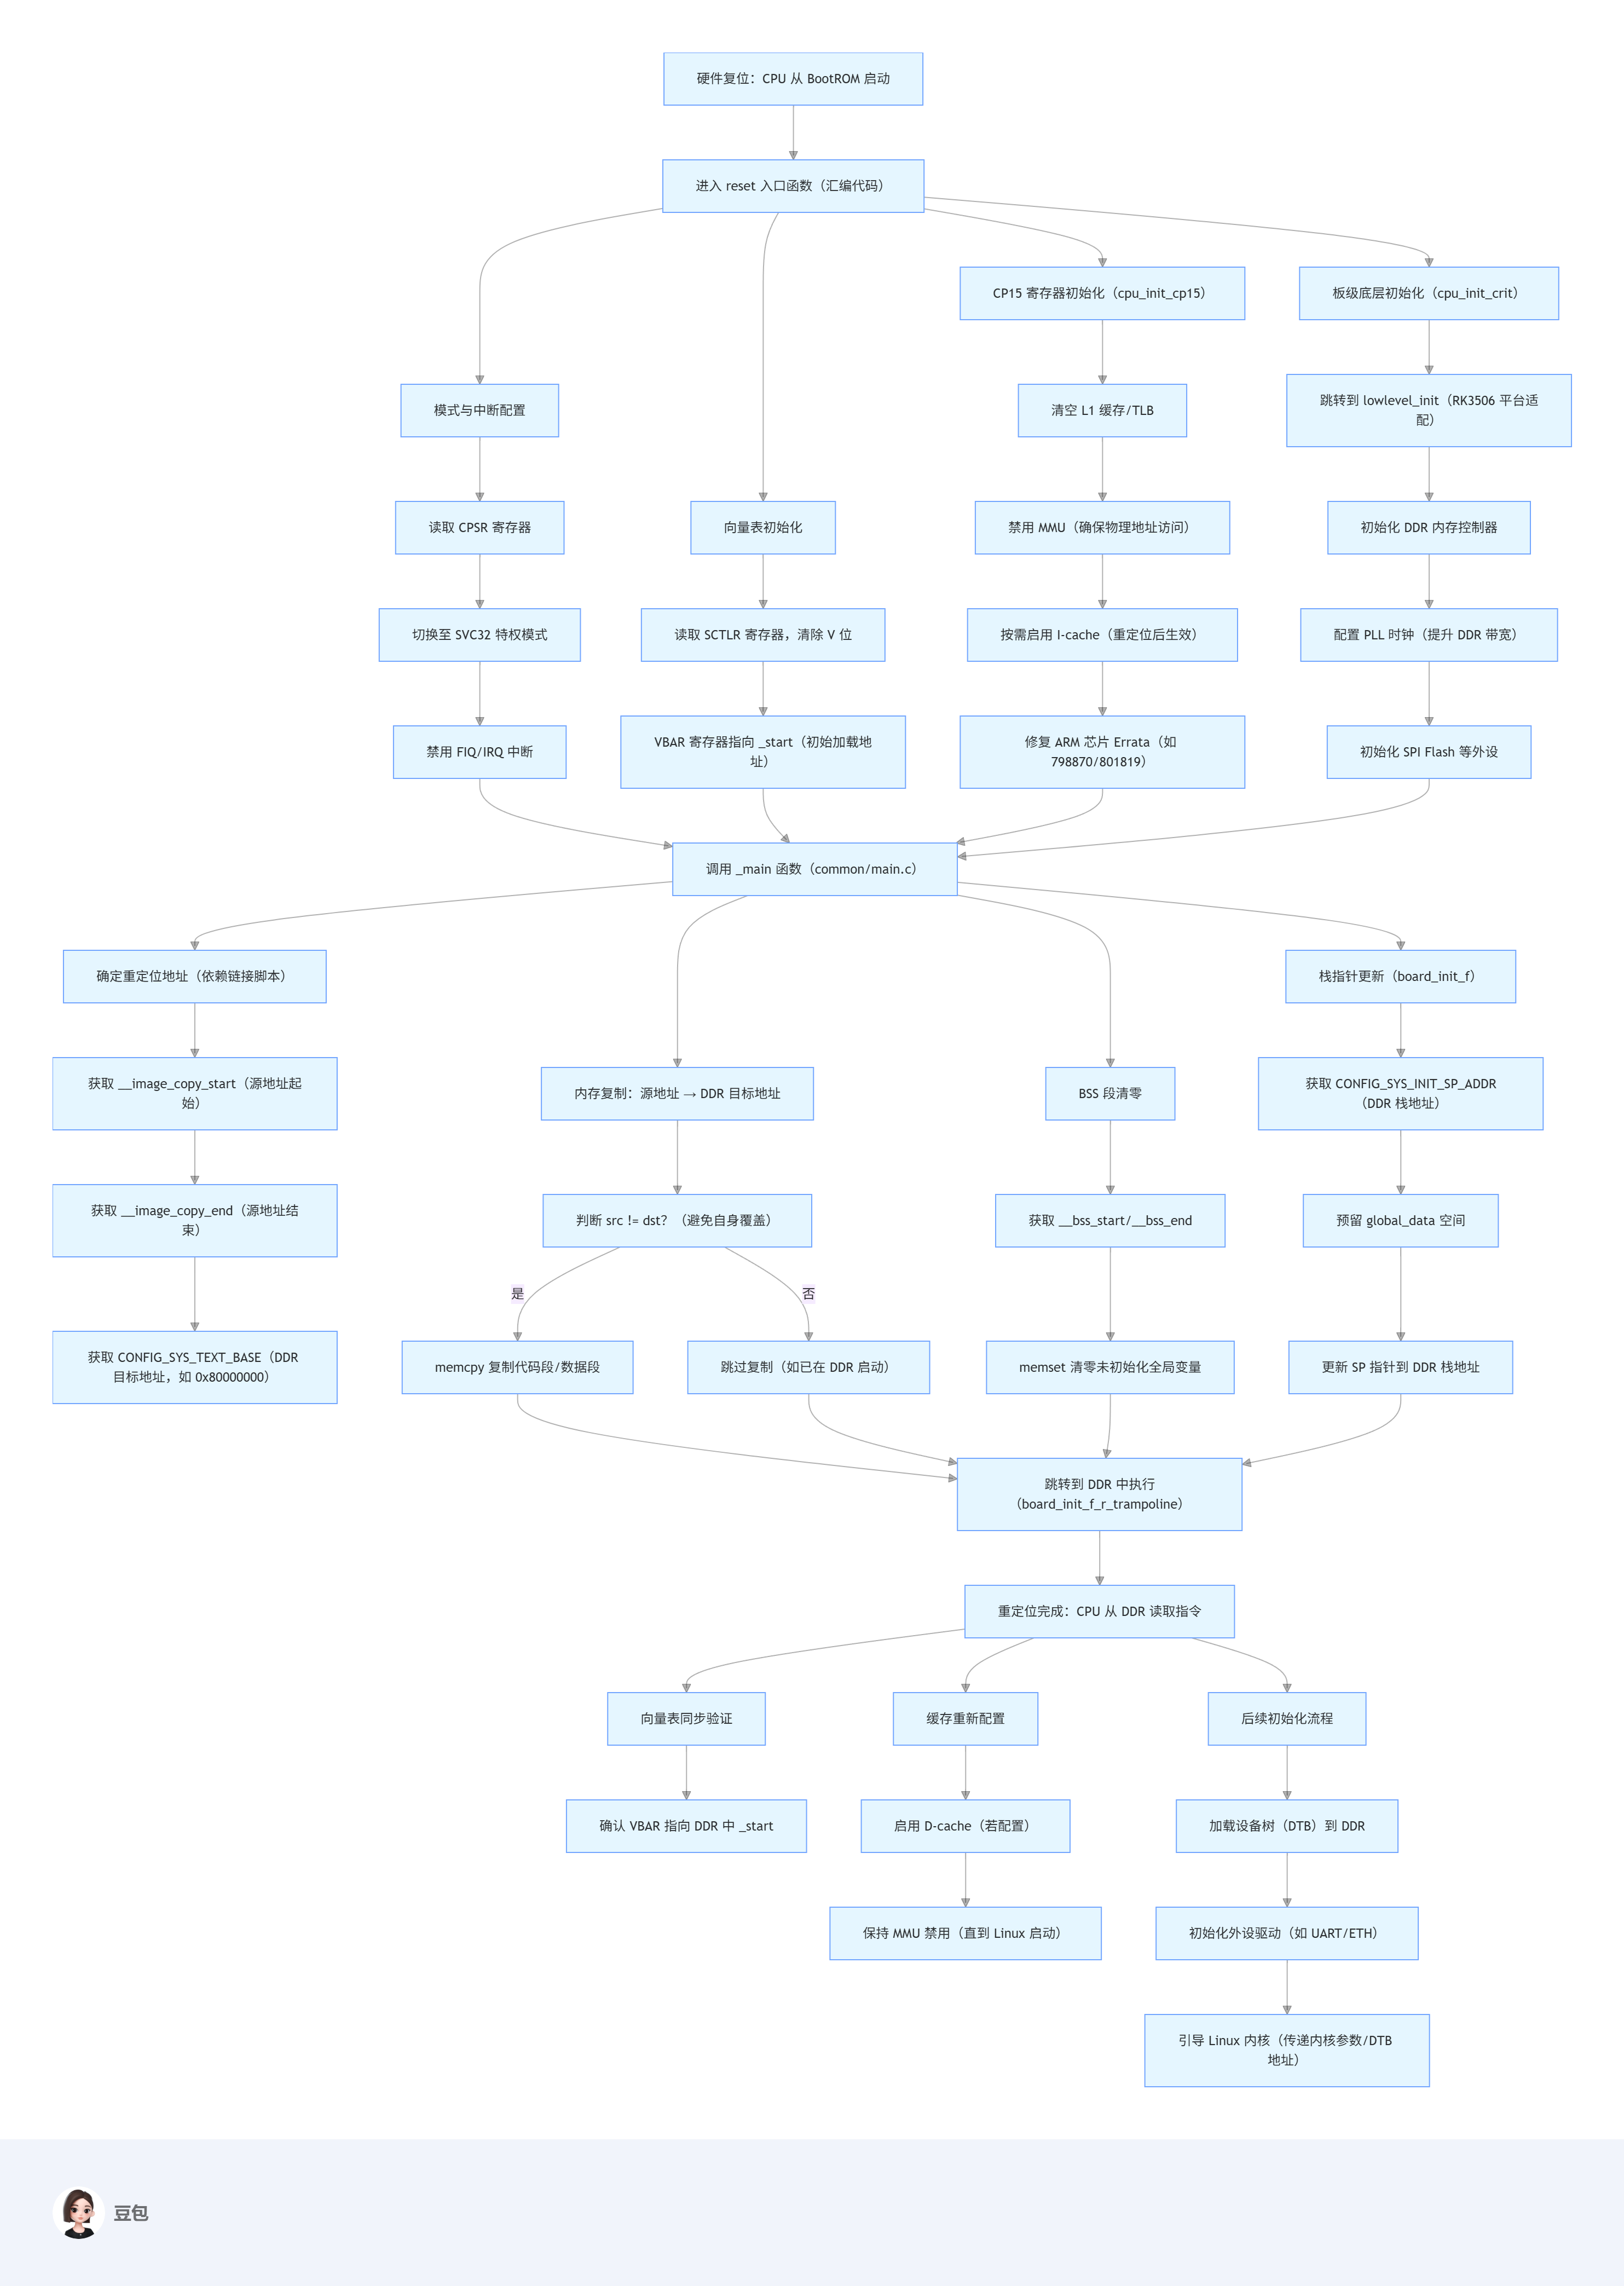
深入理解 RK3506 U-Boot 重定位:从代码到原理
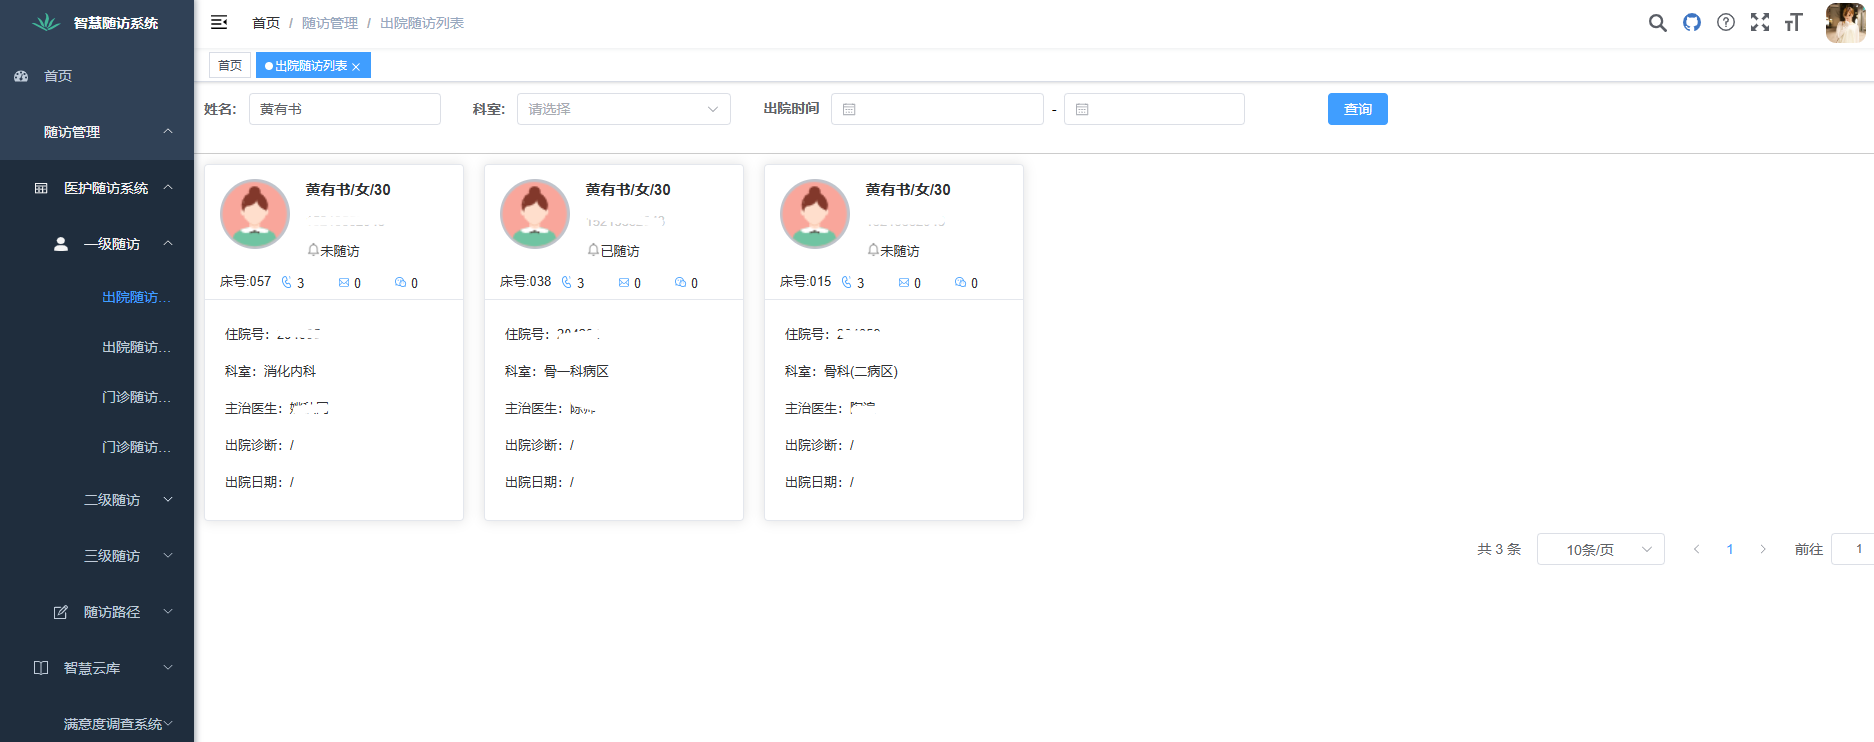
一款基于Java+Spring Boot+Vue的智慧随访管理系统源码
Spring拦截器:你的请求休想逃过我的五指山!



评论