 智能垃圾桶DIY教程

第1步:项目
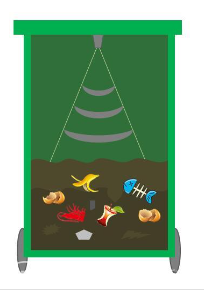
垃圾桶设计为在超声波距离传感器检测到人员时打开。当传感器没有检测到任何人3秒钟时,它会向后运行电机直到它按下按钮。温度和湿度传感器(DHT)在垃圾桶中记录条件并计算内容物何时会腐烂。液晶显示屏显示时间,直到清空为止。
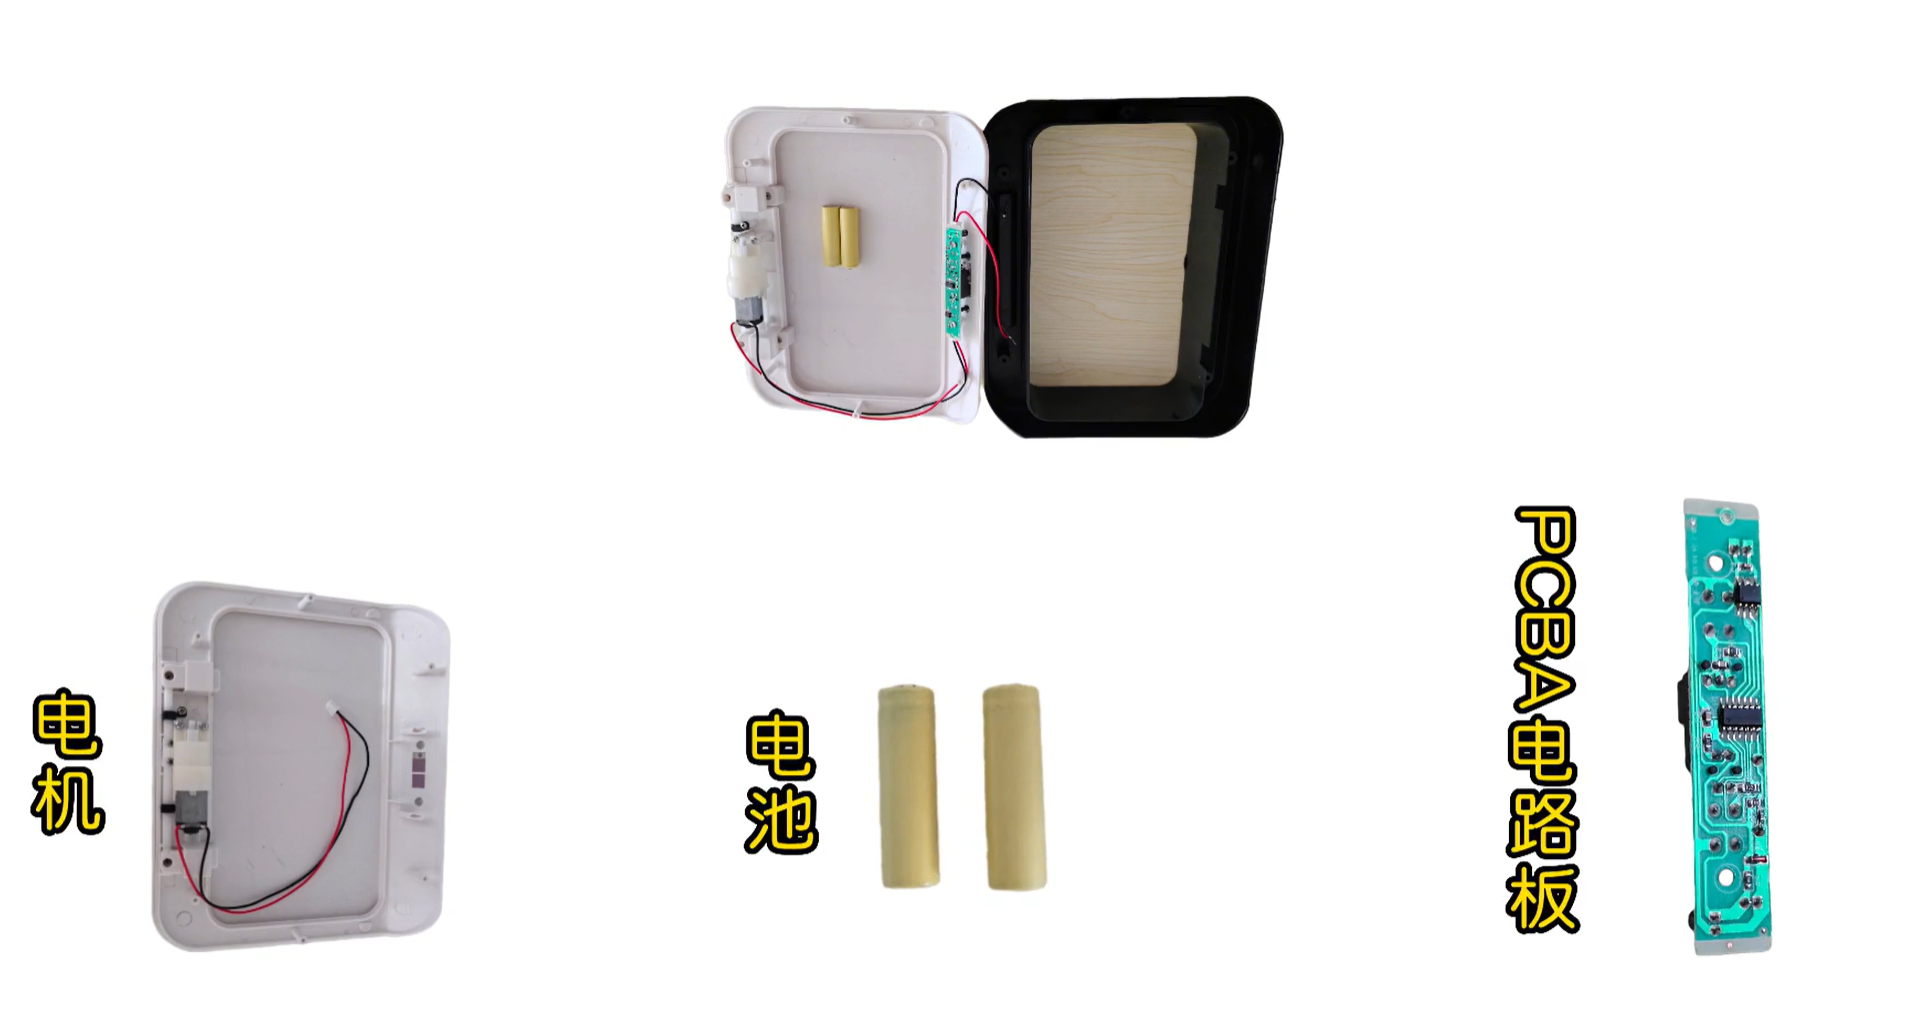
步骤2:零件清单
1 - Arduino MEGA 2560
1 - 面包板
1 - 10k欧姆电位器
1 - LCD屏幕(与Hitachi HD44780驱动程序兼容)
1 - DHT11
3 - 10k欧姆电阻
1 - 220欧姆电阻
1 - 电机控制L298N带H桥
1 - 12伏直流电机
1 - 12伏电源
1 - 超声波传感器HC-SR04
1 - 按钮
步骤3:机械设置
为了打开垃圾桶,我们制作了一个机械臂。它有两个接头,连接到电机和垃圾桶的盖子。就像在第一张照片中一样。
在秒图中可以看到它安装在电机上。
对于电机,我们钻了一些孔并使用了拉链。可以看到在第三张照片中安装在垃圾箱内。手臂粘在盖子顶部
对于超声波测距仪,我们在垃圾桶前面钻了2个孔,直径= 16mm,间距为1厘米(见4和5图片)。/p》
对于其他部件,我们刚刚为拉链或螺钉钻孔。在为其钻孔之后,LCD用螺栓和结安装在盖子上。带拉链的arduino和马达驱动器。
臂部件采用3D打印。原理图是在Autofusion 360中制作的,并使用了以下文件:
第4步:Fritzing
第一张图显示了如何系统已连线。
步骤5:代码
代码分为五个不同的功能,每个功能控制一个不同的传感器或一个传感器的一部分。为了利用代码,必须为每个函数创建一个“新选项卡”。
arduino项目文件夹必须包含每个函数的代码作为文件。
为了程序运行不间断我们使用millis()和micros()而不是delay()。
该程序还需要以下库,这些库都可以在库管理器中找到:
LiquidCrystal v1.0.7(内置)
Adafruit Unified Sensor 1.0.2
DHT传感器库v1.3.0
主程序:
//Global variables are defined here. They‘re read through out the entire program.
//Local variables are defined within each function. They can only be changed or read within the function.
//Records whether the ultrasonic sensor has detected something.
//It’s controlled within the DistanceSensor function. It will stay on for four seconds when something is within range.
//Everytime it registers something it refreshes the timer.
boolean Distance_Close;
//Remembers if trashcan is open or closed. One is open and zero is closed.
bool TrashcanState;
//Monitors for local variables.
int ButtonMonitor;
int DistanceMonitor;
int CloseMonitor;
unsigned long TimeOpenMonitor;
unsigned long TimeUsedMonitor;
int DetectedMonitor;
int TemperatureMonitor;
int HumidityMonitor;
//Sets the pin numbers.
const int DCmotorIn1 = 5;
const int DCmotorIn2 = 6;
const int TrigPin = 8;
const int EchoPin = 7;
const int ButtonPin = 9;
const int rs = 13, en = 12, d4 = 11, d5 = 10, d6 = 22, d7 = 24; //Pin numbers for the LCD.
//Libraries, make sure to install all of them.
//All libraries can be found inside the Library Manager.
//“Adafruit Unified Sensor Library” must also be installed in order for dht to work even though it is not loaded.
#include
#include “DHT.h”
#define DHTPIN 3 //Defines which pin should be used for the temperature and humidity sensor
#define DHTTYPE DHT11 //Defines which type of DHT is used. If you have a DHT22 replace DHT11 with DHT22.
DHT dht(DHTPIN, DHTTYPE); //Loads the defined pin and type.
LiquidCrystal lcd(rs, en, d4, d5, d6, d7); //Tells the program which pins are installed.
void setup() {
// Code that needs to be run once:
Serial.begin(9600); //Starts communication with the monitor. Make sure that the monitor have the same BAUD speed.
//Determine if pins are reading or writing.
pinMode(TrigPin,OUTPUT);
pinMode(EchoPin,INPUT);
pinMode(DCmotorIn1, OUTPUT);
pinMode(DCmotorIn2, OUTPUT);
pinMode(ButtonPin,INPUT);
dht.begin();
lcd.begin(16, 2); //Sets the dimension of the LCD
}
void loop() {
// put your main code here, to run repeatedly:
DistanceSensor(); //Constantly checks if someone is near the trashcan
OpenTrashcan(); //Checks if the trashcan should opened.
CloseTrashcan(); //Checks if the trashcan should be closed.
LCD();
TempHumid();
//Creates a table for monitoring all the different variables.
Serial.print(“Trashcan State : ”);
Serial.print(TrashcanState);
Serial.print(“ ”);
Serial.print(“Distance_Close: ” );
Serial.print(Distance_Close);
Serial.print(“ ”);
Serial.print(“Button: ” );
Serial.print(ButtonMonitor);
Serial.print(“ ”);
Serial.print(“Temperature: ” );
Serial.print(TemperatureMonitor);
Serial.print(“ ”);
Serial.print(“Humidity: ” );
Serial.print(HumidityMonitor);
Serial.print(“ ”);
Serial.print(“Distance: ” );
Serial.println(DistanceMonitor);
控制距离传感器的功能:
int DistanceSensor(){
//Local variables used only in this function
unsigned long TimeUsed;
unsigned long Wait;
unsigned long WaitExtra;
unsigned long TimeOpen;
bool Detected;
long Duration;
int Distance;
TimeUsed = micros(); //Reads how long the arduino have been on in microseconds.
//Writes the local variables into global variables for monitoring
DetectedMonitor = Detected;
DistanceMonitor = Distance;
//Make the ultrasonic sensor send out a sonic wave and starts two timers.
//It is activated after 12 microseconds as the timer is exceeded and the function restarts.
if (WaitExtra 《 TimeUsed){
digitalWrite(TrigPin,HIGH); //Sends out a sonic wave
Wait = TimeUsed + 10; //Takes the current time and adds 10 microseconds to create a timer
WaitExtra = TimeUsed + 12; //Takes the current time and adds 12 to create a timer
}
//Turns off the sonic wave and reads how long it took for it to return.
//Afterwards it calculates the distance it have traveled.
//The distance is calculated in cm.
if (Wait 》= TimeUsed){
digitalWrite(TrigPin,LOW); // Stops the sonic wave
Duration = pulseIn(EchoPin,HIGH); //Reads how long it took for the wave to return in microseconds.
Distance = Duration*0.034/2; //Calculates the distance
}
//Checks if anyone is within a certain distance.
//This can be changed depending on when you want it to trigger.
//Remember this can‘t be less than 2 cm (0.79 inches) unless you use a different sensor.
if ((Distance 》= 10) && (Distance 《= 30)){
Detected = 1; //Something is detected
}
else{
Detected = 0; //Nothing has been detected
}
//Allows the Distance_Close to be set if someone if within the distance set.
//Refreshes if something is detected again.
if (Detected == 1){
TimeOpen = TimeUsed + 4000000; //Refreshes or sets the time that must pass to reset Distance_Close.
}
//Sets Distance_Close to 1, if the time set in detected hasn’t been exceed.
if (TimeOpen 》 TimeUsed){
Distance_Close = 1;
}
//Sets Distance_Close to 0, if the time set in detected has been exceed.
if (TimeOpen 《= TimeUsed){
Distance_Close = 0;
}
}
控制LCD的功能:
int LCD(){
lcd.setCursor(0, 0); //Begins writing at the top row, from the beginning
lcd.print(“Temperature: ”); //Writes “temperature” on the LCD
lcd.print(TemperatureMonitor); //Writes the number measured by the DHT
lcd.setCursor(0,1); //Begins writig at the bottom row, from the beginning
lcd.print(“Humidity: ”); //Writes “humidity” on the LCD
lcd.print(HumidityMonitor); //Writes the number measured by the DHT
}
打开垃圾桶:
bool OpenTrashcan() {
//If someone is detected within a set range in DistanceSensor, the trashcan open.
if ((TrashcanState == 0) && (Distance_Close == 1)){
//Sets the motor to run at full speed in a certain direction. In our case it is CLOCKWISE???
analogWrite(DCmotorIn1, 0);
analogWrite(DCmotorIn2, 255);
//Stops the entire program to make sure it doesn‘t stop while opening.
delay(600);
//After the delay is over the motor is turned off.
analogWrite(DCmotorIn1, 0);
analogWrite(DCmotorIn2, 0);
//Tells the rest of the program that the trashcan is open.
TrashcanState = 1;
}
}
关闭垃圾桶的功能:
bool CloseTrashcan() {
//Local variable to control the button.
int button;
button = digitalRead(9); //Continually check if the button is pressed or not
//Local variable saved as a global varaible for monitoring
ButtonMonitor = button;
//If the trashcan is open and no one has been within the range of the DistanceSensor for the set time the trashcan closes.
if ((TrashcanState == 1) && (Distance_Close == 0)){
//Starts the motor at full power. It turns COUNTER CLOCKWISE???
analogWrite(DCmotorIn1, 255);
analogWrite(DCmotorIn2, 0);
}
//If the trashcan is open and the button is pressed, the trashcan will close.
if ((button == 1) && (TrashcanState == 1)){
//Stops the motor
analogWrite(DCmotorIn1, 0);
analogWrite(DCmotorIn2, 0);
TrashcanState = 0; //Sets the trashcan as open.
}
}
读取温度和湿度的函数:
int TempHumid(){
//Local variables used only in this function
unsigned long TimeUsed;
unsigned long Wait;
TimeUsed = millis(); //Counts how long the program have been running in millis
//Reads the temperature and humidity every 2.5 seconds.
if (Wait 《 TimeUsed){
int Humidity;
int Temperature;
Humidity = dht.readHumidity(); //Reads the current humidity in percentage.
Temperature = dht.readTemperature(); //Reads the current temperature in celcius.
HumidityMonitor = Humidity; // The humidity is saved in a global variable for monitoring.
TemperatureMonitor = Temperature; // The temperature is saved in a global variable for monitoring.
Wait = TimeUsed + 2500; //Takes the current time and adds 2500 milliseconds to create a timer.
}
}
为了获得灵感和帮助,我们使用了以下来源:
超声波传感器
https://howtomechatronics.com/tutorials/arduino/u.。.
DHT11
http://www.circuitbasics.com/how-to-set-up-the-dh。 。.
该代码基于DHT库提供的示例。它被命名为DHTtester。
L298电机驱动模块
https://www.instructables.com/id/How-to-use-the-L 。..
LCD
https://www.arduino.cc/en/Tutorial/HelloWorld
第6步:评估
自动垃圾桶功能齐全,但还有很多不足之处。
第一个问题是它无法检测何时打开。这可以通过安装伺服而不是直流电机来解决,通过使用可以检测何时打开的按钮或类似物。
秒的问题是超声波传感器有角度和一些困难时间材料太吸音了。它可以通过使用PIR传感器来解决。如果安装了PIR传感器,它可以成角度以便更有可能检测到人。
代码也缺少显示何时应该清空垃圾桶的部分以及可以判断垃圾桶何时清空的部分被清空了。
-
智能垃圾桶
+关注
关注
3文章
53浏览量
11071
发布评论请先 登录
智能垃圾桶感应开盖方案:WT4001A-C01 红外感应模块的精准接近检测

盲区≤50mm!大禹超声波双探头传感器实现垃圾桶精准满溢监测

家用智能垃圾桶控制板方案设计原理以及设计中需要注意的事项
红外+按键多模感应!纳祥科技智能感应垃圾桶方案0.5秒极速响应

LoRa智能网关在智慧城市市政设施监控中的功能作用
LoRa智能网关在智慧城市市政设施监控中的解决方案

智能垃圾桶红外和TOF高精度感应方案

【启扬方案】基于RK3576的智能垃圾分类站应用解决方案

RFID在垃圾分类中的核心优势

辉芒微单片机FT60F112-RB作为智能感应垃圾桶的主控芯片!
赋能智慧生活:广州唯创电子WT588F02B语音芯片引领智能垃圾桶新体验
广州黄埔城管携手海康威视打造垃圾分类智慧管理系统
超声波传感器解决方案 的详细技术设计
RFID标签在垃圾分类的应用


评论