 STM32G0开发笔记:使用ADC进行NTC温度采集

使用Platformio平台的libopencm3开发框架来开发STM32G0,以下使用ADC进行NTC温度采集。
1 新建项目
- 建立ntc_temp项目
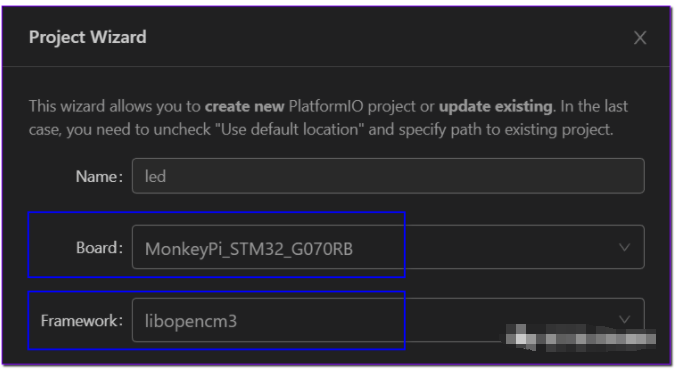
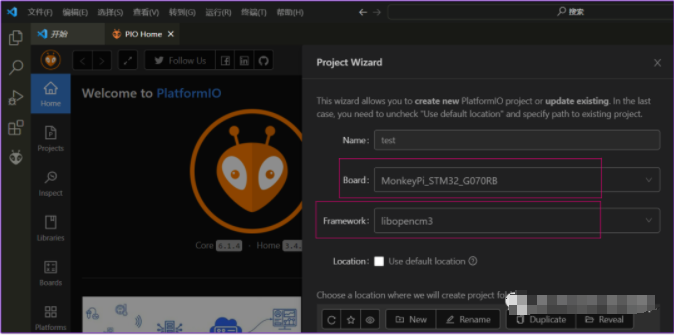
在PIO的Home页面新建项目,项目名称ntc_temp,选择开发板为 MonkeyPi_STM32_G070RB,开发框架选择libopencm3;
- 项目建立完成后在src目录下新建main.c主程序文件;
- 修改下载和调试方式,这里开发板使用的是DAPLink仿真器,因此修改platformio.ini文件如下:
1upload_protocol = cmsis-dap
2debug_tool = cmsis-dap
- 为了能使用printf的浮点功能,可以加入如下配置:
1build_flags =
2    -Wl,-u,_printf_float
2 编写程序
2.1 ADC设置
1void adc_setup()
 2{
 3    rcc_periph_clock_enable(RCC_GPIOA);
 4    rcc_periph_clock_enable(RCC_ADC);
 5
 6    gpio_mode_setup(GPIOA,GPIO_MODE_ANALOG,GPIO_PUPD_NONE,GPIO0);
 7
 8    adc_power_off(ADC1);
 9    adc_set_clk_prescale(ADC1,ADC_CCR_PRESC_DIV2);
10    adc_set_single_conversion_mode(ADC1);
11    adc_set_right_aligned(ADC1);
12    adc_set_sample_time_on_all_channels(ADC1,ADC_SMPTIME_160DOT5);
13    uint8_t channel = 0;
14    adc_set_regular_sequence(ADC1,1,&channel);
15    adc_set_resolution(ADC1,ADC_CFGR1_RES_12_BIT);
16
17    adc_power_on(ADC1);
18
19    delay_ms(10);
20
21}
ADC设置按照之前文章介绍的方法设置PA0为ADC输入;
2.2 ADC读取
1uint16_t adc_sample()
2{
3    adc_start_conversion_regular(ADC1);
4    return adc_read_regular(ADC1);
5}
2.3 ADC与NTC的温度转换
- 首先根据所选的NTC规格的温度-电阻对应表得到其ADC值的关系表:
这里的NTC分压电阻为10K,ADC分辨率为12位,因此ADC采集值为:(NTC电阻 x 4095) ÷ (NTC电阻 + 10K),即可得到如下所示的表格:
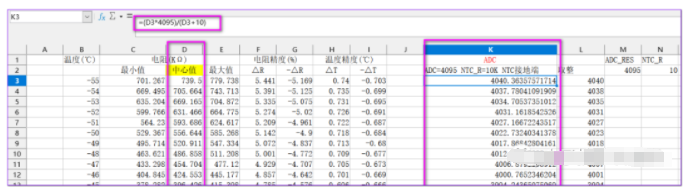
image-20220926234050183
在EXCEL中计算出ADC采样数值-温度对应表,为了简单ADC进行取整,就可以得到电阻-55到125摄氏度的ADC对应表:
1const uint16_t ntcDATA[] = {
 24040,4038,4035,4031,4027,4023,4018,4013,4007,4001,3994,3987,3980,3972,3964,3956,
 3
 43947,3937,3928,3917,3907,3896,3884,3872,3860,3847,3833,3819,3804,3789,3773,3757,
 5
 63740,3722,3703,3684,3664,3644,3622,3600,3577,3553,3528,3502,3475,3448,3419,3390,
 7
 83360,3329,3297,3264,3230,3195,3160,3123,3086,3048,3010,2970,2930,2889,2848,2806,
 9
102763,2720,2676,2633,2588,2544,2499,2454,2408,2363,2317,2272,2226,2181,2136,2091,
11
122048,2001,1957,1913,1869,1826,1783,1741,1699,1658,1617,1576,1537,1498,1459,1422,
13
141385,1348,1312,1277,1243,1209,1176,1144,1112,1081,1051,1022,993,965,937,910,
15
16884,859,834,810,786,764,741,720,699,679,659,639,621,602,585,568,
17
18551,535,519,504,490,475,461,448,435,422,410,398,387,376,365,355,
19
20345,335,325,316,307,299,290,282,274,267,259,252,245,239,232,226,
21
22220,214,208,202,197,192,187,182,177,172,168,163,159,155,151,146,
23
24143,139,135,132,129
25};
- 然后根据表格获取温度,即每个ADC对应的索引即为温度值,如4040为索引0,对应第一个温度-55℃;
- 表格中数据是有序的,因此这里可以使用二分法查找,对于两个数中间值则取其相近的那个值:
1#define TEMP_HEADER_VALUE   -55 //the first temp in table
 2
 3#define ITEM_NUM(items) sizeof(items) / sizeof(items[0])
 4
 5/**
 6 * @brief search the table, return a midium value if not found
 7 *
 8 * @param table  the data to search
 9 * @param len    the table length
10 * @param up    if data is min to max
11 * @return int32_t -1 -> if not found
12 */
13int32_t bsearch_ret_mid(const uint16_t *table, uint16_t len, bool up, uint16_t key)
14{
15    uint16_t bot;
16    uint16_t mid;
17    uint16_t check;
18    uint16_t top;
19
20    if (len == 0) {
21        return -1;
22    }
23
24    if (up) {
25        //the first data will be min
26        if (key < table[0]) {
27            return -1;
28        }
29
30        //bigger then the last data
31        if (key > table[len - 1]) {
32            return -1;
33        }
34    } else {
35        if (key > table[0]) {
36            return -1;
37        }
38
39        if (key < table[len - 1]) {
40            return -1;
41        }
42    }
43
44    bot = 0;
45    top = len - 1;
46
47    if (up) {
48        while (bot < top) {
49            mid = top - (top - bot) / 2;
50
51            if (key < table[mid]) {
52                top = mid - 1;
53            } else {
54                bot = mid;
55            }
56        }
57    } else {
58        while (bot < top) {
59            mid = top - (top - bot) / 2;
60
61            if (key > table[mid]) {
62                top = mid - 1;
63            } else {
64                bot = mid;
65            }
66        }
67    }
68
69    if (key == table[top]) {
70        return top;
71    }
72
73    //not equal the data in table
74    if (up) {
75        if (key > table[top]) {
76            return top;
77        }
78    } else {
79        if (key < table[top]) {
80            return top;
81        }
82    }
83
84    return -1;
85}
- 然后根据索引得到温度:
1//get temperature , x10
 2int16_t ntc2tem(uint16_t adc)
 3{
 4    int32_t  index = 0;
 5    int16_t temperature = 0;
 6
 7    index = bsearch_ret_mid(ntcDATA, ITEM_NUM(ntcDATA),false,adc);
 8
 9    //max, the first value
10    if(index==0){
11        temperature = TEMP_HEADER_VALUE*10;
12    }
13    //min, the last value
14    else if(index>= ITEM_NUM(ntcDATA)){
15        temperature = 10*(TEMP_HEADER_VALUE + ITEM_NUM(ntcDATA));
16    }
17    else{
18        //just get integer number
19        // temperature = TEMP_HEADER_VALUE + index;
20
21        //get approximation data
22        temperature = TEMP_HEADER_VALUE + index;
23
24        //at middle
25        temperature = (temperature+1)*10 - 10.0 * (adc-ntcDATA[index+1])/(ntcDATA[index]-ntcDATA[index+1]);
26    }
27
28    return temperature;
29
30}
表格中的温度是1度进行变化的,如果需要稍微精确的,这里在1度中间的值近似看做线性进行计算;
这里为了减小计算误差,先对其扩大十倍计算,显示时候再转为小数:
1uint16_t adc = adc_sample();
2
3int16_t temp_int = ntc2tem(adc);
4float temp = temp_int/10.0;
5
6printf("adc: %d, temp: %.1f\\r\\n",adc, temp);
3 连接硬件并测试
3.1 连接硬件
按照如下图,将NTC和10K电阻连接到PA0脚:
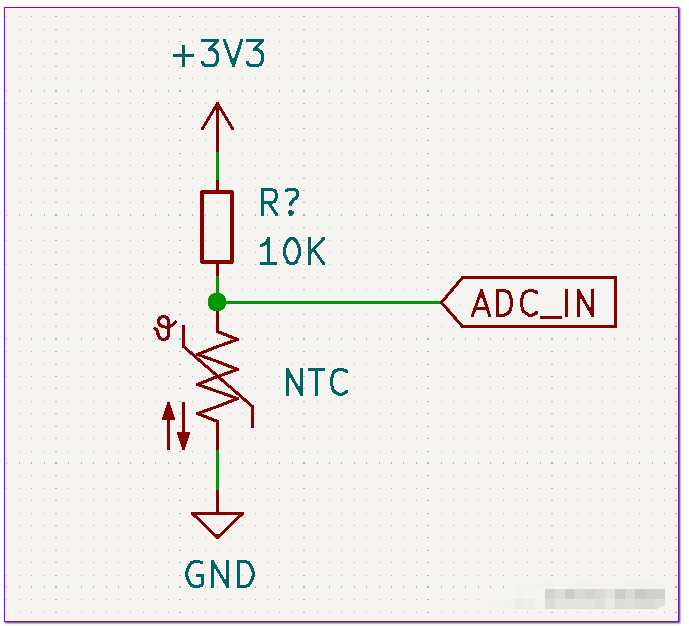
image-20220926233017743
3.2 测试
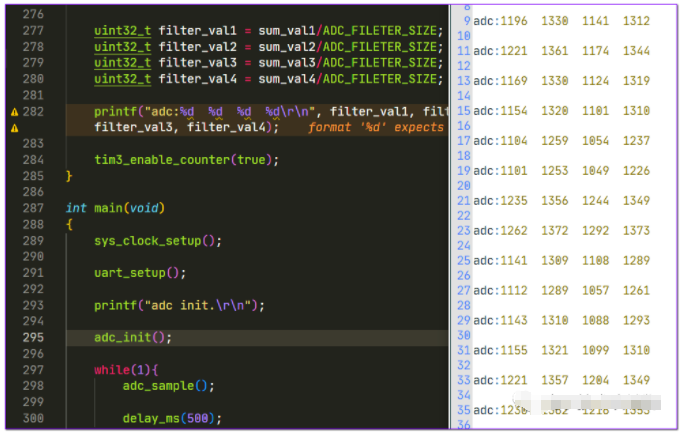
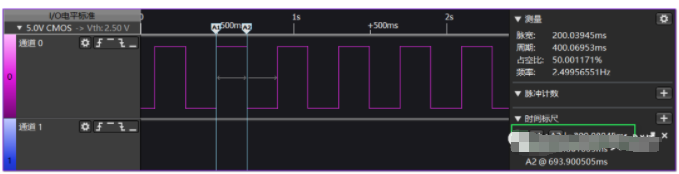
打开串口,当手放在NTC上可以看到温度变化:
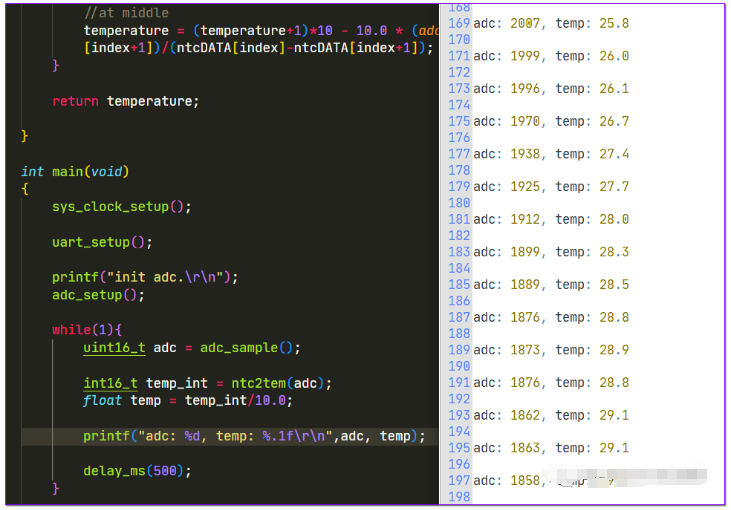
image-20220926232610018
声明:本文内容及配图由入驻作者撰写或者入驻合作网站授权转载。文章观点仅代表作者本人,不代表电子发烧友网立场。文章及其配图仅供工程师学习之用,如有内容侵权或者其他违规问题,请联系本站处理。
举报投诉
-
NTC
+关注
关注
7文章
522浏览量
54765 -
adc
+关注
关注
100文章
7947浏览量
556905 -
仿真器
+关注
关注
14文章
1052浏览量
88200 -
开发板
+关注
关注
26文章
6426浏览量
120947 -
STM3
+关注
关注
0文章
5浏览量
9195
发布评论请先 登录
相关推荐
热点推荐

STM32G0开发笔记:FreeRTOS和FreeModbus库使用
使用Platformio平台的libopencm3开发框架来开发STM32G0,以下为FreeRTOS和FreeModbus库使用。
STM32G0开发笔记:FreeRTOS和CLI组件使用
使用Platformio平台的libopencm3开发框架来开发STM32G0,以下为FreeRTOS和CLI组件使用。
STM32G0开发笔记:使用FreeRTOS系统的队列Queue
使用Platformio平台的libopencm3开发框架来开发STM32G0,下面为使用FreeRTOS系统的队列Queue。
STM32G0开发笔记:使用FreeRTOS系统
使用Platformio平台的libopencm3开发框架来开发STM32G0,下面为使用FreeRTOS系统。
STM32G0开发笔记:用PWM来实现LED呼吸灯效果
使用Platformio平台的libopencm3开发框架来开发STM32G0,下面使用PWM来实现LED呼吸灯效果。

STM32G0开发笔记:EEPROM M24C02的使用方法
使用Platformio平台的libopencm3开发框架来开发STM32G0,以下为EEPROM M24C02的使用方法。

STM32G0开发笔记:SD卡模块的使用方法
使用Platformio平台的libopencm3开发框架来开发STM32G0,下面介绍SD卡模块的使用方法。

STM32G0开发笔记:SPI接口的基本使用
使用Platformio平台的libopencm3开发框架来开发STM32G0,下面介绍SPI接口的基本使用。
STM32G0开发笔记:多通道ADC与DMA的使用
使用Platformio平台的libopencm3开发框架来开发STM32G0,以下为多通道ADC与DMA的使用。
STM32G0开发笔记:定时器timer的基本使用方法
使用Platformio平台的libopencm3开发框架来开发STM32G0,以下为定时器timer的基本使用方法。
STM32G0开发笔记:GPIO接按键的使用方式
使用Platformio平台的libopencm3开发框架来开发STM32G0,下面为GPIO接按键的使用方式。
STM32G0开发笔记:使用libopencm3库
使用Platformio平台的libopencm3开发框架来开发STM32G0,开发环境为VSCode+PIO插件,这里以开发


评论