 STM32G0开发笔记:FreeRTOS和CLI组件使用

使用Platformio平台的libopencm3开发框架来开发STM32G0,以下为FreeRTOS和CLI组件使用。
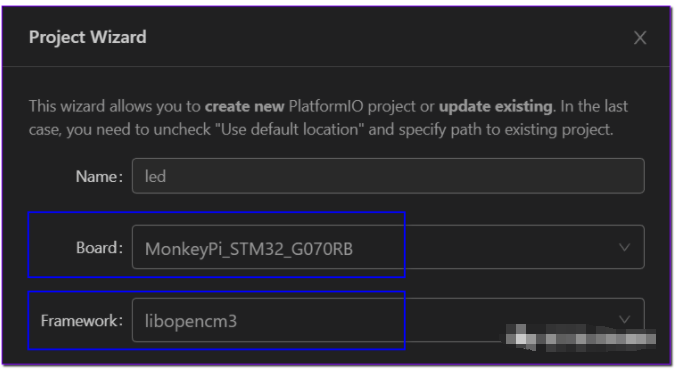
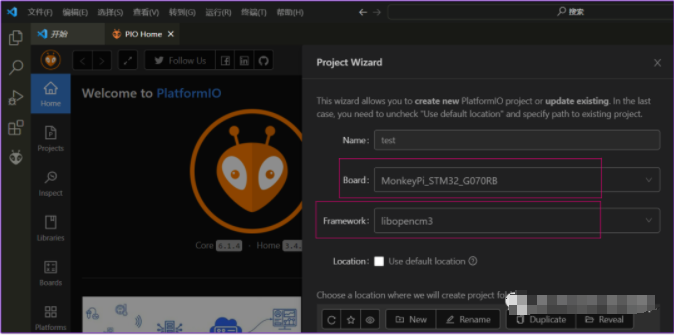
1 新建项目
- 建立freertos_cli项目
在PIO的Home页面新建项目,项目名称freertos_cli,选择开发板为 MonkeyPi_STM32_G070RB,开发框架选择libopencm3;
- 项目建立完成后在src目录下新建main.c主程序文件;
- 修改下载和调试方式,这里开发板使用的是DAPLink仿真器,因此修改platformio.ini文件如下:
1upload_protocol = cmsis-dap
2debug_tool = cmsis-dap
2 编写程序
直接在之前的文章-FreeRTOS基本使用基础上进行添加,在项目中添加好FreeRTOS源码后,再将FreeRTOS源码中的 FreeRTOS-Plus\\Source\\FreeRTOS-Plus-CLI 目录放置到项目lib目录下,目录如下:
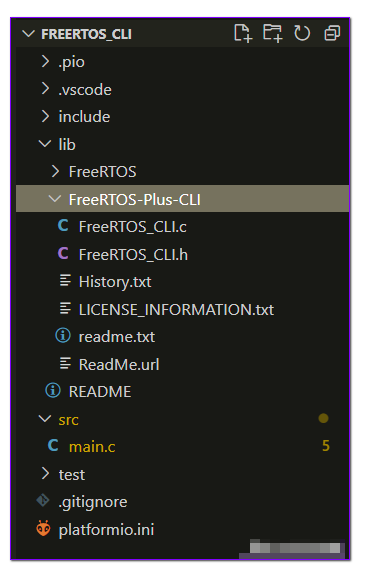
image-20220927232611980
2.1 串口设置
1void uart_setup(void)
 2{
 3
 4    //uart pin
 5    rcc_periph_clock_enable(RCC_USART1);
 6    rcc_periph_clock_enable(RCC_GPIOB);
 7
 8    gpio_mode_setup(GPIOB,GPIO_MODE_AF,GPIO_PUPD_NONE,GPIO6|GPIO7);
 9    gpio_set_af(GPIOB,GPIO_AF0,GPIO6|GPIO7);
10
11    usart_set_baudrate(USART1,115200);
12    usart_set_databits(USART1,8);
13    usart_set_stopbits(USART1,USART_STOPBITS_1);
14    usart_set_parity(USART1,USART_PARITY_NONE);
15    usart_set_flow_control(USART1,USART_FLOWCONTROL_NONE);
16    usart_set_mode(USART1,USART_MODE_TX_RX);
17
18    //uart isr
19    nvic_enable_irq(NVIC_USART1_IRQ);
20
21    usart_enable(USART1);
22
23    usart_enable_rx_interrupt(USART1);
24}
25
26/**
27 * @brief uart1 isr function
28 *
29 */
30void usart1_isr(void)
31{
32    //receive interrupt
33    if (((USART_CR1(USART1) & USART_CR1_RXNEIE) != 0) &&
34        ((USART_ISR(USART1) & USART_ISR_RXNE) != 0)) {
35
36        char c = usart_recv(USART1);
37
38        xQueueSendFromISR(uart_queue, &c, NULL);
39    }
40}
开启出口中断,并在串口接收到数据时候发送到队列;
2.2 命令程序
编写执行命令后要进行的动作函数,这里为了简单直接打印一个信息:
1static BaseType_t prvHelloCommand(
 2    int8_t *pcWriteBuffer,
 3    size_t xWriteBufferLen,
 4    const int8_t *pcCommandString )
 5{
 6
 7    sprintf(pcWriteBuffer, "hello world command");
 8
 9    /* Execution of this command is complete, so return pdFALSE. */
10    return pdFALSE;
11}
- pcWriteBuffer 参数为要写入的信息;
- xWriteBufferLen 参数为写入的缓冲大小;
- pcCommandString 为整个命令字符串指针,可以使用 FreeRTOS_CLIGetParameter 来获取命令的参数;
2.3 命令和函数进行映射
1static const CLI_Command_Definition_t xHelloCommand =
2{
3    "hello",
4    "\\r\\nhello:\\r\\n This is a hello command for testing\\r\\n",
5    prvHelloCommand,
6    0
7};
- 第一个参数为命令名字;
- 第二个参数为命令描述;
- 第三个参数为命令所需要的参数个数;
2.4 注册命令
1    //register cli command
2    FreeRTOS_CLIRegisterCommand(&xHelloCommand);
2.5 命令任务
建立一个任务,用于处理CLI输入输出:
1static void hello_cli_task(void *args)
  2{
  3    //register cli command
  4    FreeRTOS_CLIRegisterCommand(&xHelloCommand);
  5
  6    char *outbuff;
  7    static int8_t inbuff[64];
  8    static int8_t lastinbuff[64];
  9    uint8_t index =  0;
 10    BaseType_t ret;
 11
 12    outbuff = FreeRTOS_CLIGetOutputBuffer();
 13
 14    printf(">");//command prompt
 15    fflush(stdout);
 16    // printf("\\r\\n");
 17
 18    char c;
 19
 20    while(1){
 21
 22        if( xQueueReceive(uart_queue, &c, 5) == pdPASS) {
 23            printf("%c",c);//echo
 24            fflush(stdout);
 25
 26            /* Was it the end of the line? */
 27            if( c == '\\n' || c == '\\r' )
 28            {
 29                printf("\\r\\n");
 30                fflush(stdout);
 31
 32                /* See if the command is empty, indicating that the last command is to be executed again. */
 33                if( index == 0 )
 34                {
 35                    /* Copy the last command back into the input string. */
 36                    strcpy( inbuff, lastinbuff );
 37                }
 38
 39                /* Pass the received command to the command interpreter.  The
 40                command interpreter is called repeatedly until it returns
 41                pdFALSE    (indicating there is no more output) as it might
 42                generate more than one string. */
 43                do
 44                {
 45                    /* Get the next output string from the command interpreter. */
 46                    ret = FreeRTOS_CLIProcessCommand( inbuff, outbuff, configCOMMAND_INT_MAX_OUTPUT_SIZE );
 47
 48                    /* Write the generated string to the UART. */
 49                    printf("%s",outbuff);
 50                    fflush(stdout);
 51
 52                } while( ret != pdFALSE );
 53
 54                /* All the strings generated by the input command have been
 55                sent.  Clear the input string ready to receive the next command.
 56                Remember the command that was just processed first in case it is
 57                to be processed again. */
 58                strcpy( lastinbuff, inbuff );
 59                index = 0;
 60                memset( inbuff, 0x00, 64 );
 61
 62                printf("\\r\\n>");
 63                fflush(stdout);
 64
 65            }
 66            else
 67            {
 68                if( c == '\\r' )
 69                {
 70                    /* Ignore the character. */
 71                }
 72                else if( ( c == '\\b' ) || ( c == 0x7f ) )//del
 73                {
 74                    /* Backspace was pressed.  Erase the last character in the
 75                    string - if any. */
 76                    if( index > 0 )
 77                    {
 78                        index--;
 79                        inbuff[ index ] = '\\0';
 80                    }
 81                }
 82                else
 83                {
 84                    /* A character was entered.  Add it to the string entered so
 85                    far.  When a \\n is entered the complete string will be
 86                    passed to the command interpreter. */
 87                    if( ( c >= ' ' ) && ( c <= '~' ) )
 88                    {
 89                        if( index < 64 )
 90                        {
 91                            inbuff[ index ] = c;
 92                            index++;
 93                        }
 94                    }
 95                }
 96            }
 97
 98        }
 99    }
100
101}
输入这里直接从之前串口中断获取的数据队列中得到;
输出使用串口打印输出即可;
3 烧写测试
将程序烧写到开发板,连接好串口后,执行命令测试:
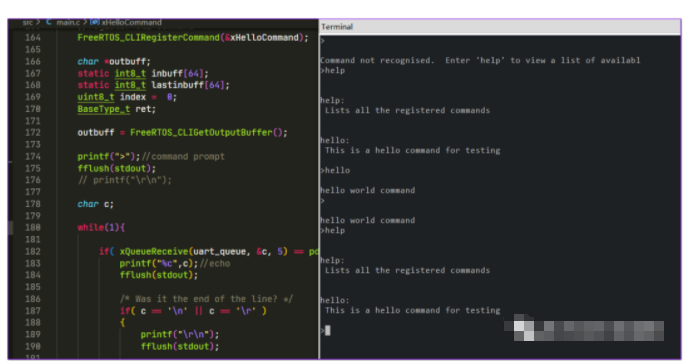
image-20220928203000256
声明:本文内容及配图由入驻作者撰写或者入驻合作网站授权转载。文章观点仅代表作者本人,不代表电子发烧友网立场。文章及其配图仅供工程师学习之用,如有内容侵权或者其他违规问题,请联系本站处理。
举报投诉
-
STM32
+关注
关注
2313文章
11197浏览量
374824 -
串口
+关注
关注
15文章
1628浏览量
83436 -
开发板
+关注
关注
26文章
6439浏览量
121244 -
FreeRTOS
+关注
关注
14文章
501浏览量
67316 -
CLI
+关注
关注
1文章
80浏览量
9102
发布评论请先 登录
相关推荐
热点推荐

STM32G0开发笔记:FreeRTOS和FreeModbus库使用
使用Platformio平台的libopencm3开发框架来开发STM32G0,以下为FreeRTOS和FreeModbus库使用。
STM32G0开发笔记:使用FreeRTOS系统的队列Queue
使用Platformio平台的libopencm3开发框架来开发STM32G0,下面为使用FreeRTOS系统的队列Queue。
STM32G0开发笔记:使用FreeRTOS系统
使用Platformio平台的libopencm3开发框架来开发STM32G0,下面为使用FreeRTOS系统。
STM32G0开发笔记:使用ADC进行NTC温度采集
使用Platformio平台的libopencm3开发框架来开发STM32G0,以下使用ADC进行NTC温度采集。
STM32G0开发笔记:用PWM来实现LED呼吸灯效果
使用Platformio平台的libopencm3开发框架来开发STM32G0,下面使用PWM来实现LED呼吸灯效果。

STM32G0开发笔记:EEPROM M24C02的使用方法
使用Platformio平台的libopencm3开发框架来开发STM32G0,以下为EEPROM M24C02的使用方法。

STM32G0开发笔记:SD卡模块的使用方法
使用Platformio平台的libopencm3开发框架来开发STM32G0,下面介绍SD卡模块的使用方法。

STM32G0开发笔记:SPI接口的基本使用
使用Platformio平台的libopencm3开发框架来开发STM32G0,下面介绍SPI接口的基本使用。
STM32G0开发笔记:多通道ADC与DMA的使用
使用Platformio平台的libopencm3开发框架来开发STM32G0,以下为多通道ADC与DMA的使用。
STM32G0开发笔记:定时器timer的基本使用方法
使用Platformio平台的libopencm3开发框架来开发STM32G0,以下为定时器timer的基本使用方法。
STM32G0开发笔记:GPIO接按键的使用方式
使用Platformio平台的libopencm3开发框架来开发STM32G0,下面为GPIO接按键的使用方式。
STM32G0开发笔记:使用libopencm3库
使用Platformio平台的libopencm3开发框架来开发STM32G0,开发环境为VSCode+PIO插件,这里以开发


评论