


 2. 使用 RASC 生成 Keil 工程

1.新建一个一个工作空间文件夹
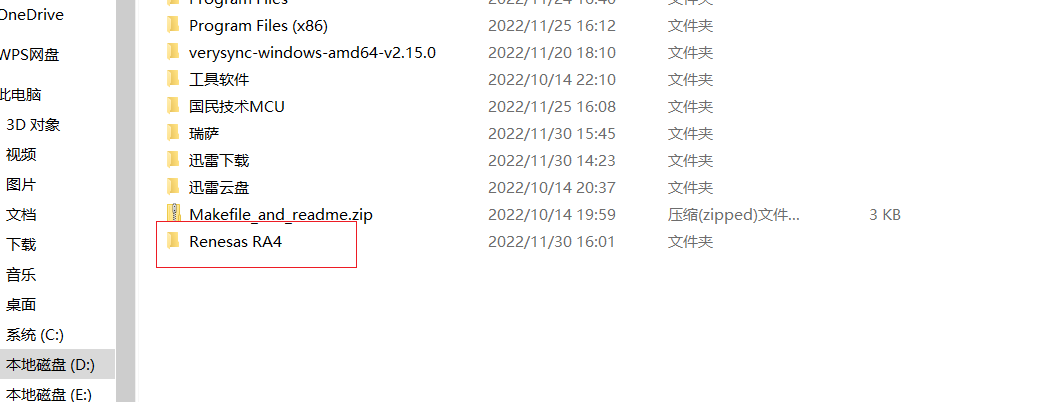
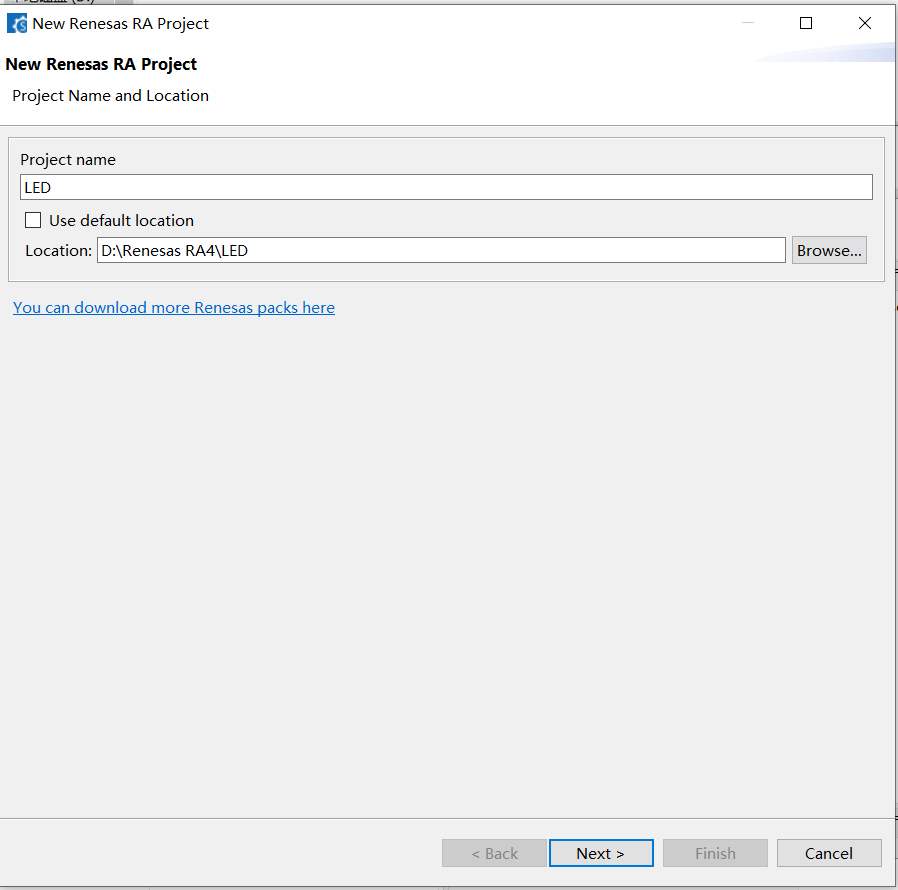
2.创建一个工程
2.1
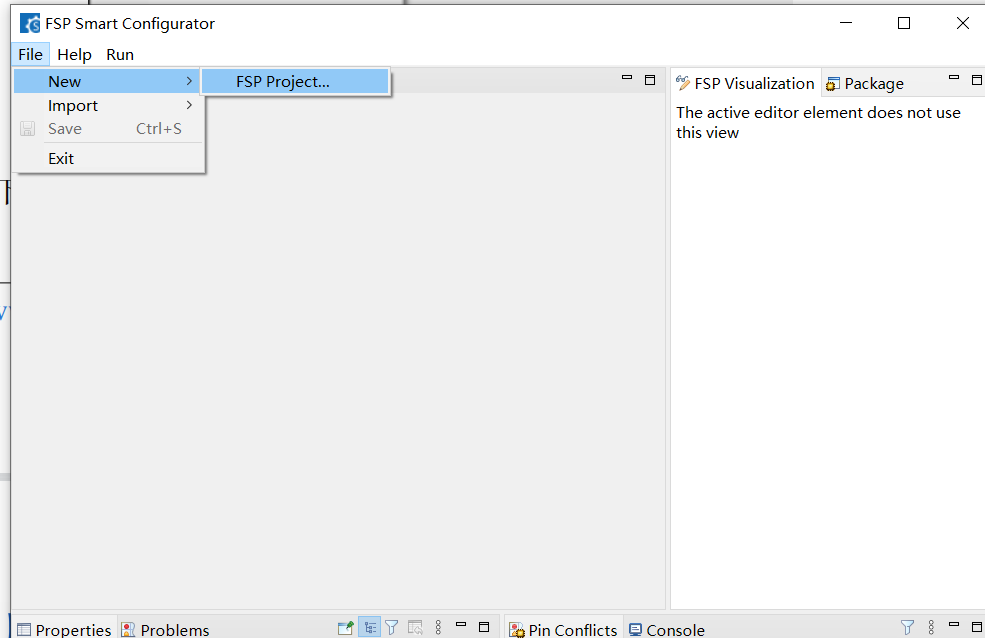
2.2
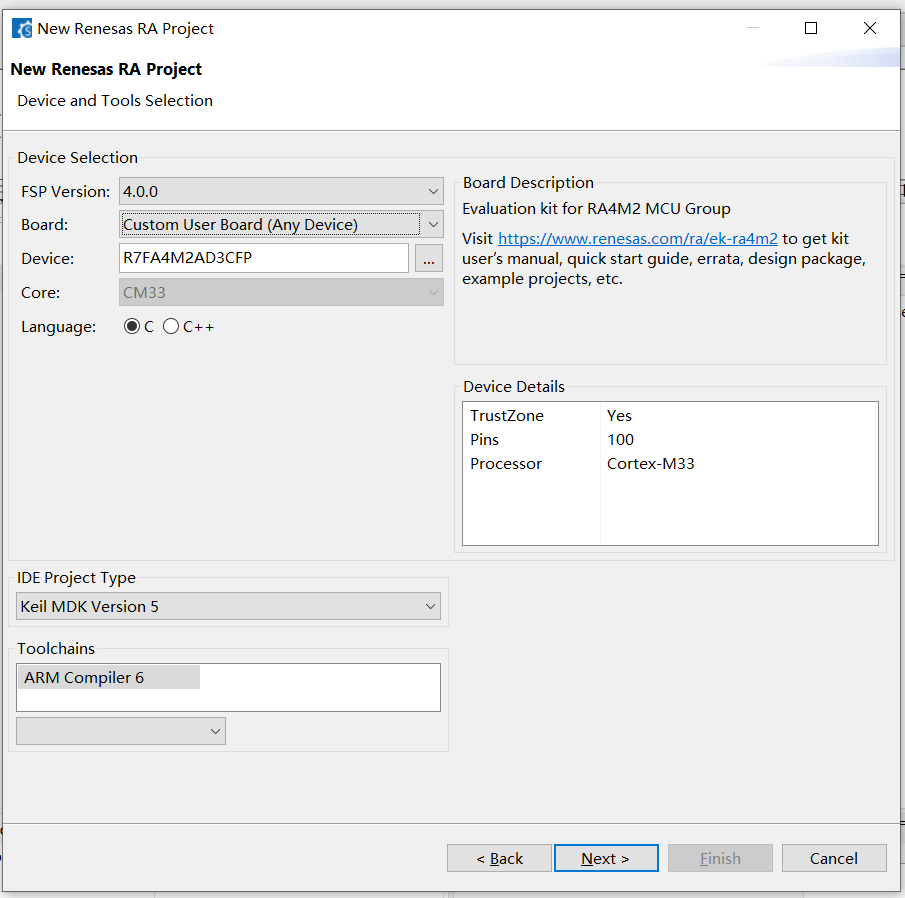
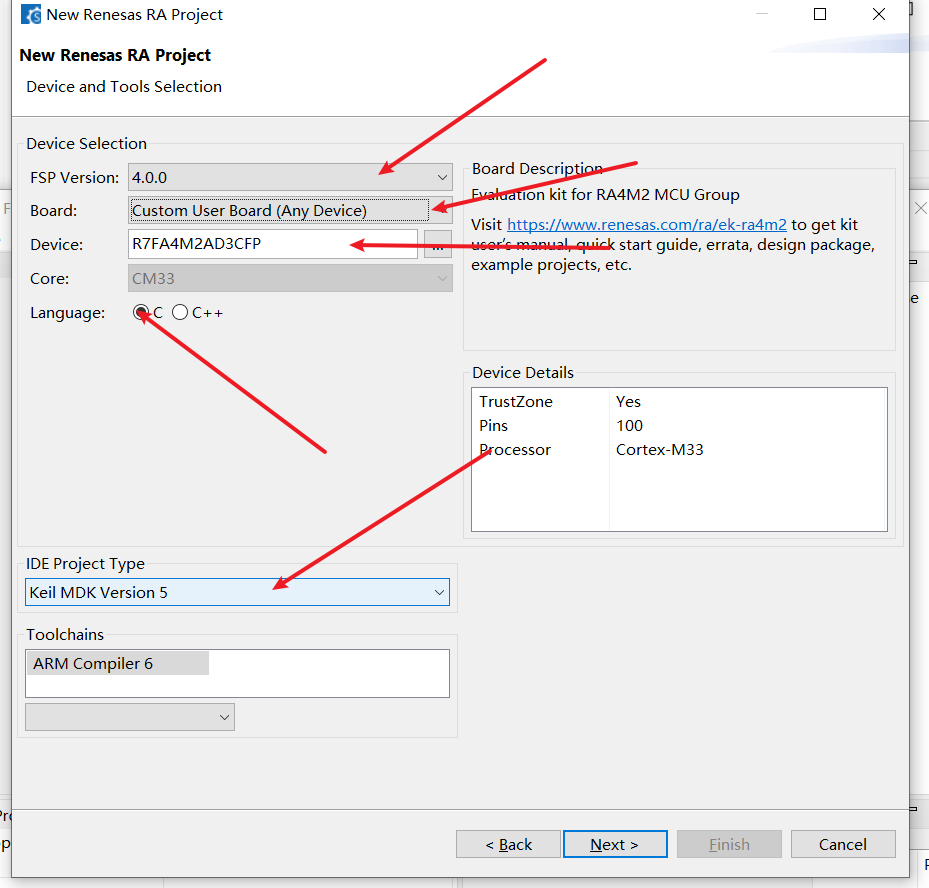
2.3 选择 FSP 库版本、板子型号、设备(MCU)型号、编程语言、编译器
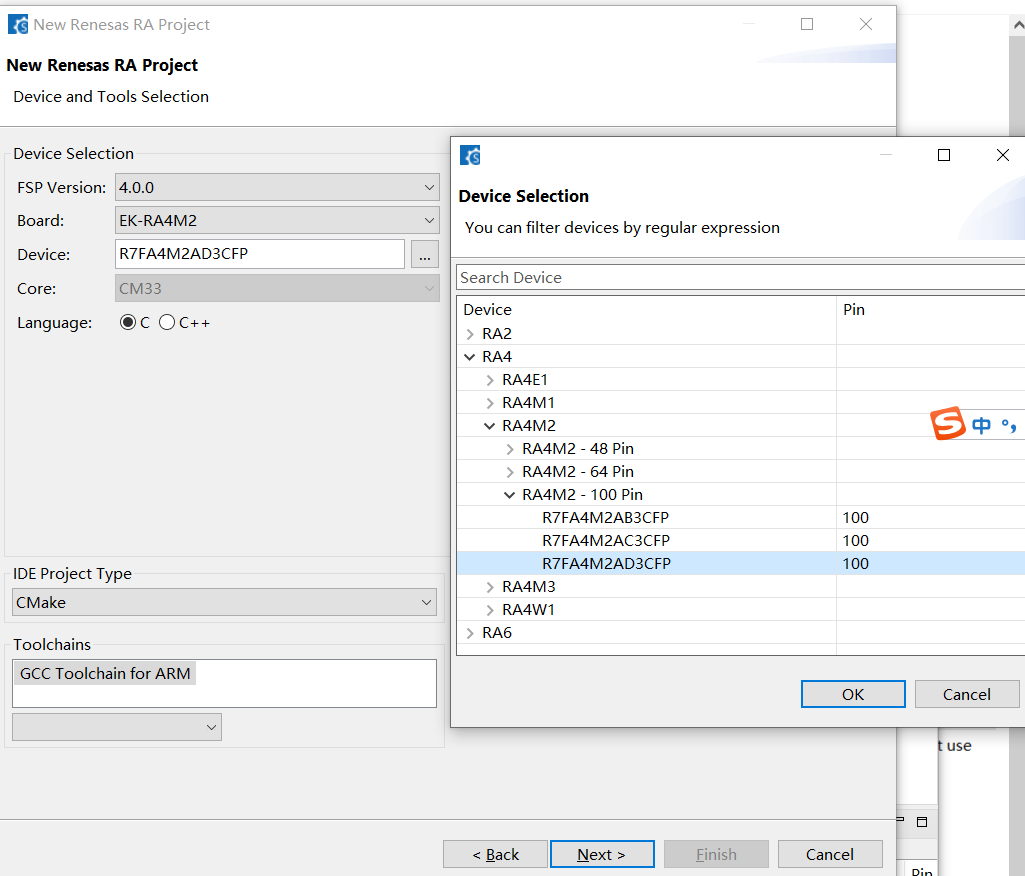
2.4
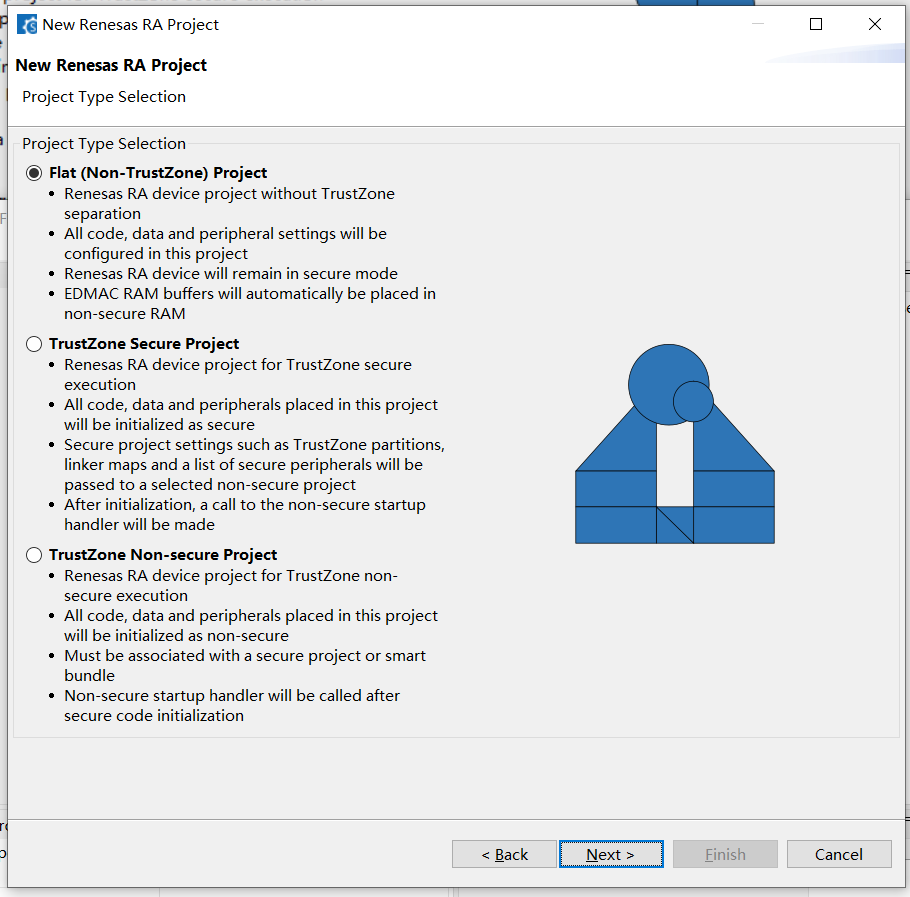
2.5
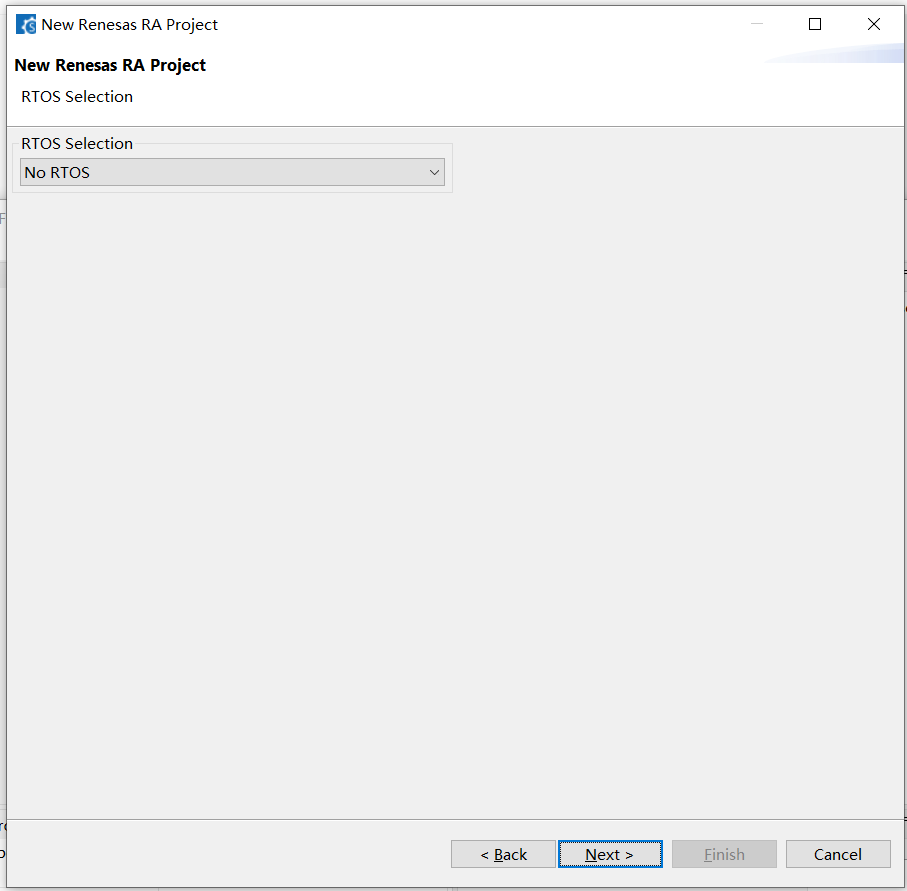
2.6
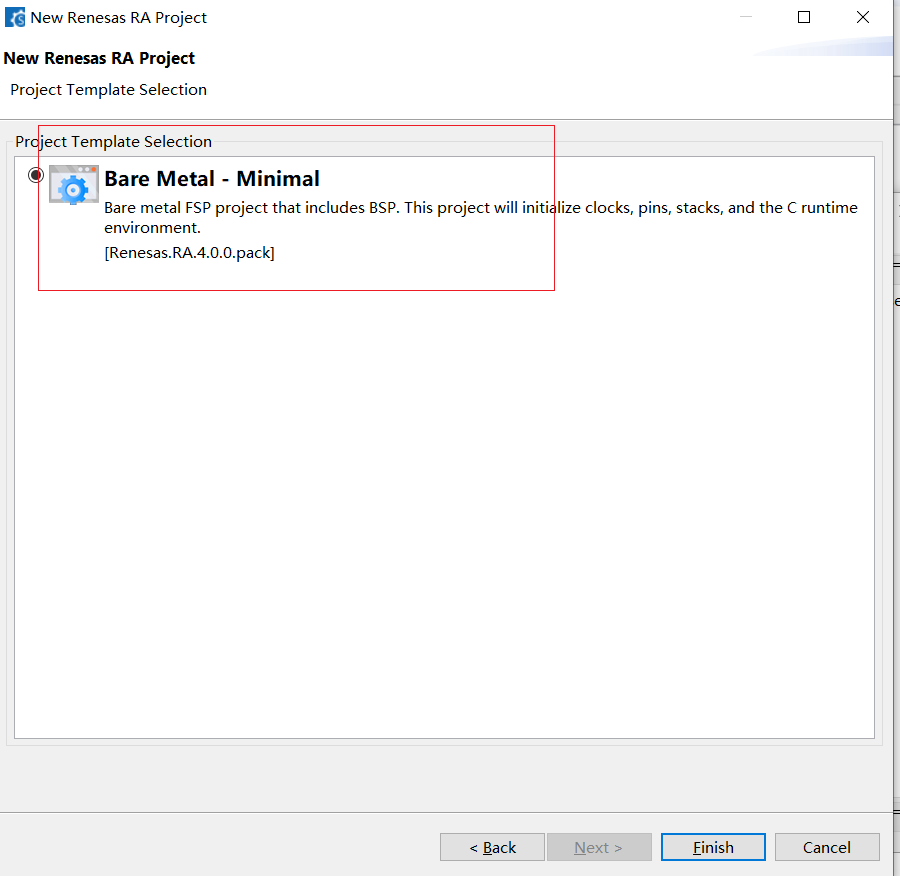
2.7
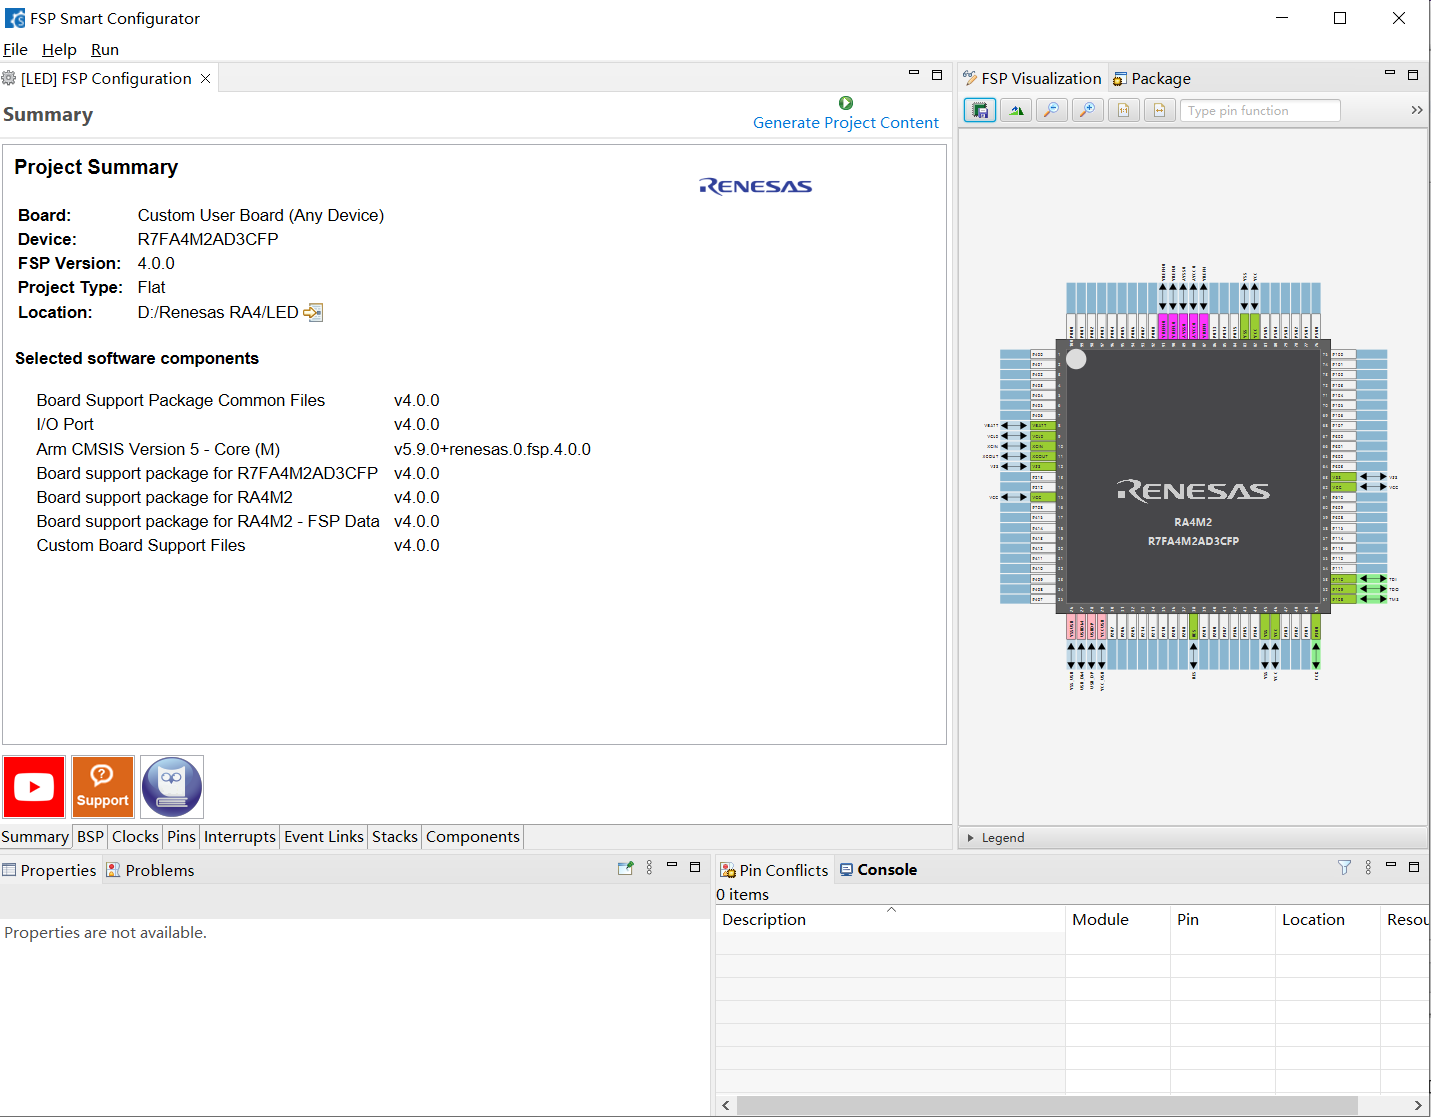
2.8 代码生成
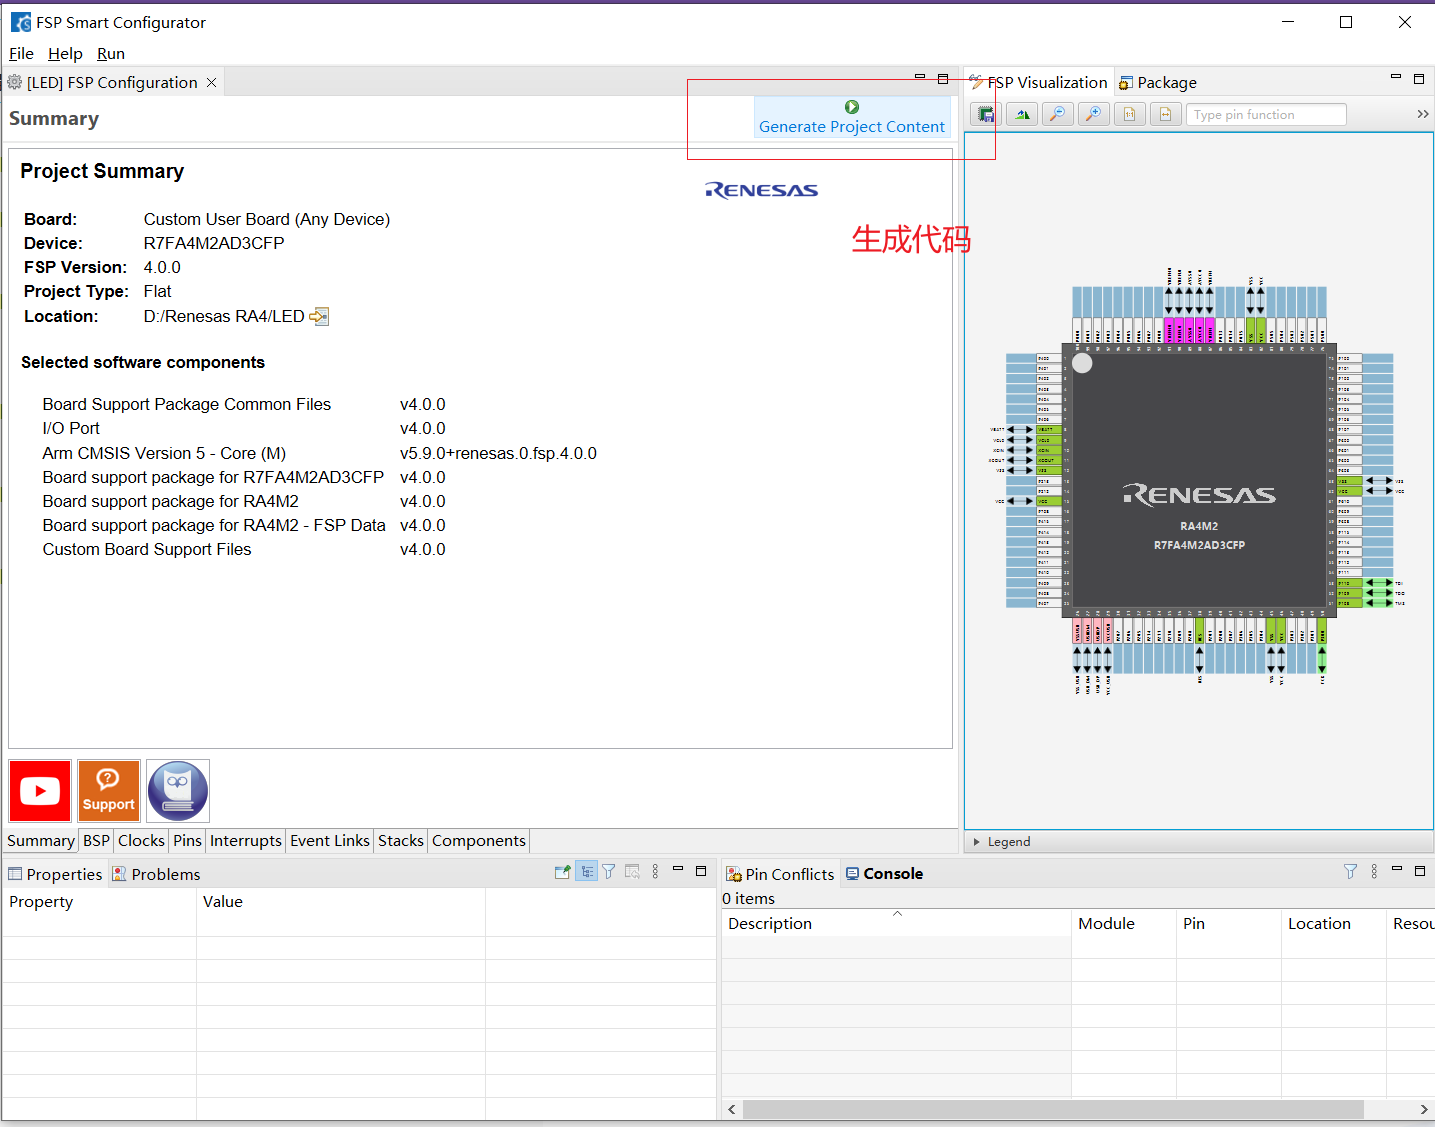
2.9 代码生成结果
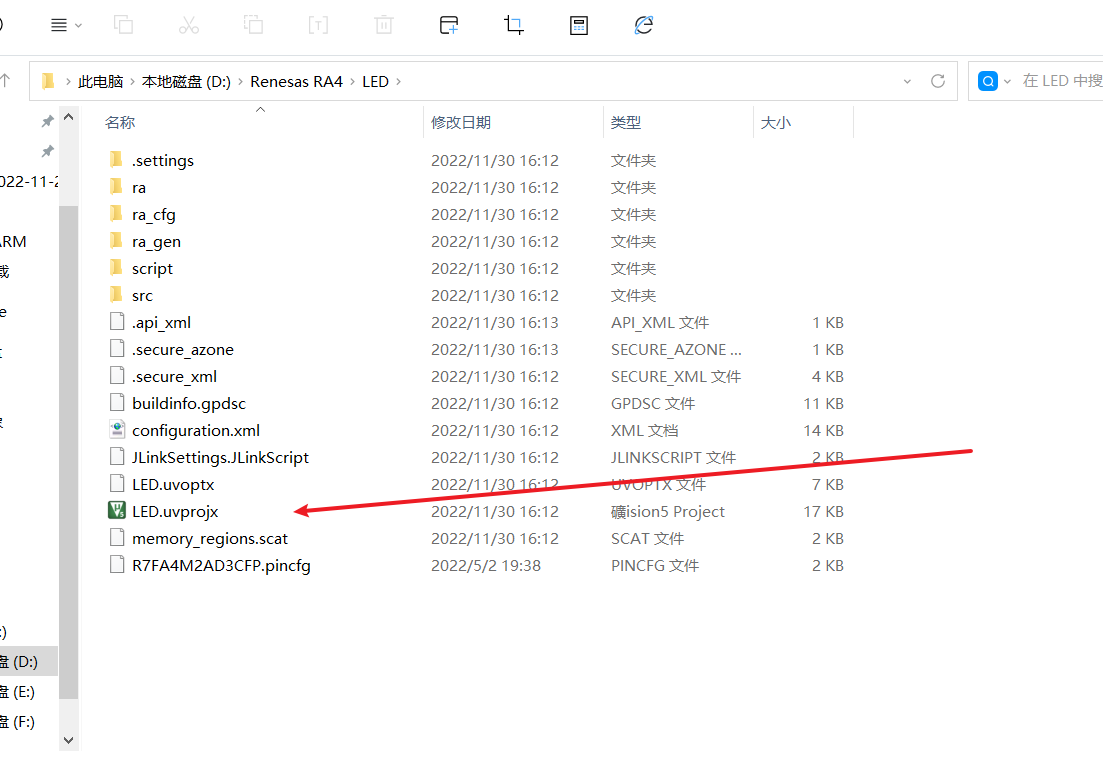
2.10 通过MDK 打卡RASC配置软件
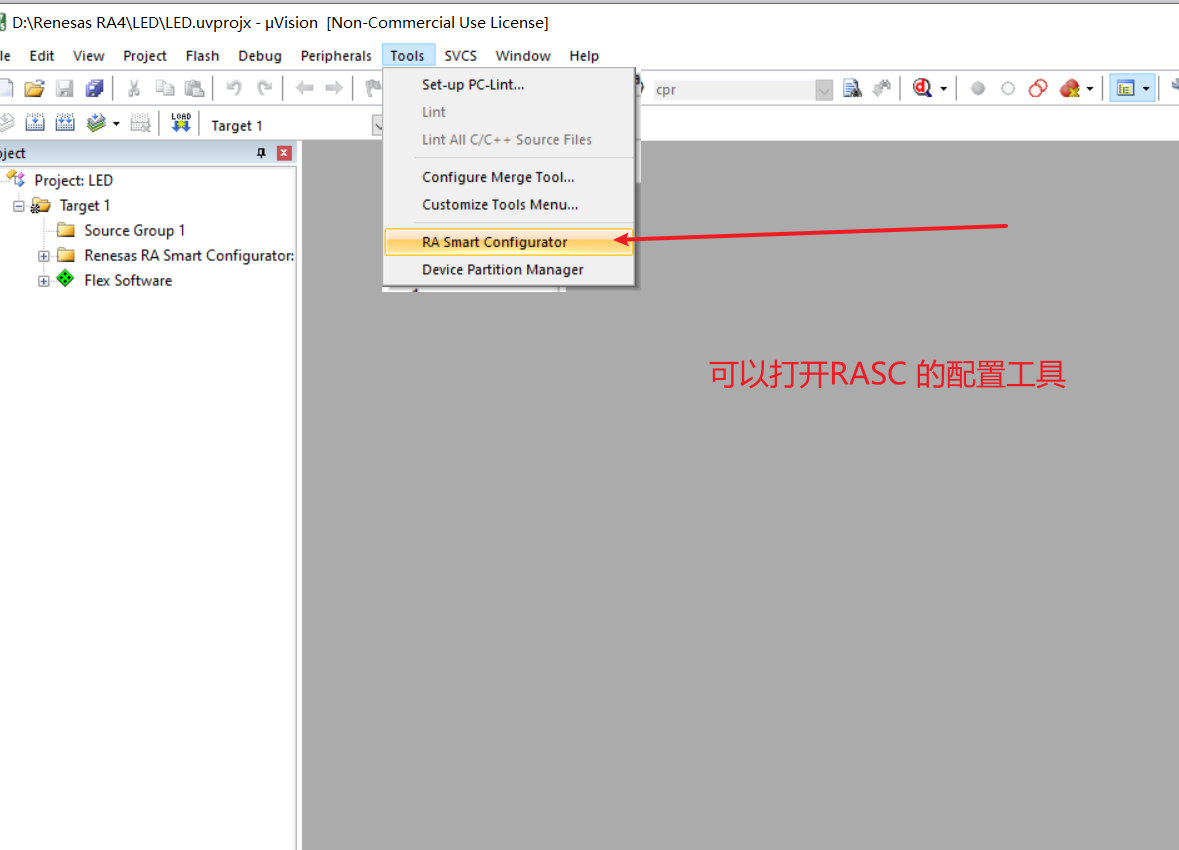
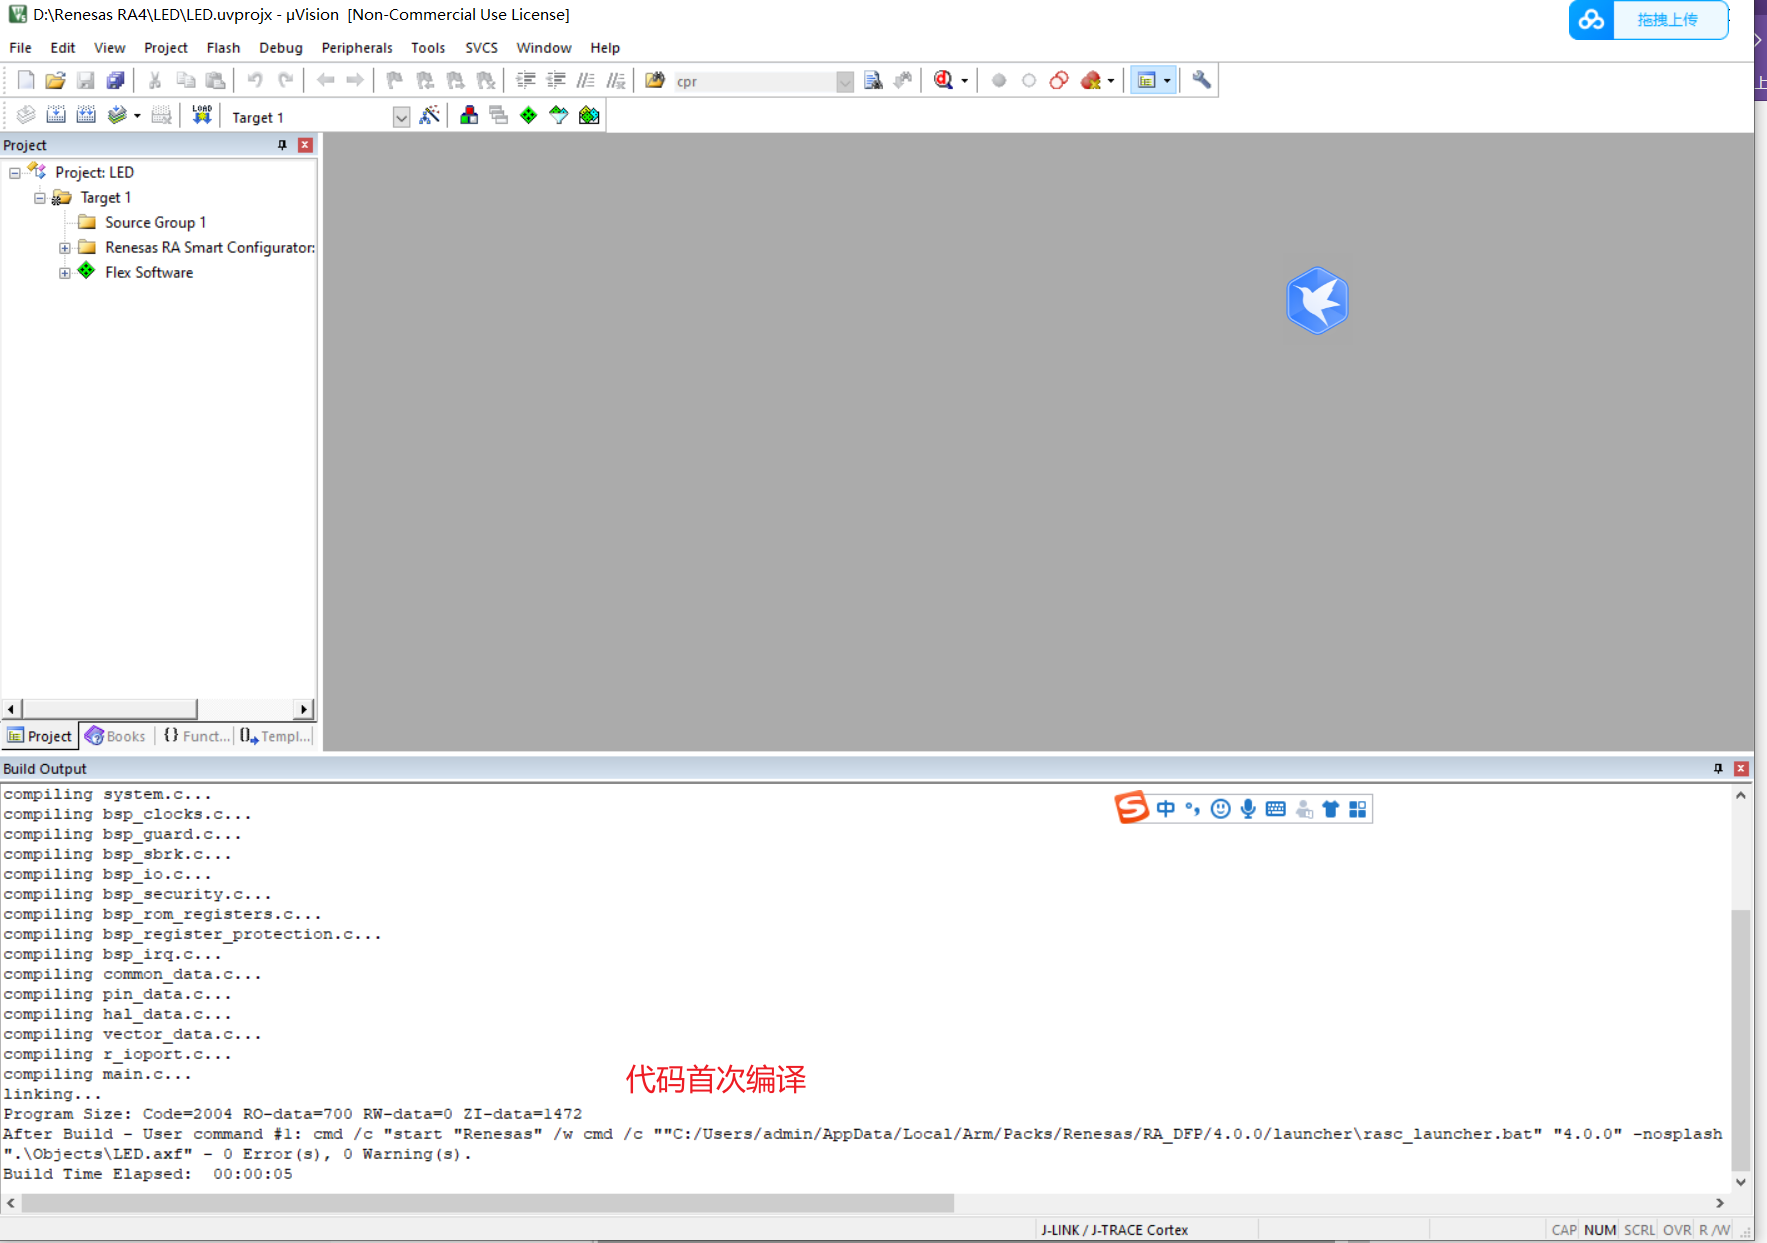
2.11
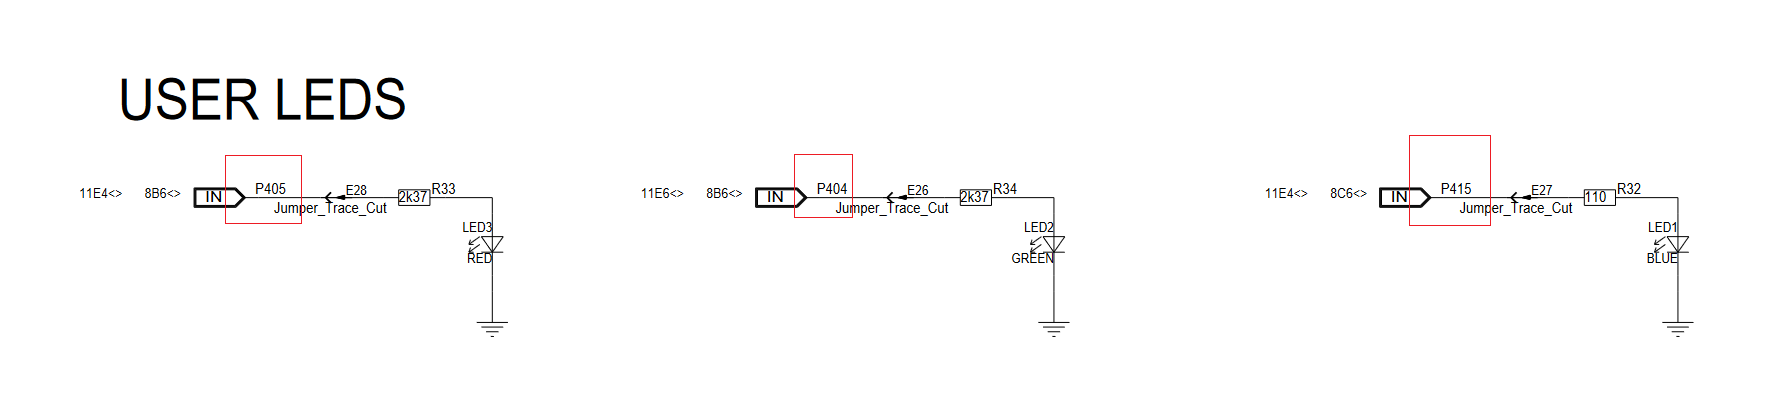
LED硬件信息
3.1 LED
3.2 RASC 配置gpio
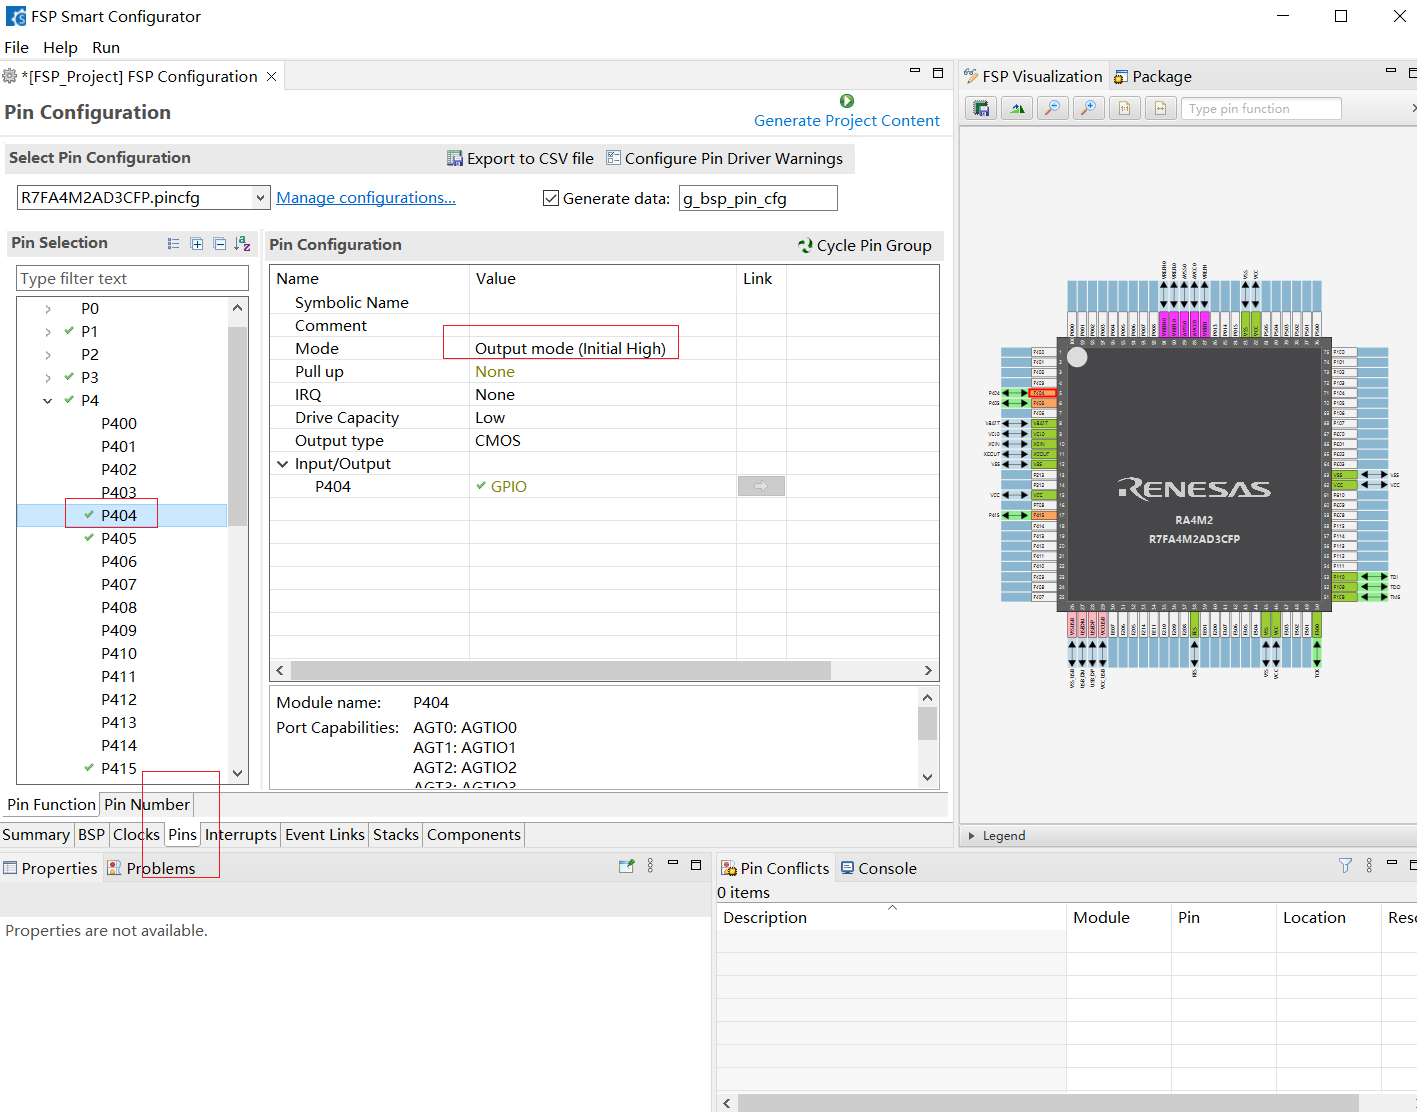
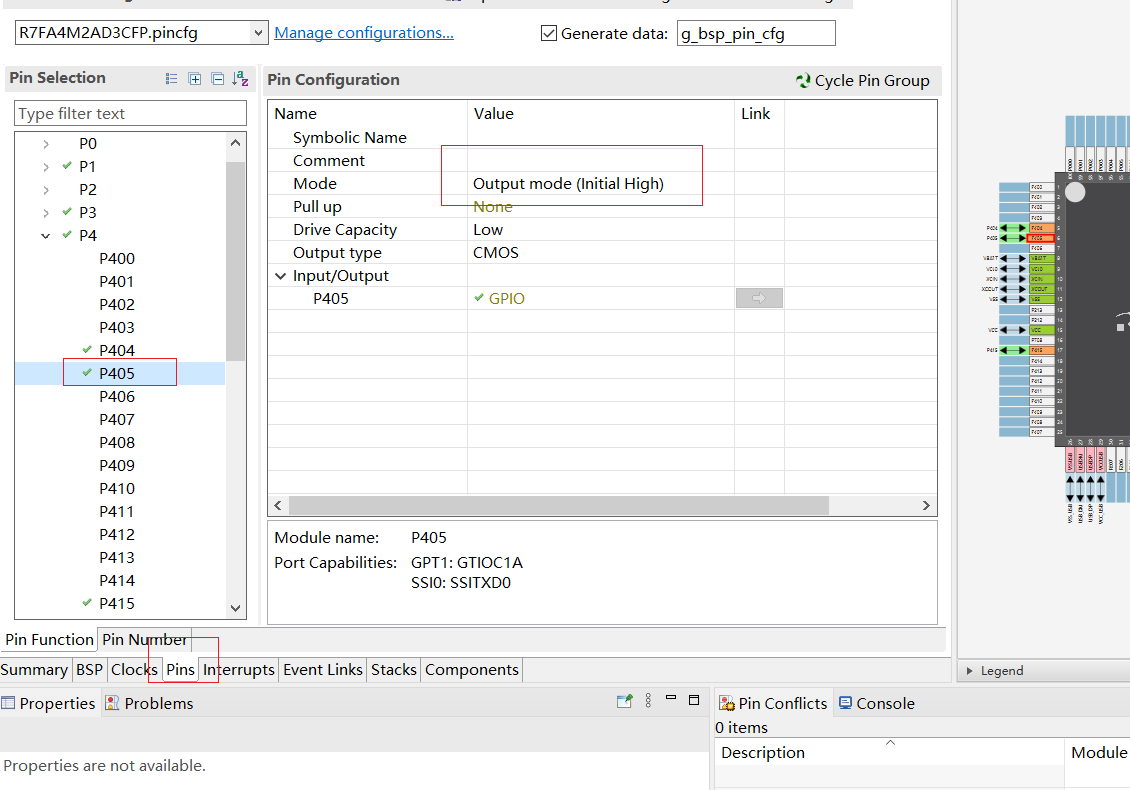
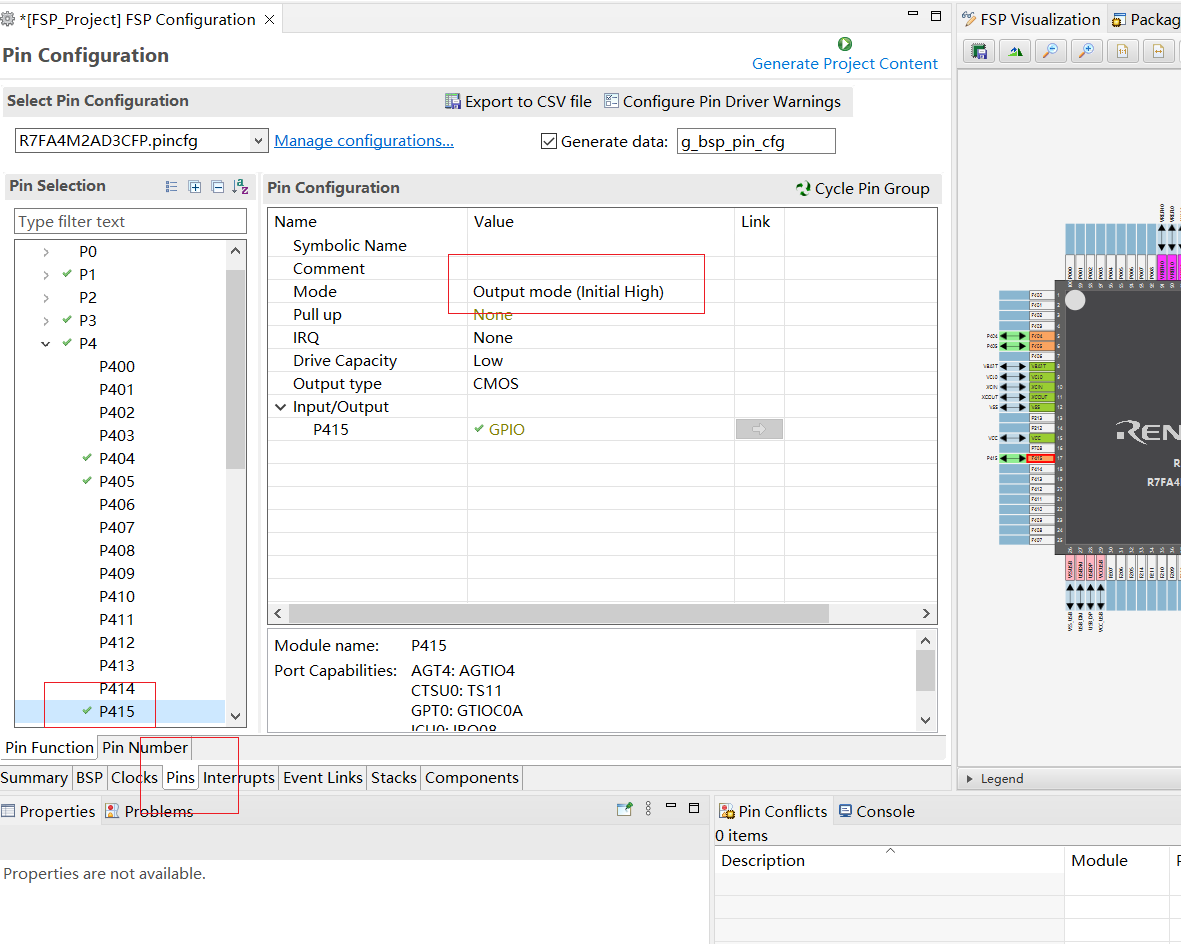
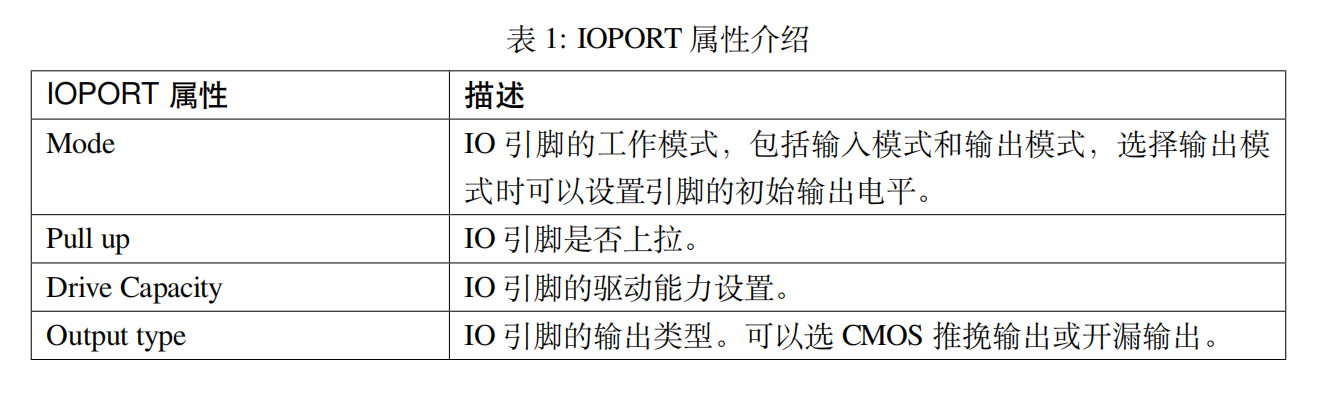
属性说明:
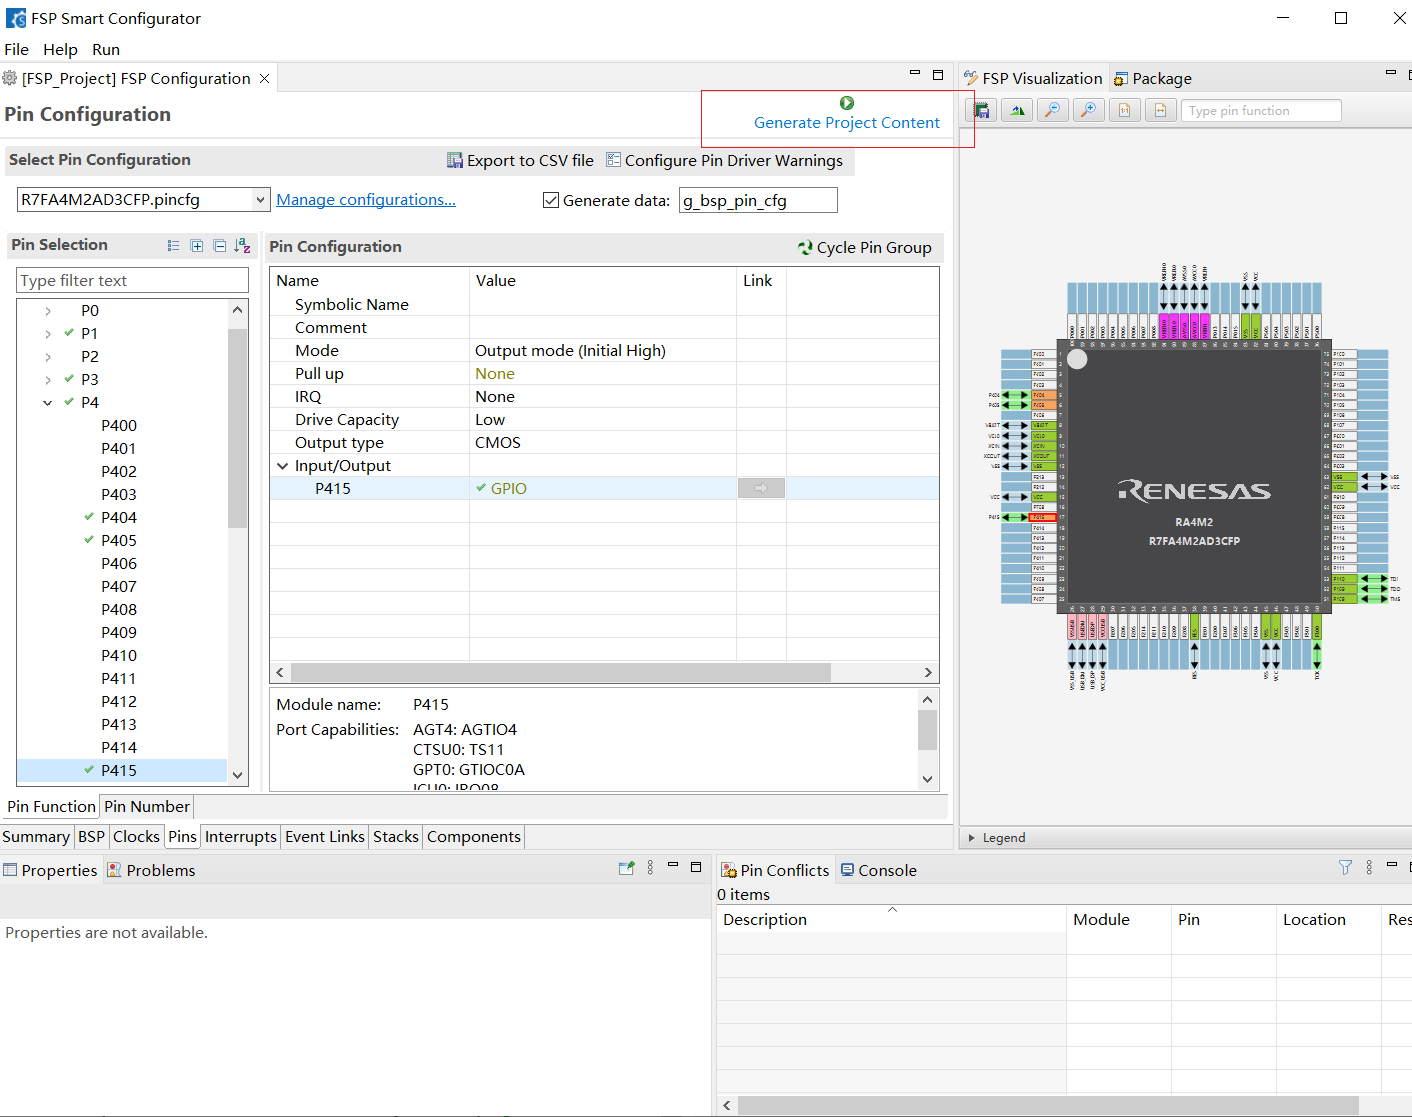
生成代码
软件编写
软件入口函数
void hal_entry(void)
led 闪烁函数
void hal_entry(void)
{
    /* TODO: add your own code here */
	//初始化io
	R_IOPORT_Open (&g_ioport_ctrl, g_ioport.p_cfg);
	//
	while(1)
	{
		R_IOPORT_PinWrite(&g_ioport_ctrl, BSP_IO_PORT_04_PIN_04, BSP_IO_LEVEL_LOW);
		R_BSP_SoftwareDelay(100, BSP_DELAY_UNITS_MILLISECONDS); //延时 100毫秒
		R_IOPORT_PinWrite(&g_ioport_ctrl, BSP_IO_PORT_04_PIN_04, BSP_IO_LEVEL_HIGH);
		R_IOPORT_PinWrite(&g_ioport_ctrl, BSP_IO_PORT_04_PIN_05, BSP_IO_LEVEL_LOW);
		R_BSP_SoftwareDelay(100, BSP_DELAY_UNITS_MILLISECONDS); //延时 100毫秒
		R_IOPORT_PinWrite(&g_ioport_ctrl, BSP_IO_PORT_04_PIN_05, BSP_IO_LEVEL_HIGH);
		R_IOPORT_PinWrite(&g_ioport_ctrl, BSP_IO_PORT_04_PIN_15, BSP_IO_LEVEL_LOW);
		R_BSP_SoftwareDelay(100, BSP_DELAY_UNITS_MILLISECONDS); //延时 100毫秒
		R_IOPORT_PinWrite(&g_ioport_ctrl, BSP_IO_PORT_04_PIN_15, BSP_IO_LEVEL_HIGH);
	}
#if BSP_TZ_SECURE_BUILD
    /* Enter non-secure code */
    R_BSP_NonSecureEnter();
#endif
}
系统延时函数
/*


void R_BSP_SoftwareDelay (uint32_t delay, bsp_delay_units_t units)
delay:时间数量
units:时间单位
*/
可选的时间单位
```c

typedef enum
{
    BSP_DELAY_UNITS_SECONDS      = 1000000, ///< Requested delay amount is in seconds
    BSP_DELAY_UNITS_MILLISECONDS = 1000,    ///< Requested delay amount is in milliseconds
    BSP_DELAY_UNITS_MICROSECONDS = 1        ///< Requested delay amount is in microseconds
} bsp_delay_units_t;
gpio相关的函数
fsp_err_t R_IOPORT_Open(ioport_ctrl_t * const p_ctrl, const ioport_cfg_t * p_cfg);
fsp_err_t R_IOPORT_Close(ioport_ctrl_t * const p_ctrl);
fsp_err_t R_IOPORT_PinsCfg(ioport_ctrl_t * const p_ctrl, const ioport_cfg_t * p_cfg);
fsp_err_t R_IOPORT_PinCfg(ioport_ctrl_t * const p_ctrl, bsp_io_port_pin_t pin, uint32_t cfg);
fsp_err_t R_IOPORT_PinEventInputRead(ioport_ctrl_t * const p_ctrl, bsp_io_port_pin_t pin, bsp_io_level_t * p_pin_event);
fsp_err_t R_IOPORT_PinEventOutputWrite(ioport_ctrl_t * const p_ctrl, bsp_io_port_pin_t pin, bsp_io_level_t pin_value);
fsp_err_t R_IOPORT_PinRead(ioport_ctrl_t * const p_ctrl, bsp_io_port_pin_t pin, bsp_io_level_t * p_pin_value);
fsp_err_t R_IOPORT_PinWrite(ioport_ctrl_t * const p_ctrl, bsp_io_port_pin_t pin, bsp_io_level_t level);
fsp_err_t R_IOPORT_PortDirectionSet(ioport_ctrl_t * const p_ctrl,
                                    bsp_io_port_t         port,
                                    ioport_size_t         direction_values,
                                    ioport_size_t         mask);
fsp_err_t R_IOPORT_PortEventInputRead(ioport_ctrl_t * const p_ctrl, bsp_io_port_t port, ioport_size_t * event_data);
fsp_err_t R_IOPORT_PortEventOutputWrite(ioport_ctrl_t * const p_ctrl,
                                        bsp_io_port_t         port,
                                        ioport_size_t         event_data,
                                        ioport_size_t         mask_value);
fsp_err_t R_IOPORT_PortRead(ioport_ctrl_t * const p_ctrl, bsp_io_port_t port, ioport_size_t * p_port_value);
fsp_err_t R_IOPORT_PortWrite(ioport_ctrl_t * const p_ctrl, bsp_io_port_t port, ioport_size_t value, ioport_size_t mask);
审核编辑 黄昊宇
声明:本文内容及配图由入驻作者撰写或者入驻合作网站授权转载。文章观点仅代表作者本人,不代表电子发烧友网立场。文章及其配图仅供工程师学习之用,如有内容侵权或者其他违规问题,请联系本站处理。
举报投诉
-
keil
+关注
关注
69文章
1233浏览量
173402
发布评论请先 登录
相关推荐
热点推荐
【RA-Eco-RA4M2开发板评测】第一篇:环境搭建+闪烁LED1
创建Keil基础工程
1)打开RASC软件创建工程,填写项目名称和地址
2)选择目标芯片
3)采用裸机模式
4)不使用TZ功能
5)配置时钟
发表于 04-19 15:01
【RA-Eco-RA2E1-V1.0开发板试用】篇一:硬件介绍+环境搭建
到此,利用RASC就可以生成一份基础工程了
4)后续配置
1.之后,打开keil软件,需要进行一些配置
2.在“Menu Content
发表于 02-07 21:18
RA4L1-SENSOR(01)Keil+RASC环境搭建
好个人信息并submit一下,在此下载安装即可。
RA4L1要求Keil MDK版本在5.38以上,下载时需要注意版本是否正确~
具体安装教程可以参考网络资料。
2.RASC和keil固件包的下载链接:
国际
发表于 12-20 00:17
【瑞萨RA6E2地奇星开发板试用】+开发环境构建与下载测试
MDK及IAR EWARM。
这里介绍的是一种混合式的方法,即使用RASC来配置引脚并生成Keil MDK的项目工程,然后再在Keil M
发表于 12-06 00:11
【RA4E2开发板评测】之开发环境配置和LED点亮验证
Configurator” 和 “Device Partition Manager” 这两个菜单项已经被加入到 Tools 栏上面了。
接下来使用RSC生成KEIL工程,首先打开 RASC
发表于 10-26 15:28
【CPKCOR-RA8D1】+ 2.串口输出测试
波特率
3.点击生成代码
4.打开KEIL工程
5.添加核心动能代码
void hal_entry(void)
{
/* TODO: add your own code here
发表于 09-24 19:39
RT-Thread Studio 基于芯片创建的工程能直接输出keil 工程吗?
您好!RT-Thread Studio 基于芯片创建的工程能直接输出keil 工程吗?
基于BSP创建的工程可以通过,ENV 生成
发表于 09-12 07:06
【RA4M2-SENSOR】 Keil开发环境建立和跑马灯运行
/chapter2.html
使用RASC生成Keil工程 — [野火]瑞萨RA系列FSP库开发实战指南——基于野火启明开发板 文档htt
发表于 09-11 07:53
【RA4E2开发板评测】1、从开箱到点亮 LED
。
2. 开发环境搭建与遇到的问题
2.1 开发环境选择
对于瑞萨 RA 系列 MCU,常见的开发环境有:
Keil MDK :需要安装 Renesas RA Pack 和 RASC(RA Smart
发表于 09-05 17:37
【RA4M2-SENSOR】+开发环境构建
安装RASC,首要的工作就是下载该软件,其网址为:
https://github.com/renesas/fsp/releases
在完成下载后,通过点击即开始安装过程。
2.生成Keil
发表于 09-02 11:33
【RA-Eco-RA6M4开发板评测】开箱+Keil环境搭建+点灯
Keil 工程生成和芯片功能配置(类似 STM32 的 MX 软件功能)
RASC 下载地址:https://github.com/renesas/fsp/releases
发表于 07-16 08:45
【RA4L1-SENSOR】1、开箱、Keil环境开发和官方示例移植
和芯片支持包。
下载上图中的MDK芯片支持包和fsp rasc安装程序,搭建Keil开发板环境。工具的安装很简单,安装选项选择默认即可,安装完成后从开始工具栏打开该工具即可使用。
2、创建开发板
发表于 06-17 21:00
【RA4L1-SENSOR】开箱+Keil环境搭建+点灯
E2 Studio、Keil、IAR 等开发工具
这里使用 Keil 开发
需要安装瑞萨 RASC (RA Smart Configurator)软件进行
发表于 06-08 11:06



评论