 电子发烧友App















 创作
创作 发文章
发文章 发帖
发帖  提问
提问  发资料
发资料 发视频
发视频资料介绍
描述
Dmitry Maslov 在 Seeed 工作室博客上的原创文章。
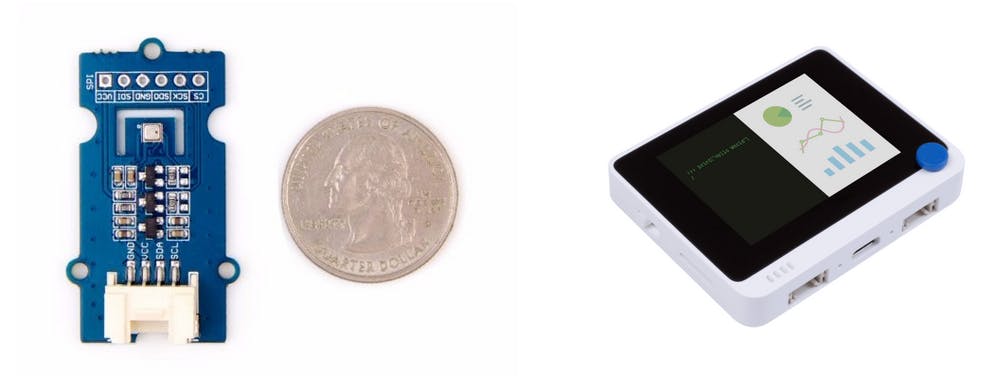
在今天的文章中,我们将使用用于微控制器的 Wio Terminal 和 Tensorflow Lite 创建一个智能气象站,能够根据 BME280 环境传感器的本地数据预测未来 24 小时的天气和降水。
。
我将告诉你如何应用模型优化技术,这不仅可以运行中型卷积神经网络,还可以让这个时尚的 GUI 和 WiFi 连接在同一时间同时运行数天和数月!
2022 年 3 月 29 日更新。我尽我所能定期更新我的文章,并根据您在 YouTube/Hackster 评论部分的反馈。如果您想表达对这些努力的支持和赞赏,请考虑给我买杯咖啡(或披萨):) 。
这是最终结果,您可以看到屏幕上显示当前温度、湿度和大气压力值,以及城市名称、预测天气类型和预测降水机会——屏幕底部有一个日志输出字段,您可以轻松地将其重新用于显示极端天气信息、人工智能笑话或来自我的推文。 虽然它看起来不错且有用,但您可以自己添加很多东西 - 例如上面提到的屏幕上的新闻/推文输出或使用深度睡眠模式来节省能源并使其由电池供电等等。
这个项目扩展了我的同事Jonathan Tan的一篇关于天气预报的文章。最值得注意的是,我们将从该文章中的基本实现中改进一些内容:
- 我们将使用 BME280 传感器,它可以用来获取大气压力信息,以及温度和湿度。
- 原始项目中的神经网络模型经过训练,可以根据前 3 小时的数据点预测下半小时的天气,每半小时测量一次。所以,它更像是一个天气描述符,而不是一个真正的天气预报。我们将利用更先进的数据处理和模型架构,根据之前 24 小时的测量结果预测未来 24 小时的天气类型和降水机会。
- 我们还将利用模型优化,这将使我们能够获得更小的模型并在 Wio Terminal 内存中容纳更多的东西,例如,Web 服务器和带有暗/亮材质主题的漂亮 LVGL 界面。
数据处理和模型训练
那么,我们从哪里开始呢?当然,这一切都始于数据。在本教程中,我们将使用来自 Kaggle 的现成天气数据集,历史每小时天气数据 2012-2017。 我住在深圳,中国南方的一个城市——数据集中没有那个城市,所以我选择了一个纬度相近,也属于亚热带气候的城市——迈阿密。
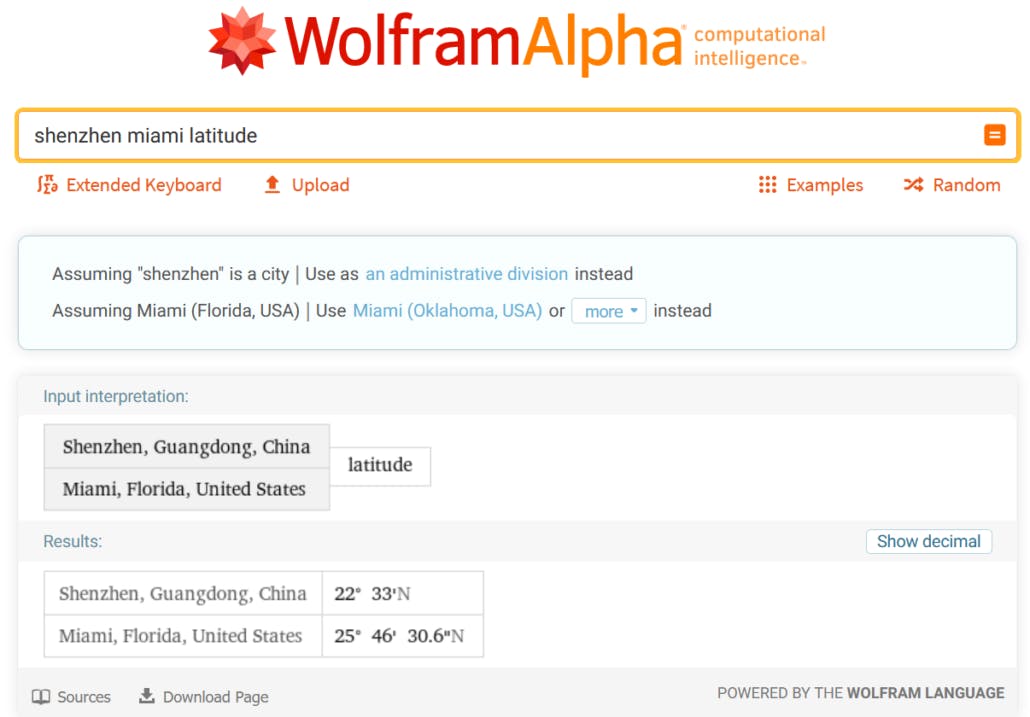
你需要选择一个至少与你居住的气候相似的城市——不用说,这个模型在迈阿密的数据上进行了训练,然后在冬天部署到芝加哥,这将是 Confused Beyond All Reason。

对于数据处理和模型训练步骤,让我们打开我为这个项目在 Github 存储库中准备和共享的 Colab Notebook 。
准备环境
获得训练好的模型后,就可以将其部署到 Wio Terminal。
编辑 2021 年 10 月:如果您为 Wio 终端使用 1.8.2 板定义,则无需替换 cmsis_gcc.h。这也是 TC3 定时器库正常运行所必需的。
其次,您需要将 cmsis_gcc.h 文件的内容替换为较新的版本,以避免`__SXTB16_RORn`未定义。您将在此项目的 Github 存储库中找到该文件的较新版本。然后只需将其复制到C:\Users\[your_user_name]\AppData\Local\Arduino15\packages\Seeeduino\tools\CMSIS\5.4.0\CMSIS\Core\IncludeWindows 和/home/[your_user_name]/.arduino15/packages/Seeeduino/tools/CMSIS/5.4.0/CMSIS/Core/IncludeLinux 上。
最后,由于我们使用卷积神经网络并使用 Keras API 构建它,它包含当前稳定版本的 Tensorflow Micro 不支持的操作。浏览 Github 上的 Tensorflow 问题,我发现有一个拉取请求将此操作(EXPAND_DIMS)添加到可用操作列表中,但在撰写本文时它没有合并到 master 中。因此,您需要做的(2021 年 10 月编辑)是执行
git clone https://github.com/tensorflow/tflite-micro-arduino-examples Arduino_TensorFlowLite
在您的 Arduino 草图/库文件夹中。您可以在TensorFlow Lite Micro Library for Arduino 存储库中找到有关安装最新开发版本库的更多详细信息。
使用虚拟数据进行测试
完成后,创建一个空草图并保存。然后将您训练的模型复制到草图文件夹并重新打开草图。将模型和模型长度的变量名称更改为更短的名称。然后使用 wio_terminal_tfmicro_weather_prediction_static.ino 中的代码进行测试:
让我们回顾一下我们在 C++ 代码中的主要步骤
我们包含了 Tensorflow 库的头文件和带有模型 flatbuffer 的文件
#include
//#include "tensorflow/lite/micro/micro_mutable_op_resolver.h"
#include "tensorflow/lite/micro/all_ops_resolver.h"
#include "tensorflow/lite/micro/micro_error_reporter.h"
#include "tensorflow/lite/micro/system_setup.h"
#include "tensorflow/lite/micro/micro_interpreter.h"
#include "tensorflow/lite/schema/schema_generated.h"

#include "model_Conv1D.h"
请注意我如何注释掉 micro_mutable_op_resolver.h 并启用 all_ops_resolver.h – all_ops_resolver.h 标头编译了 Tensorflow Micro 中当前存在的所有操作并且便于测试,但是一旦完成测试,最好切换到 micro_mutable_op_resolver.h 以保存设备内存——它确实有很大的不同。
接下来我们定义错误报告器、模型、输入和输出张量和解释器的指针。注意我们的模型有两个输出——一个是降水量,另一个是天气类型。我们还定义了 tensor arena,您可以将其视为一个草稿板,用于保存输入、输出和中间数组——所需的大小取决于您使用的模型,并且可能需要通过实验来确定。
// Globals, used for compatibility with Arduino-style sketches.
namespace {
tflite::ErrorReporter* error_reporter = nullptr;
const tflite::Model* model = nullptr;
tflite::MicroInterpreter* interpreter = nullptr;
TfLiteTensor* input = nullptr;
TfLiteTensor* output_type = nullptr;
TfLiteTensor* output_precip = nullptr;

constexpr int kTensorArenaSize = 1024*25;
uint8_t tensor_arena[kTensorArenaSize];
}  // namespace
然后在 setup 函数中,有更多样板文件,例如实例化错误报告器、操作解析器、解释器、映射模型、分配张量以及最后检查分配后的张量形状。如果当前版本的 Tensorflow Micro 库不支持某些模型操作,则代码可能会在运行时抛出错误。如果您有不受支持的操作,您可以更改模型架构或自己添加对操作员的支持,通常是从 Tensorflow Lite 移植它。
void setup() {
  Serial.begin(115200);
  while (!Serial) {delay(10);}

  // Set up logging. Google style is to avoid globals or statics because of
  // lifetime uncertainty, but since this has a trivial destructor it's okay.
  // NOLINTNEXTLINE(runtime-global-variables)
  static tflite::MicroErrorReporter micro_error_reporter;
  error_reporter = µ_error_reporter;

  // Map the model into a usable data structure. This doesn't involve any
  // copying or parsing, it's a very lightweight operation.
  model = tflite::GetModel(Conv1D_tflite);
  if (model->version() != TFLITE_SCHEMA_VERSION) {
    TF_LITE_REPORT_ERROR(error_reporter,
                         "Model provided is schema version %d not equal "
                         "to supported version %d.",
                         model->version(), TFLITE_SCHEMA_VERSION);
    return;
  }

  // This pulls in all the operation implementations we need.
  // NOLINTNEXTLINE(runtime-global-variables)
  //static tflite::MicroMutableOpResolver<1> resolver;
  static tflite::AllOpsResolver resolver;
  // Build an interpreter to run the model with.
  static tflite::MicroInterpreter static_interpreter(model, resolver, tensor_arena, kTensorArenaSize, error_reporter);
  interpreter = &static_interpreter;

  // Allocate memory from the tensor_arena for the model's tensors.
  TfLiteStatus allocate_status = interpreter->AllocateTensors();
  if (allocate_status != kTfLiteOk) {
    TF_LITE_REPORT_ERROR(error_reporter, "AllocateTensors() failed");
    return;
  }

  // Obtain pointers to the model's input and output tensors.
  input = interpreter->input(0);
  output_type = interpreter->output(1);
  output_precip = interpreter->output(0);

  Serial.println(input->dims->size);
  Serial.println(input->dims->data[1]);
  Serial.println(input->dims->data[2]);
  Serial.println(input->type);

  Serial.println(output_type->dims->size);
  Serial.println(output_type->dims->data[1]);
  Serial.println(output_type->type);

  Serial.println(output_precip->dims->size);
  Serial.println(output_precip->dims->data[1]);
  Serial.println(output_precip->type);
}
最后,在循环函数中,我们为量化的 INT8 值和浮点值数组定义了一个占位符,您可以从 Colab 笔记本复制粘贴,以比较设备上的模型推理与 Colab 中的模型推理。
void loop() {

  int8_t x_quantized[72];
  float x[72] = {0, 0, 0, 0, 0, 0, 0, 0, 0, 0, 0, 0, 0, 0, 0, 0, 0, 0, 0, 0, 0, 0,
       0, 0, 0, 0, 0, 0, 0, 0, 0, 0, 0, 0, 0, 0, 0, 0, 0, 0, 0, 0, 0, 0,
       0, 0, 0, 0, 0, 0, 0, 0, 0, 0, 0, 0, 0, 0, 0, 0, 0, 0, 0, 0, 0, 0,
       0, 0, 0, 0, 0, 0};
我们在 for 循环中将浮点值量化为 INT8,并将它们一一放入输入张量中:
for (byte i = 0; i < 72; i = i + 1) {
        input->data.int8[i] = x[i] / input->params.scale + input->params.zero_point;
  }
然后由 Tensorflow Micro 解释器执行推理,如果没有报告错误,则将值放置在输出张量中。
// Run inference, and report any error
  TfLiteStatus invoke_status = interpreter->Invoke();

  if (invoke_status != kTfLiteOk) {
    TF_LITE_REPORT_ERROR(error_reporter, "Invoke failed");
    return;
  }
与输入类似,模型的输出也是量化的,所以我们需要进行逆运算,将其从INT8转换为float。
// Obtain the quantized output from model's output tensor
  float y_type[4];

  // Dequantize the output from integer to floating-point
  int8_t y_precip_q = output_precip->data.int8[0];
  Serial.println(y_precip_q);
  float y_precip = (y_precip_q - output_precip->params.zero_point) * output_precip->params.scale;
  Serial.print("Precip: ");
  Serial.print(y_precip);
  Serial.print("\t");
  Serial.print("Type: ");
  for (byte i = 0; i < 4; i = i + 1) {
    y_type[i] = (output_type->data.int8[i] - output_type->params.zero_point) * output_type->params.scale;
    Serial.print(y_type[i]);
    Serial.print(" ");
  }
  Serial.print("\n");
}
检查并比较同一数据点的值,对于 Colab 笔记本中的量化 Tensorflow Lite 模型和在 Wio 终端上运行的 Tensorflow Micro 模型,它们应该相同。
探索并尝试完整版的草图
凉爽的!所以它确实有效,现在下一步是将其从演示变成实际有用的项目。从 Seeed Arduino 速写本存储库打开速写并查看其内容。
我将代码分为主草图、get_historical_data 和 GUI 部分。由于我们的模型需要过去 24 小时的数据,我们需要等待 24 小时才能执行第一次推理,这需要很多时间——为了解决这个问题,我们从 openweathermap.com API 获取过去 24 小时的天气,并且可以执行第一次推理设备启动后立即推断,然后用连接到 Wio 终端 I2C Grove 插座的 BME280 传感器的温度、湿度和压力替换循环缓冲区中的值。对于 GUI,我使用了 LVGL,一个小巧而多功能的图形库——它也是一个快速发展的项目,使用它并不容易,但它的功能非常值得!
按照 Github 存储库中的说明安装必要的库并配置 LVGL 以运行演示。
直到下一次!
- Arduino在线气象站(NodeMCU)
- 如何制作简单的气象站
- Arduino无线气象站
- Arduino气象站
- 基于LoPy4的气象站设计 0次下载
- Sigfox和Arduino气象站
- 基于Arduino的无线气象站 0次下载
- Arduino气象站项目
- 使用蓝牙连接的小型气象站
- DIY简单气象站
- 使用Arduino和NodeMCU的气象站
- 基于网络的InqWeather气象站
- 手持式气象站BNL-GPRS系列使用手册 4次下载
- 自动气象站的抗干扰技术 26次下载
- 基于MSP430的智能气象站的设计
- 小型气象站监测系统技术解析 113次阅读
- 便携式气象站:移动场景下的气象“感知官” 176次阅读
- 小型自动气象站:精细化气象监测的技术革新与应用拓展 342次阅读
- 校园科普气象站:技术赋能下的自然探索课堂 230次阅读
- 小型全自动气象站到底 “自动” 在哪? 586次阅读
- 光伏实验气象站的技术架构与应用实践 2k次阅读
- 车载气象站在多领域的应用 347次阅读
- 基于ESP32和Wio Terminal的DeepSeeek移动终端项目 1.7k次阅读
- 如何利用ESP8266实现防雨物联网气象站的设计 6.2k次阅读
- 如何使用ESP32创建一个气象站 5.5k次阅读
- 基于树莓派组成的可随身携带气象站设计方案 3.7k次阅读
- 如何使用两个dht传感器及HC12模块制作远程气象站? 4.1k次阅读
- 基于创建带有空气质量传感器的室内气象站 2.9k次阅读
- dfrobotDIY智能气象站套件简介 2.3k次阅读
- 基于STM32的自动气象站控制模块设计 9.4k次阅读

 上传资料赚积分
下载排行
本周
- 1山景DSP芯片AP8248A2数据手册
- 1.06 MB | 532次下载 | 免费
- 2RK3399完整板原理图(支持平板,盒子VR)
- 3.28 MB | 339次下载 | 免费
- 3TC358743XBG评估板参考手册
- 1.36 MB | 330次下载 | 免费
- 4DFM软件使用教程
- 0.84 MB | 295次下载 | 免费
- 5元宇宙深度解析—未来的未来-风口还是泡沫
- 6.40 MB | 227次下载 | 免费
- 6迪文DGUS开发指南
- 31.67 MB | 194次下载 | 免费
- 7元宇宙底层硬件系列报告
- 13.42 MB | 182次下载 | 免费
- 8FP5207XR-G1中文应用手册
- 1.09 MB | 178次下载 | 免费
本月
- 1OrCAD10.5下载OrCAD10.5中文版软件
- 0.00 MB | 234315次下载 | 免费
- 2555集成电路应用800例(新编版)
- 0.00 MB | 33566次下载 | 免费
- 3接口电路图大全
- 未知 | 30323次下载 | 免费
- 4开关电源设计实例指南
- 未知 | 21549次下载 | 免费
- 5电气工程师手册免费下载(新编第二版pdf电子书)
- 0.00 MB | 15349次下载 | 免费
- 6数字电路基础pdf(下载)
- 未知 | 13750次下载 | 免费
- 7电子制作实例集锦 下载
- 未知 | 8113次下载 | 免费
- 8《LED驱动电路设计》 温德尔著
- 0.00 MB | 6656次下载 | 免费
总榜
- 1matlab软件下载入口
- 未知 | 935054次下载 | 免费
- 2protel99se软件下载(可英文版转中文版)
- 78.1 MB | 537798次下载 | 免费
- 3MATLAB 7.1 下载 (含软件介绍)
- 未知 | 420027次下载 | 免费
- 4OrCAD10.5下载OrCAD10.5中文版软件
- 0.00 MB | 234315次下载 | 免费
- 5Altium DXP2002下载入口
- 未知 | 233046次下载 | 免费
- 6电路仿真软件multisim 10.0免费下载
- 340992 | 191187次下载 | 免费
- 7十天学会AVR单片机与C语言视频教程 下载
- 158M | 183279次下载 | 免费
- 8proe5.0野火版下载(中文版免费下载)
- 未知 | 138040次下载 | 免费



 工商网监
工商网监
评论