 3自由度串联机械臂实现电磁铁搬运功能

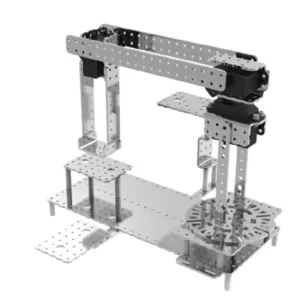
1、功能描述
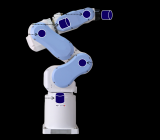
R308样机是一款拥有3自由度的串联机械臂。本文提供的示例所实现的功能为:在3自由度串联机械臂样机上安装电磁铁,实现电磁铁搬运物品的功能。

2、电子硬件
在这个示例中,我们采用了以下硬件,请大家参考:
| 主控板 | Basra(兼容Arduino Uno) |
| 扩展板 | Bigfish2.1 |
| 舵机 | 270°伺服电机 |
| 电池 | 7.4V锂电池 |
| 其它 | 电磁铁、USB线 |
电路连接说明:
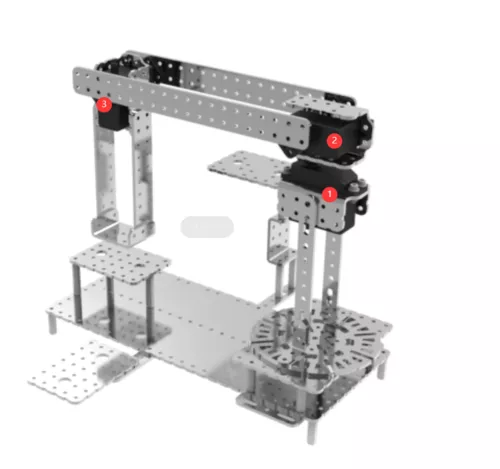
注:
① 270°伺服电机连接在Bigfish扩展板D4 . GND . VCC接口上
② 270°伺服电机连接在Bigfish扩展板D7 . GND . VCC接口上
③ 270°伺服电机连接在Bigfish扩展板D11 . GND . VCC接口上
电磁铁连接在Bigfish扩展板D9,D10接口上
3、运动控制
上位机:Controller 1.0
下位机编程环境:Arduino 1.8.19
3.1初始位置的设定
① 将Controller下位机程序servo_bigfish.ino直接下载到主控板。这段代码供Controller上位机与主控板通信,并允许调试舵机。代码如下:
/*------------------------------------------------------------------------------------

  版权说明:Copyright 2023 Robottime(Beijing) Technology Co., Ltd. All Rights Reserved.

           Distributed under MIT license.See file LICENSE for detail or copy at

           https://opensource.org/licenses/MIT

           by 机器谱 2023-01-31 https://www.robotway.com/

  ------------------------------

/*

* Bigfish扩展板舵机口; 4, 7, 11, 3, 8, 12, 14, 15, 16, 17, 18, 19

* 使用软件调节舵机时请拖拽对应序号的控制块

*/

#include


#define ANGLE_VALUE_MIN 0

#define ANGLE_VALUE_MAX 180

#define PWM_VALUE_MIN 500

#define PWM_VALUE_MAX 2500


#define SERVO_NUM 12


Servo myServo[SERVO_NUM];


int data_array[2] = {0,0};   //servo_pin: data_array[0], servo_value: data_array[1];

int servo_port[SERVO_NUM] = {4, 7, 11, 3, 8, 12, 14, 15, 16, 17, 18, 19};

int servo_value[SERVO_NUM] = {};


String data = "";


boolean dataComplete = false;


void setup() {

  Serial.begin(9600);


}


void loop() {


  while(Serial.available())

  {

    int B_flag, P_flag, T_flag;

    data = Serial.readStringUntil('n');

    data.trim();

    for(int i=0;i= ANGLE_VALUE_MIN && where <= ANGLE_VALUE_MAX)

  {

    myServo[which].write(where);

  }

  else if(where >= PWM_VALUE_MIN && where <= PWM_VALUE_MAX)

  {

    myServo[which].writeMicroseconds(where);

  }

}


int pin2index(int _pin){

  int index;

  switch(_pin)

  {

    case 4: index = 0; break;

    case 7: index = 1; break;

    case 11: index = 2; break;

    case 3: index = 3; break;

    case 8: index = 4; break;

    case 12: index = 5; break;

    case 14: index = 6; break;

    case 15: index = 7; break;

    case 16: index = 8; break;

    case 17: index = 9; break;

    case 18: index = 10; break;

    case 19: index = 11; break;

  }

  return index;

}
下载完成后,保持主控板和电脑的USB连接,以便利用上位机进行调试。
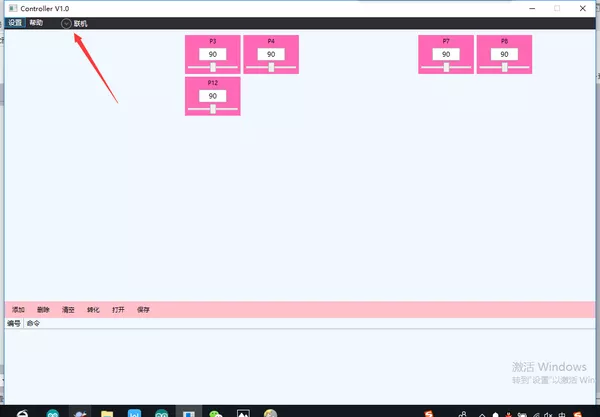
② 双击打开Controller 1.0b.exe:

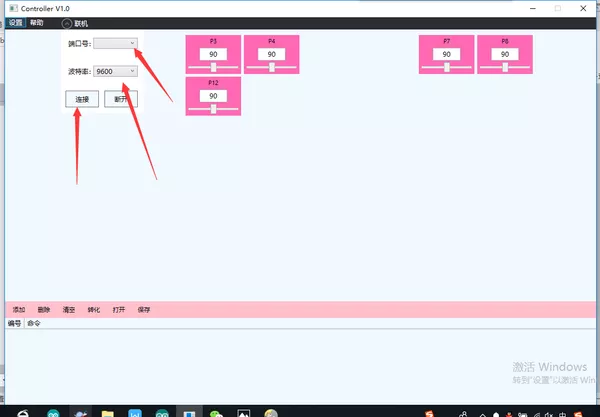
③ 界面左上角选择:设置-面板设置,弹出需要显示的调试块,可通过勾选隐藏不需要调试的舵机块:联机-选择主控板对应端口号以及波特率。
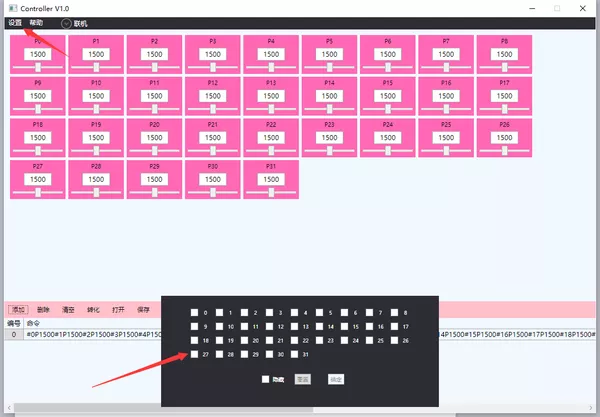
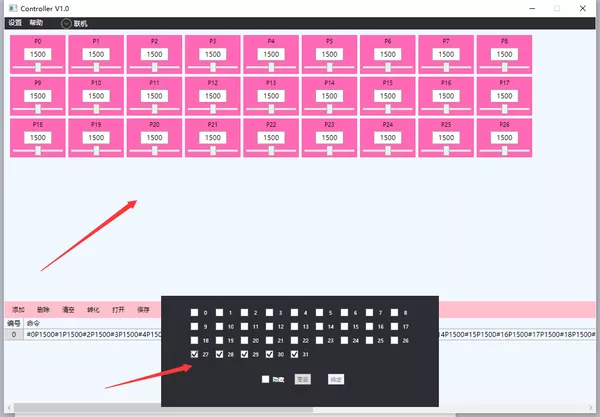
④ 拖动进度条,可以观察相应的舵机角度转动。写好对应的舵机调试角度,勾选左下角添加-转化,获得舵机调试的数组:

⑤ 将该数组直接复制到相应的Arduino程序中的get_coordinate()部分进行使用。
3.2调试好角度后将电磁铁搬运例程(calculate_angle_test.ino)下载到主控板【程序源码详见 https://www.robotway.com/h-col-191.html】
/*------------------------------------------------------------------------------------

  版权说明:Copyright 2023 Robottime(Beijing) Technology Co., Ltd. All Rights Reserved.

           Distributed under MIT license.See file LICENSE for detail or copy at

           https://opensource.org/licenses/MIT

           by 机器谱 2023-01-31 https://www.robotway.com/

  ------------------------------*/

#include

#include


#define SERVO_SPEED 3460                                        //定义舵机转动快慢的时间

#define ACTION_DELAY 200                                        //定义所有舵机每个状态时间间隔


#define L1 172

#define L2 160

#define L3 135


Servo myServo[6];


int f = 200;                                                    //定义舵机每个状态间转动的次数,以此来确定每个舵机每次转动的角度

int servo_port[6] = {4,7,11,3,8,12};                            //定义舵机引脚

int servo_num = sizeof(servo_port) / sizeof(servo_port[0]);     //定义舵机数量

float value_init[6] = {1500, 1500, 1500, 0, 0, 0};              //定义舵机初始角度


double theta[3] = {};

float value_pwm[6] = {};

float coordinate[3] = {};

int data_num;


boolean dataComplete = false;


void setup() {

  Serial.begin(9600);

  pinMode(9, OUTPUT);

  pinMode(10, OUTPUT);

  for(int i=0;i= 0){

    theta[0] = theta0 * 180 / PI;

  }

  else

  {

    theta[0] = 180 + theta0 * 180 / PI;

  }


  theta[1] = 90 - theta1 * 180 / PI;

  theta[2] = theta2 * 180 / PI;

//   Serial.print("theta0 = ");

//   Serial.println(theta[0]);

//   Serial.print("theta1 = ");

//   Serial.println(theta[1]);

//   Serial.print("theta2 = ");

//   Serial.println(theta[2]);

//   Serial.println("-------------------------------------");


}


void ServoStart(int which)

{

  if(!myServo[which].attached())myServo[which].attach(servo_port[which]);

  pinMode(servo_port[which], OUTPUT);

}


void ServoStop(int which)

{

  myServo[which].detach();

  digitalWrite(servo_port[which],LOW);

}


void ServoGo(int which , int where)

{

  if(where!=200)

  {

    if(where==201) ServoStop(which);

    else

    {

      ServoStart(which);

      myServo[which].writeMicroseconds(where);

    }

  }

}


void servo_move(float value0, float value1, float value2, float value3, float value4, float value5)

{


  float value_arguments[] = {value0, value1, value2, value3, value4, value5};

  float value_delta[servo_num];


  for(int i=0;i
审核编辑黄宇
-
机器人
+关注
关注
213文章
31451浏览量
223677 -
Arduino
+关注
关注
190文章
6527浏览量
197467 -
机械臂
+关注
关注
14文章
601浏览量
26186
发布评论请先 登录
机器人主控核心板米尔RK3576 + ROS2,NPU加速实现目标跟随与机械臂抓取

复合机器人机械结构设计与创新:智能制造的前沿技术与发展趋势

SCH16T-K01:高性能6自由度传感器的技术剖析与应用指南
复合机器人对比传统AGV和机械臂的优势何在?
人形机器人市场火爆!雷赛智能重磅推出“20自由度”灵巧手方案

机器人机械臂效率提升的革命性解决方案:上海永铭电容器实践

多自由度云台控制系统赋能安防监控的智能巡检与目标锁定
不到万元!智元机器人高自由度灵巧手做到了

协作机械臂产品介绍
EtherCAT科普系列(17):EtherCAT技术在多自由度 3D 打印领域应用

极海G32R501工业六轴机械臂参考方案释放工业4.0产业价值
十字形多自由度超声电机接触分析模型研究
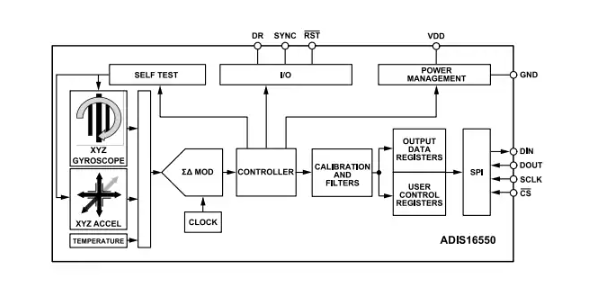
Analog Devices Inc. ADIS16550六自由度惯性传感器数据手册
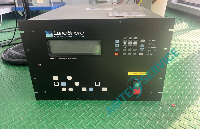
Lake Shore 643电磁铁电源无法开机深度维修案例剖析与解决方案


评论