 腾讯云Ubuntu主机搭建Ghost

开发环境
腾讯云主机配置:
操作系统 Ubuntu Server 16.04.1 LTS 64位
CPU 1 核
内存 2 GB
公网带宽 1 Mbps
官方推荐的安装条件
Ubuntu 16.04或Ubuntu 18.04
内存至少为1GB的服务器
注册域名
在开始之前,首先去解析域名,指向服务器的IP地址并确保它正确解析。必须提前完成此操作,以便在安装过程中正确配置SSL。
开始操作
1. 创建一个新用户
打开终端并以root用户身份登录服务器,创建一个非root用户,官方不推荐在root下安装ghost(注意这里很多坑,搞不定就重装系统吧,我已经重装很多次了)
创建一个新用户(非root),命令如下:sudo adduser blog,期间会让你输入两次新用户的密码
sudo adduser
将新创建的用户添加到组。
usermod -aG sudo
输入完一些信息就Yes下一步。
注意事项:如果使用用户名“ghost”会导致与Ghost-CLI冲突,不允许使用“ghost”这个用户名。
2. 更新包
确保包列表和已安装的包是最新的。
sudo apt-get update
sudo apt-get upgrade
3. 安装Node.js
执行以下命令,安装Node.js
sudo curl -sL https://deb.nodesource.com/setup_10.x | sudo -E bash -
sudo apt-get install -y nodejs
注意了,ghost支持的版本如下:

推荐使用10.x
如果想选择其他版本的话,可以在安装的时候修改sudo curl -sL https://deb.nodesource.com/setup_10.x | sudo -E bash -中的setup_10.x,改为你需要的版本即可。
安装完成后,执行以下命令查看Node.js版本和npm版本。
node -v
npm -v
回显信息:
ubuntu@VM-0-10-ubuntu:~$ node -v
v10.15.1
ubuntu@VM-0-10-ubuntu:~$ npm -v
6.4.1
4. 安装NGINX
Ghost使用NGINX服务器,SSL配置需要NGINX 1.9.5或更高版本。
执行命令:
sudo apt-get update
sudo apt-get install nginx
UFW(Uncomplicated Firewall)是一个 iptables 的接口,可以简化配置防火墙的过程。Ubuntu 默认安装了 UFW,执行以下命令查看防火墙的状态。
sudo ufw status
如果你没有也不想开启防火墙,则可以直接跳过此步骤,如果你想要开启防火墙可以通过以下命令实现。
sudo ufw enable
之后再次检查防火墙状态验证是否成功开启防火墙。
在测试Nginx之前,需要重新配置我们的防火墙软件以允许访问Nginx。执行以下命令,将Nginx自动 注册在 UFW。
sudo ufw app list
如果ufw已激活,则防火墙允许HTTP和HTTPS连接。打开防火墙:
sudo ufw allow 'Nginx Full'
输出信息:
ubuntu@VM-0-10-ubuntu:~$ sudo ufw app list
Available applications:
  Nginx Full
  Nginx HTTP
  Nginx HTTPS
  OpenSSH
配置Nginx
# 新建配置文件
sudo vim /etc/nginx/sites-available/ghost.conf
把以下配置内容粘贴进你的配置文件中,修改server_name 的内容
server {
    listen 80;
    server_name 119.3.xx.xxx.com;     #这里写你的域名或者ip地址
    location / {
        proxy_set_header   X-Real-IP $remote_addr;
        proxy_set_header   Host      $http_host;
        proxy_pass         http://127.0.0.1:2368;
    }
}
把配置文件软链接到sites-enabled中:
sudo ln -s /etc/nginx/sites-available/ghost.conf /etc/nginx/sites-enabled/ghost.conf
重启Nginx
sudo service nginx restart
验证Nginx是否正常工作
在浏览器中通过域名或者 IP 地址进行访问Nginx,如果Nginx正常启动则会打开Welcome to nginx的欢迎页面。
使用浏览器访问 http://云服务器IP地址,显示如下页面,说明Nginx安装成功。

安装Nginx成功
5. 安装MySQL
安装MySQL以用作数据库。
sudo apt-get update
sudo apt-get install mysql-server
安装的过程中会让你输入密码,安装输入即可,我是为了方便记录,用户、数据库都输入了一样的密码。
执行这个命令
mysql_secure_installation
根据提示,前两项是 n ,后面的y即可
Securing the MySQL server deployment.

Enter password for user root:    #输入上一步骤中获取的安装MySQL时自动设置的root用户密码
The existing password for the user account root has expired. Please set a new password.

Estimated strength of the password: 100
Change the password for root ? ((Press y|Y for Yes, any other key for No) : N   #是否更改root用户密码,输入N

Remove anonymous users? (Press y|Y for Yes, any other key for No) : Y   #是否删除匿名用户,输入Y
Success.

Disallow root login remotely? (Press y|Y for Yes, any other key for No) : Y   #禁止root远程登录,输入Y
Success.

Remove test database and access to it? (Press y|Y for Yes, any other key for No) : Y   #是否删除test库和对它的访问权限,输入Y
 - Dropping test database...
Success.

Reload privilege tables now? (Press y|Y for Yes, any other key for No) : Y   #是否重新加载授权表,输入Y
Success.

All done!
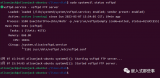
测试数据库状态:
systemctl status mysql.service
结果如下:(按Ctrl+C退出)
ubuntu@VM-0-10-ubuntu:~$ systemctl status mysql.service
● mysql.service - MySQL Community Server
   Loaded: loaded (/lib/systemd/system/mysql.service; enabled; vendor preset: en
   Active: active (running) since Sun 2019-02-24 13:56:36 CST; 1h 3min ago
 Main PID: 7203 (mysqld)
   CGroup: /system.slice/mysql.service
           └─7203 /usr/sbin/mysqld

Feb 24 13:56:35 VM-0-10-ubuntu systemd[1]: Stopped MySQL Community Server.
Feb 24 13:56:35 VM-0-10-ubuntu systemd[1]: Starting MySQL Community Server...
Feb 24 13:56:36 VM-0-10-ubuntu systemd[1]: Started MySQL Community Server.
lines 1-10/10 (END)
ubuntu@VM-0-10-ubuntu:~$
为了避免数据库存放的中文是乱码,执行以下命令设置Mysql的编码:
sudo vi /etc/my.cnf
复制粘贴以下内容:
[client]
default-character-set=utf8
[mysql]
default-character-set=utf8
[mysqld]
character-set-server=utf8
collation-server=utf8_general_ci
保存退出,执行以下命令重启 Mysql 生效:
sudo /usr/sbin/service mysql restart
建立ghost依赖的数据库
以 root 身份登录MySql然后创建一个名为 ghost 的数据库并验证创建结果,强调!!!进入数据库必须是root(超级用户,比如默认用户 ubuntu )。
首先执行命令:(他会提示你输入密码)
mysql -u root -p;
进入数据库界面:
执行创建数据库,名字随意,我使用的是ghost(注意要有分号)
create database ghost;
创建完显示一下当前数据库:
show databases;
结果(当然我这里有好几个数据库,列表中有你的数据库名称就行了)
mysql> show databases;
+--------------------+
| Database           |
+--------------------+
| information_schema |
| blog               |
| ghost              |
| mysql              |
| performance_schema |
| sys                |
+--------------------+
6 rows in set (0.00 sec)
由于很多教程都是没有让数据库给非root用户(即我们刚开始创建的用户)分配权限,在这里我们要补充这点。
数据库分配权限
执行:
grant all privileges on mysql_name.* to 'user_name'@'%' identified by 'xxxxxxxxx';
参数说明:
mysql_name:在前面创建数据库时候的名称,我的是ghost
user_nam:在刚开始创建的用户名称,我的是blog
xxxxxxxxx:是访问数据库的密码(口令),要记牢
结果:
mysql> grant all privileges on ghost.* to 'blog'@'%' identified by '************';
Query OK, 0 rows affected, 1 warning (0.00 sec)
退出数据库
mysql> exit
最好在这里重启一下数据库
sudo /usr/sbin/service mysql restart
Ghost 安装与配置
安装Ghost-CLI
Ghost v1.0.0 及以上版本已加入了Ghost-CLI,因此可以直接安装配置Ghost-CLI。
Ghost-CLI是一个命令行工具,可帮助您快速轻松地安装和配置Ghost。可以用npm或安装yarn。
sudo npm i -g ghost-cli
安装后,可以运行ghost help以查看可用命令列表。
安装Ghost
正确设置服务器并ghost-cli安装后,即可安装Ghost。
注意:在/root或home/目录中安装Ghost会导致设置损坏。始终使用具有正确配置权限的自定义目录。
首先创建一个文件夹,官方推荐在 /var/www/目录下安装ghost
sudo mkdir -p /var/www/ghost
配置文件夹权限:
sudo chown [user]:[user] /var/www/ghost
其中[user]替换为一开始创建的用户(我的是blog)
sudo chown blog:blog /var/www/ghost
配值文件夹权限:
sudo chmod 775 /var/www/ghost
切换路径:
cd /var/www/ghost
由于官方指定安装ghost不允许在root用户下,因此我们去到一开始创建的用户(非root用户)下安装,
su
结果可以看到ubuntu用户已经切换为blog用户。
ubuntu@VM-0-10-ubuntu:/var/www/ghost$ su blog
Password:
blog@VM-0-10-ubuntu:/var/www/ghost$ ls
如果你已经做到了这一点,说明已经完成90%了,是时候用一个命令安装Ghost了
ghost install
结果:
blog@VM-0-10-ubuntu:/var/www/ghost$ ghost install
✔ Downloading and installing Ghost v2.15.0
✔ Finishing install process
? Enter your blog URL: http://jiejietop.cn                #输入博客的路径
? Enter your MySQL hostname: localhost                    #使用本地数据库
? Enter your MySQL username: blog                        #用户名字
? Enter your MySQL password: [hidden]                    #密码(为了方便用户名与数据库最好设置为一样的密码)
? Enter your Ghost database name: ghost                    #数据库名字
✔ Configuring Ghost
✔ Setting up instance
+ sudo chown -R ghost:ghost /var/www/ghost/content
? Sudo Password [hidden]                                    #输入密码
✔ Setting up "ghost" system user
ℹ Setting up "ghost" mysql user [skipped]
+ sudo ln -sf /etc/nginx/sites-available/jiejietop.cn.conf /etc/nginx/sites-enabled/jiejietop.cn.conf
+ sudo nginx -s reload
☲ Setting up Nginx
✔ Setting up Nginx
? Do you wish to set up SSL? Yes                    #输入 Y
? Enter your email (For SSL Certificate) 1161959934@qq.com            #你自己的邮箱,可能是防止忘了密码吧
+ sudo /etc/letsencrypt/acme.sh --issue --home /etc/letsencrypt --domain jiejietop.cn --webroot /var/www/ghost/system/nginx-root --reloadcmd "nginx -s reload" --accountema
il 1161959934@qq.com
✔ Creating ssl config file at /var/www/ghost/system/files/jiejietop.cn-ssl.conf
+ sudo ln -sf /var/www/ghost/system/files/jiejietop.cn-ssl.conf /etc/nginx/sites-available/jiejietop.cn-ssl.conf
+ sudo ln -sf /etc/nginx/sites-available/jiejietop.cn-ssl.conf /etc/nginx/sites-enabled/jiejietop.cn-ssl.conf
+ sudo nginx -s reload
✔ Setting up SSL
? Do you wish to set up Systemd? Yes                #输入 Y
✔ Creating systemd service file at /var/www/ghost/system/files/ghost_jiejietop-cn.service
+ sudo ln -sf /var/www/ghost/system/files/ghost_jiejietop-cn.service /lib/systemd/system/ghost_jiejietop-cn.service
+ sudo systemctl daemon-reload
✔ Setting up Systemd
? Do you want to start Ghost? Yes                    #输入 Y
+ sudo systemctl is-active ghost_jiejietop-cn
✔ Ensuring user is not logged in as ghost user
✔ Checking if logged in user is directory owner
✔ Checking current folder permissions
+ sudo systemctl is-active ghost_jiejietop-cn
✔ Validating config
✔ Checking folder permissions
✔ Checking file permissions
✔ Checking content folder ownership
✔ Checking memory availability
+ sudo systemctl start ghost_jiejietop-cn
✔ Starting Ghost
+ sudo systemctl is-enabled ghost_jiejietop-cn
+ sudo systemctl enable ghost_jiejietop-cn --quiet
✔ Enabling Ghost instance startup on server boot

Ghost uses direct mail by default. To set up an alternative email method read our docs at https://docs.ghost.org/concepts/config/#mail

------------------------------------------------------------------------------

Ghost was installed successfully! To complete setup of your publication, visit:

    http://jiejietop.cn/ghost/                    #表示安装正常,通过这个就能配置你的博客
虽然啥都没有,但是搭起来还是很爽的,我是踩了很多坑的,什么数据库分配权限啥的,还有配置ghost文件夹权限什么的,还有root用户,乱七八糟的东西,也是一步步查资料解决的

博客配置界面
搭建ghost参考:
如何在Ubuntu上安装Ghost
手工搭建Ghost博客(Ubuntu 16.04)
Ghost 安裝在 Ubuntu 環境底下
Ghost博客安装、使用、更新一条龙教程-中文版
解决问题参考:
MySQL学习笔记(一)Ubuntu16.04中MySQL安装配置(5.6优化、错误日志、DNS解决)
MySQL列出所有数据库
【MySQL】创建普通用户,分配权限,取消权限
同时还要感谢 谷歌翻译 ,它解决了我很多问题!!
-
服务器
+关注
关注
14文章
10345浏览量
91739 -
ip地址
+关注
关注
0文章
309浏览量
19012 -
SSL
+关注
关注
0文章
132浏览量
26816
发布评论请先 登录
如何在Ubuntu 22.04上搭建ftp服务器
Ubuntu环境搭建
【推荐体验】腾讯云自然语言处理
【迪文COF结构智能屏试用体验】结合腾讯云搭建在线聊天室--文本对话
Linux Ubuntu教程之Linux Ubuntu14.04如何进行开发环境的搭建
Ghost frame:使用Adafruit PyPortal显示Ghost

Ubuntu替代Windows?使用Station主机打造桌面操作系统!

推荐续费便宜的云主机(云虚拟主机免费试用)
自己电脑搭建云主机,自己电脑如何搭建云主机?


评论