 如何用Arduino Uno和游戏杆制作PC鼠标

第1步:材料
这个项目不需要很多材料:
1 Arduino Uno
5对公对母线
5对母对母线(连接到操纵杆模块并添加操纵杆的延伸长度。
1个操纵杆(我使用了SainSmart PS2游戏杆模块,并且会推荐它)
步骤2:设置Arduino Uno
Uno的设置可以在材料图片,以及这里的说明:
将五根母头线连接到操纵杆模块的引脚上。现在,将五根公头线连接到母线的末端并将它们连接到这样的Arduino:
1.操纵杆上的地面到Arduino Gnd
2.操纵杆上的+ 5V到Arduino 5V
3。操纵杆上的UPx到Arduino上的A0
4.操纵杆上的UPy到A1
5. SW引脚(数字式点击开关)到数字引脚7上Arduino
第3步:上传Joysti ck程序到Arduino
将Uno连接到你的PC并上传这里看到的操纵杆代码(请注意我最初没有创建这个代码):
int pushPin = 7; // potentiometer wiper (middle terminal) connected to analog pin 3
int xPin = 0;
int yPin = 1;
int xMove = 0;
int yMove = 0;
// outside leads to ground and +5V
int valPush = HIGH; // variable to store the value read
int valX = 0;
int valY = 0;
void setup()
{
pinMode(pushPin,INPUT);
Serial.begin(9600); // setup serial
digitalWrite(pushPin,HIGH);
}
void loop()
{
valX = analogRead(xPin); // read the x input pin
valY = analogRead(yPin); // read the y input pin
valPush = digitalRead(pushPin); // read the push button input pin
Serial.println(String(valX) + “ ” + String(valY) + “ ” + valPush); //output to Java program
}
步骤4:设置Java程序
现在已经设置了Uno,我们需要将它连接到我的Java程序,该程序能够获取Uno的串行输出值特殊库RxTx并使用库集合JNA移动鼠标。这两个库都包含在此步骤结束时供下载。请注意,我从示例RxTx中更改的代码的唯一部分是添加了以我为操纵杆校准的方式移动鼠标的方法。它有点粗糙,但它符合我的目的。
我使用BlueJ作为我的IDE,但无论你使用哪种Java IDE,都要为这个项目安装RxTx和JNA库,我将其命名为“Mouse”。完成后,创建一个项目并包含以下代码:
import java.awt.*;
import java.awt.event.InputEvent;
import java.io.BufferedReader;
import java.io.InputStreamReader;
import java.io.OutputStream;
import gnu.io.CommPortIdentifier;
import gnu.io.SerialPort;
import gnu.io.SerialPortEvent;
import gnu.io.SerialPortEventListener;
import java.util.Enumeration;
public class Mouse implements SerialPortEventListener {
SerialPort serialPort;
/** The port we‘re normally going to use. */
private static final String PORT_NAMES[] = {
“/dev/tty.usbserial-A9007UX1”, // Mac OS X
“/dev/ttyACM0”, // Raspberry Pi
“/dev/ttyUSB0”, // Linux
“COM4”, // Windows**********(I changed)
};
/**
* A BufferedReader which will be fed by a InputStreamReader
* converting the bytes into characters
* making the displayed results codepage independent
*/
private BufferedReader input;
/** The output stream to the port */
private OutputStream output;
/** Milliseconds to block while waiting for port open */
private static final int TIME_OUT = 2000;
/** Default bits per second for COM port. */
private static final int DATA_RATE = 9600;
int buttonOld = 1;
public void initialize() {
// the next line is for Raspberry Pi and
// gets us into the while loop and was suggested here was suggested http://www.raspberrypi.org/phpBB3/viewtopic.php?f.。.
//System.setProperty(“gnu.io.rxtx.SerialPorts”, “/dev/ttyACM0”); I got rid of this
CommPortIdentifier portId = null;
Enumeration portEnum = CommPortIdentifier.getPortIdentifiers();
//First, Find an instance of serial port as set in PORT_NAMES.
while (portEnum.hasMoreElements()) {
CommPortIdentifier currPortId = (CommPortIdentifier) portEnum.nextElement();
for (String portName : PORT_NAMES) {
if (currPortId.getName().equals(portName)) {
portId = currPortId;
break;
}
}
}
if (portId == null) {
System.out.println(“Could not find COM port.”);
return;
}
try {
// open serial port, and use class name for the appName.
serialPort = (SerialPort) portId.open(this.getClass().getName(),
TIME_OUT);
// set port parameters
serialPort.setSerialPortParams(DATA_RATE,
SerialPort.DATABITS_8,
SerialPort.STOPBITS_1,
SerialPort.PARITY_NONE);
// open the streams
input = new BufferedReader(new InputStreamReader(serialPort.getInputStream()));
output = serialPort.getOutputStream();
// add event listeners
serialPort.addEventListener(this);
serialPort.notifyOnDataAvailable(true);
} catch (Exception e) {
System.err.println(e.toString());
}
}
/**
* This should be called when you stop using the port.
* This will prevent port locking on platforms like Linux.
*/
public synchronized void close() {
if (serialPort != null) {
serialPort.removeEventListener();
serialPort.close();
}
}
/**
* Handle an event on the serial port. Read the data and print it. In this case, it calls the mouseMove method.
*/
public synchronized void serialEvent(SerialPortEvent oEvent) {
if (oEvent.getEventType() == SerialPortEvent.DATA_AVAILABLE) {
try {
String inputLine=input.readLine();
mouseMove(inputLine);
System.out.println(“********************”);
//System.out.println(inputLine);
} catch (Exception e) {
System.err.println(e.toString());
}
}
// Ignore all the other eventTypes, but you should consider the other ones.
}
public static void main(String[] args) throws Exception {
Mouse main = new Mouse();
main.initialize();
Thread t=new Thread() {
public void run() {
//the following line will keep this app alive for 1000 seconds,
//waiting for events to occur and responding to them (printing incoming messages to console)。
try {Thread.sleep(1000000);} catch (InterruptedException ie) {}
}
};
t.start();
System.out.println(“Started”);
}
// My method mouseMove, takes in a string containing the three data points and operates the mouse in turn
public void mouseMove(String data) throws AWTException
{
int index1 = data.indexOf(“ ”, 0);
int index2 = data.indexOf(“ ”, index1+1);
int yCord = Integer.valueOf(data.substring(0, index1));
int xCord = Integer.valueOf(data.substring(index1 + 1 , index2));
int button = Integer.valueOf(data.substring(index2 + 1));
Robot robot = new Robot();
int mouseY = MouseInfo.getPointerInfo().getLocation().y;
int mouseX = MouseInfo.getPointerInfo().getLocation().x;
if (button == 0)
{
if (buttonOld == 1)
{
robot.mousePress(InputEvent.BUTTON1_DOWN_MASK);
robot.delay(10);
}
}
else
{
if (buttonOld == 0)
robot.mouseRelease(InputEvent.BUTTON1_DOWN_MASK);
}
if (Math.abs(xCord - 500) 》 5)
mouseX = mouseX + (int)((500 - xCord) * 0.02);
if (Math.abs(yCord - 500) 》 5)
mouseY = mouseY - (int)((500 - yCord) * 0.02);
robot.mouseMove(mouseX, mouseY);
buttonOld = button;
System.out.println(xCord + “:” + yCord + “:” + button + “:” + mouseX + “:” + mouseY);
return;
}
}
步骤5:疑难解答
使Java程序正常工作可能是难。如果您遇到困难我会得到一些提示:
- 将PORT_NAMES []中的“Com4”字符串更改为您的arduino Uno所连接的端口。 (我从Java程序中的默认Com3更改为Com4)
- 指出与Raspberry Pi相关的行(如果你复制了我的程序,我已经这样做了)
- 单击“重建软件包”或等效的IDE
-在IDE中重置Java虚拟机。甚至可能在第一次使用鼠标之前重置程序。
第6步:结论
我希望这个项目适用于您,并且您可以改善它。最终,最简单的解决方案是使用Arduino Leonard或Mini作为鼠标输入的系统设备,但我发现使Uno功能以非设计的方式 - 鼠标 - 通过使用我的方式很有趣有限的Java知识。
我独自学习了很多方法,并希望将来增加一些功能:
-右键单击按钮。操纵杆有一个我保留左键的按钮。
- 这个项目的实际设备驱动程序。我不确定这是否可行,也许有人可以就此问题给我启发!
责任编辑:wv
-
鼠标
+关注
关注
6文章
599浏览量
41904 -
Arduino
+关注
关注
190文章
6527浏览量
197471
发布评论请先 登录
高通中国与网易游戏达成深度生态合作
基于PixArt PMW3360传感器的游戏鼠标开源项目介绍

UNO Q:开启Arduino的全新未来
贸泽电子开售全新Arduino UNO Q单板计算机
如何用FPGA实现4K视频的输入输出与处理
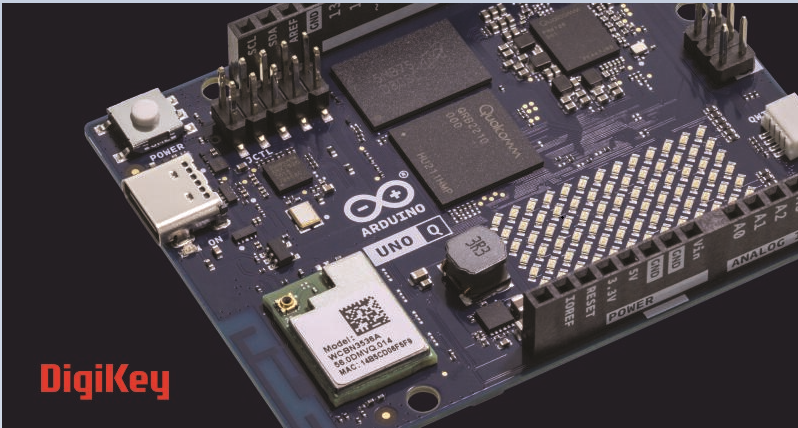
Arduino UNO Q 登陆 DigiKey,现已开放预订
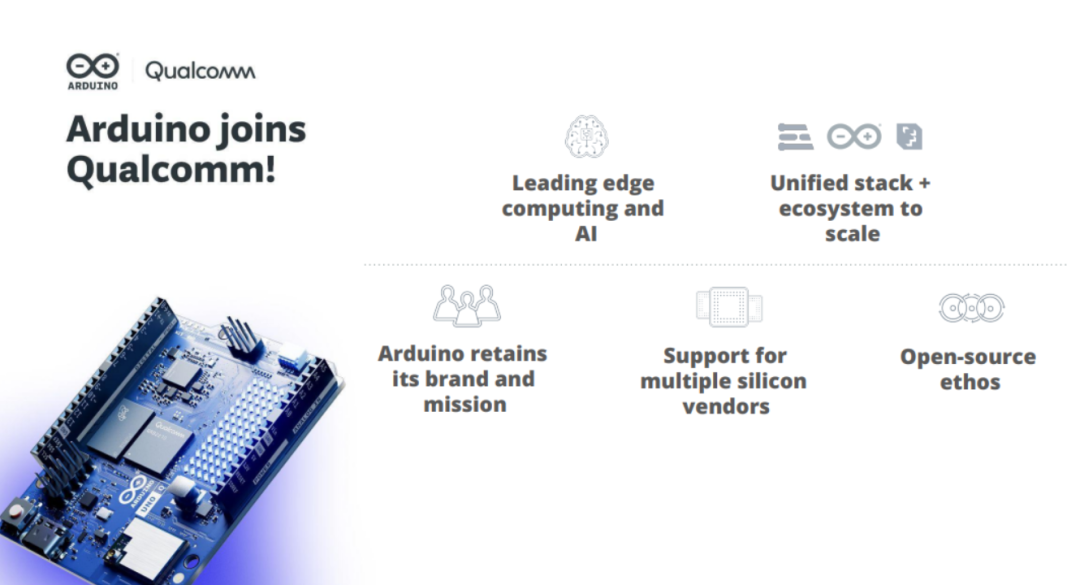
高通宣布收购 Arduino,加速普及前沿边缘计算与 AI 技术
如何在 NuMaker-IoT-M467 板上使用 Arduino IDE 控制 Wi-Fi 模块?
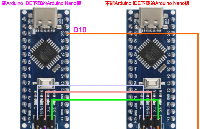
如何用Arduino Nano/UNO R3开发板给另一个Arduino IDE不能下载的Arduino Nano/UNO R3开发板重新烧录引导程序bootlaoder

颠覆游戏体验!全球首款UWB无线鼠标面世


评论