 零知开源——玩转WS2812B灯条模块

WS2812RGB灯带
通过零知标准开发板平台上驱动WS2812RGB灯珠,包括WS2812B的供电电压、接线和代码实现。通过创建延时函数和设置级联数据,实现对RGB灯珠的控制,展示了从关闭到开启不同颜色以及跑马灯、呼吸灯和彩虹灯等效果。
一、工具原料
电脑、Windows系统
零知开发板
Micro-usb线
WS2812RGB灯
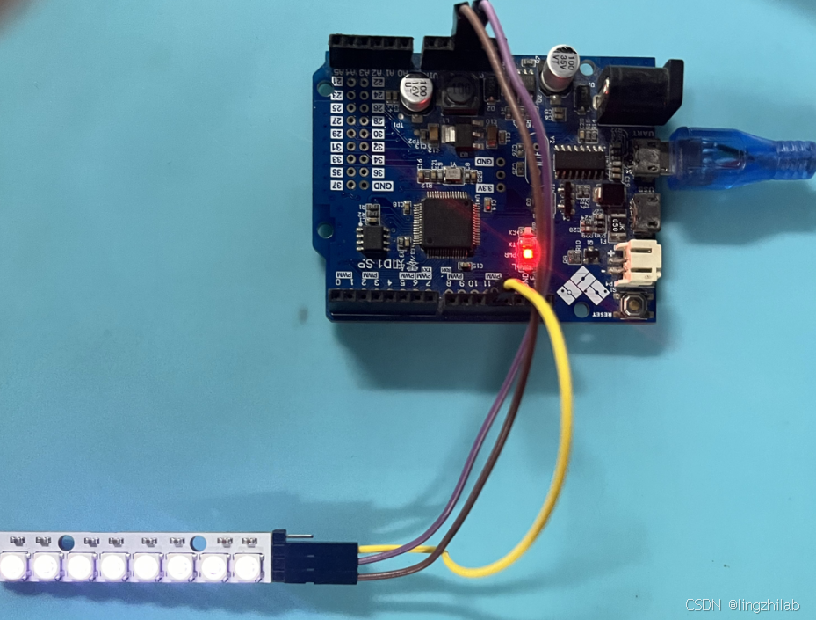
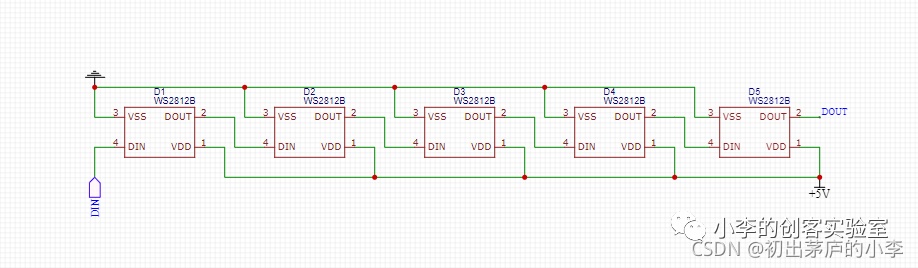
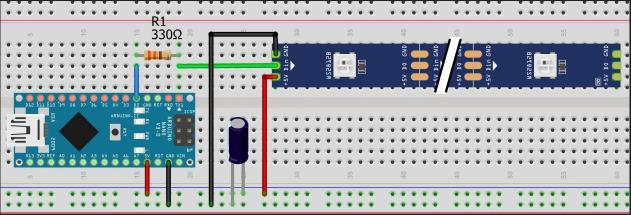
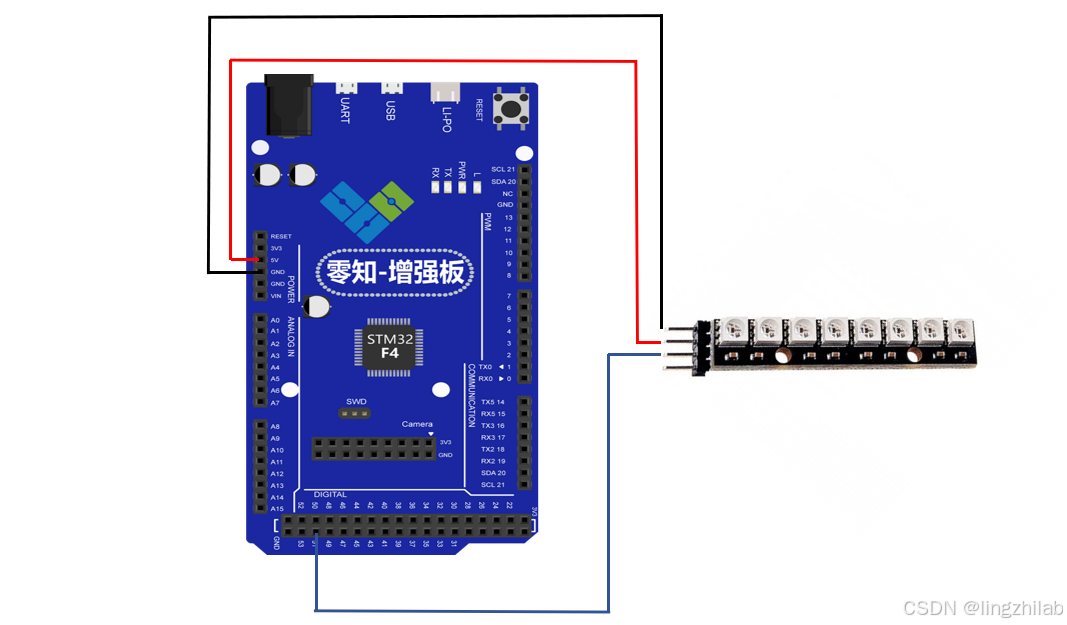
二、硬件连接
| 零知标准开发板 | WS2812B |
| 5V | VCC |
| GND | GND |
| 11 | Din |
硬件连接示意图


实际连接

三、方法步骤
1、打开零知实验室软件开发工具,然后新建项目,输入代码
2、将库文件解压放到库文件存放的目录下
3、选择端口进行编译,然后上传到开发板中。
引用库文件WS2812B.h
#include < WS2812B.h > // 引入用于控制WS2812B LED灯带的库 #define NUM_LEDS 9 // 定义灯带上的LED数量 #define DELAYVAL 500 // 定义延迟时间(单位:毫秒),用于在不同效果之间的暂停时间 /* * 注意:该库使用SPI1进行数据传输 * 将WS2812B的数据信号输入引脚连接到开发板的MOSI引脚。 */ WS2812B strip = WS2812B(NUM_LEDS); // 创建一个WS2812B对象,用于控制灯带
设置SPI、点亮不同效果的RGB灯
 // 请注意。库中并不真正支持Gamma,它只是在本例中使用的一些函数需要Gamma时才包含
uint8_t LEDGamma[] = {
    0,  0,  0,  0,  0,  0,  0,  0,  0,  0,  0,  0,  0,  0,  0,  0,
    0,  0,  0,  0,  0,  0,  0,  0,  0,  0,  0,  0,  1,  1,  1,  1,
    1,  1,  1,  1,  1,  1,  1,  1,  1,  2,  2,  2,  2,  2,  2,  2,
    2,  3,  3,  3,  3,  3,  3,  3,  4,  4,  4,  4,  4,  5,  5,  5,
    5,  6,  6,  6,  6,  7,  7,  7,  7,  8,  8,  8,  9,  9,  9, 10,
   10, 10, 11, 11, 11, 12, 12, 13, 13, 13, 14, 14, 15, 15, 16, 16,
   17, 17, 18, 18, 19, 19, 20, 20, 21, 21, 22, 22, 23, 24, 24, 25,
   25, 26, 27, 27, 28, 29, 29, 30, 31, 32, 32, 33, 34, 35, 35, 36,
   37, 38, 39, 39, 40, 41, 42, 43, 44, 45, 46, 47, 48, 49, 50, 50,
   51, 52, 54, 55, 56, 57, 58, 59, 60, 61, 62, 63, 64, 66, 67, 68,
   69, 70, 72, 73, 74, 75, 77, 78, 79, 81, 82, 83, 85, 86, 87, 89,
   90, 92, 93, 95, 96, 98, 99,101,102,104,105,107,109,110,112,114,
  115,117,119,120,122,124,126,127,129,131,133,135,137,138,140,142,
  144,146,148,150,152,154,156,158,160,162,164,167,169,171,173,175,
  177,180,182,184,186,189,191,193,196,198,200,203,205,208,210,213,
  215,218,220,223,225,228,231,233,236,239,241,244,247,249,252,255 };

void setup()
{
  strip.begin();// 设置SPI
  strip.show();// 清除strip,因为默认情况下条带数据设置为所有LED关闭。
 // strip.setBrightness(8);
}

void loop() {
    // 实现不同的灯光效果
    colorWipe(strip.Color(0, 255, 0), 20);  // 使用绿色逐个点亮灯带
    colorWipe(strip.Color(255, 0, 0), 20); // 使用红色逐个点亮灯带
    colorWipe(strip.Color(0, 0, 255), 20); // 使用蓝色逐个点亮灯带
    rainbow(10);                          // 显示彩虹渐变效果
    rainbowCycle(10);  // 显示循环的彩虹效果

    theaterChase(strip.Color(255, 0, 0), 20);
    theaterChase(strip.Color(0, 255, 0), 20);
    theaterChase(strip.Color(0, 0, 255), 20);
    theaterChaseRainbow(10);

    whiteOverRainbow(20, 75, 5);  // 白光覆盖在彩虹效果上
    fullWhite();                  // 将灯带上的所有LED点亮为白光
    delay(250);                   // 暂停250毫秒
    rainbowFade2White(3, 3, 1);   // 彩虹效果逐渐过渡到白光
    theaterChaseWhiteAndOff(DELAYVAL); // 实现白光追逐与关闭的效果
    delay(250);

    flowingLight(100); // 实现流动光效果,速度为100ms

    breathLight(255, 50); // PWM呼吸灯效果

}
将呼吸灯、彩虹灯和流水灯等功能的库函数封装
void breathLight(uint8_t maxBrightness, uint8_t speed) {
    // 实现PWM呼吸灯效果
    for (uint8_t brightness = 0; brightness <= maxBrightness; brightness++) {
        for (uint16_t i = 0; i < strip.numPixels(); i++) {
            // 设置每个LED的颜色,使用伽马校正后的亮度值
            strip.setPixelColor(i, strip.Color(LEDGamma[brightness], LEDGamma[brightness], LEDGamma[brightness]));
        }
        strip.show();
        delay(speed); // 延迟以实现亮度变化
    }
    for (uint8_t brightness = maxBrightness; brightness > 0; brightness--) {
        for (uint16_t i = 0; i < strip.numPixels(); i++) {
            strip.setPixelColor(i, strip.Color(LEDGamma[brightness], LEDGamma[brightness], LEDGamma[brightness]));
        }
        strip.show();
        delay(speed);
    }
}

void flowingLight(uint8_t speed) {
  // 实现流动光效果
  uint16_t index = 0;        // 记录当前流动的索引
  uint8_t currentColor = 0;  // 记录当前的颜色(红、绿、蓝)

  while (true) {
    for (uint16_t i = 0; i < NUM_LEDS; i++) {
      // 根据当前索引计算目标索引
      uint16_t targetIndex = (i + index) % NUM_LEDS;

      switch (currentColor) {
        case 0:
          strip.setPixelColor(targetIndex, strip.Color(255, 0, 0)); //  设置为红色
          break;
        case 1:
          strip.setPixelColor(targetIndex, strip.Color(0, 255, 0)); //  设置为绿色
          break;
        case 2:
          strip.setPixelColor(targetIndex, strip.Color(0, 0, 255)); //  设置为蓝色
          break;
      }

      strip.setPixelColor(i, strip.Color(0, 0, 0)); // 将之前的LED关闭

      strip.show();
      delay(speed);// 设置流动光的速度
    }

   // 切换到下一个颜色
    currentColor = (currentColor + 1) % 3;

     // 增加索引,实现流动效果
    index++;
    if (index >= NUM_LEDS) {
      index = 0; //重置索引
    }
  }
}

void theaterChaseWhiteAndOff(uint8_t wait) {
  for (int j = 0; j < 10; j++) {  // 10 cycles of chasing
    for (int q = 0; q < 3; q++) {
      for (uint16_t i = 0; i < strip.numPixels(); i = i + 3) {
        strip.setPixelColor(i + q, (j % 2 == 0 ? strip.Color(128, 0, 128) : 0));
      }
      strip.show();
      delay(wait);
      for (uint16_t i = 0; i < strip.numPixels(); i = i + 3) {
        strip.setPixelColor(i + q, 0);  // Turn every third pixel off
      }
    }
  }
}

// Fill the dots one after the other with a color
void colorWipe(uint32_t c, uint8_t wait)
{
  for(uint16_t i=0; i< strip.numPixels(); i++)
  {
      strip.setPixelColor(i, c);
      strip.show();
      delay(wait);
  }
}

// rainbow 函数: 实现彩虹效果的灯带动画
// 参数:
//   wait: 每次更新彩虹效果的等待时间(毫秒)
void rainbow(uint8_t wait) {
    uint16_t i, j;

    // 外层循环控制彩虹的移动效果
    for(j = 0; j < 256; j++) {
        // 内层循环逐个像素更新颜色
        for(i = 0; i < strip.numPixels(); i++) {
            // 通过 Wheel 函数生成彩虹颜色
            strip.setPixelColor(i, Wheel((i + j) & 255));
        }
        strip.show(); // 更新灯带显示
        delay(wait);  // 等待一段时间
    }
}

// rainbowCycle 函数: 实现彩虹效果循环播放,每个像素显示的颜色均匀分布
// 参数:
//   wait: 每次更新动画的等待时间(毫秒)
void rainbowCycle(uint8_t wait) {
    uint16_t i, j;

    // 外层循环控制彩虹的循环次数,5次完整循环
    for(j = 0; j < 256 * 5; j++) {
        // 内层循环更新每个像素的颜色
        for(i = 0; i < strip.numPixels(); i++) {
            // 使用 Wheel 函数计算彩虹颜色,保证均匀分布
            strip.setPixelColor(i, Wheel(((i * 256 / strip.numPixels()) + j) & 255));
        }
        strip.show(); // 更新灯带显示
        delay(wait);  // 等待一段时间
    }
}

// Wheel 函数: 根据输入值生成渐变的 RGB 颜色
// 参数:
//   WheelPos: 输入值(范围 0-255),表示颜色的渐变位置
// 返回值:
//   对应的 RGB 颜色值(以 32 位整数形式表示)
uint32_t Wheel(byte WheelPos) {
    if(WheelPos < 85) {
        // 红色逐渐变为绿色
        return strip.Color(WheelPos * 3, 255 - WheelPos * 3, 0);
    } else if(WheelPos < 170) {
        // 绿色逐渐变为蓝色
        WheelPos -= 85;
        return strip.Color(255 - WheelPos * 3, 0, WheelPos * 3);
    } else {
        // 蓝色逐渐变为红色
        WheelPos -= 170;
        return strip.Color(0, WheelPos * 3, 255 - WheelPos * 3);
    }
}

// theaterChase 函数: 实现戏剧风格的爬行灯效果,每三个像素作为一个循环
// 参数:
//   c: 颜色值(RGB 格式)
//   wait: 每次更新动画的等待时间(毫秒)
void theaterChase(uint32_t c, uint8_t wait) {
    // 外层循环控制效果的整体循环次数
    for(int j = 0; j < 10; j++) {
        // 中间循环负责调整动画的偏移量
        for(int q = 0; q < 3; q++) {
            // 内层循环设置每第三个像素的颜色
            for(uint16_t i = 0; i < strip.numPixels(); i += 3) {
                strip.setPixelColor(i + q, c); // 设置当前像素为指定颜色
            }
            strip.show(); // 更新灯带显示
            delay(wait);  // 等待一段时间

            // 关闭每第三个像素
            for(uint16_t i = 0; i < strip.numPixels(); i += 3) {
                strip.setPixelColor(i + q, 0);
            }
        }
    }
}

// theaterChaseRainbow 函数: 实现戏剧风格的彩虹爬行灯效果
// 参数:
//   wait: 每次更新动画的等待时间(毫秒)
void theaterChaseRainbow(uint8_t wait) {
    // 外层循环控制颜色的变化
    for(int j = 0; j < 256; j++) {
        // 中间循环控制动画的偏移
        for(int q = 0; q < 3; q++) {
            // 内层循环设置每第三个像素的彩虹颜色
            for(uint16_t i = 0; i < strip.numPixels(); i += 3) {
                strip.setPixelColor(i + q, Wheel((i + j) % 255));
            }
            strip.show(); // 更新灯带显示
            delay(wait);  // 等待一段时间

            // 关闭每第三个像素
            for(uint16_t i = 0; i < strip.numPixels(); i += 3) {
                strip.setPixelColor(i + q, 0);
            }
        }
    }
}

void pulseWhite(uint8_t wait) {
  // 功能:实现白色脉冲效果
  // 参数:wait - 每次更新动画的等待时间(毫秒)

  for(int j = 0; j < 256 ; j++){ // 亮度从0渐变至255
    for(uint16_t i=0; i< strip.numPixels(); i++) {
      // 设置每个LED的颜色,亮度根据j的值变化
      strip.setPixelColor(i, strip.Color(LEDGamma[j],LEDGamma[j],LEDGamma[j] ) );
    }
    delay(wait);
    strip.show();
  }

  for(int j = 255; j >= 0 ; j--){ // 亮度从255渐变回0
    for(uint16_t i=0; i< strip.numPixels(); i++) {
      strip.setPixelColor(i, strip.Color(LEDGamma[j],LEDGamma[j],LEDGamma[j] ) );
    }
    delay(wait);
    strip.show();
  }
}

void rainbowFade2White(uint8_t wait, int rainbowLoops, int whiteLoops) {
  // 功能:先显示彩虹效果,然后逐渐过渡到白色
  // 参数:
  //   wait - 每次更新动画的等待时间(毫秒)
  //   rainbowLoops - 彩虹循环次数
  //   whiteLoops - 白色循环次数

  float fadeMax = 100.0;
  int fadeVal = 0;
  uint32_t wheelVal;
  int redVal, greenVal, blueVal;

  for(int k = 0 ; k < rainbowLoops ; k ++){ // 循环执行彩虹效果
    for(int j=0; j< 256; j++) {
      for(int i=0; i< strip.numPixels(); i++) {
        wheelVal = Wheel(((i * 256 / strip.numPixels()) + j) & 255);
        // 逐步调整RGB值以实现渐变效果
        redVal = red(wheelVal) * float(fadeVal/fadeMax);
        greenVal = green(wheelVal) * float(fadeVal/fadeMax);
        blueVal = blue(wheelVal) * float(fadeVal/fadeMax);
        strip.setPixelColor( i, strip.Color( redVal, greenVal, blueVal ) );
      }
      if(k == 0 && fadeVal < fadeMax-1) {
        // 第一次循环,亮度逐渐增加
        fadeVal++;
      } else if(k == rainbowLoops - 1 && j > 255 - fadeMax){
        // 最后一次循环,亮度逐渐减少
        fadeVal--;
      }
      strip.show();
      delay(wait);
    }
  }

  delay(500);

  for(int k = 0 ; k < whiteLoops ; k ++){ // 循环执行白色渐变效果
    for(int j = 0; j < 256 ; j++){
      for(uint16_t i=0; i < strip.numPixels(); i++) {
        strip.setPixelColor(i, strip.Color(LEDGamma[j],LEDGamma[j],LEDGamma[j] ) );
      }
      strip.show();
      delay(wait);
    }
    delay(2000);
    for(int j = 255; j >= 0 ; j--){
      for(uint16_t i=0; i < strip.numPixels(); i++) {
        strip.setPixelColor(i, strip.Color(LEDGamma[j],LEDGamma[j],LEDGamma[j] ) );
      }
      strip.show();
      delay(wait);
    }
  }
}


void whiteOverRainbow(uint8_t wait, uint8_t whiteSpeed, uint8_t whiteLength ) {
  // 功能:在彩虹背景上叠加白色的流动效果
  // 参数:
  //   wait - 动画更新间隔
  //   whiteSpeed - 白色流动速度
  //   whiteLength - 白色光束长度
  if(whiteLength >= strip.numPixels()) whiteLength = strip.numPixels() - 1;

  int head = whiteLength - 1;
  int tail = 0;

  int loops = 3;
  int loopNum = 0;

  static unsigned long lastTime = 0;


  while(true){
    for(int j=0; j< 256; j++) {
      for(uint16_t i=0; i< strip.numPixels(); i++) {
        if((i >= tail && i <= head) || (tail > head && i >= tail) || (tail > head && i <= head) ){
          // 如果在白色光束范围内,设置为白色
          strip.setPixelColor(i, strip.Color(255,255,255 ) );
        }
        else{
           // 否则,根据j值设置彩虹颜色
          strip.setPixelColor(i, Wheel(((i * 256 / strip.numPixels()) + j) & 255));
        }

      }

      if(millis() - lastTime > whiteSpeed) {
        head++;
        tail++;
        if(head == strip.numPixels()){
          loopNum++;
        }
        lastTime = millis();
      }

      if(loopNum == loops) return;

      head%=strip.numPixels();
      tail%=strip.numPixels();
        strip.show();
        delay(wait);
    }
  }
}

void fullWhite() {
  // 功能:点亮所有LED为白色
  for(uint16_t i=0; i< strip.numPixels(); i++) {
    strip.setPixelColor(i, strip.Color(255, 255, 255 ) );
  }
  strip.show();
}

// red 函数: 提取颜色值中的红色分量
// 参数:
//   c: RGB 颜色值(32 位整数)
// 返回值:
//   红色分量(0-255)
uint8_t red(uint32_t c) {
    return (c >> 16);
}

// green 函数: 提取颜色值中的绿色分量
// 参数:
//   c: RGB 颜色值(32 位整数)
// 返回值:
//   绿色分量(0-255)
uint8_t green(uint32_t c) {
    return (c >> 8);
}

// blue 函数: 提取颜色值中的蓝色分量
// 参数:
//   c: RGB 颜色值(32 位整数)
// 返回值:
//   蓝色分量(0-255)
uint8_t blue(uint32_t c) {
    return (c);
}
四、成果展示
将上述代码验证后上传到零知板,就可以看到测试结果,实现流水灯、彩虹灯和呼吸灯等效果
https://live.csdn.net/v/435823?spm=1001.2014.3001.5501
审核编辑 黄宇
声明:本文内容及配图由入驻作者撰写或者入驻合作网站授权转载。文章观点仅代表作者本人,不代表电子发烧友网立场。文章及其配图仅供工程师学习之用,如有内容侵权或者其他违规问题,请联系本站处理。
举报投诉
-
开源
+关注
关注
3文章
4440浏览量
46654 -
开发板
+关注
关注
26文章
6532浏览量
121439
发布评论请先 登录
相关推荐
热点推荐
什么是WS2812B?WS2812B灯带是怎么连接的呢?
WS2812B是一款全彩LED控制IC,单总线控制,何为单总线我的理解就是数据线在一根线上传输的控制方式就是单总线。
零知开源——使用 GPIO 模拟时序驱动 WS2812B LED 灯带
、Windows系统
零知增强版开发板
Micro-usb线
WS2812RGB灯 WS2812B 是一款内含控制器芯片的全彩 LED
发表于 02-20 14:31
WS2812B RGB全彩LED灯珠
WS2812B RGB全彩LED灯珠,只需通过一根信号线控制多个灯显示,本教程使用X-CTR100控制器驱动WS2812灯环。原理
发表于 08-06 08:15
用ws2812b led灯条做远程区域面板控制器的教程
描述WS2812B 远程区域面板控制器我用ws2812b led灯条做了一个面板,你可以把覆盆子前面的动画放到面板上使用此板,您可以控制面板并将其放置在任何有 wifi 的地方PCB代
发表于 07-29 07:16
使用WS2812b Led灯条的diy光剑光剑控制器
描述使用 WS2812b Led 灯条的 diy 光剑光剑控制器,包括用于声音的微型 SD 插槽、用于运动跟踪的 6 轴传感器和用于光剑声音的扬声器。通过板载 USB 端口和 Arduino IDE 进行编程。
发表于 08-25 07:40
使用WS2812B实现一个带有麦克风的RGB LED灯条控制电路
描述RGB LED游戏灯在这个项目中,我们将使用可编程LED条WS2812B Yeladuino nano实现一个带有麦克风的RGB LED灯条
发表于 08-29 06:45
Arduino WS2812B LED灯带设计方案
Arduino WS2812B LED灯带可单独控制每个LED的亮度和颜色,提供了一种简单而酷炫的LED效果体验。
发表于 04-24 08:36
•1.6w次阅读
迷你乒乓球含Arduino Nano WS2812B LED灯条
电子发烧友网站提供《迷你乒乓球含Arduino Nano WS2812B LED灯条.zip》资料免费下载
发表于 11-02 11:00
•1次下载

驱动WS2812B灯条时显示其他颜色咋办?
前段时间发现在驱动WS2812B灯条的时候会有突然显示其他颜色的情况,后来排查发现是时序被其他任务打断了,在控制时序的时候需要做原子性访问来保证时序的正确性。
零知开源——使用 GPIO 模拟时序驱动 WS2812B LED 灯带
利用零知增强版的GPIO 模拟时序 在本教程中,我们将探讨如何使用 零知增强版的 GPIO 接口来模拟 WS2812B LE


评论