 OLED 显示雷达数据

【萤火工场CEM5826-M11测评】OLED显示雷达数据
本文结合之前关于串口打印雷达监测数据的研究,进一步扩展至 OLED 屏幕显示。
该项目整体分为两部分:一、框架显示;二、数据采集与填充显示。
为了减小 MCU 负担,采用 局部刷新 的方案。
1. 显示框架
所需库函数 Wire.h 、Adafruit_GFX.h 、Adafruit_SSD1306.h .
代码
#include < Wire.h >
#include < Adafruit_GFX.h >
#include < Adafruit_SSD1306.h >
#include "logo_128x64.h"
#include "logo_95x32.h"
#define OLED_RESET 4
Adafruit_SSD1306 display(128, 64, &Wire, OLED_RESET);
void setup()
{
Serial.begin(115200);
display.begin(SSD1306_SWITCHCAPVCC, 0x3C); // initialize with the I2C addr 0x3C (for the 128x64)
display.clearDisplay(); // 清屏
display.drawBitmap(0, 0, logo, 128, 64, 1); //画出字符对应点阵数据
display.display();
delay(1000);
display.clearDisplay();
/*-------------------- Display picture and text ---------------------------*/
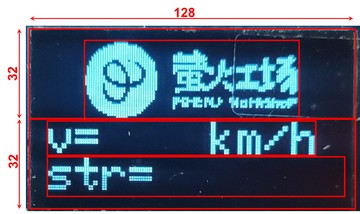
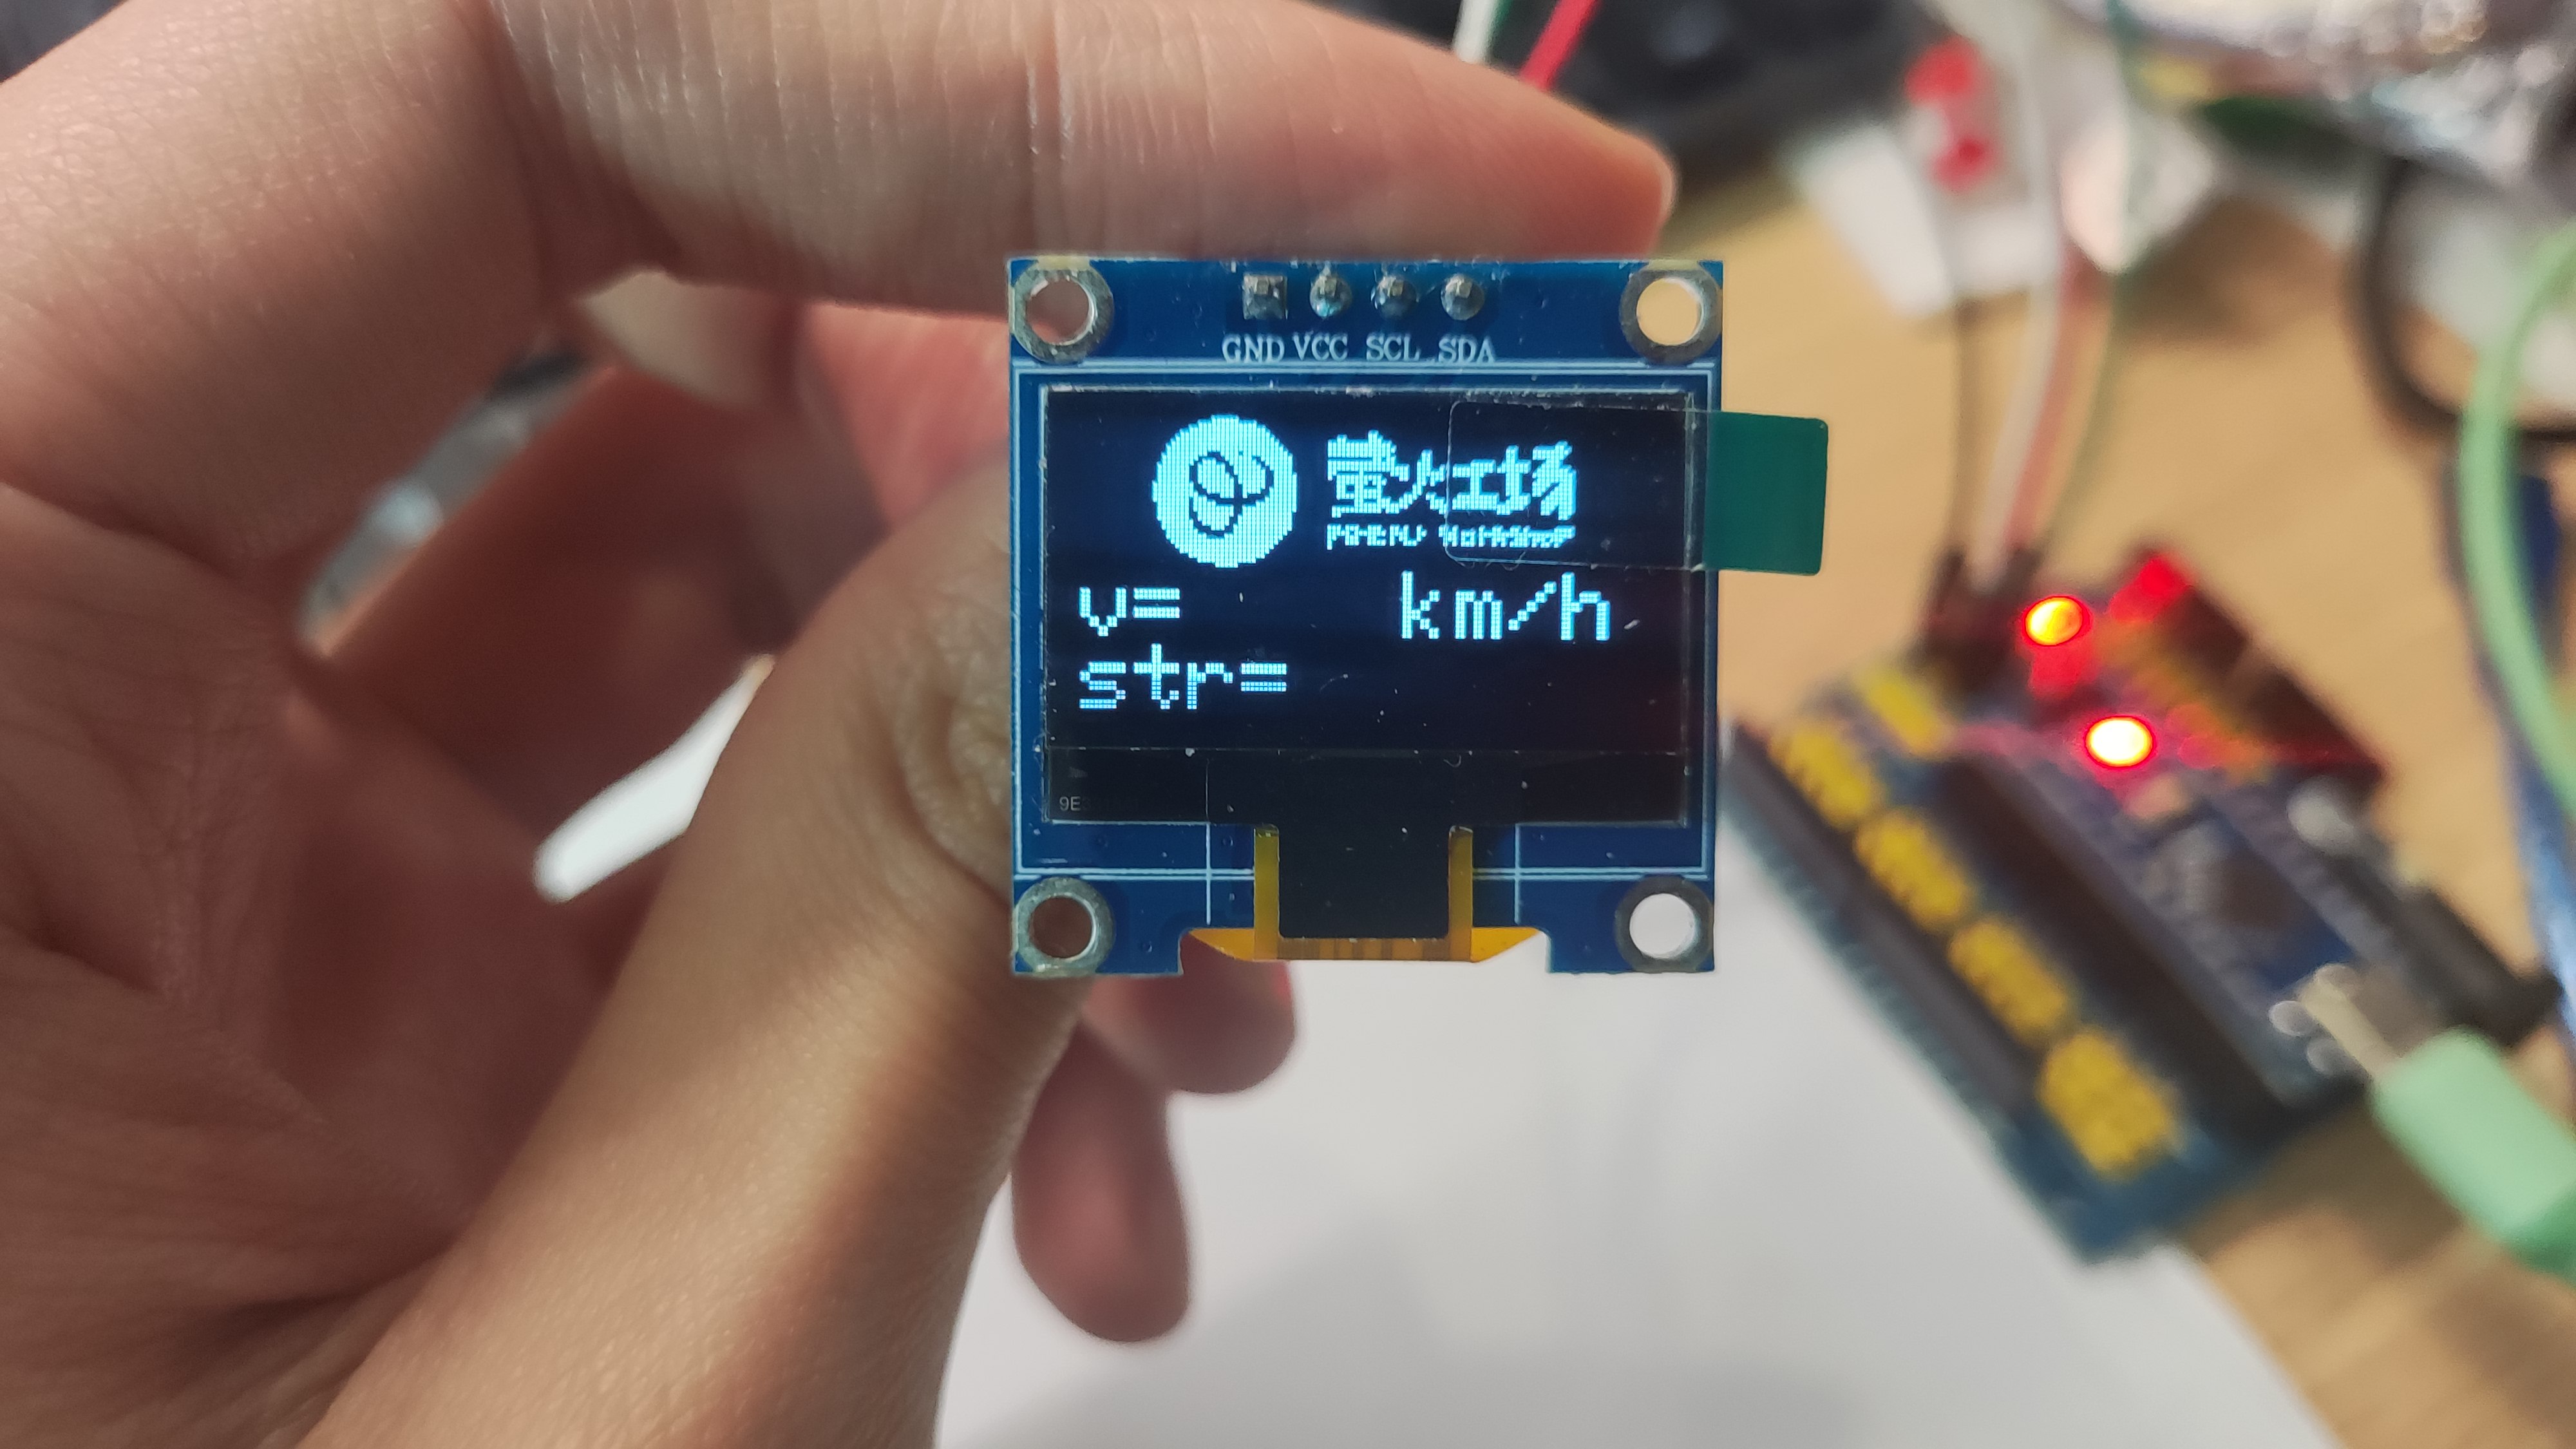
display.drawBitmap(16, 0, logo_small, 95, 32, 1);
display.setTextColor(WHITE); //设置字体颜色
display.setTextSize(2); //设置字体大小 1 is default 6x8, 2 is 12x16, 3 is 18x24
display.setCursor(0,33); //设置起始光标
display.print("v=");
display.setCursor(72,33); //设置起始光标
display.print("km/h");
display.setCursor(0,49); //设置起始光标
display.print("str=");
display.display();
}
void loop()
{
}
效果
2. 显示数据
目标:实现雷达监测数据的对应填充显示,包括速度 v 和信号强度 str
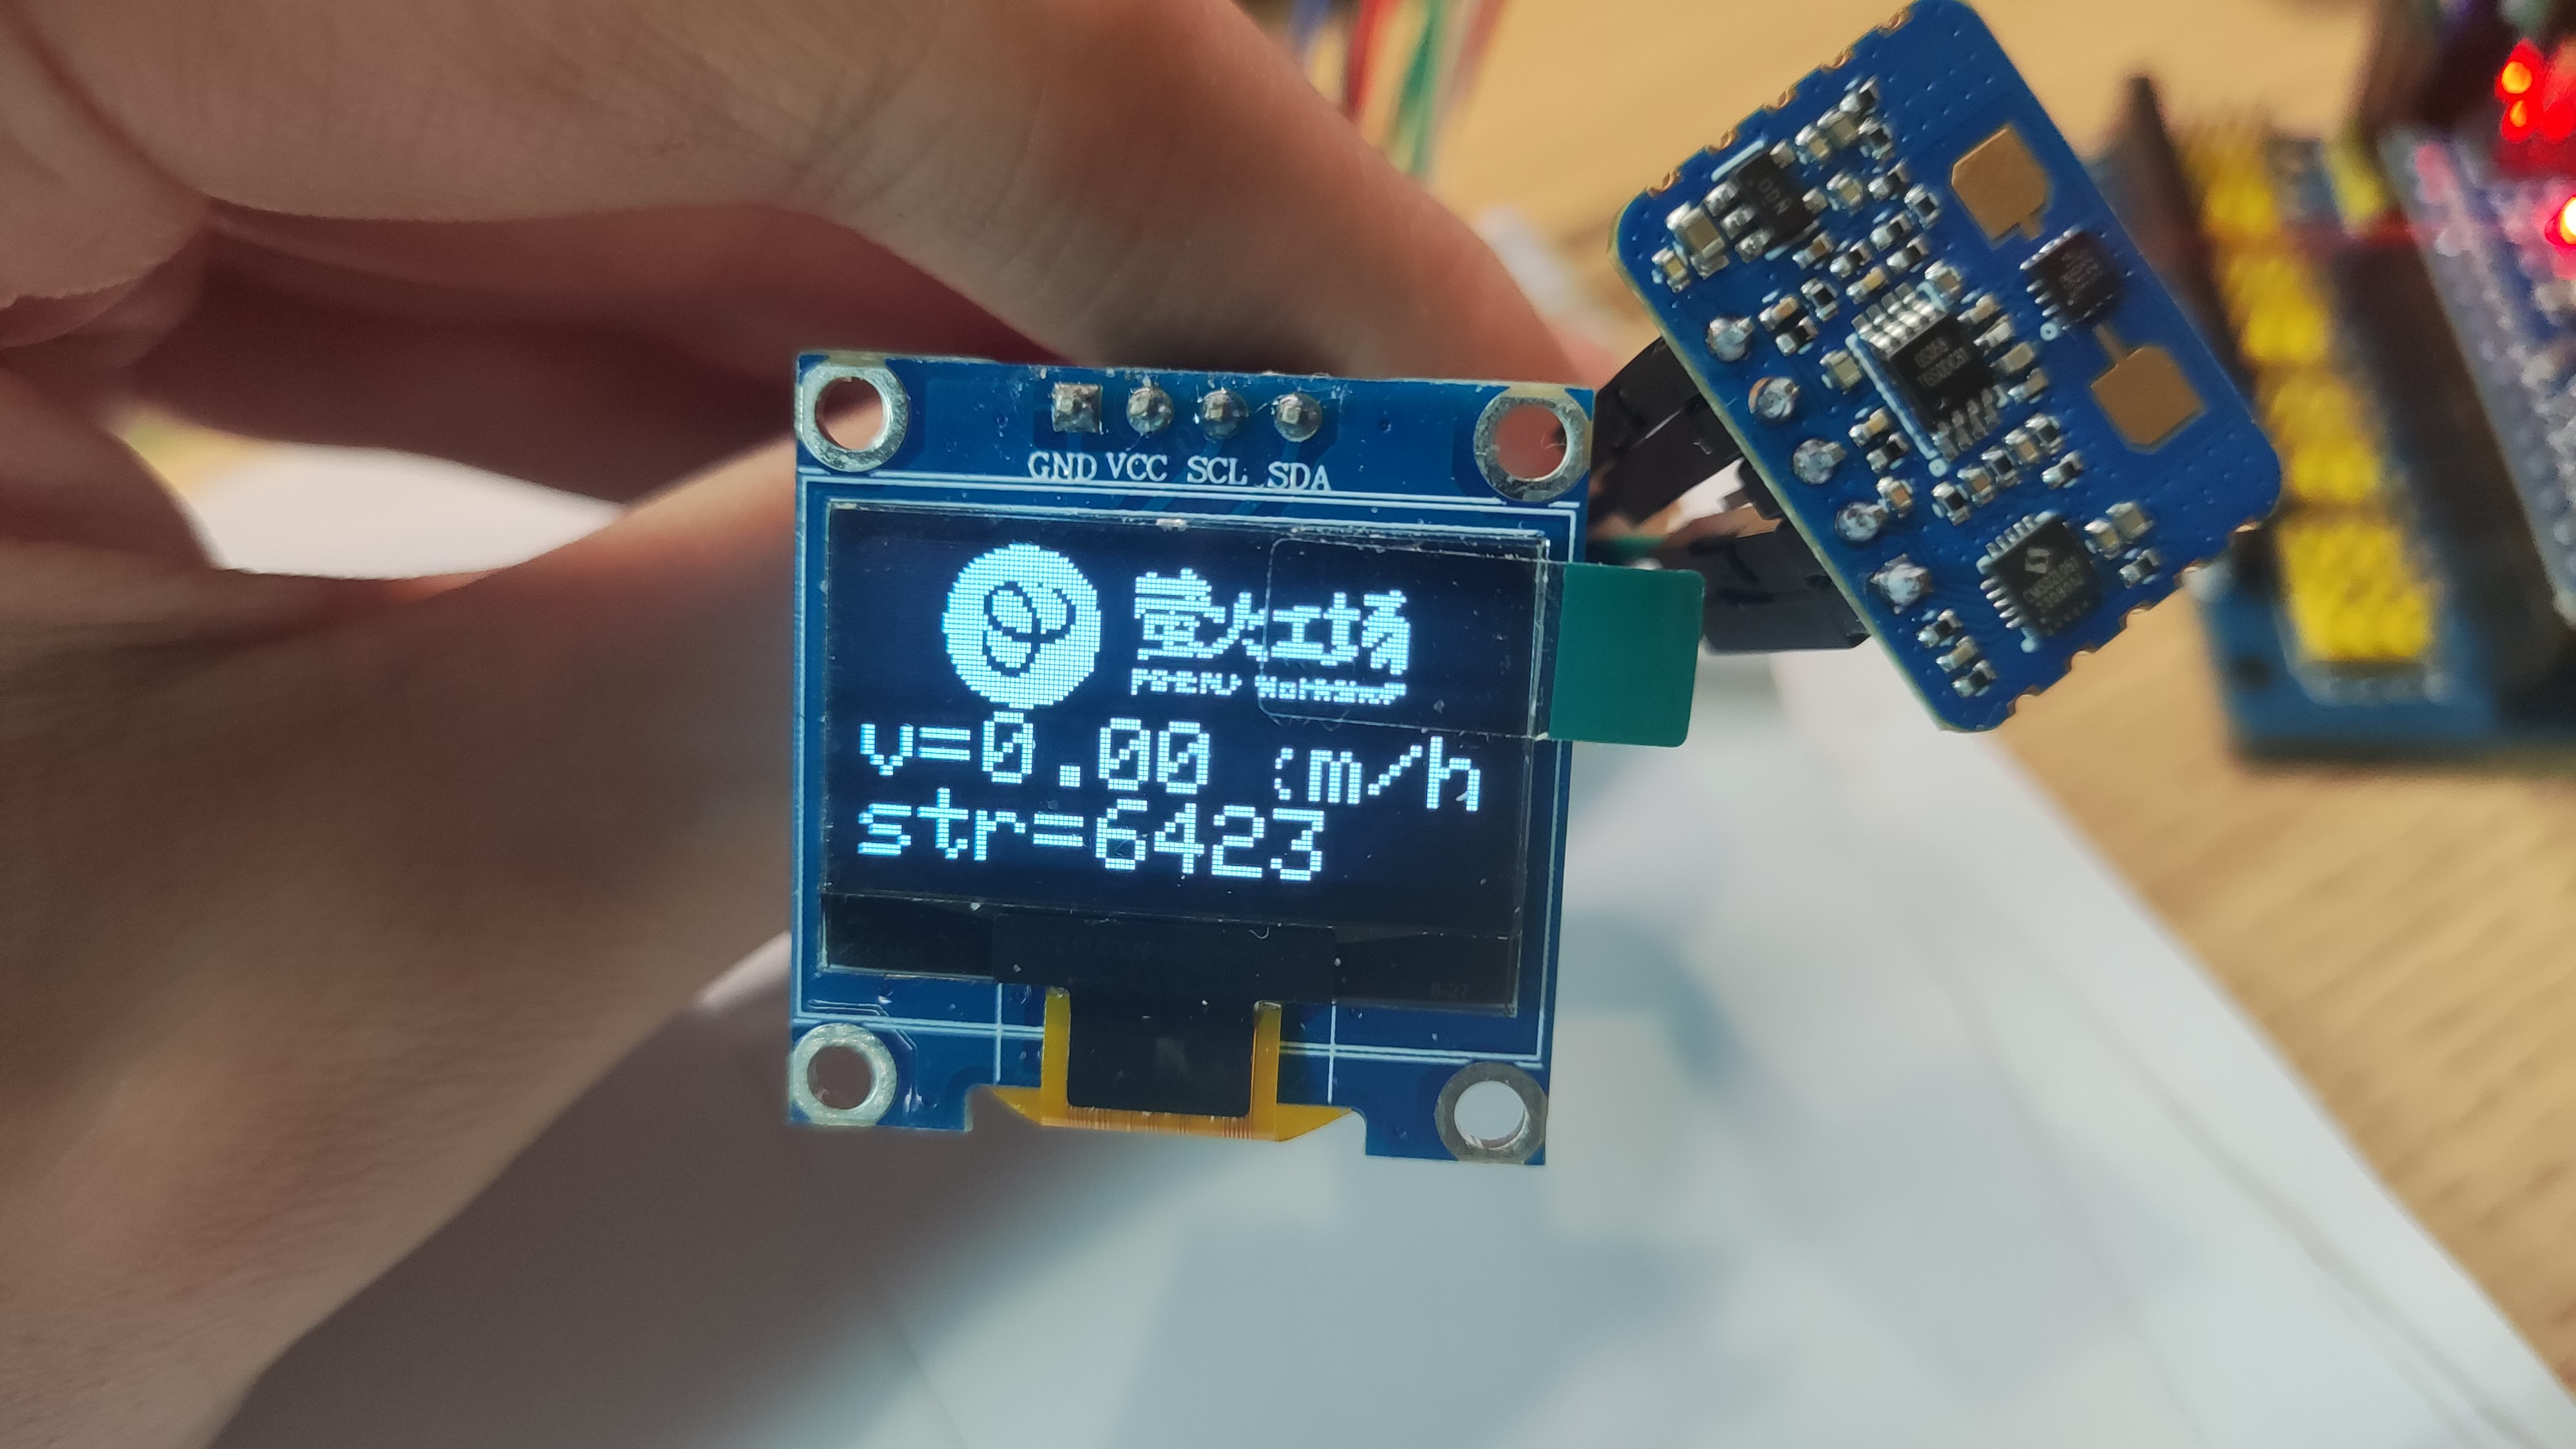
代码
思路:将之前帖子中实现的串口打印数据与 OLED 显示框架结合,将 v 和 str 两数据分别填充至 OLED 屏预留位置处即可。
#include < Wire.h >
#include < Adafruit_GFX.h >
#include < Adafruit_SSD1306.h >
#include "logo_128x64.h"
#include "logo_95x32.h"
#define OLED_RESET 4
Adafruit_SSD1306 display(128, 64, &Wire, OLED_RESET);
String comdata = "";
void setup()
{
Serial.begin(115200);
while (Serial.read() >= 0){}//clear serialbuffer
display.begin(SSD1306_SWITCHCAPVCC, 0x3C); // initialize with the I2C addr 0x3C (for the 128x64)
display.clearDisplay(); // 清屏
display.drawBitmap(0, 0, logo, 128, 64, 1); //画出字符对应点阵数据
display.display();
delay(1000);
display.clearDisplay();
/*-------------------- Display picture and text ---------------------------*/
display.drawBitmap(16, 0, logo_small, 95, 32, 1);
display.setTextColor(WHITE); //设置字体颜色
display.setTextSize(2); //设置字体大小 1 is default 6x8, 2 is 12x16, 3 is 18x24
display.setCursor(0,33); //设置起始光标
display.print("v=");
display.setCursor(80,33); //设置起始光标
display.print("km/h");
display.setCursor(0,49); //设置起始光标
display.print("str=");
display.display();
}
void loop()
{
if (Serial.available() > 0)
{
char data = Serial.read();
comdata += data;
if (data == 'n')
{// type of comdata: v=1.0 km/h, str=10151
int separatorIndex = comdata.indexOf(','); // 假设分隔符为逗号
if (separatorIndex != -1)
{
String part1 = comdata.substring(0, separatorIndex); // 第一个部分
String part2 = comdata.substring(separatorIndex + 1); // 第二个部分
// 打印分割后的数据
//Serial.println(part1); // type of part1: v=1.0 km/h
//Serial.println(part2); // type of part2: str=10151
/*------------ part1 : v=1.0 km/h ----------*/
int part1separatorIndex = part1.indexOf('='); //index of '='
if (part1separatorIndex != -1)
{
String vlc = part1.substring(part1separatorIndex + 1); // index of velocity, type of vlc is 1.0 km/h
// vlc: 1.0 km/h
int VLCseparatorIndex = vlc.indexOf(' '); // index of ' '
String v = vlc.substring(0, VLCseparatorIndex);// v only include number
float Vn = v.toFloat();
Serial.print(Vn); // print velocity number
Serial.print(',');
//display.setCursor(25,33); //设置起始光标
display.fillRect(25, 33, 60, 16, BLACK);
display.display();
display.setCursor(25,33); //设置起始光标
display.print(Vn);
display.display();
}
/*------------- part2 : str=10151 ------------------*/
int part2separatorIndex = part2.indexOf('='); //index of '='
if (part2separatorIndex != -1)
{
String strng = part2.substring(part2separatorIndex + 1); // strng only include number
int Sn = strng.toInt();
Serial.print(Sn); // print strength number
Serial.println();
//display.setCursor(49,49); //设置起始光标
display.fillRect(49, 49, 79, 16, BLACK);
//display.setPixelColor();
display.display();
display.setCursor(49,49); //设置起始光标
display.print(Sn);
display.display();
}
}
comdata = "";
}
}
}
效果
这里由于字体设置为 2 号,无法满足 km/h 单位的完整填充,因此被数据覆盖住一部分,可根据实际需求调整字体大小。
审核编辑 黄宇
声明:本文内容及配图由入驻作者撰写或者入驻合作网站授权转载。文章观点仅代表作者本人,不代表电子发烧友网立场。文章及其配图仅供工程师学习之用,如有内容侵权或者其他违规问题,请联系本站处理。
举报投诉
-
传感器
+关注
关注
2579文章
55986浏览量
796361 -
单片机
+关注
关注
6078文章
45649浏览量
676509 -
OLED
+关注
关注
121文章
6397浏览量
234908 -
雷达
+关注
关注
52文章
3453浏览量
124954
发布评论请先 登录
相关推荐
热点推荐
郑州中景园OLED显示模块产品解析
郑州中景园OLED显示模块产品解析 在电子设备的设计中,显示模块是至关重要的组件之一。今天我们来详细解析郑州中景园电子技术有限公司的OLED显示
0.96寸4针IIC OLED显示模块的设计与使用指南
0.96寸4针IIC OLED显示模块的设计与使用指南 一、引言 在电子设备的设计中,显示模块是不可或缺的一部分。0.96寸4针IIC OLED显示
深入剖析OLED显示模块:从规格到应用的全面指南
深入剖析OLED显示模块:从规格到应用的全面指南 在电子设备飞速发展的今天,OLED显示模块凭借其独特的优势在众多显示技术中崭露头角。作为一
使用硬件SPI1轮询模式来实现驱动OLED显示屏
此篇介绍使用硬件SPI1轮询模式来实现驱动OLED显示屏硬件连接
GND ——GND
VCC ——3.3V
DO——PA5
DI——PA7
RES ——PB1
DC——PB0
CS——PA4
软件
发表于 01-27 12:36
运用CW32F030芯片的SPI来实现0.96寸的oled屏幕显示
本文通过运用CW32F030芯片的SPI来实现0.96寸的oled屏幕显示。接下来我们一共分为这几个步骤进行配置。
首先我们需要配置相关的IO口以及SPI的初始化:
void
发表于 01-21 06:33
【瑞萨RA6E2】硬件IIC驱动九轴传感器与OLED显示
OLED屏幕上实时显示传感器采集的原始数据。项目直接使用现有的完整代码实现,未对传感器数据进行滤波处理,仅获取和显示基本
发表于 11-27 02:18
蜂鸟E203驱动OLED显示
利用GPIO模拟IIC驱动4pin的OLED显示字符,开发平台为芯来官方IDE。
不想写过程,上传整个工程文件,主要代码如下:
下载:led
发表于 10-31 06:08
【六岳微LY-F335开发板试用体验】epwm启动ADC并在OLED上显示结果
芯片,所以工具链选择了CCS10等可用于TI公司28335MCU的编译下载仿真软件,工具非常成熟,安装完成之后也易于使用。这些已经在上篇介绍完成,这一篇测评着重测试ADC转换结果在OLED上的显示
发表于 09-26 17:32
【六岳微LY-F335开发板试用体验】OLED显示和调试过程中的坑
使用的UART串口通信,在此基础上介绍工程文件作用。
第一步硬件接线,在数据手册上查到可以使用了GPIO1、3、5、7作为OLED通信引脚,在开发板上找到之后,将GPIO1、3作为SDA引脚和SCL引脚
发表于 09-22 19:17
【RA4E2开发板评测】oled显示光照度+串口通信
/object_oriented_module_programming_method_in_ARM_embedded_system/
选择P402、P401为OLED显示屏I2C接口的SCL与SDA引脚,选择
发表于 09-17 21:01
【RA4E2开发板评测】串口传输+OLED显示
/object_oriented_module_programming_method_in_ARM_embedded_system/
开发板如图:
选择P402、P401为OLED显示屏I2C接口的SCL与SDA
发表于 09-16 21:18
[RA4M2-SENSOR]使用OLED显示光照传感器信号数据
RA使用OLED显示光照度测评
1. 套件概述
RA4M2-SENSOR 是一款基于 RA4M2 系列微控制器的评估套件,支持 TrustZone 技
术和片内安全加密引擎(SCE),提供硬件级安全
发表于 09-13 20:30
【RA4M2-SENSOR】+OLED屏显示驱动
);
OLED_SCLK_Clr();
delay_us(3);
}
}
对显示屏的初始化函数为:
void OLED_Init(void)
{
Write_IIC_Command(0xAE
发表于 09-02 18:28
硅基OLED微显示器:在扩展现实(XR)中的应用
基于OLED的微显示器作为一种先进的微显示技术,有时被称为硅基OLED(OLEDoS),它突出了OLED技术与基于半导体(CMOS)的硅片的

【RA-Eco-RA6M4开发板评测】+OLED屏显示驱动
;lt;<1;
delay_us(3);
OLED_SCLK_Set();
delay_us(3);
OLED_SCLK_Clr();
delay_us(3);
}
}
对显示屏的初始化
发表于 07-23 17:33


评论