 鸿蒙实战开发:【7日天气预报】

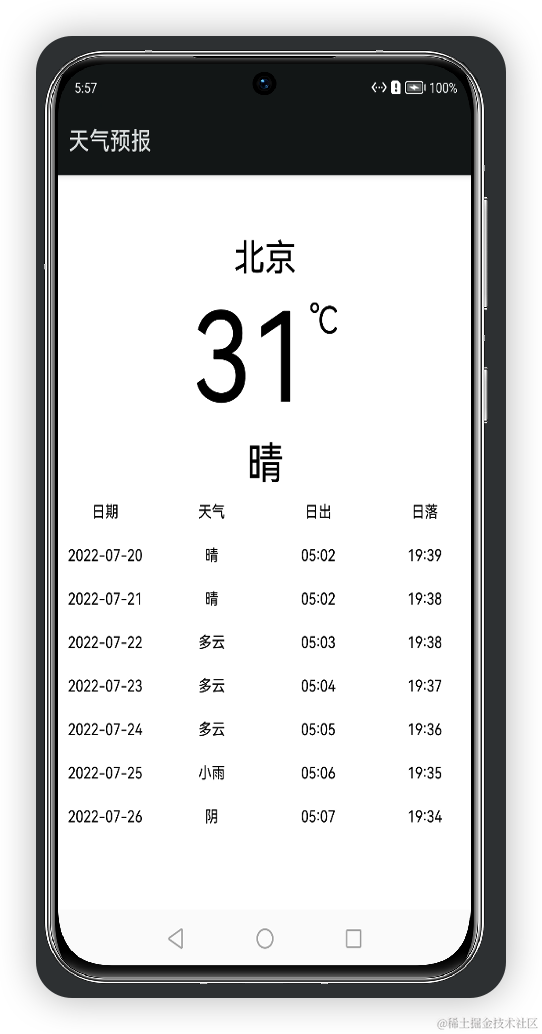
先来看一下效果
本项目界面搭建基于ArkUI中TS扩展的声明式开发范式,
数据接口是[和风(天气预报)],
使用ArkUI自带的网络请求调用接口。
我想要实现的一个功能是,查询当前城市的实时天气,
目前已实现的功能有:
- 默认查询北京的天气预报
- 查看当前的天气
- 查看未来七天的天气
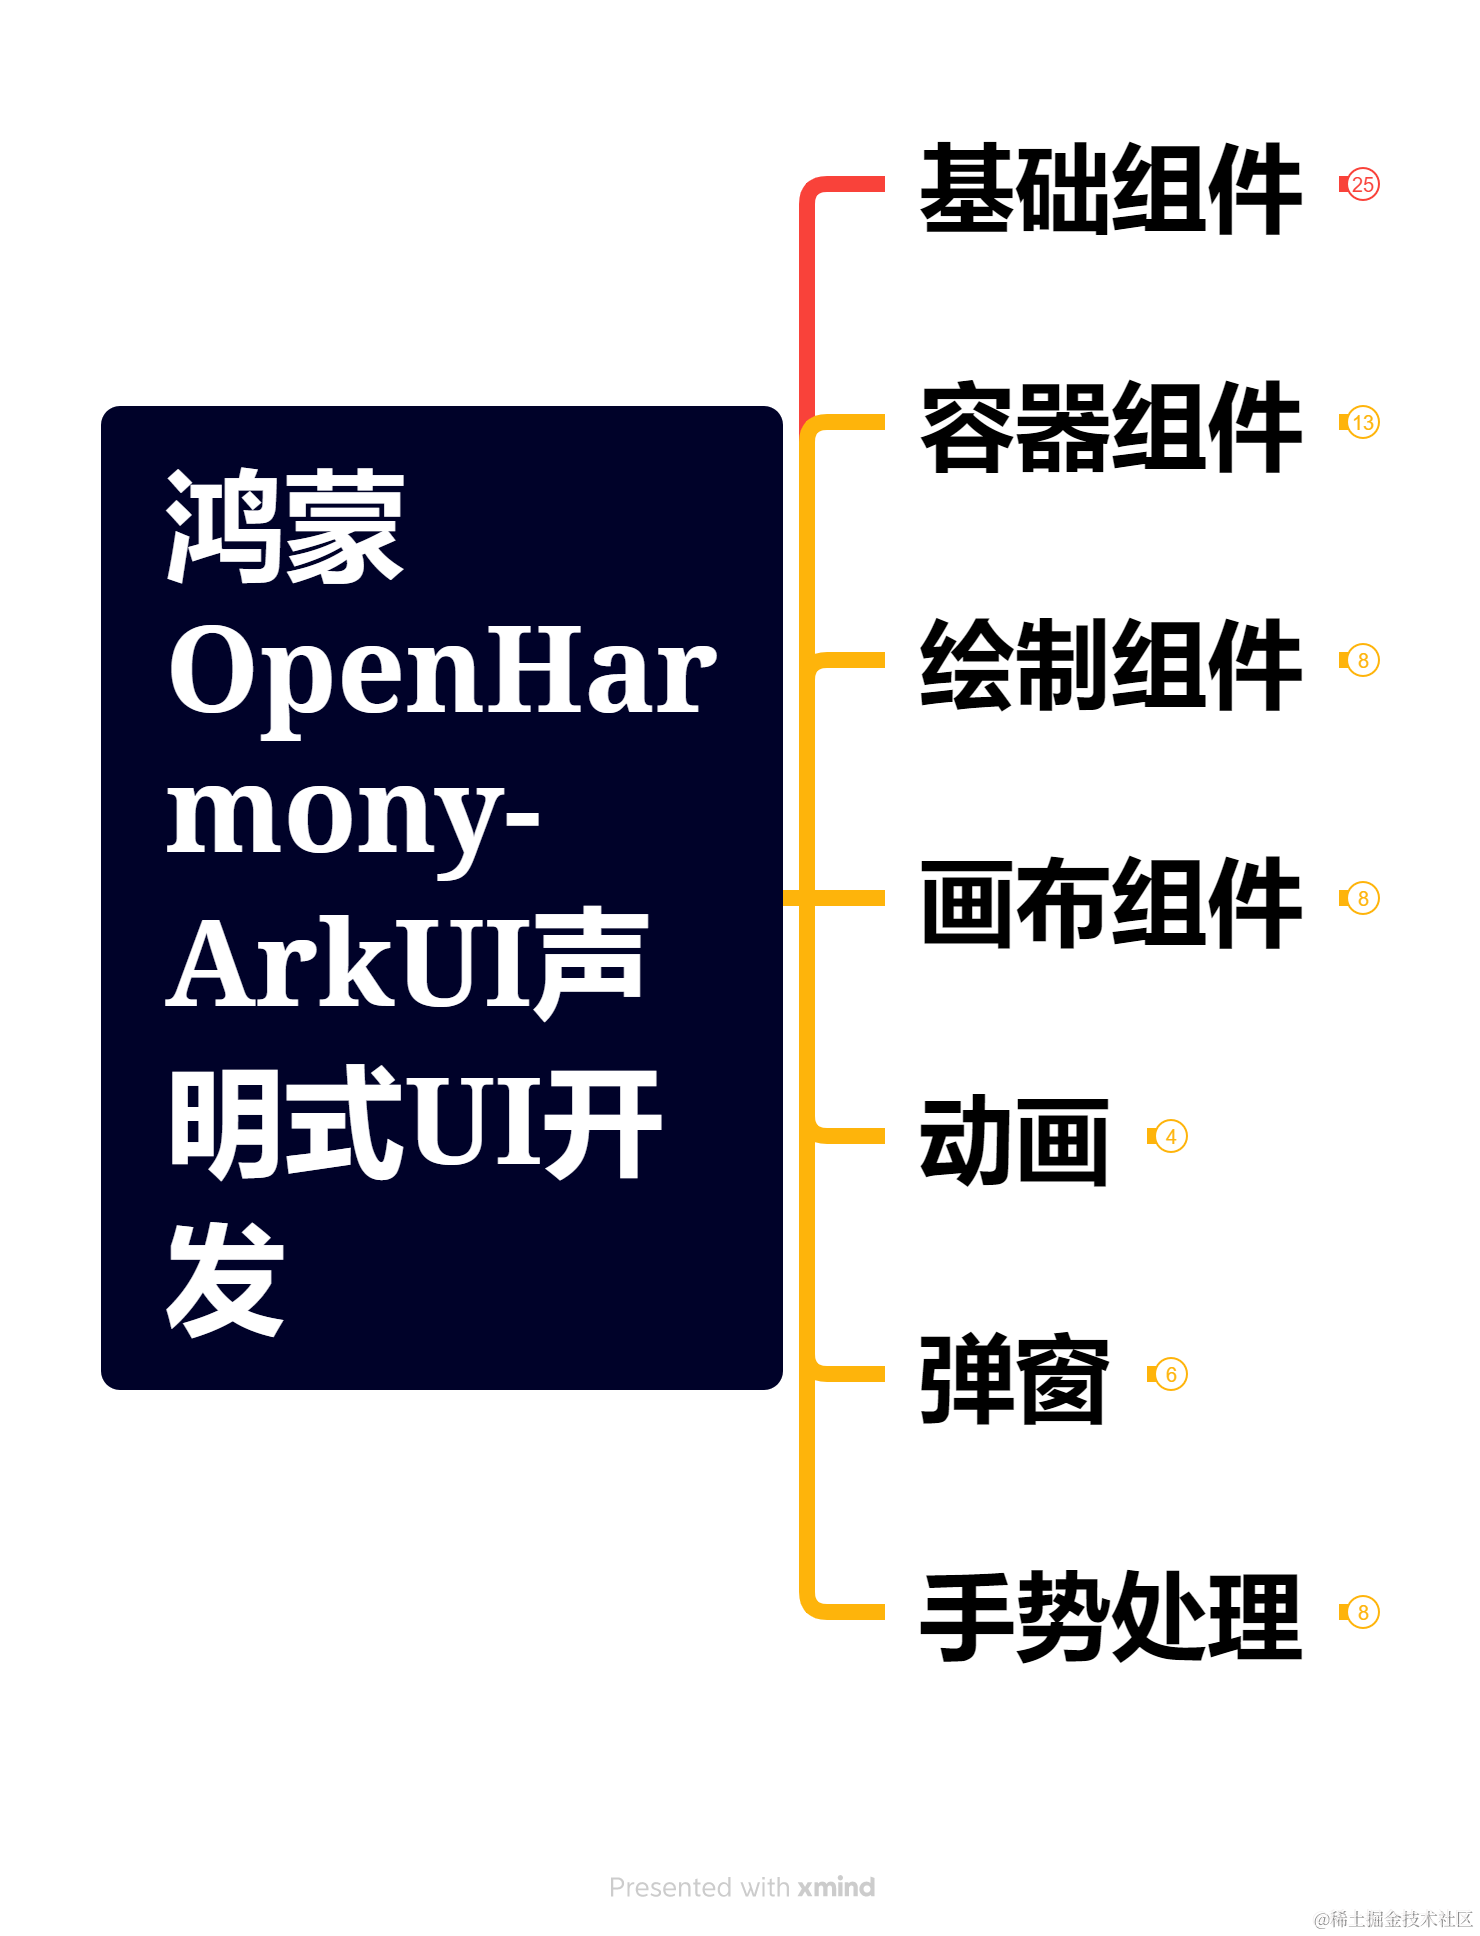
通过本项目,你能学到的知识有:
- 网络请求
- 条件渲染
- 状态管理
先来看一下
接下来开始正文,
我们先分析一下结构:
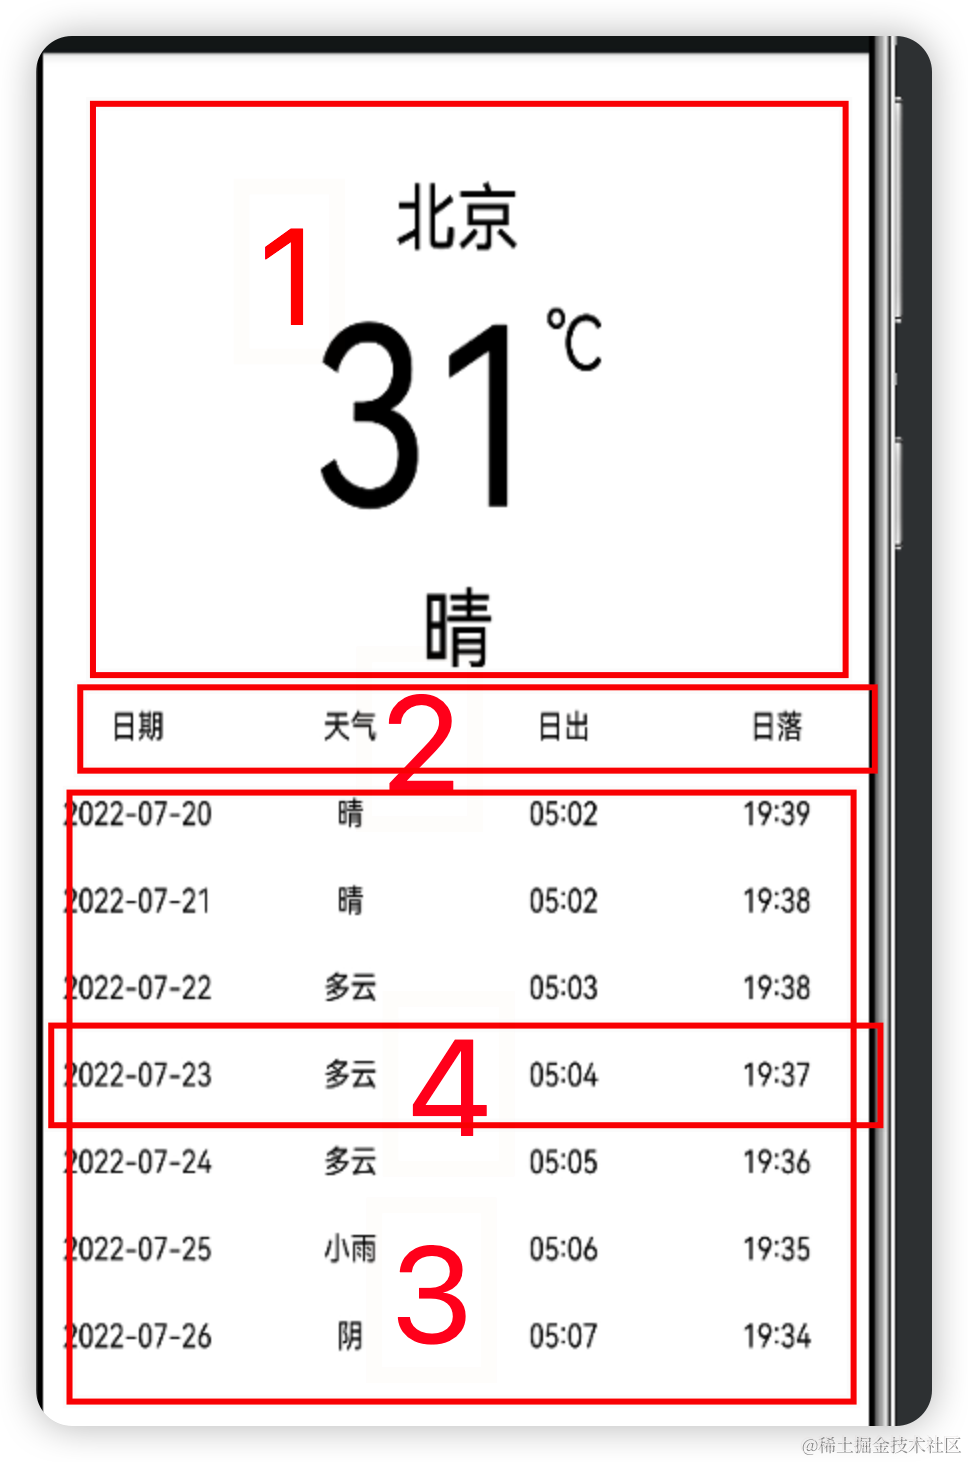
我们可以分为三块
第一部分为实时天气信息栏
代码如下
// @ts-nocheck
/**
* 该组件为实时天气预报组件
*
* powered by 坚果
* 2022/7/20
*/
@Entry
@Component
export struct RealtimeWeather{
@State temp: string = "9"
@State text: string = "坚果"
@State isRequestSucceed: boolean = true
build(){
Column() {
Text($r("app.string.city"))
.fontSize(30)
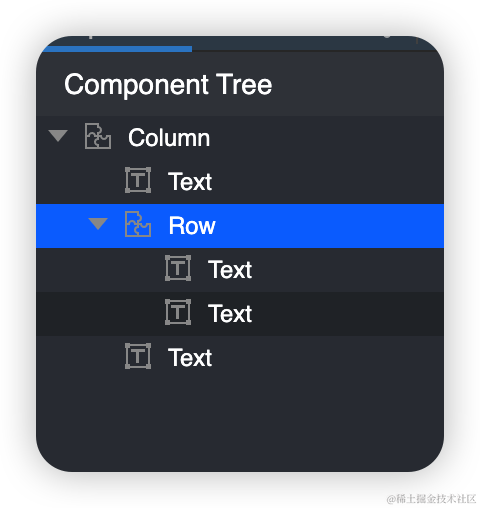
Row() {
Text(this.temp)
.fontSize(100)
Text('℃')
.fontSize(30)
.margin({ top: 10 })
}
.alignItems(VerticalAlign.Top)
.margin({ top: 5 })
Text(this.text)
.fontSize(36)
.margin({ top: 5 })
}.margin({ top: 50 })
}
}
第二部分为
this.WeatherText("日期")
          this.WeatherText("天气")
          this.WeatherText("日出")
          this.WeatherText("日落")
第三部分为:
Scroll(){
 Column(){
   ForEach(this.future, (item: WeatherWeekData) = > {

     Row() {
       this.WeatherText(item.fxDate)
       this.WeatherText(item.textDay)
       this.WeatherText(item.sunrise)
       this.WeatherText(item.sunset)


     }.margin({left:10})


   }, item = > item.fxDate)
 }
}
最后用Column包裹
完整的代码如下:
Main.ets
// @ts-nocheck

/*
 * Copyright (c) 2021 JianGuo Device Co., Ltd.
 * Licensed under the Apache License, Version 2.0 (the "License");
 * you may not use this file except in compliance with the License.
 * You may obtain a copy of the License at
 *
 *    http://www.apache.org/licenses/LICENSE-2.0
 *
 * Unless required by applicable law or agreed to in writing, software
 * distributed under the License is distributed on an "AS IS" BASIS,
 * WITHOUT WARRANTIES OR CONDITIONS OF ANY KIND, either express or implied.
 * See the License for the specific language governing permissions and
 * limitations under the License.
 */
import { WeatherModel, WeatherData, WeatherWeekData, } from '../model/weatherModel';

import { RealtimeWeather } from '../common/RealtimeWeather'
import { getWeekTest } from '../data/get_week_test'
import { getTest } from '../data/get_test'

import prompt from '@system.prompt';
import http from '@ohos.net.http';


@Entry
@Component
struct Main {
  aboutToAppear() {

    this.getRequest()
    this.getWeekRequest()
  }

  @State realtime: WeatherData = getTest()
  @State future: Array< WeatherWeekData > = getWeekTest()
  @State isRequestSucceed: boolean = true

  @Builder WeatherText(text: string) {
    Text(text)
      .fontSize(14)
      .layoutWeight(1)
      .textAlign(TextAlign.Center)
      .margin({ top: 10, bottom: 10 })
  }

  build() {


    Column() {
      if (this.isRequestSucceed) {
        // 当前天气
        RealtimeWeather({ temp: this.realtime.temp, text: this.realtime.text })

        Row() {
          this.WeatherText("日期")
          this.WeatherText("天气")
          this.WeatherText("日出")
          this.WeatherText("日落")


        }.margin({top:20})


       Scroll(){
        Column(){
          ForEach(this.future, (item: WeatherWeekData) = > {

            Row() {
              this.WeatherText(item.fxDate)
              this.WeatherText(item.textDay)
              this.WeatherText(item.sunrise)
              this.WeatherText(item.sunset)


            }.margin({left:10})


          }, item = > item.fxDate)
        }
       }

        Text("数据来自和风天气")
          .fontSize(14)

          .margin({ bottom: 30 })


      }
    }.width("100%").height("100%")
  }


  // 请求方式:GET 获取一周天气预报

  getWeekRequest() {
    // 每一个httpRequest对应一个http请求任务,不可复用
    let httpRequest = http.createHttp()
    let url = 'https://devapi.qweather.com/v7/weather/7d?location=101010100&key=48fbadf80bbc43ce853ab9a92408373e'
    httpRequest.request(url, (err, data) = > {
      if (!err) {
        if (data.responseCode == 200) {
          console.info('=====data.result=====' + data.result)

          // 解析数据
          var weatherModel: WeatherModel = JSON.parse(data.result.toString())
          // 判断接口返回码,0成功
          if (weatherModel.code == 200) {
            // 设置数据

            this.future = weatherModel.daily
            this.isRequestSucceed = true;
            ForEach(weatherModel.daily, (item: WeatherWeekData) = > {
              console.log(console.info('=====data.result+item.fxDate=====' + item.fxDate))

            }, item = > item.date)

            console.info('=====data.result===' + weatherModel.daily)

          } else {
            // 接口异常,弹出提示
            prompt.showToast({ message: "数据请求失败" })
          }

        } else {
          // 请求失败,弹出提示
          prompt.showToast({ message: '网络异常' })
        }
      } else {
        // 请求失败,弹出提示
        prompt.showToast({ message: err.message })
      }
    })
  }


  // 请求方式:GET
  getRequest() {
    // 每一个httpRequest对应一个http请求任务,不可复用
    let httpRequest = http.createHttp()
    let url = 'https://devapi.qweather.com/v7/weather/now?location=101010100&key=48fbadf80bbc43ce853ab9a92408373e'
    httpRequest.request(url, (err, data) = > {
      if (!err) {
        if (data.responseCode == 200) {
          console.info('=====data.result=====' + data.result)
          // 解析数据
          //this.content= data.result;
          // 解析数据
          var weatherModel: WeatherModel = JSON.parse(data.result.toString())
          // 判断接口返回码,0成功
          if (weatherModel.code == 200) {
            // 设置数据

            this.realtime = weatherModel.now


            this.isRequestSucceed = true;

            console.info('=====data.result===this.content==' + weatherModel.now)

          } else {
            // 接口异常,弹出提示
            prompt.showToast({ message: "数据请求失败" })
          }

        } else {
          // 请求失败,弹出提示
          prompt.showToast({ message: '网络异常' })
        }
      } else {
        // 请求失败,弹出提示
        prompt.showToast({ message: err.message })
      }
    })
  }
}
里面用到了网络请求
网络请求的步骤
1、声明网络请求权限
在entry下的config.json中module字段下配置权限
"reqPermissions": [
   {
      "name": "ohos.permission.INTERNET"
   }
]
2、支持http明文请求
默认支持https,如果要支持http,在entry下的config.json中deviceConfig字段下配置
"default": {
  "network": {
    "cleartextTraffic": true
  }
}
3、创建HttpRequest
// 导入模块
import http from '@ohos.net.http';
// 创建HttpRequest对象
let httpRequest = http.createHttp();
4、发起请求
GET请求( 默认为GET请求 )
// 请求方式:GET
  getRequest() {
    // 每一个httpRequest对应一个http请求任务,不可复用
    let httpRequest = http.createHttp()
    let url = 'https://devapi.qweather.com/v7/weather/now?location=101010100&key=48fbadf80bbc43ce853ab9a92408373e'
    httpRequest.request(url, (err, data) = > {
      if (!err) {
        if (data.responseCode == 200) {
          console.info('=====data.result=====' + data.result)
          // 解析数据
          //this.content= data.result;
          // 解析数据
          var weatherModel: WeatherModel = JSON.parse(data.result.toString())
          // 判断接口返回码,0成功
          if (weatherModel.code == 200) {
            // 设置数据

            this.realtime = weatherModel.now


            this.isRequestSucceed = true;

            console.info('=====data.result===this.content==' + weatherModel.now)

          } else {
            // 接口异常,弹出提示
            prompt.showToast({ message: "数据请求失败" })
          }

        } else {
          // 请求失败,弹出提示
          prompt.showToast({ message: '网络异常' })
        }
      } else {
        // 请求失败,弹出提示
        prompt.showToast({ message: err.message })
      }
    })}
5、解析数据(简单示例)
1.网络请求到的json字符串
export function getTest() {
  return [
    {
      "obsTime": "2022-07-20T09:24+08:00",
      "temp": "28",
      "feelsLike": "29",
      "icon": "101",
      "text": "多云",
      "wind360": "225",
      "windDir": "西南风",
      "windScale": "3",
      "windSpeed": "17",
      "humidity": "71",
      "precip": "0.0",
      "pressure": "1000",
      "vis": "8",
      "cloud": "91",
      "dew": "21"
    },
  ]
}
2.创建相应的对象
export class WeatherWeekData {
  fxDate: string //
  sunrise: string //
  sunset: string //
  moonrise: string //
  moonset: string //
  moonPhase: string //
  moonPhaseIcon: string //
  tempMax: string //
  tempMin: string //
  iconDay: string //
  textDay: string
  textNight: string //
  wind360Day: string //
  windDirDay: string //
  windScaleDay: string //
  windSpeedDay: string //
  wind360Night: string //
  windDirNight: string //
  dew: string //


  windScaleNight: string // ,
  windSpeedNight: string //
  humidity: string //
  precip: string //
  pressure: string //
  vis: string //


  cloud: string //
  uvIndex: string //


}
实况天气
目前支持全国4000+个市县区和海外15万个城市实时天气数据,包括实时温度、体感温度、风力风向、相对湿度、大气压强、降水量、能见度、露点温度、云量等数据。
)请求URL
// 北京实况天气

 https://devapi.qweather.com/v7/weather/now?location=101010100&key=你的KEY
请求参数
请求参数包括必选和可选参数,如不填写可选参数将使用其默认值,参数之间使用&进行分隔。
key
用户认证key。如何获取KRY可前往我之前的文章。例如 key=123456789ABC
location
需要查询地区的LocationID或以英文逗号分隔的经度,纬度坐标十进制,最多支持小数点后两位),LocationID可通过[城市搜索]服务获取。例如 location=101010100 或 location=116.41,39.92
返回数据格式
// 北京实况天气

//  https://devapi.qweather.com/v7/weather/now?location=101010100&key=你的KEY

{
  "code": "200",
  "updateTime": "2020-06-30T22:00+08:00",
  "fxLink": "http://hfx.link/2ax1",
  "now": {
    "obsTime": "2020-06-30T21:40+08:00",
    "temp": "24",
    "feelsLike": "26",
    "icon": "101",
    "text": "多云",
    "wind360": "123",
    "windDir": "东南风",
    "windScale": "1",
    "windSpeed": "3",
    "humidity": "72",
    "precip": "0.0",
    "pressure": "1003",
    "vis": "16",
    "cloud": "10",
    "dew": "21"
  },
  "refer": {
    "sources": [
      "QWeather",
      "NMC",
      "ECMWF"
    ],
    "license": [
      "commercial license"
    ]
  }
}
// 请求方式:GET
  getRequest() {
    // 每一个httpRequest对应一个http请求任务,不可复用
    let httpRequest = http.createHttp()
    let url = 'https://devapi.qweather.com/v7/weather/now?location=101010100&key=48fbadf80bbc43ce853ab9a92408373e'
    httpRequest.request(url, (err, data) = > {
      if (!err) {
        if (data.responseCode == 200) {
          console.info('=====data.result=====' + data.result)
          // 解析数据
          //this.content= data.result;
          // 解析数据
          var weatherModel: WeatherModel = JSON.parse(data.result.toString())
          // 判断接口返回码,0成功
          if (weatherModel.code == 200) {
            // 设置数据

            this.realtime = weatherModel.now


            this.isRequestSucceed = true;

            console.info('=====data.result===this.content==' + weatherModel.now)

          } else {
            // 接口异常,弹出提示
            prompt.showToast({ message: "数据请求失败" })
          }

        } else {
          // 请求失败,弹出提示
          prompt.showToast({ message: '网络异常' })
        }
      } else {
        // 请求失败,弹出提示
        prompt.showToast({ message: err.message })
      }
    })
  }
七天天气预报
接口
// 北京7天预报

//  https://devapi.qweather.com/v7/weather/7d?location=101010100&key=你的KEY
返回数据
// 北京3天预报
// 商业版 https://api.qweather.com/v7/weather/3d?location=101010100&key=你的KEY
// 开发版 https://devapi.qweather.com/v7/weather/3d?location=101010100&key=你的KEY

{
  "code": "200",
  "updateTime": "2021-11-15T16:35+08:00",
  "fxLink": "http://hfx.link/2ax1",
  "daily": [
    {
      "fxDate": "2021-11-15",
      "sunrise": "06:58",
      "sunset": "16:59",
      "moonrise": "15:16",
      "moonset": "03:40",
      "moonPhase": "盈凸月",
      "moonPhaseIcon": "803",
      "tempMax": "12",
      "tempMin": "-1",
      "iconDay": "101",
      "textDay": "多云",
      "iconNight": "150",
      "textNight": "晴",
      "wind360Day": "45",
      "windDirDay": "东北风",
      "windScaleDay": "1-2",
      "windSpeedDay": "3",
      "wind360Night": "0",
      "windDirNight": "北风",
      "windScaleNight": "1-2",
      "windSpeedNight": "3",
      "humidity": "65",
      "precip": "0.0",
      "pressure": "1020",
      "vis": "25",
      "cloud": "4",
      "uvIndex": "3"
    },
    {
      "fxDate": "2021-11-16",
      "sunrise": "07:00",
      "sunset": "16:58",
      "moonrise": "15:38",
      "moonset": "04:40",
      "moonPhase": "盈凸月",
      "moonPhaseIcon": "803",
      "tempMax": "13",
      "tempMin": "0",
      "iconDay": "100",
      "textDay": "晴",
      "iconNight": "101",
      "textNight": "多云",
      "wind360Day": "225",
      "windDirDay": "西南风",
      "windScaleDay": "1-2",
      "windSpeedDay": "3",
      "wind360Night": "225",
      "windDirNight": "西南风",
      "windScaleNight": "1-2",
      "windSpeedNight": "3",
      "humidity": "74",
      "precip": "0.0",
      "pressure": "1016",
      "vis": "25",
      "cloud": "1",
      "uvIndex": "3"
    },
    {
      "fxDate": "2021-11-17",
      "sunrise": "07:01",
      "sunset": "16:57",
      "moonrise": "16:01",
      "moonset": "05:41",
      "moonPhase": "盈凸月",
      "moonPhaseIcon": "803",
      "tempMax": "13",
      "tempMin": "0",
      "iconDay": "100",
      "textDay": "晴",
      "iconNight": "150",
      "textNight": "晴",
      "wind360Day": "225",
      "windDirDay": "西南风",
      "windScaleDay": "1-2",
      "windSpeedDay": "3",
      "wind360Night": "225",
      "windDirNight": "西南风",
      "windScaleNight": "1-2",
      "windSpeedNight": "3",
      "humidity": "56",
      "precip": "0.0",
      "pressure": "1009",
      "vis": "25",
      "cloud": "0",
      "uvIndex": "3"
    }
  ],
  "refer": {
    "sources": [
      "QWeather",
      "NMC",
      "ECMWF"
    ],
    "license": [
      "commercial license"
    ]
  }
}
代码
// 请求方式:GET 获取一周天气预报

  getWeekRequest() {
    // 每一个httpRequest对应一个http请求任务,不可复用
    let httpRequest = http.createHttp()
    let url = 'https://devapi.qweather.com/v7/weather/7d?location=101010100&key=48fbadf80bbc43ce853ab9a92408373e'
    httpRequest.request(url, (err, data) = > {
      if (!err) {
        if (data.responseCode == 200) {
          console.info('=====data.result=====' + data.result)

          // 解析数据
          var weatherModel: WeatherModel = JSON.parse(data.result.toString())
          // 判断接口返回码,0成功
          if (weatherModel.code == 200) {
            // 设置数据

            this.future = weatherModel.daily
            this.isRequestSucceed = true;
            ForEach(weatherModel.daily, (item: WeatherWeekData) = > {
              console.log(console.info('=====data.result+item.fxDate=====' + item.fxDate))

            }, item = > item.date)

            console.info('=====data.result===' + weatherModel.daily)

          } else {
            // 接口异常,弹出提示
            prompt.showToast({ message: "数据请求失败" })
          }

        } else {
          // 请求失败,弹出提示
          prompt.showToast({ message: '网络异常' })
        }
      } else {
        // 请求失败,弹出提示
        prompt.showToast({ message: err.message })
      }
    })
  }
更多鸿蒙开发知识更新在[gitee.com/li-shizhen-skin/harmony-os/blob/master/README.md]参考学习。
城市搜索
调用接口(Get方式)
请求URL
# 搜索关键字beij
// https://geoapi.qweather.com/v2/city/lookup?location=beij&key=你的KEY
location
需要查询地区的名称,支持文字、以英文逗号分隔的经度,纬度坐标(十进制,最多支持小数点后两位)、LocationID或Adcode(仅限中国城市)。例如 location=北京 或 location=116.41,39.92
模糊搜索,当location传递的为文字时,支持模糊搜索,即用户可以只输入城市名称一部分进行搜索,最少一个汉字或2个字符,结果将按照相关性和Rank值进行排列,便于开发或用户进行选择他们需要查看哪个城市的天气。例如location=bei,将返回与bei相关性最强的若干结果,包括黎巴嫩的贝鲁特和中国的北京市
重名,当location传递的为文字时,可能会出现重名的城市,例如陕西省西安市、吉林省辽源市下辖的西安区和黑龙江省牡丹江市下辖的西安区,此时会根据Rank值排序返回所有结果。在这种情况下,可以通过adm参数的方式进一步确定需要查询的城市或地区,例如location=西安&adm=黑龙江
名词解释
Rank值
Rank值是表明一个城市或地区排名的数字,基于多种因素综合计算而来,例如:人口、面积、GDP、搜索热度等。取值范围为1-10,在定位搜索服务中,返回的结果除了关键字的相关性以外,也会参考该城市的Rank值。数值越大代表该城市或地区的人口越多、面积更大或更加热门。例如陕西省西安市的Rank值就要比黑龙江省牡丹江市西安区更高,当使用“西安”作为关键字定位的时候,西安市的排名要高于西安区。
LocationID
LocationID或locid,是城市、地区或POI点的ID,一般由数字或字母+数字组成,是一个地点的唯一标识。LocationID可以通过定位搜索服务获取,中国地区、热门海外城市、一些POI点的LocationID还可以通过[城市列表]下载。
审核编辑 黄宇
-
接口
+关注
关注
33文章
9588浏览量
157591 -
鸿蒙
+关注
关注
60文章
3014浏览量
46161
发布评论请先 登录
基于ESP32 WiFi连接天气预报机的设计方案
人工智能将应用于日常的天气预报

AWTK 开源串口屏开发(11) - 天气预报


评论