 【飞腾派4G版免费试用】第四章:部署模型到飞腾派的尝试

部署模型到飞腾派
本章作为一个这几天,我尝试将训练的佩奇检测模型部署到飞腾派的阶段总结,在部署的过程中,我的计划是分三步走:
- 在第三章的基础上,直接迁移模型到飞腾派,通过python测试模型是否正常使用;
- 使用 C++ 将 TensorFlow Lite 移植到飞腾派,分别在 PC 端和飞腾派上使用 sample/image_label 进行测试;
- 开发基于 TensorFlow Lite 的应用程序,完成佩奇检测模型的部署;
第一个部分,比较容易,因为我已经在第一章编译了 jammy 到飞腾派,这部分的工作可以认为就是第二章和第三章测试模型的工作在飞腾派进行一个重复,步骤几乎是一样的,我对比了 PC 和飞腾派使用同一个模型进行检测的时间,可以对比看下:
飞腾派耗时大概 9s
PC端耗时大概 2s
第二部分,分别在PC和飞腾派测试 TensorFlow Lite 的简单模型例程,这里我选择的例程是label_image。
2.1 首先是在 PC 端编译 TensorFlow Lite,这部分参考[官网的 build_cmake],主要执行的命令是,我这里执行的命令是在 tensorflow 的源码目录:
mkdir tflite_pc; cd tflite_pc;
cmake --build ../tensorflow/lite/ -j -t label_image
根据实际的网络环境(保证可以正常下载部分文件),我作了部分修改,
diff --git a/tensorflow/workspace3.bzl b/tensorflow/workspace3.bzl
index af1613994a7..baba25d3d4d 100644
--- a/tensorflow/workspace3.bzl
+++ b/tensorflow/workspace3.bzl
@@ -55,7 +55,7 @@ def workspace():
         name = "rules_jvm_external",
         strip_prefix = "rules_jvm_external-%s" % RULES_JVM_EXTERNAL_TAG,
         sha256 = "6274687f6fc5783b589f56a2f1ed60de3ce1f99bc4e8f9edef3de43bdf7c6e74",
-        url = "https://github.com/bazelbuild/rules_jvm_external/archive/%s.zip" % RULES_JVM_EXTERNAL_TAG,
+        url = "https://hub.gitmirror.com/https://github.com/bazelbuild/rules_jvm_external/archive/%s.zip" % RULES_JVM_EXTERNAL_TAG,
     )

     # Load the raw llvm-project.  llvm does not have build rules set up by default,
编译完成后,进入 examples/label_image/ 目录,从网络下载[mobilenet_v1_1.0_224.tgz],进行测试,还需要一个 labels.txt 文件,这里列出了目标的类别,这个文件的内容大概是这样的:
dummy
tench
goldfish
great white shark
tiger shark
hammerhead
electric ray
stingray
cock
hen
...
下面使用这个文件[tensorflow/lite/examples/label_image/testdata/grace_hopper.bmp] 进行测试,
![grace_hopper.bmp]
测试命令及其结果为:
▸ ./label_image -m mobilenet_quant_v1_224.tflite -l labels.txt grace_hopper.bmp
INFO: Loaded model mobilenet_quant_v1_224.tflite
INFO: resolved reporter
INFO: Created TensorFlow Lite XNNPACK delegate for CPU.
INFO: invoked
INFO: average time: 5.001 ms
INFO: 0.796078: 653 military uniform
INFO: 0.0901961: 907 Windsor tie
INFO: 0.0156863: 458 bow tie
INFO: 0.0117647: 466 bulletproof vest
INFO: 0.00392157: 922 book jacket
可以看出正常检测了出来。
2.2 下一步就是在 PC 上交叉编译,然后将 label_image 放在飞腾派上运行。交叉编译的,这里需要的一个交叉工具链的配置文件:
set(CMAKE_SYSTEM_NAME Linux)
set(CMAKE_SYSTEM_PROCESSOR aarch64)

set(TOOLCHAIN_PATH /home/red/.local/gcc-arm-10.2-2020.11-x86_64-aarch64-none-linux-gnu/)
set(CMAKE_C_COMPILER ${TOOLCHAIN_PATH}/bin/aarch64-none-linux-gnu-gcc)
set(CMAKE_CXX_COMPILER ${TOOLCHAIN_PATH}/bin/aarch64-none-linux-gnu-g++)
然后执行下面的命令进行构建
mkdir tflite_build; cd tflite_build;
cmake -DCMAKE_TOOLCHAIN_FILE=cross.txt ../tensorflow/lite/ -j -t label_image
make -j10
交叉编译之后,看下 label_image 的动态库依赖:
▸ aarch64-none-linux-gnu-readelf -d examples/label_image/label_image  | head

Dynamic section at offset 0x523e90 contains 31 entries:
  Tag        Type                         Name/Value
 0x0000000000000001 (NEEDED)             Shared library: [librt.so.1]
 0x0000000000000001 (NEEDED)             Shared library: [libdl.so.2]
 0x0000000000000001 (NEEDED)             Shared library: [libpthread.so.0]
 0x0000000000000001 (NEEDED)             Shared library: [libm.so.6]
 0x0000000000000001 (NEEDED)             Shared library: [libstdc++.so.6]
 0x0000000000000001 (NEEDED)             Shared library: [libgcc_s.so.1]
 0x0000000000000001 (NEEDED)             Shared library: [libc.so.6]
这里,看到都是常规的依赖库,将相关的模型文件,labels.txt,图片文件等发送到飞腾派进行测试:
red@phytiumpi:~$ ./label_image -m mobilenet_quant_v1_224.tflite -l labels.txt grace_hopper.bmp
INFO: Loaded model mobilenet_quant_v1_224.tflite
INFO: resolved reporter
INFO: Created TensorFlow Lite XNNPACK delegate for CPU.
INFO: invoked
INFO: average time: 34.457 ms
INFO: 0.768627: 653 military uniform
INFO: 0.105882: 907 Windsor tie
INFO: 0.0196078: 458 bow tie
INFO: 0.0117647: 466 bulletproof vest
INFO: 0.00784314: 835 suit
可以看到平均时间是34ms而PC端大概5ms,差距还是比较明显的。
第三部分就有点复杂了,首先是模型导出,使用下面脚本,将佩奇检测模型导出为tflite格式。
#!/bin/python3.8

import tensorflow as tf

saved_model_dir="saved_model"
# Convert the model
converter = tf.lite.TFLiteConverter.from_saved_model(saved_model_dir) # path to the SavedModel directory
converter.optimizations = [tf.lite.Optimize.DEFAULT]
converter.experimental_new_converter=True
converter.target_spec.supported_ops = [tf.lite.OpsSet.TFLITE_BUILTINS, tf.lite.OpsSet.SELECT_TF_OPS]

tflite_model = converter.convert()
# Save the model.
with open('model.tflite', 'wb') as f:
  f.write(tflite_model)
在第三章训练出的模型目录下执行上述转换命令,可以在当前目录下得到 model.tflite 文件,打印是这样的:
▸ ./convert_tflite.py
2023-12-19 18:59:58.400519: I tensorflow/core/util/port.cc:110] oneDNN custom operations are on. You may see slightly different numerical results due to floating-point round
-off errors from different computation orders. To turn them off, set the environment variable `TF_ENABLE_ONEDNN_OPTS=0`.
2023-12-19 18:59:58.417367: I tensorflow/tsl/cuda/cudart_stub.cc:28] Could not find cuda drivers on your machine, GPU will not be used.
2023-12-19 18:59:58.556611: I tensorflow/tsl/cuda/cudart_stub.cc:28] Could not find cuda drivers on your machine, GPU will not be used.
2023-12-19 18:59:58.557891: I tensorflow/core/platform/cpu_feature_guard.cc:182] This TensorFlow binary is optimized to use available CPU instructions in performance-critica
l operations.
To enable the following instructions: AVX2 AVX_VNNI FMA, in other operations, rebuild TensorFlow with the appropriate compiler flags.
2023-12-19 18:59:59.146661: W tensorflow/compiler/tf2tensorrt/utils/py_utils.cc:38] TF-TRT Warning: Could not find TensorRT
2023-12-19 19:00:00.078886: E tensorflow/compiler/xla/stream_executor/cuda/cuda_driver.cc:268] failed call to cuInit: CUDA_ERROR_UNKNOWN: unknown error
2023-12-19 19:00:00.078951: I tensorflow/compiler/xla/stream_executor/cuda/cuda_diagnostics.cc:168] retrieving CUDA diagnostic information for host: fedora
2023-12-19 19:00:00.078955: I tensorflow/compiler/xla/stream_executor/cuda/cuda_diagnostics.cc:175] hostname: fedora
2023-12-19 19:00:00.079032: I tensorflow/colempiler/xla/stream_executor/cuda/cuda_diagnostics.cc:199] libcuda reported version is: 535.146.2
2023-12-19 19:00:00.079041: I tensorflow/compiler/xla/stream_executor/cuda/cuda_diagnostics.cc:203] kernel reported version is: 535.146.2
2023-12-19 19:00:00.079043: I tensorflow/compiler/xla/stream_executor/cuda/cuda_diagnostics.cc:309] kernel version seems to match DSO: 535.146.2
2023-12-19 19:00:06.622272: W tensorflow/compiler/mlir/lite/python/tf_tfl_flatbuffer_helpers.cc:364] Ignored output_format.
2023-12-19 19:00:06.622301: W tensorflow/compiler/mlir/lite/python/tf_tfl_flatbuffer_helpers.cc:367] Ignored drop_control_dependency.
2023-12-19 19:00:06.622673: I tensorflow/cc/saved_model/reader.cc:45] Reading SavedModel from: saved_model
2023-12-19 19:00:06.677554: I tensorflow/cc/saved_model/reader.cc:91] Reading meta graph with tags { serve }
2023-12-19 19:00:06.677584: I tensorflow/cc/saved_model/reader.cc:132] Reading SavedModel debug info (if present) from: saved_model
2023-12-19 19:00:06.777090: I tensorflow/compiler/mlir/mlir_graph_optimization_pass.cc:375] MLIR V1 optimization pass is not enabled
2023-12-19 19:00:06.810628: I tensorflow/cc/saved_model/loader.cc:231] Restoring SavedModel bundle.
2023-12-19 19:00:07.527629: I tensorflow/cc/saved_model/loader.cc:215] Running initialization op on SavedModel bundle at path: saved_model
2023-12-19 19:00:07.821400: I tensorflow/cc/saved_model/loader.cc:314] SavedModel load for tags { serve }; Status: success: OK. Took 1198726 microseconds.
2023-12-19 19:00:08.118777: I tensorflow/compiler/mlir/tensorflow/utils/dump_mlir_util.cc:255] disabling MLIR crash reproducer, set env var `MLIR_CRASH_REPRODUCER_DIRECTORY` to enable.
2023-12-19 19:00:14.333479: W tensorflow/compiler/mlir/lite/flatbuffer_export.cc:2073] TFLite interpreter needs to link Flex delegate in order to run the model since it contains the following Select TFop(s):
Flex ops: FlexStridedSlice, FlexTensorListReserve, FlexTensorListSetItem, FlexTensorListStack
Details:
        tf.StridedSlice(tensor< ?x?x3xf32 >, tensor< 4xi32 >, tensor< 4xi32 >, tensor< 4xi32 >) - > (tensor< 1x?x?x3xf32 >) : {begin_mask = 14 : i64, device = "", ellipsis_mask = 0 : i64, end_mask = 14 : i64, new_axis_mask = 1 : i64, shrink_axis_mask = 0 : i64}
        tf.TensorListReserve(tensor< i32 >, tensor< i32 >) - > (tensor< !tf_type.variant< tensor< *xf32 >> >) : {device = ""}
        tf.TensorListReserve(tensor< i32 >, tensor< i32 >) - > (tensor< !tf_type.variant< tensor< *xi32 >> >) : {device = ""}
        tf.TensorListSetItem(tensor< !tf_type.variant< tensor< *xf32 >> >, tensor< i32 >, tensor< ?x?x3xf32 >) - > (tensor< !tf_type.variant< tensor< *xf32 >> >) : {device = "", resize_if_index_out_of_bounds = false}
        tf.TensorListSetItem(tensor< !tf_type.variant< tensor< *xi32 >> >, tensor< i32 >, tensor< 3xi32 >) - > (tensor< !tf_type.variant< tensor< *xi32 >> >) : {device = "", resize_if_index_out_of_bounds = false}
        tf.TensorListStack(tensor< !tf_type.variant< tensor< *xf32 >> >, tensor< 3xi32 >) - > (tensor< 1x512x512x3xf32 >) : {device = "", num_elements = 1 : i64}
        tf.TensorListStack(tensor< !tf_type.variant< tensor< *xi32 >> >, tensor< 1xi32 >) - > (tensor< 1x3xi32 >) : {device = "", num_elements = 1 : i64}
See instructions: https://www.tensorflow.org/lite/guide/ops_select
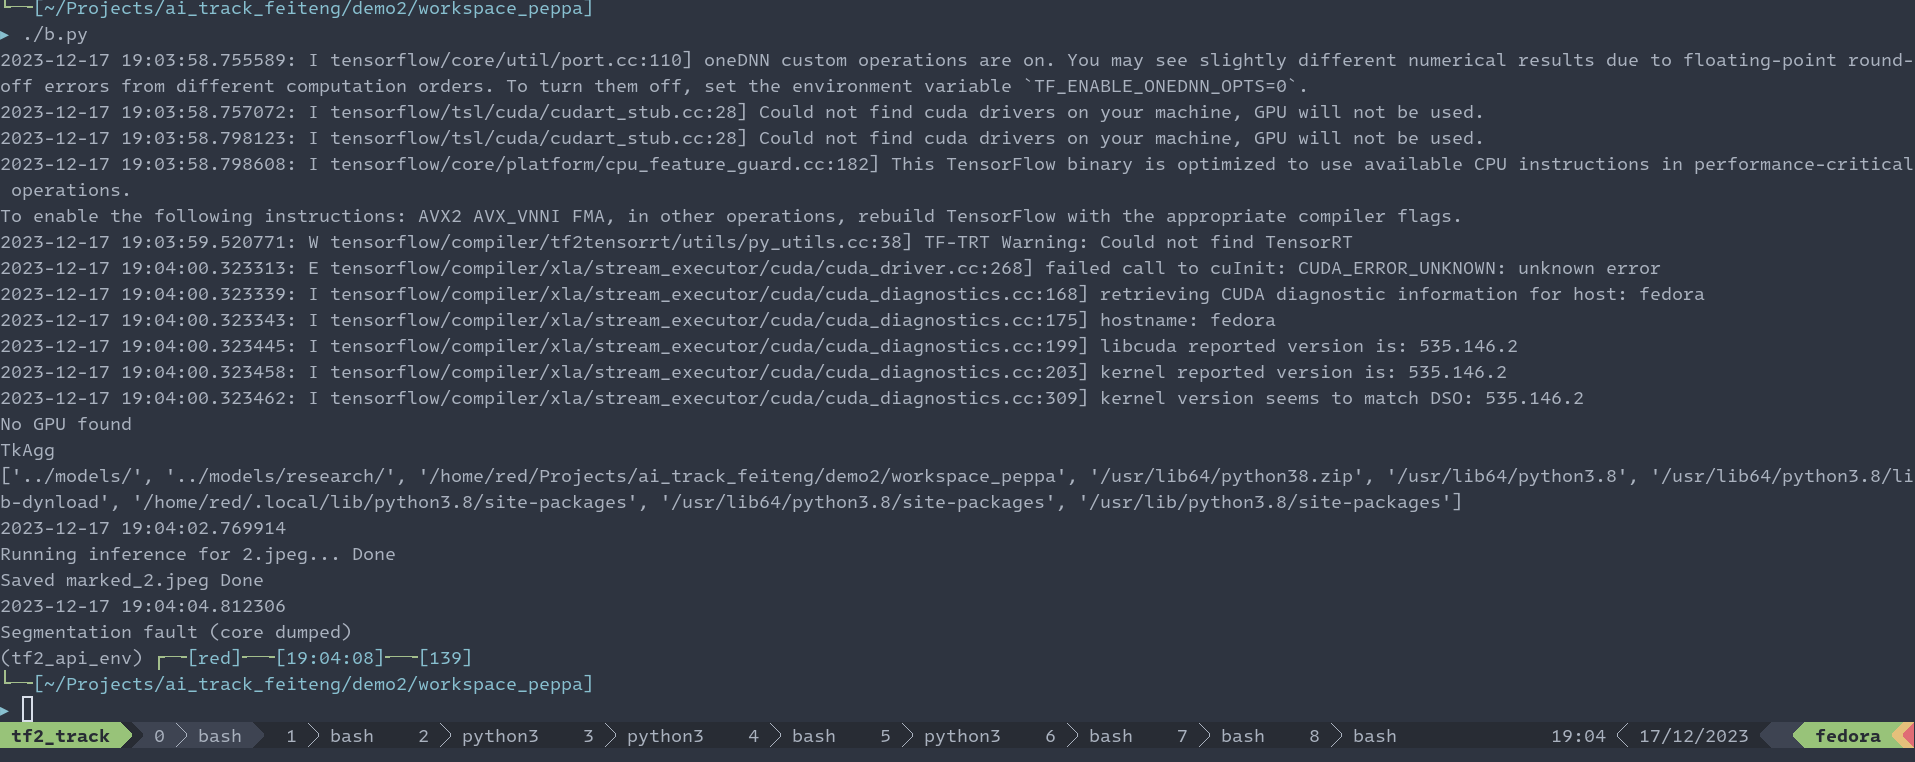
这里有很重要的一段内容:
TFLite interpreter needs to link Flex delegate in order to run the model since it contains the following Select TFop(s):
Flex ops: FlexStridedSlice, FlexTensorListReserve, FlexTensorListSetItem, FlexTensorListStack ,这段话提示我们这个模型使用了部分算子需要 Flex 代理,之前使用 cmake 编译出来的 TensorFlow Lite 并没有包含 Flex 代理,所以这个模型是无法被前面编译的 TensorFlow Lite 解析的,这里我使用 TensorFlow 的 minimal 工具尝试解析这个模型,得到的结果如下:
可以看到因为缺少部分算子,导致无法解析这个我们转换的佩奇检测模型,经过一段时间的搜索发现了解决方法 [Adding Select Tf Ops to Cmake]。简单来说,首先通过bazel工具(我尝试强制使用7.0.0发现无法构建成功,后来还是使用bazel-6.1.0才正常构建了出来) 使用如下命令构建出来库文件。
bazel build -c opt --config=monolithic tensorflow/lite/delegates/flex:tensorflowlite_flex
然后修改 minimal 工具的 CMakeLists.txt 文件,diff 文件为:
diff --git a/tensorflow/lite/examples/minimal/CMakeLists.txt b/tensorflow/lite/examples/minimal/CMakeLists.txt
index 7f8301162bb..1dd8ae05089 100644
--- a/tensorflow/lite/examples/minimal/CMakeLists.txt
+++ b/tensorflow/lite/examples/minimal/CMakeLists.txt
@@ -35,10 +35,14 @@ add_subdirectory(
   EXCLUDE_FROM_ALL
 )

+find_library(TF_LIB_FLEX tensorflowlite_flex HINTS "${TENSORFLOW_SOURCE_DIR}/bazel-bin/tensorflow/lite/delegates/flex/")
+
 set(CMAKE_CXX_STANDARD 17)
 add_executable(minimal
   minimal.cc
 )
 target_link_libraries(minimal
+  -Wl,--no-as-needed # Need --no-as-needed to link tensorflowlite_flex
   tensorflow-lite
+  ${TF_LIB_FLEX{TF_LIB_FLEX}
 )
构建成功后,会在目录中看到对应的库文件:
▸ ll bazel-bin/tensorflow/lite/delegates/flex/libtensorflowlite_flex.so
-r-xr-xr-x. 1 red red 194047768 Dec 19 16:10 bazel-bin/tensorflow/lite/delegates/flex/libtensorflowlite_flex.so
使用命令
cmake ../tensorflow_src/tensorflow/lite/examples/minimal;
cmake --build . -j;
重新构建 minimal 工具,然后再次测试:
▸ ldd minimal
linux-vdso.so.1 (0x00007ffdab5e4000)
libtensorflowlite_flex.so = > /home/red/Projects/ai_track_feiteng/demo_tflite/tensorflow_src/bazel-bin/tensorflow/lite/delegates/flex/libtensorflowlite_flex.so (0x00007f8a00800000)
libm.so.6 = > /lib64/libm.so.6 (0x00007f8a0c189000)
libstdc++.so.6 = > /lib64/libstdc++.so.6 (0x00007f8a00400000)
libgcc_s.so.1 = > /lib64/libgcc_s.so.1 (0x00007f8a0c165000)
libc.so.6 = > /lib64/libc.so.6 (0x00007f8a00222000)
/lib64/ld-linux-x86-64.so.2 (0x00007f8a0c287000)
▸ ./minimal model.tflite
2023-12-20 08:51:21.278490: I tensorflow/core/util/port.cc:113] oneDNN custom operations are on. You may see slightly different numerical results due to floating-point round-off errors from different computation orders. To turn them off, set the environment variable `TF_ENABLE_ONEDNN_OPTS=0`.
INFO: Created TensorFlow Lite delegate for select TF ops.
2023-12-20 08:51:21.300452: I tensorflow/core/platform/cpu_feature_guard.cc:210] This TensorFlow binary is optimized to use available CPU instructions in performance-critical operations.
To enable the following instructions: SSE3 SSE4.1 SSE4.2 AVX AVX2 AVX_VNNI FMA, in other operations, rebuild TensorFlow with the appropriate compiler flags.
INFO: TfLiteFlexDelegate delegate: 4 nodes delegated out of 21284 nodes with 2 partitions.
INFO: Created TensorFlow Lite XNNPACK delegate for CPU.
WARNING: Attempting to use a delegate that only supports static-sized tensors with a graph that has dynamic-sized tensors (tensor#394 is a dynamic-sized tensor).
=== Pre-invoke Interpreter State ===
Interpreter has 5 subgraphs.
-----------Subgraph-0 has 164547 tensors and 21286 nodes------------
1 Inputs: [0] - > 3B (0.00MB)
8 Outputs: [41871,42025,41990,41891,42078,42060,42007,42043] - > 982104B (0.94MB)
Tensor ID Name Type AllocType Size (Bytes/MB) Shape MemAddr-Offset
Tensor 0 serving_default_input_... kTfLiteUInt8 kTfLiteArenaRw 3 / 0.00 [1,1,1,3] [0, 3)
Tensor 1 Postprocessor/Decode/g... kTfLiteFloat32 kTfLiteMmapRo 196416 / 0.19 [49104] [4628736, 4825152)
...... 省略
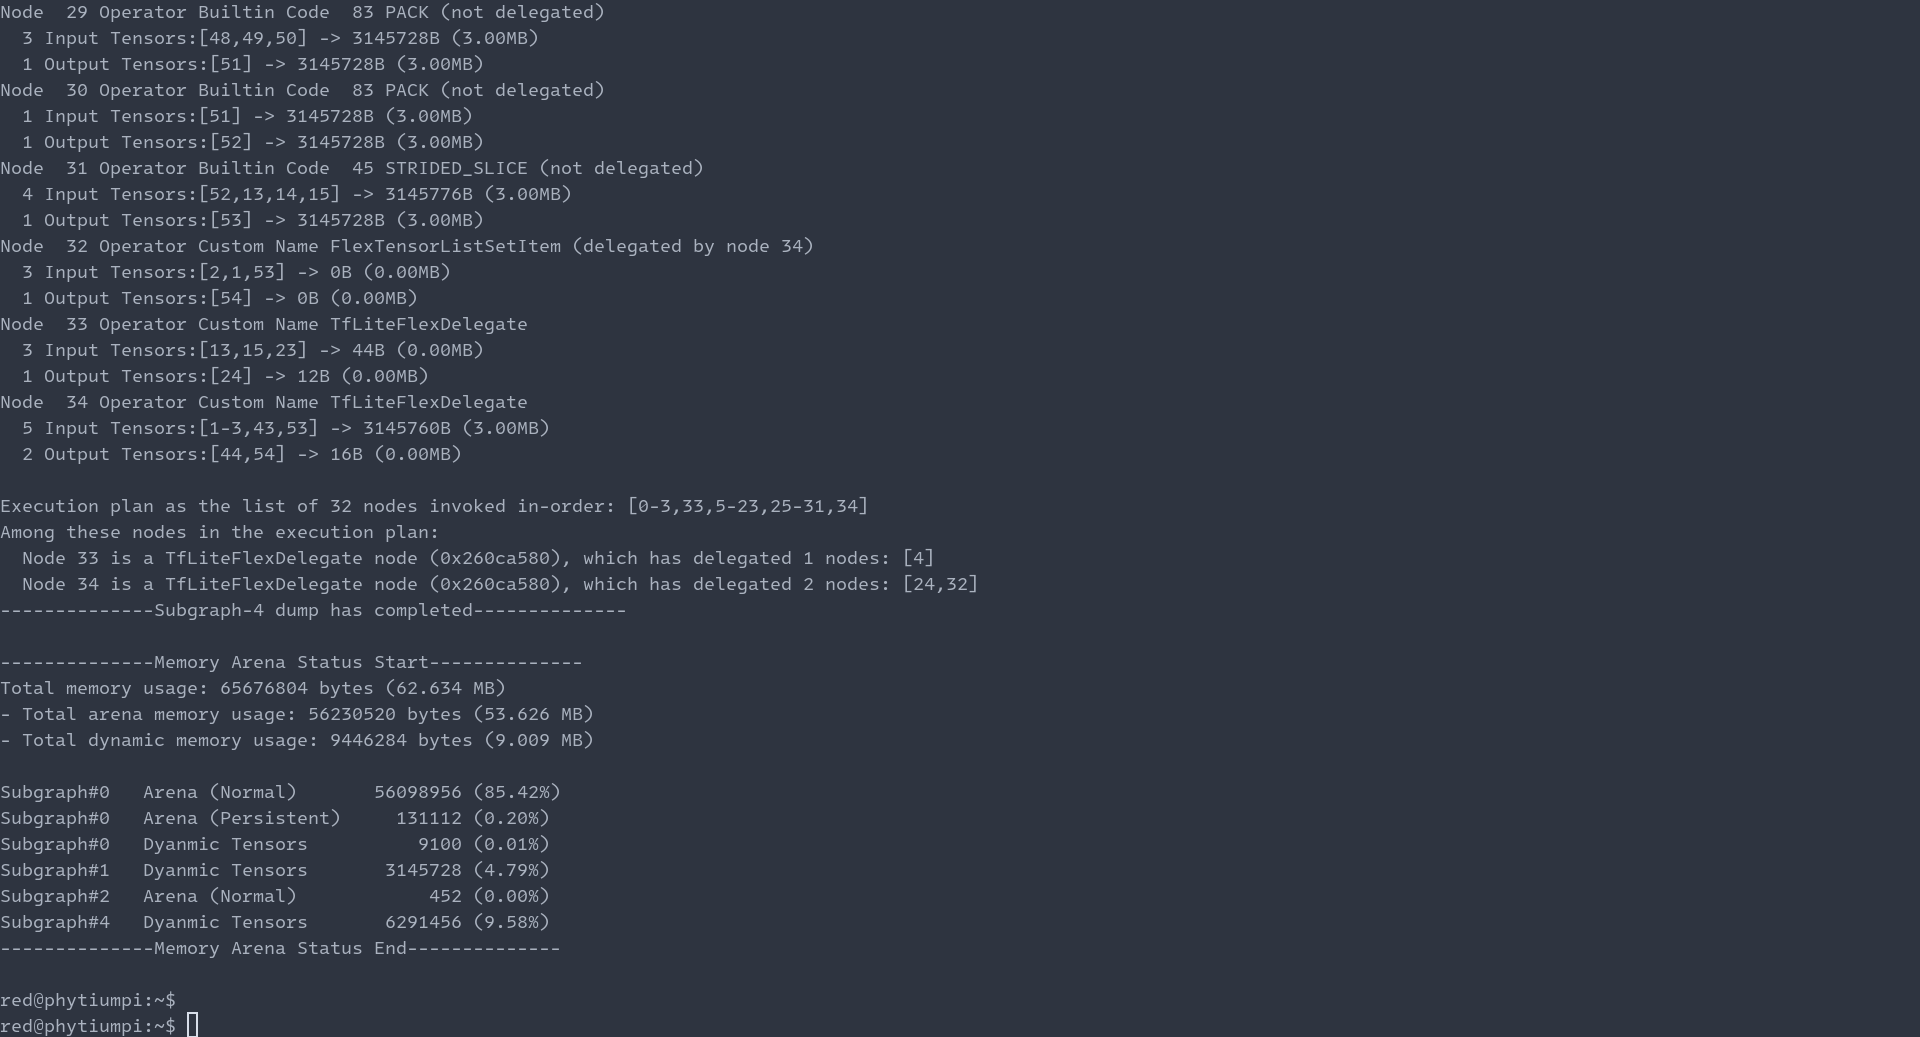
--------------Subgraph-4 dump has completed--------------
--------------Memory Arena Status Start--------------
Total memory usage: 65676804 bytes (62.634 MB)
- Total arena memory usage: 56230520 bytes (53.626 MB)
- Total dynamic memory usage: 9446284 bytes (9.009 MB)
Subgraph#0 Arena (Normal) 56098956 (85.42%)
Subgraph#0 Arena (Persistent) 131112 (0.20%)
Subgraph#0 Dyanmic Tensors 9100 (0.01%)
Subgraph#1 Dyanmic Tensors 3145728 (4.79%)
Subgraph#2 Arena (Normal) 452 (0.00%)
Subgraph#4 Dyanmic Tensors 6291456 (9.58%)
--------------Memory Arena Status End--------------
至此,就完成了在 PC 端使用 C++ 对我们佩奇模型的检测。下面就是关键的在飞腾派上使用 C++ 通过 tensorflowlite 完成对模型的检测和调用。
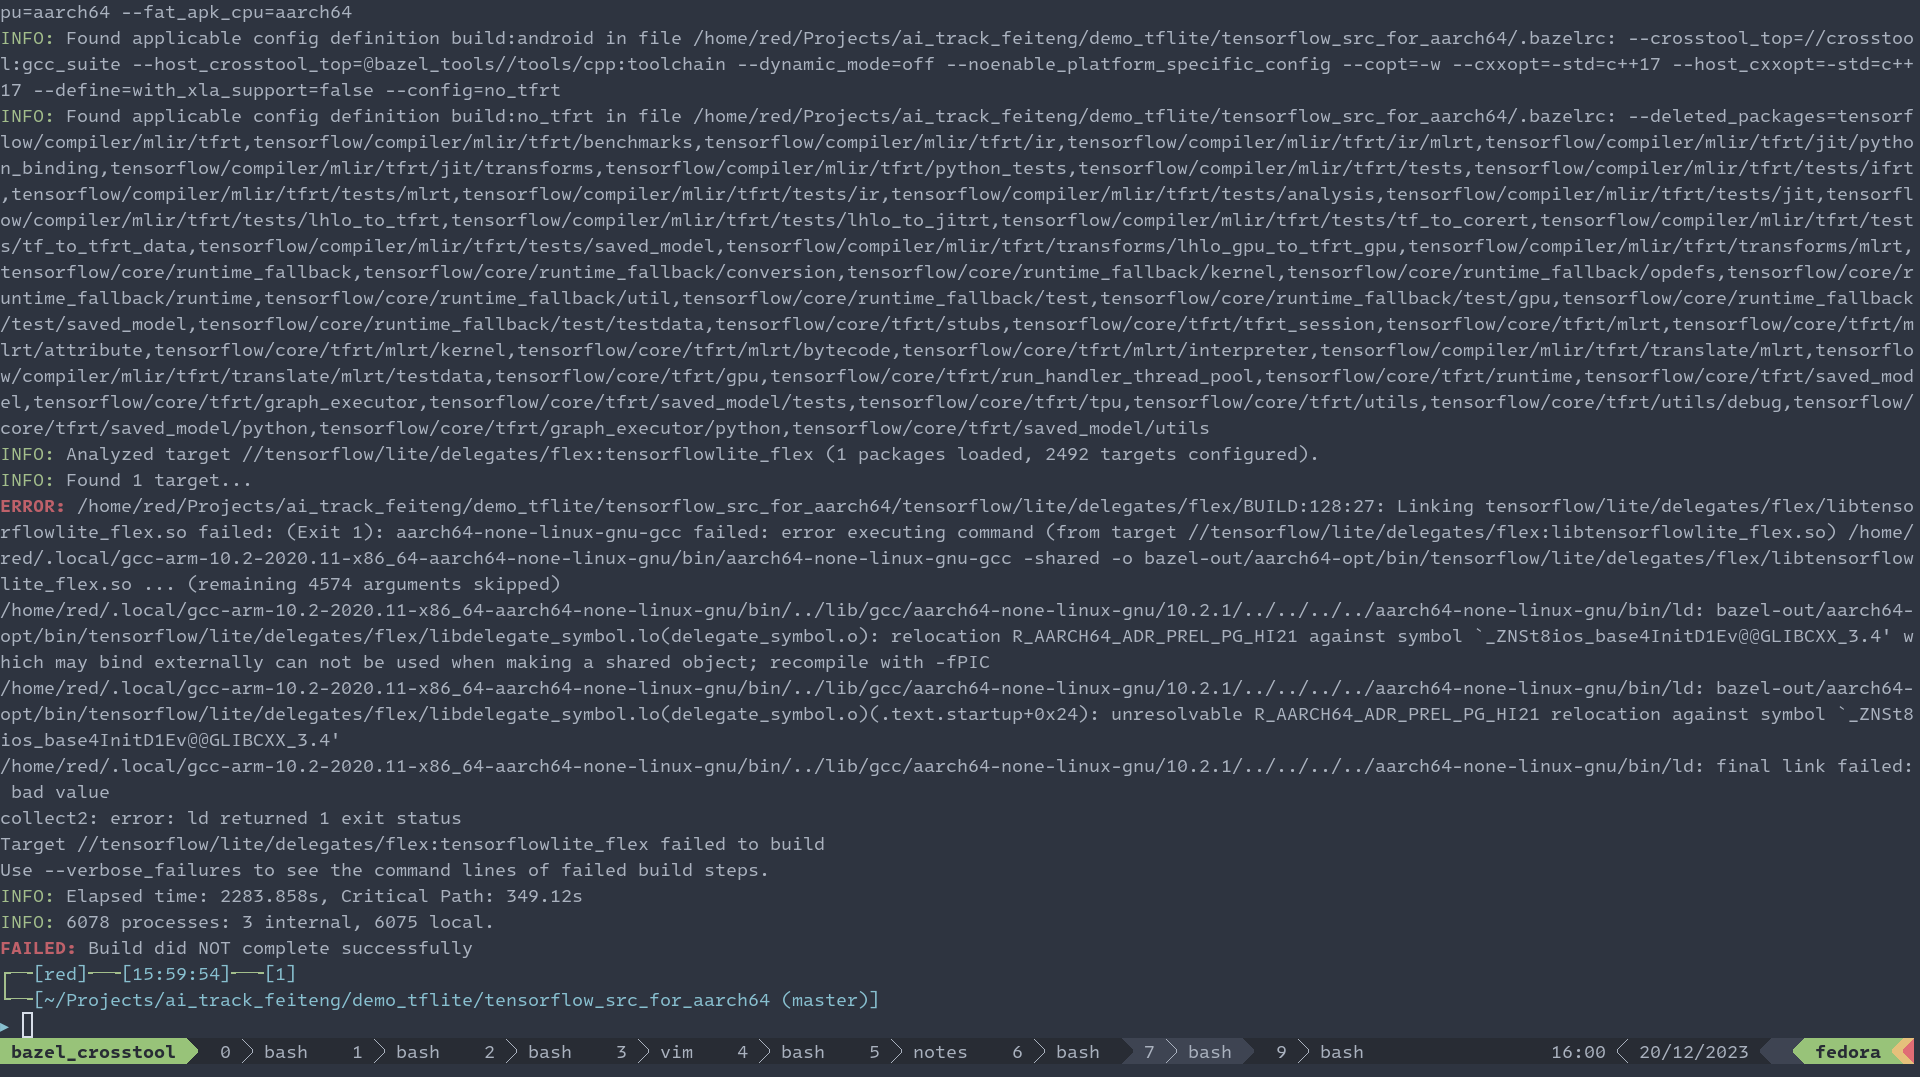
这里参照在 PC 端的过程经验,首先使用 Bazel 交叉编译出飞腾派对应的库文件,这个过程可以参照 Bazel 的官方文档了解如何配置工具链,然后配置到 tensorflow 的仓库。这里注意的是要添加额外的编译参数:
build:android_arm64 --cxxopt=-fPIC
build:android_arm64 --copt=-fPIC
否则的话在编译最后阶段会提示类似如下的错误:
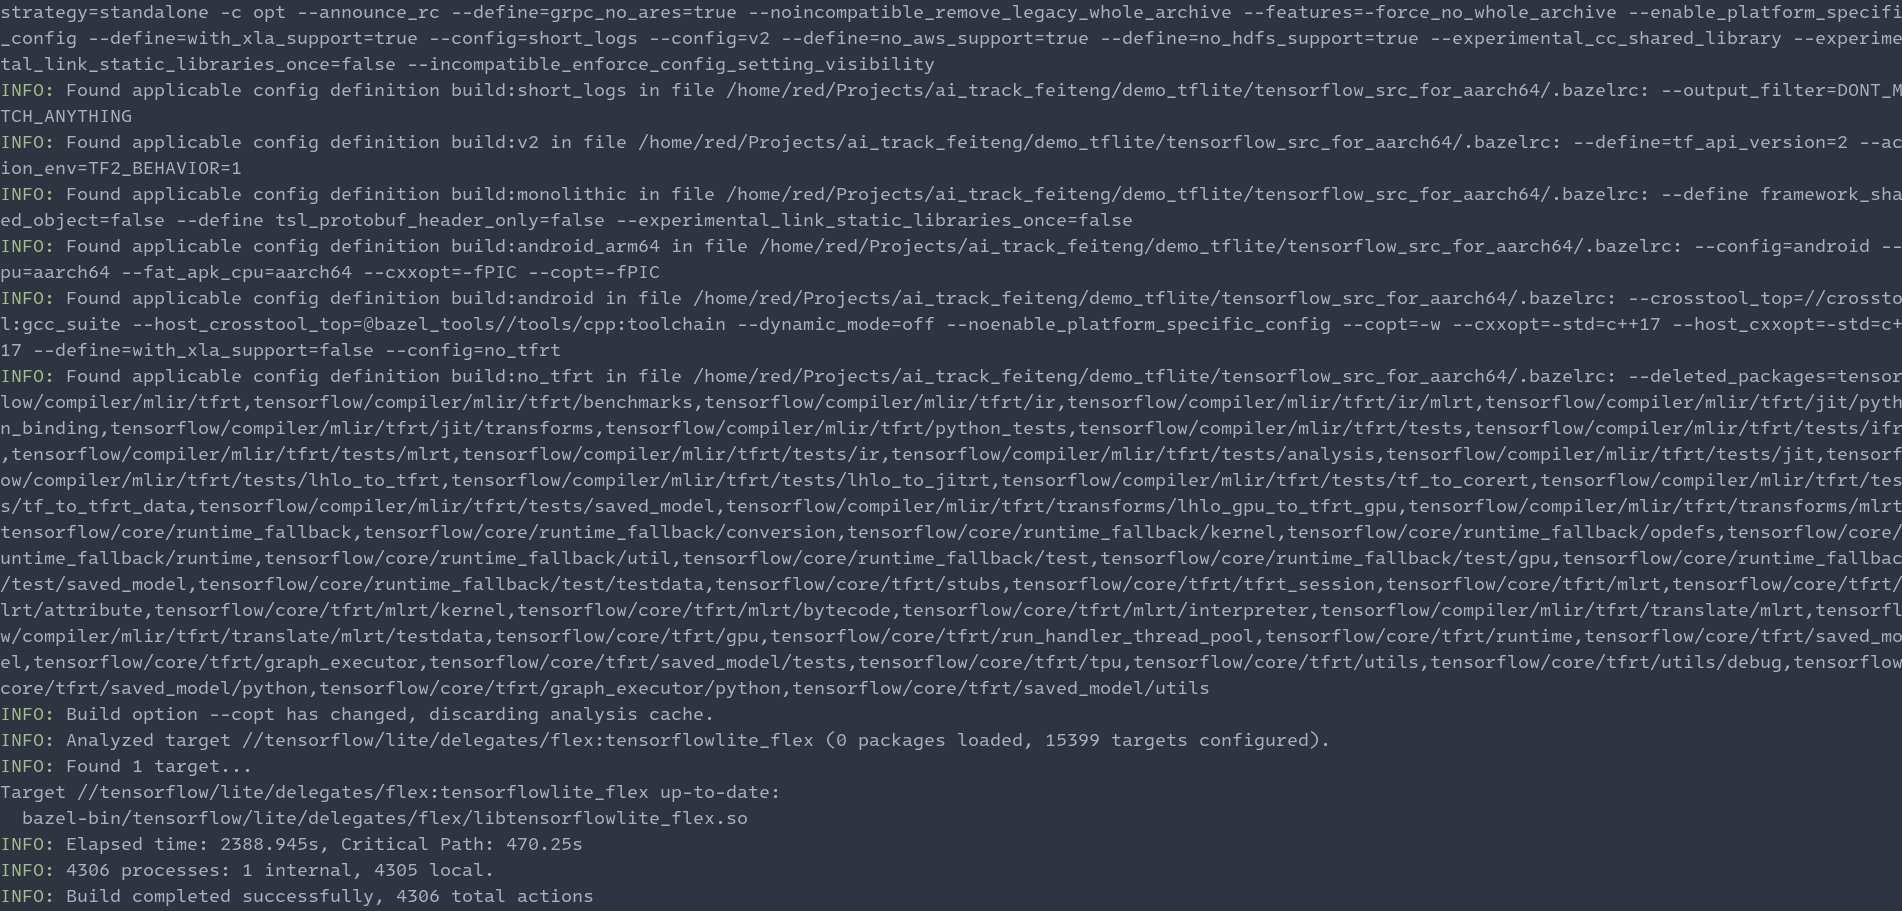
在PC上经过一段时间的编译,最后编译成功的截图为:
检查下库文件的类型:
▸ file bazel-bin/tensorflow/lite/delegates/flex/libtensorflowlite_flex.so
bazel-bin/tensorflow/lite/delegates/flex/libtensorflowlite_flex.so: ELF 64-bit LSB shared object, ARM aarch64, version 1 (SYSV), dynamically linked, stripped
可以看到 aarch64 版本的类型,然后参照[tensorflow/lite/examples/minimal/README.md]交叉编译出 minimal 例程进行测试。
▸ aarch64-none-linux-gnu-readelf -d minimal | head -n 12

Dynamic section at offset 0x4ecea0 contains 33 entries:
  Tag        Type                         Name/Value
 0x0000000000000001 (NEEDED)             Shared library: [libtensorflowlite_flex.so]
 0x0000000000000001 (NEEDED)             Shared library: [librt.so.1]
 0x0000000000000001 (NEEDED)             Shared library: [libdl.so.2]
 0x0000000000000001 (NEEDED)             Shared library: [libpthread.so.0]
 0x0000000000000001 (NEEDED)             Shared library: [libm.so.6]
 0x0000000000000001 (NEEDED)             Shared library: [libstdc++.so.6]
 0x0000000000000001 (NEEDED)             Shared library: [libgcc_s.so.1]
 0x0000000000000001 (NEEDED)             Shared library: [libc.so.6]
 0x000000000000000f (RPATH)              Library rpath: [/home/red/Projects/ai_track_feiteng/demo_tflite/tensorflow_src_for_aarch64/bazel-bin/tensorflow/lite/delegates/flex]
┏─╼[red]╾─╼[17:51:57]╾─╼[0]
┗─╼[~/Projects/ai_track_feiteng/demo_tflite/tensorflow_src_for_aarch64/tflite_aarch64_minimal (master)]
▸ file minimal
minimal: ELF 64-bit LSB executable, ARM aarch64, version 1 (GNU/Linux), dynamically linked, interpreter /lib/ld-linux-aarch64.so.1, for GNU/Linux 3.7.0, with debug_info, not stripped
下面将对应的 minimal 和 libtensorflowlite_flex.so 文件发送到飞腾派并对佩奇检测模型进行测试。测试过程和结果分别如下:
red@phytiumpi:~$ file minimal
minimal: ELF 64-bit LSB executable, ARM aarch64, version 1 (GNU/Linux), dynamically linked, interpreter /lib/ld-linux-aarch64.so.1, for GNU/Linux 3.7.0, with debug_info, not stripped
red@phytiumpi:~$ ldd minimal
        linux-vdso.so.1 (0x0000ffffb29be000)
        libtensorflowlite_flex.so = > /lib/libtensorflowlite_flex.so (0x0000ffff96480000)
        librt.so.1 = > /lib/aarch64-linux-gnu/librt.so.1 (0x0000ffff96460000)
        libdl.so.2 = > /lib/aarch64-linux-gnu/libdl.so.2 (0x0000ffff96440000)
        libpthread.so.0 = > /lib/aarch64-linux-gnu/libpthread.so.0 (0x0000ffff96420000)
        libm.so.6 = > /lib/aarch64-linux-gnu/libm.so.6 (0x0000ffff96380000)
        libstdc++.so.6 = > /lib/aarch64-linux-gnu/libstdc++.so.6 (0x0000ffff96150000)
        libgcc_s.so.1 = > /lib/aarch64-linux-gnu/libgcc_s.so.1 (0x0000ffff96120000)
        libc.so.6 = > /lib/aarch64-linux-gnu/libc.so.6 (0x0000ffff95f70000)
        /lib/ld-linux-aarch64.so.1 (0x0000ffffb2985000)
red@phytiumpi:~$
可以看到检测的结果和PC端的一致。
至此已经完成了佩奇检测模型部署到飞腾派的前期准备工作(环境搭建,功能测试验证)。接下来的章节,就是开始使用 C++ 开发佩奇检测模型的应用功能了,敬请期待。
审核编辑 黄宇
-
4G
+关注
关注
15文章
5635浏览量
124946 -
飞腾派
+关注
关注
4文章
10浏览量
572
发布评论请先 登录


评论