 【飞腾派4G版免费试用】 第二章:在PC端使用 TensorFlow2 训练目标检测模型

使用 TensorFlow2 训练目标检测模型
因为我的项目是计划在飞腾派上实现一个目标检测跟踪算法,通过算法输出控制信号控制电机跟随目标运行。在第一章完成了Ubuntu系统的构建和烧写,这几天就在研究如何训练目标检测模型和部署,经过一段时间的资料搜集和测试,目前已经顺利使用 TensorFlow2 完成了模型的训练的测试,首先描述下我测试的 PC 配置。
单个 step 实际测试大概2s+,为了加快测试,我设置了训练的 step 为 300 ,实际测试15分钟左右完成了模型训练,这个在后续配置文件中可以看到。
PC端关键的软件配置
内核 :Linux fedora 6.6.4-100.fc38.x86_64 #1 SMP PREEMPT_DYNAMIC Sun Dec 3 18:11:27 UTC 2023 x86_64 GNU/Linux
Python :Python 3.8.18 (default, Aug 28 2023, 00:00:00)
参考内容
- [How to train your own Object Detector with TensorFlow’s Object Detector API]
- [How to Train Your Own Object Detector Using TensorFlow Object Detection API]
环境准备
为了训练的方便,建议安装一个虚拟的python环境,首先创建一个新的文件夹demo,然后 进入到 demo 目录 。
- 首先接着使用到 python 的 venv 模块创建一个虚拟环境。
python -m venv tf2_api_env
- 接着激活创建的虚拟环境
▸ source ../tf2_api_env/bin/activate
(tf2_api_env) ┏─╼[red]╾─╼[17:01:44]╾─╼[0]
┗─╼[~/Projects/ai_track_feiteng/demo2/workspace]
▸
- 接下来的操作都在这个虚拟环境中完成,下面开始安装 tensorflow2:
pip install tensorflow==2.*
- 下载,安装编译 models 下的 Protobuf
git clone https://github.com/tensorflow/models.git
cd models/research/
protoc models/research/object_detection/protos/*.proto --python_out=../../
- 下载,安装编译 coco API
pip install cython
git clone https://github.com/cocodataset/cocoapi.git
cd cocoapi/PythonAPI
make
cp -r pycocotools ./models/research/
- 对象检测 API 安装
cd models/research
cp object_detection/packages/tf2/setup.py .
python3.8 -m pip install .
- 测试是否安装正确
python3.8 object_detection/builders/model_builder_tf2_test.py
2023-12-14 18:30:03.462617: I tensorflow/core/util/port.cc:110] oneDNN custom operations are on. You may see slightly different numerical results due to floating-point round-
off errors from different computation orders. To turn them off, set the environment variable `TF_ENABLE_ONEDNN_OPTS=0`.
2023-12-14 18:30:03.463746: I tensorflow/tsl/cuda/cudart_stub.cc:28] Could not find cuda drivers on your machine, GPU will not be used.
2023-12-14 18:30:03.489237: I tensorflow/tsl/cuda/cudart_stub.cc:28] Could not find cuda drivers on your machine, GPU will not be used.
2023-12-14 18:30:03.489587: I tensorflow/core/platform/cpu_feature_guard.cc:182] This TensorFlow binary is optimized to use available CPU instructions in performance-critical
 operations.
To enable the following instructions: AVX2 AVX_VNNI FMA, in other operations, rebuild TensorFlow with the appropriate compiler flags.
2023-12-14 18:30:03.994817: W tensorflow/compiler/tf2tensorrt/utils/py_utils.cc:38] TF-TRT Warning: Could not find TensorRT
2023-12-14 18:30:04.975870: I tensorflow/compiler/xla/stream_executor/cuda/cuda_gpu_executor.cc:995] successful NUMA node read from SysFS had negative value (-1), but there m
ust be at least one NUMA node, so returning NUMA node zero. See more at https://github.com/torvalds/linux/blob/v6.0/Documentation/ABI/testing/sysfs-bus-pci#L344-L355
2023-12-14 18:30:04.976136: W tensorflow/core/common_runtime/gpu/gpu_device.cc:1960] Cannot dlopen some GPU libraries. Please make sure the missing libraries mentioned above
are installed properly if you would like to use GPU. Follow the guide at https://www.tensorflow.org/install/gpu for how to download and setup the required libraries for your
platform.
Skipping registering GPU devices...
Running tests under Python 3.8.18: /home/red/Projects/ai_track_feiteng/demo2/tf2_api_env/bin/python3.8
[ RUN      ] ModelBuilderTF2Test.test_create_center_net_deepmac
WARNING:tensorflow:`tf.keras.layers.experimental.SyncBatchNormalization` endpoint is deprecated and will be removed in a future release. Please use `tf.keras.layers.BatchNorm
alization` with parameter `synchronized` set to True.
W1214 18:30:05.009487 140273879242560 batch_normalization.py:1531] `tf.keras.layers.experimental.SyncBatchNormalization` endpoint is deprecated and will be removed in a futur
e release. Please use `tf.keras.layers.BatchNormalization` with parameter `synchronized` set to True.
/home/red/Projects/ai_track_feiteng/demo2/tf2_api_env/lib64/python3.8/site-packages/object_detection/builders/model_builder.py:1112: DeprecationWarning: The 'warn' function i
s deprecated, use 'warning' instead
  logging.warn(('Building experimental DeepMAC meta-arch.'
...... 省略 ......
[ RUN      ] ModelBuilderTF2Test.test_session
[  SKIPPED ] ModelBuilderTF2Test.test_session
[ RUN      ] ModelBuilderTF2Test.test_unknown_faster_rcnn_feature_extractor
INFO:tensorflow:time(__main__.ModelBuilderTF2Test.test_unknown_faster_rcnn_feature_extractor): 0.0s
I1214 18:30:21.144221 140273879242560 test_util.py:2462] time(__main__.ModelBuilderTF2Test.test_unknown_faster_rcnn_feature_extractor): 0.0s
[       OK ] ModelBuilderTF2Test.test_unknown_faster_rcnn_feature_extractor
[ RUN      ] ModelBuilderTF2Test.test_unknown_meta_architecture
INFO:tensorflow:time(__main__.ModelBuilderTF2Test.test_unknown_meta_architecture): 0.0s
I1214 18:30:21.144374 140273879242560 test_util.py:2462] time(__main__.ModelBuilderTF2Test.test_unknown_meta_architecture): 0.0s
[       OK ] ModelBuilderTF2Test.test_unknown_meta_architecture
[ RUN      ] ModelBuilderTF2Test.test_unknown_ssd_feature_extractor
INFO:tensorflow:time(__main__.ModelBuilderTF2Test.test_unknown_ssd_feature_extractor): 0.0s
I1214 18:30:21.144848 140273879242560 test_util.py:2462] time(__main__.ModelBuilderTF2Test.test_unknown_ssd_feature_extractor): 0.0s
[       OK ] ModelBuilderTF2Test.test_unknown_ssd_feature_extractor
----------------------------------------------------------------------
Ran 24 tests in 16.167s

OK (skipped=1)
- 数据准备,这里为了重点关注模型训练过程,我们这里从仓库[raccoon_dataset]获取已经标注好的数据集。
然后放在对应的目录 workspace/data 目录,如下所示:
▸ ls workspace/data/
object-detection.pbtxt  raccoon_labels.csv  test_labels.csv  test.record  train_labels.csv  train.record
- 模型选择和训练参数配置(重点!!!,这里为了演示不会详细介绍每一个参数的意义,具体参数的意义可以查看)
- 模型选择,现在有很多现成的模型可以加快我们的训练,我们需要在此基础上进行调参,TensorFlow2 对象检测已有的算法模型在这里 [tf2_detection_zoo],这里我们需要从中下载一个模型进行训练,本章中我选择的是 [efficientdet_d0_coco17_tpu-32.tar.gz]。将这个模型的压缩包解压到 demo/workspace/pre_trained_models 目录下。
▸ tree -L 3 workspace/pre_trained_models/efficientdet_d0_coco17_tpu-32/
workspace/pre_trained_models/efficientdet_d0_coco17_tpu-32/
├── checkpoint
│   ├── checkpoint
│   ├── ckpt-0.data-00000-of-00001
│   └── ckpt-0.index
├── pipeline.config
└── saved_model
    ├── assets
    ├── saved_model.pb
    └── variables
        ├── variables.data-00000-of-00001
        └── variables.index

5 directories, 7 files
这里关键的是 chekpoint 目录和 pipeline.config,checkpoint 包含了目标训练的切入点,pipeline.config 是我们后续需要调整的模型训练配置文件。
- 训练参数微调,这里为了加快介绍模型训练的过程,直接看下对该文件的 diff 文件可以更直观看到做了哪些修改
--- workspace/pre_trained_models/efficientdet_d0_coco17_tpu-32/pipeline.config	2020-07-11 08:12:31.000000000 +0800
+++ workspace/models/efficientdet_d0/v2/pipeline.config	2023-12-14 14:10:58.998130084 +0800
@@ -1,6 +1,6 @@
 model {
   ssd {
-    num_classes: 90
+    num_classes: 1
     image_resizer {
       keep_aspect_ratio_resizer {
         min_dimension: 512
@@ -131,7 +131,7 @@
   }
 }
 train_config {
-  batch_size: 128
+  batch_size: 8
   data_augmentation_options {
     random_horizontal_flip {
     }
@@ -149,29 +149,29 @@
       learning_rate {
         cosine_decay_learning_rate {
           learning_rate_base: 0.07999999821186066
-          total_steps: 300000
+          total_steps: 300
           warmup_learning_rate: 0.0010000000474974513
-          warmup_steps: 2500
+          warmup_steps: 25
         }
       }
       momentum_optimizer_value: 0.8999999761581421
     }
     use_moving_average: false
   }
-  fine_tune_checkpoint: "PATH_TO_BE_CONFIGURED"
-  num_steps: 300000
+  fine_tune_checkpoint: "/home/red/Projects/ai_track_feiteng/demo2/workspace/pre_trained_models/efficientdet_d0_coco17_tpu-32/checkpoint/ckpt-0"
+  num_steps: 300
   startup_delay_steps: 0.0
   replicas_to_aggregate: 8
   max_number_of_boxes: 100
   unpad_groundtruth_tensors: false
-  fine_tune_checkpoint_type: "classification"
-  use_bfloat16: true
+  fine_tune_checkpoint_type: "detection"
+  use_bfloat16: false
   fine_tune_checkpoint_version: V2
 }
 train_input_reader: {
-  label_map_path: "PATH_TO_BE_CONFIGURED/label_map.txt"
+  label_map_path: "/home/red/Projects/ai_track_feiteng/demo2/workspace/data/object-detection.pbtxt"
   tf_record_input_reader {
-    input_path: "PATH_TO_BE_CONFIGURED/train2017-?????-of-00256.tfrecord"
+    input_path: "/home/red/Projects/ai_track_feiteng/demo2/workspace/data/train.record"
   }
 }

@@ -182,10 +182,10 @@
 }

 eval_input_reader: {
-  label_map_path: "PATH_TO_BE_CONFIGURED/label_map.txt"
+  label_map_path: "/home/red/Projects/ai_track_feiteng/demo2/workspace/data/object-detection.pbtxt"
   shuffle: false
   num_epochs: 1
   tf_record_input_reader {
-    input_path: "PATH_TO_BE_CONFIGURED/val2017-?????-of-00032.tfrecord"
+    input_path: "/home/red/Projects/ai_track_feiteng/demo2/workspace/data/test.record"
   }
 }
其中关键的修改点:
num_classes = 1  表示识别一类目标
batch_size = 8   表示这个参数会影响训练时候消耗的内存
fine_tune_checkpoint_type: "detection" 表示进行目标检测
use_bfloat16: false 不使用 TPU
fine_tune_checkpoint: "/home/red/Projects/ai_track_feiteng/demo2/workspace/pre_trained_models/efficientdet_d0_coco17_tpu-32/checkpoint/ckpt-0" 设置模型训练的切入点
num_steps: 300 总的学习步数
- 模型训练和导出
经过前面的铺垫,目前已经具备了训练条件,执行如下脚本开始训练,我这边训练了大概15分钟:
#!/bin/sh
python3.8 model_main_tf2.py
  --pipeline_config_path=./models/efficientdet_d0/v2/pipeline.config
  --model_dir=./models/efficientdet_d0/v2
  --checkpoint_every_n=8
  --num_workers=12
  --alsologtostderr
训练完成后,就可以将模型导出,使用如下命令:
python3.8 exporter_main_v2.py
  --pipeline_config_path=./models/efficientdet_d0/v2/pipeline.config
  --trained_checkpoint_dir=./models/efficientdet_d0/v2
  --output_directory=./exported_models/efficientdet_d0
  --input_type=image_tensor
上述命令会将模型导出到 ./exported_models/efficientdet_d0 目录,导出成功后会看到如下内容:
▸ tree -L 3 workspace/exported_models/efficientdet_d0/
workspace/exported_models/efficientdet_d0/
├── checkpoint
│   ├── checkpoint
│   ├── ckpt-0.data-00000-of-00001
│   └── ckpt-0.index
├── pipeline.config
└── saved_model
    ├── assets
    ├── fingerprint.pb
    ├── saved_model.pb
    └── variables
        ├── variables.data-00000-of-00001
        └── variables.index

5 directories, 8 files
可以看到这是我们自己训练出来的模型和前面提到的和网上下载的模型efficientdet_d0_coco17_tpu-32.tar.gz解压之后的结构很像。
11. 最后就演示下训练模型的精度,这里提供了网上的一个示例代码,针对我的代码结构,我做了下微调(代码之前是在.ipynb格式文件中的,为此,我还改了一个 python 脚本用来提取其中的 python代码),该代码会对测试图像进行检测,将识别出来的目标用框标注出来。首先看下测试的脚本:
#!/bin/python3.8

import os # importing OS in order to make GPU visible
os.environ["CUDA_DEVICE_ORDER"]="PCI_BUS_ID" # do not change anything in here

# specify which device you want to work on.
# Use "-1" to work on a CPU. Default value "0" stands for the 1st GPU that will be used
os.environ["CUDA_VISIBLE_DEVICES"]="0" # TODO: specify your computational device
import tensorflow as tf # import tensorflow

# checking that GPU is found
if tf.test.gpu_device_name():
    print('GPU found')
else:
    print("No GPU found")
# other import
import numpy as np
from PIL import Image
import matplotlib
from matplotlib import pyplot as plt
from tqdm import tqdm
import sys # importyng sys in order to access scripts located in a different folder

print(matplotlib.get_backend())

path2scripts = ['../models/research/', '../models/'] # TODO: provide pass to the research folder
sys.path.insert(0, path2scripts[0]) # making scripts in models/research available for import
sys.path.insert(0, path2scripts[1]) # making scripts in models/research available for import
print(sys.path)
# importing all scripts that will be needed to export your model and use it for inference
from object_detection.utils import label_map_util
from object_detection.utils import config_util
from object_detection.utils import visualization_utils as viz_utils
from object_detection.builders import model_builder
# NOTE: your current working directory should be Tensorflow.

# TODO: specify two pathes: to the pipeline.config file and to the folder with trained model.
path2config ='exported_models/efficientdet_d0/pipeline.config'
path2model = 'exported_models/efficientdet_d0/'
# do not change anything in this cell
configs = config_util.get_configs_from_pipeline_file(path2config) # importing config
model_config = configs['model'] # recreating model config
detection_model = model_builder.build(model_config=model_config, is_training=False) # importing model
ckpt = tf.compat.v2.train.Checkpoint(model=detection_model)
ckpt.restore(os.path.join(path2model, 'checkpoint/ckpt-0')).expect_partial()
path2label_map = 'data/object-detection.pbtxt' # TODO: provide a path to the label map file
category_index = label_map_util.create_category_index_from_labelmap(path2label_map,use_display_name=True)
def detect_fn(image):
    """
    Detect objects in image.

    Args:
      image: (tf.tensor): 4D input image

    Returs:
      detections (dict): predictions that model made
    """

    image, shapes = detection_model.preprocess(image)
    prediction_dict = detection_model.predict(image, shapes)
    detections = detection_model.postprocess(prediction_dict, shapes)

    return detections
def load_image_into_numpy_array(path):
    """Load an image from file into a numpy array.

    Puts image into numpy array to feed into tensorflow graph.
    Note that by convention we put it into a numpy array with shape
    (height, width, channels), where channels=3 for RGB.

    Args:
      path: the file path to the image

    Returns:
      numpy array with shape (img_height, img_width, 3)
    """

    return np.array(Image.open(path))
def inference_with_plot(path2images, box_th=0.25):
    """
    Function that performs inference and plots resulting b-boxes

    Args:
      path2images: an array with pathes to images
      box_th: (float) value that defines threshold for model prediction.

    Returns:
      None
    """
    for image_path in path2images:

        print('Running inference for {}... '.format(image_path), end='')

        image_np = load_image_into_numpy_array(image_path)

        input_tensor = tf.convert_to_tensor(np.expand_dims(image_np, 0), dtype=tf.float32)
        detections = detect_fn(input_tensor)

        # All outputs are batches tensors.
        # Convert to numpy arrays, and take index [0] to remove the batch dimension.
        # We're only interested in the first num_detections.
        num_detections = int(detections.pop('num_detections'))
        detections = {key: value[0, :num_detections].numpy()
                      for key, value in detections.items()}

        detections['num_detections'] = num_detections

        # detection_classes should be ints.
        detections['detection_classes'] = detections['detection_classes'].astype(np.int64)

        label_id_offset = 1
        image_np_with_detections = image_np.copy()

        viz_utils.visualize_boxes_and_labels_on_image_array(
                image_np_with_detections,
                detections['detection_boxes'],
                detections['detection_classes']+label_id_offset,
                detections['detection_scores'],
                category_index,
                use_normalized_coordinates=True,
                max_boxes_to_draw=200,
                min_score_thresh=box_th,
                agnostic_mode=False,
                line_thickness=5)

        plt.figure(figsize=(15,10))
        plt.imshow(image_np_with_detections)
        print('Done')
        marked_file_name="marked_"+image_path
        plt.savefig(marked_file_name)
        print('Saved {} Done'.format(marked_file_name))
    matplotlib.use('TkAgg')
    plt.show()
def nms(rects, thd=0.5):
    """
    Filter rectangles
    rects is array of oblects ([x1,y1,x2,y2], confidence, class)
    thd - intersection threshold (intersection divides min square of rectange)
    """
    out = []

    remove = [False] * len(rects)

    for i in range(0, len(rects) - 1):
        if remove[i]:
            continue
        inter = [0.0] * len(rects)
        for j in range(i, len(rects)):
            if remove[j]:
                continue
            inter[j] = intersection(rects[i][0], rects[j][0]) / min(square(rects[i][0]), square(rects[j][0]))

        max_prob = 0.0
        max_idx = 0
        for k in range(i, len(rects)):
            if inter[k] >= thd:
                if rects[k][1] > max_prob:
                    max_prob = rects[k][1]
                    max_idx = k

        for k in range(i, len(rects)):
            if (inter[k] >= thd) & (k != max_idx):
                remove[k] = True

    for k in range(0, len(rects)):
        if not remove[k]:
            out.append(rects[k])

    boxes = [box[0] for box in out]
    scores = [score[1] for score in out]
    classes = [cls[2] for cls in out]
    return boxes, scores, classes


def intersection(rect1, rect2):
    """
    Calculates square of intersection of two rectangles
    rect: list with coords of top-right and left-boom corners [x1,y1,x2,y2]
    return: square of intersection
    """
    x_overlap = max(0, min(rect1[2], rect2[2]) - max(rect1[0], rect2[0]));
    y_overlap = max(0, min(rect1[3], rect2[3]) - max(rect1[1], rect2[1]));
    overlapArea = x_overlap * y_overlap;
    return overlapArea


def square(rect):
    """
    Calculates square of rectangle
    """
    return abs(rect[2] - rect[0]) * abs(rect[3] - rect[1])
def inference_as_raw_output(path2images,
                            box_th = 0.25,
                            nms_th = 0.5,
                            to_file = False,
                            data = None,
                            path2dir = False):
    """
    Function that performs inference and return filtered predictions

    Args:
      path2images: an array with pathes to images
      box_th: (float) value that defines threshold for model prediction. Consider 0.25 as a value.
      nms_th: (float) value that defines threshold for non-maximum suppression. Consider 0.5 as a value.
      to_file: (boolean). When passed as True = > results are saved into a file. Writing format is
      path2image + (x1abs, y1abs, x2abs, y2abs, score, conf) for box in boxes
      data: (str) name of the dataset you passed in (e.g. test/validation)
      path2dir: (str). Should be passed if path2images has only basenames. If full pathes provided = > set False.

    Returs:
      detections (dict): filtered predictions that model made
    """
    print (f'Current data set is {data}')
    print (f'Ready to start inference on {len(path2images)} images!')

    for image_path in tqdm(path2images):

        if path2dir: # if a path to a directory where images are stored was passed in
            image_path = os.path.join(path2dir, image_path.strip())

        image_np = load_image_into_numpy_array(image_path)

        input_tensor = tf.convert_to_tensor(np.expand_dims(image_np, 0), dtype=tf.float32)
        detections = detect_fn(input_tensor)

        # checking how many detections we got
        num_detections = int(detections.pop('num_detections'))

        # filtering out detection in order to get only the one that are indeed detections
        detections = {key: value[0, :num_detections].numpy() for key, value in detections.items()}

        # detection_classes should be ints.
        detections['detection_classes'] = detections['detection_classes'].astype(np.int64)

        # defining what we need from the resulting detection dict that we got from model output
        key_of_interest = ['detection_classes', 'detection_boxes', 'detection_scores']

        # filtering out detection dict in order to get only boxes, classes and scores
        detections = {key: value for key, value in detections.items() if key in key_of_interest}

        if box_th: # filtering detection if a confidence threshold for boxes was given as a parameter
            for key in key_of_interest:
                scores = detections['detection_scores']
                current_array = detections[key]
                filtered_current_array = current_array[scores > box_th]
                detections[key] = filtered_current_array

        if nms_th: # filtering rectangles if nms threshold was passed in as a parameter
            # creating a zip object that will contain model output info as
            output_info = list(zip(detections['detection_boxes'],
                                   detections['detection_scores'],
                                   detections['detection_classes']
                                  )
                              )
            boxes, scores, classes = nms(output_info)

            detections['detection_boxes'] = boxes # format: [y1, x1, y2, x2]
            detections['detection_scores'] = scores
            detections['detection_classes'] = classes

        if to_file and data: # if saving to txt file was requested

            image_h, image_w, _ = image_np.shape
            file_name = f'pred_result_{data}.txt'

            line2write = list()
            line2write.append(os.path.basename(image_path))

            with open(file_name, 'a+') as text_file:
                # iterating over boxes
                for b, s, c in zip(boxes, scores, classes):

                    y1abs, x1abs = b[0] * image_h, b[1] * image_w
                    y2abs, x2abs = b[2] * image_h, b[3] * image_w

                    list2append = [x1abs, y1abs, x2abs, y2abs, s, c]
                    line2append = ','.join([str(item) for item in list2append])

                    line2write.append(line2append)

                line2write = ' '.join(line2write)
                text_file.write(line2write + os.linesep)

        return detections
inference_with_plot(["1.jpg", "2.jpg"], 0.6)
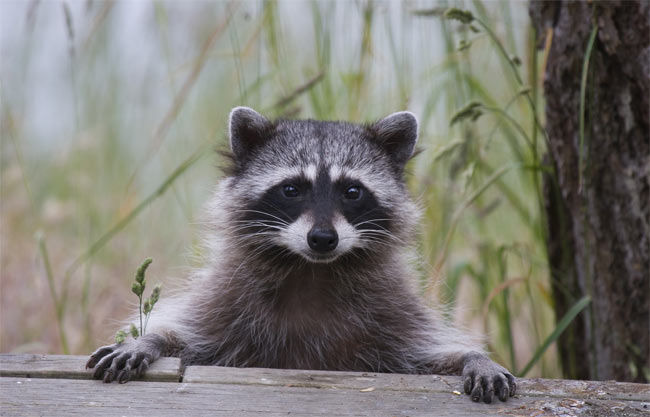
这个脚本会检测当前目录下的 1.jpg 和 2.jpg 文件,然后将识别出来概率>0.5的目标用框框起来,并分别命名为marked_1.jpg和marked_2.jpg。原始图像分别是: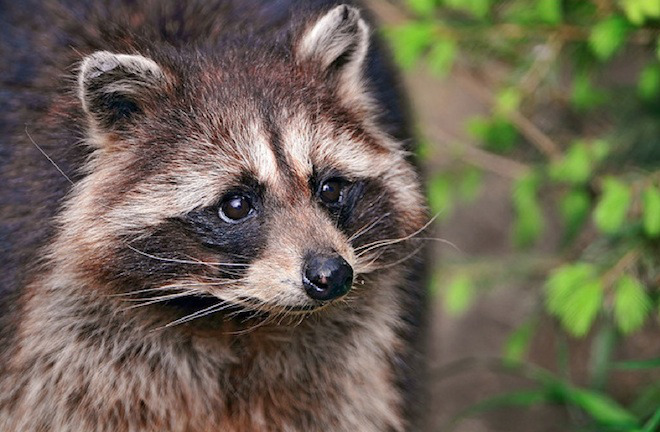
执行脚本进行检测处理:
▸ source ../t./b.py
2023-12-15 06:28:50.519691: I tensorflow/core/util/port.cc:110] oneDNN custom operations are on. You may see slightly different numerical results due to floating-point round-off errors from different computation orders. To turn them off, set the environment variable `TF_ENABLE_ONEDNN_OPTS=0`.
2023-12-15 06:28:50.520813: I tensorflow/tsl/cuda/cudart_stub.cc:28] Could not find cuda drivers on your machine, GPU will not be used.
2023-12-15 06:28:50.545707: I tensorflow/tsl/cuda/cudart_stub.cc:28] Could not find cuda drivers on your machine, GPU will not be used.
2023-12-15 06:28:50.546025: I tensorflow/core/platform/cpu_feature_guard.cc:182] This TensorFlow binary is optimized to use available CPU instructions in performance-critical operations.
To enable the following instructions: AVX2 AVX_VNNI FMA, in other operations, rebuild TensorFlow with the appropriate compiler flags.
2023-12-15 06:28:50.990588: W tensorflow/compiler/tf2tensorrt/utils/py_utils.cc:38] TF-TRT Warning: Could not find TensorRT
2023-12-15 06:28:51.480008: E tensorflow/compiler/xla/stream_executor/cuda/cuda_driver.cc:268] failed call to cuInit: CUDA_ERROR_UNKNOWN: unknown error
2023-12-15 06:28:51.480053: I tensorflow/compiler/xla/stream_executor/cuda/cuda_diagnostics.cc:168] retrieving CUDA diagnostic information for host: fedora
2023-12-15 06:28:51.480057: I tensorflow/compiler/xla/stream_executor/cuda/cuda_diagnostics.cc:175] hostname: fedora
2023-12-15 06:28:51.480104: I tensorflow/compiler/xla/stream_executor/cuda/cuda_diagnostics.cc:199] libcuda reported version is: 535.146.2
2023-12-15 06:28:51.480114: I tensorflow/compiler/xla/stream_executor/cuda/cuda_diagnostics.cc:203] kernel reported version is: 535.146.2
2023-12-15 06:28:51.480117: I tensorflow/compiler/xla/stream_executor/cuda/cuda_diagnostics.cc:309] kernel version seems to match DSO: 535.146.2
No GPU found
TkAgg
['../models/', '../models/research/', '/home/red/Projects/ai_track_feiteng/demo2/workspace', '/usr/lib64/python38.zip', '/usr/lib64/python3.8', '/usr/lib64/python3.8/lib-dynload', '/home/red/.local/lib/python3.8/site-packages', '/usr/lib64/python3.8/site-packages', '/usr/lib/python3.8/site-packages']
Running inference for 1.jpg... Done
Saved marked_1.jpg Done
Running inference for 2.jpg... Done
Saved marked_2.jpg Done
检测后并处理的图像是: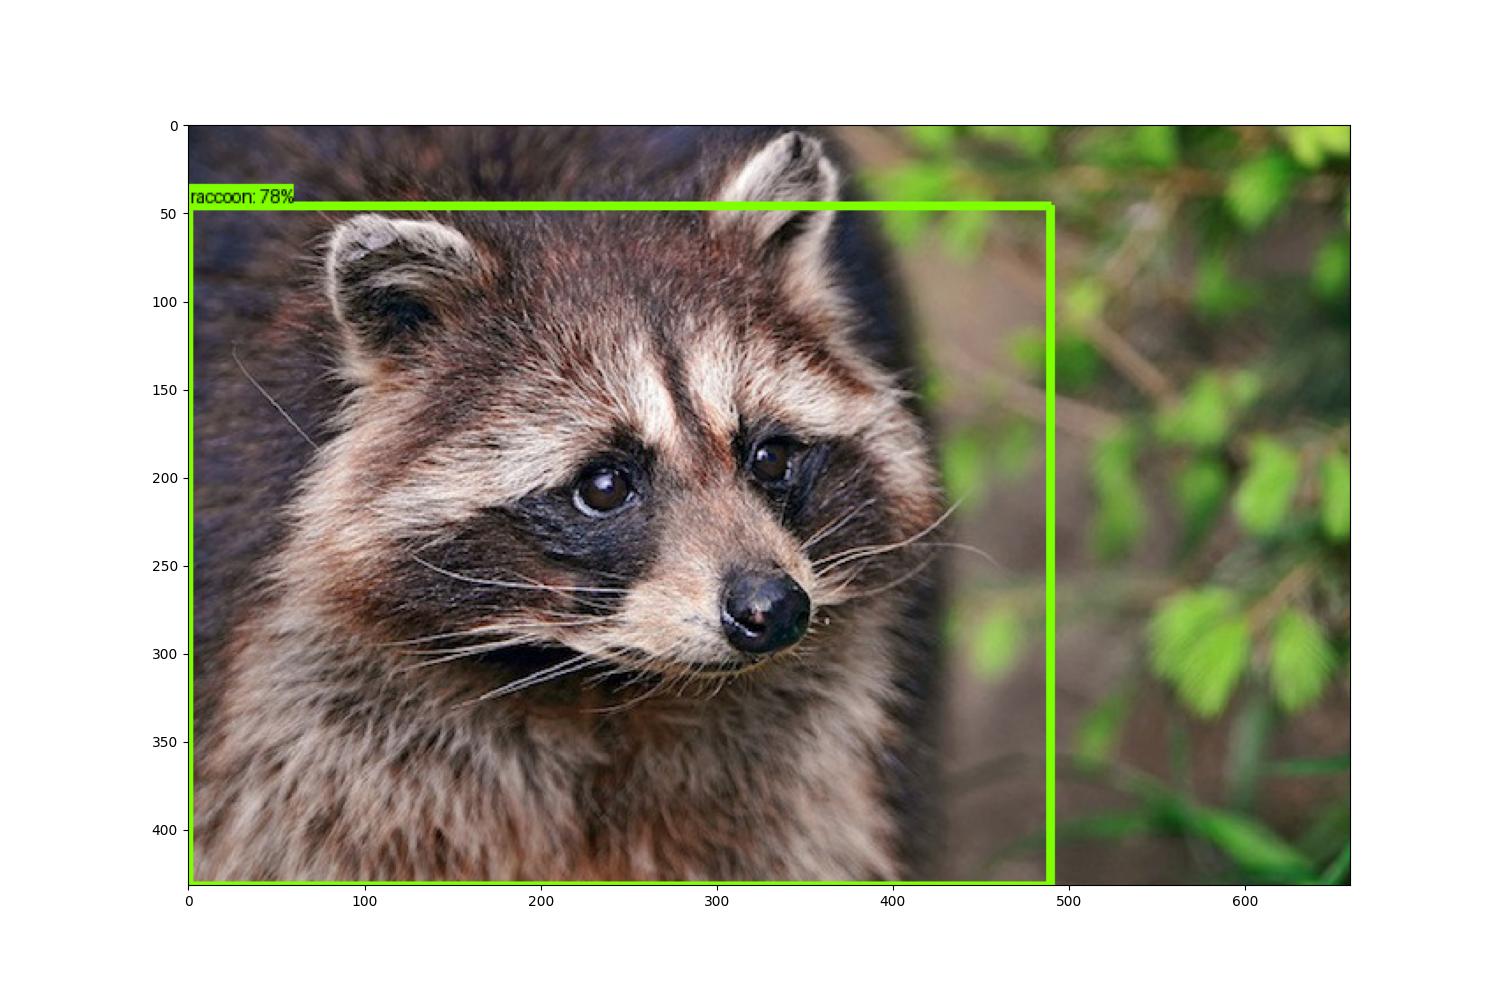
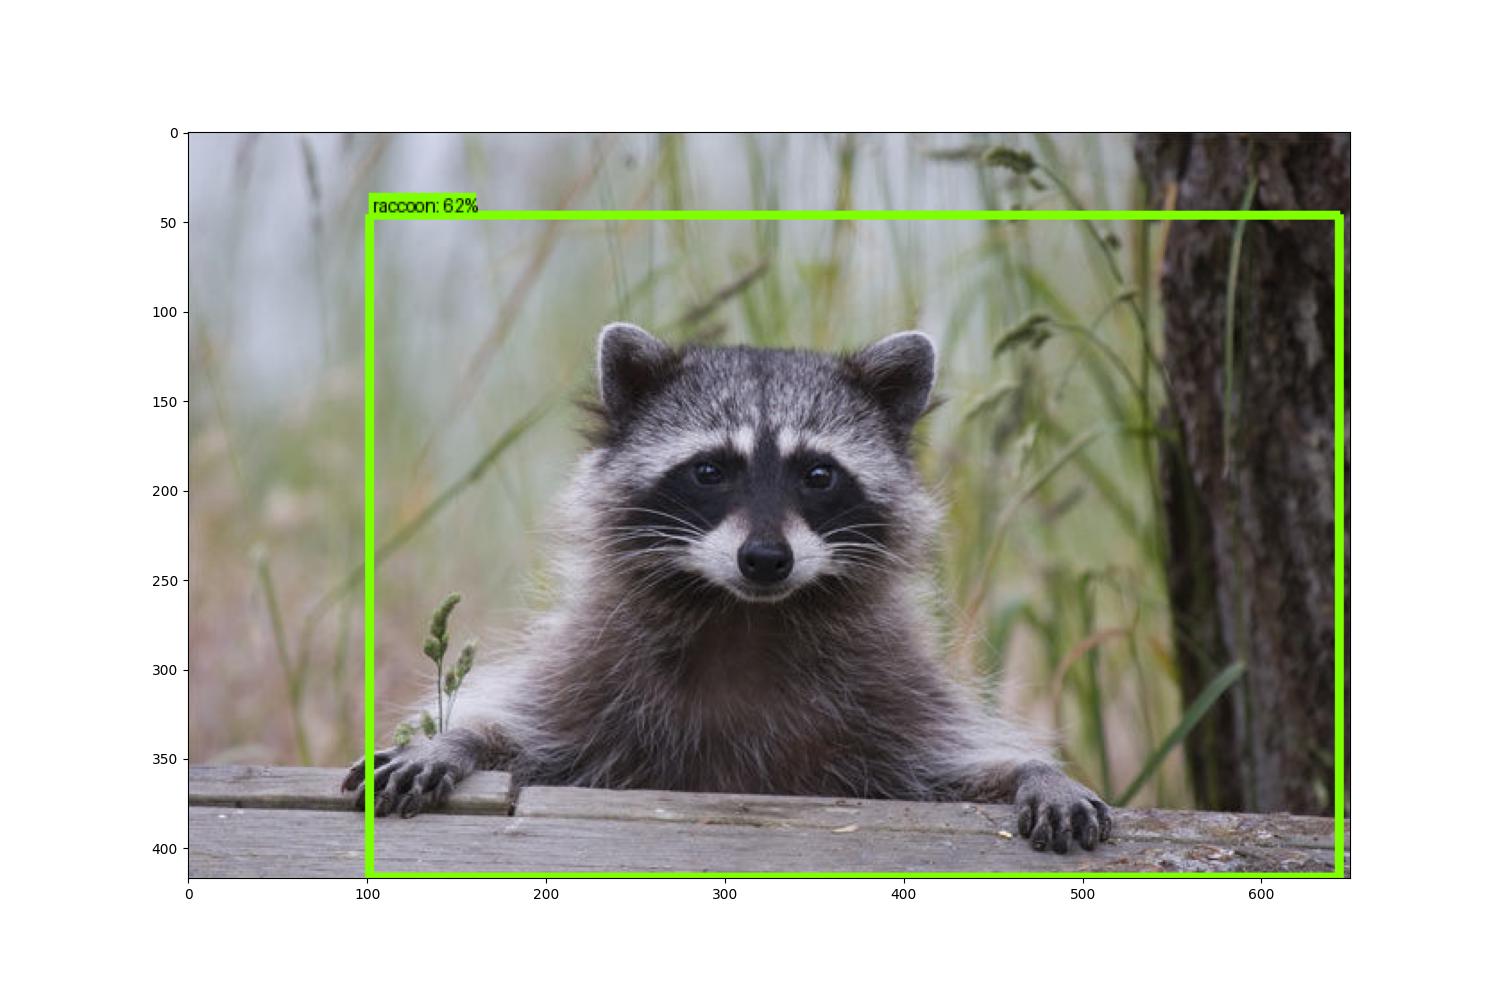
因为训练的次数较少,导致识别的准确度并不是特别高,但是整个训练和演示的流程的还是完整的。希望能对大家了解 TensorFlow2 进行目标检测有所帮助。
这里再附下,提取.ipynb格式文件中python代码的示例代码:
#!/bin/python3.8

import json
import sys
import os
from pathlib import Path

out_file_name=Path(sys.argv[1]).stem+'.py'

with open(sys.argv[1],'r') as f:
    text=json.load(f)

if len(sys.argv) > 2:
    out_file_name = sys.argv[2]

print('args:{}nout_file:{}'.format(sys.argv[1:], out_file_name))
with open(out_file_name, 'w') as fp:
    fp.writelines("#!/bin/python3.8nn")
    for x in text['cells']:
        if x['cell_type'] == "code":
            fp.writelines([i.rstrip()+'n' for i in x['source']])
下一章,我会介绍如何获取图像数据, 标柱图像 ,然后进行模型训练,敬请期待。
审核编辑 黄宇
-
目标检测
+关注
关注
0文章
234浏览量
16544 -
tensorflow
+关注
关注
13文章
336浏览量
62385 -
飞腾派
+关注
关注
4文章
10浏览量
550
发布评论请先 登录


评论