 鸿蒙上实现文件上传功能

此帖主要讲解通过开发文档示例代码写一个完整 Demo,方便初学者理解开发文档内容。
大家都知道 3.0 使用的是 FA 模式、3.1 使用的是 Stage 模式,所以同样是文件上传,代码写法上有些不一样,开发文档也不一样。
比如在 3.1 下,可以在 HarmonyOS Developer > 文档 > 指南 > 开发下找到文件上传下载示例代码。
而在 3.0 下,就找不到相应指南开发了,只能在 HarmonyOS Developer > 文档 > API 参考 > ArkTS API 参考找到 @ohos.request (上传下载)文档。
为了实现一个完整文件上传 Demo,后端是少不了的,这里我使用了我平常工作中用到的 SpringBoot 开发后端。
为了验证文件上传接口是否正常,使用 Thymeleaf 写一个简单的前端页面来测试接口,先保证后端文件上传接口是正常的。
这样其它前端调用就可以排除后端文件上传接口问题,专心调试前端代码,希望小伙伴通过此贴学习到文件上传同时,参考此思路也可以自己完成其它示例代码完成 Demo。
效果如下:

ArkTS(3.0)文件管理(前端)
此版本使用的是 FA 模式、配置文件名是 config.json 由于文件上传需要网络,需要添加权限:ohos.permission.INTERNET,默认支持 https。
如果要支持 http,需要在 config.json 里增加 network 标签,属性标识 “cleartextTraffic”: true。
所以 config.json 要添加的内容以下:
{
"app":{...},
"deviceConfig":{
"default":{
"network":{
"cleartextTraffic":true
}
}
},
"module":{
"reqPermissions":[
{
"name":"ohos.permission.INTERNET"
}
]
}
}
文件上传页面就一个 index.ets 文件,里面包含 UI 和调用后端接口,代码如下:
importrequestfrom'@ohos.request';
importfeatureAbilityfrom'@ohos.ability.featureAbility';
importfileiofrom'@ohos.fileio';

@Entry
@Component
structIndex{
@StatebtnLabel:string='提交文件'
privateuploadTask:request.UploadTask

aboutToAppear(){
//获取应用文件路径
varcontext=featureAbility.getContext();
context.getCacheDir().then((data)=>{
console.info("xx======================>getCacheDirPromsie====================>");
console.info("xx====>data====>"+JSON.stringify(data));

//新建一个本地应用文件
letfd=fileio.openSync(data+'/test.txt',0o102,0o666);
fileio.writeSync(fd,'uploadfiletestbyarmy');
fileio.closeSync(fd);
});
}

aboutToDisappear(){
this.uploadTask.off("progress")
}

uploadFile(){
//上传任务配置项
letuploadConfig={
url:'http://111.114.238.134:8740/file/upload',
header:{key1:'Content-Type',key2:'multipart/form-data'},
method:'POST',
files:[
{filename:'test.txt',name:'test',uri:'internal://cache/test.txt',type:'txt'}
],
data:[
{name:'fileId',value:'FP000008'}
]
}

//将本地应用文件上传至网络服务器
try{
this.btnLabel='文件上传中...'
request.upload(uploadConfig)
.then((data)=>{
this.btnLabel='文件上传成功'
this.uploadTask=data
console.info('xxSuccesstorequesttheupload.Cause:'+JSON.stringify(data));
//uploadTask=data;
this.uploadTask.on("progress",(uploadedSize,totalSize)=>{
console.info('xx上传进度值是:'+uploadedSize+',总大小:'+totalSize)
})

}).catch((err)=>{
this.btnLabel='文件上传失败'
console.error('xxFailedtorequesttheupload.Cause:'+JSON.stringify(err));
})
}catch(err){
this.btnLabel='文件上传失败'
console.error(`xxInvokeuploadFilefailed,codeis${err.code},messageis${err.message}`);
}

}

build(){
Column({space:30}){
Text('上传文件实例:')
.width('100%')
.height(50)
.fontSize(24)
.textAlign(TextAlign.Center)
Button('提交文件')
.onClick(()=>{
this.uploadFile()
})
.width('80%')
.height(50)
.fontSize(24)
}.width('100%').height('100%')
.justifyContent(FlexAlign.Center)
.alignItems(HorizontalAlign.Center)
}
}
ArkTS(3.1)文件管理(前端)
此版本使用的是 Stage 模式、配置文件名是 module.json5 由于文件上传需要网络,需要添加权限:ohos.permission.INTERNET。
在 3.1 不用配置,就支持 http 和 https,当前上传应用文件功能,仅支持上传应用缓存文件路径(cacheDir)下的文件。
所以 module.json5 要添加的内容以下:
{
"module":{
"requestPermissions":[
{
"name":"ohos.permission.INTERNET"
}
]
}
}
文件上传页面就一个 index.ets 文件,里面包含 UI 和调用后端接口,代码如下:
importcommonfrom'@ohos.app.ability.common';
importfsfrom'@ohos.file.fs';
importrequestfrom'@ohos.request';
importhashfrom'@ohos.file.hash';


//获取应用文件路径
letcontext=getContext(this)ascommon.UIAbilityContext;

@Entry
@Component
structIndex{
@StatebtnLabel:string='提交文件'
privateuploadTask:request.UploadTask

aboutToAppear(){
letcacheDir=context.cacheDir;

//新建一个本地应用文件
letfile=fs.openSync(cacheDir+'/test.txt',fs.OpenMode.READ_WRITE|fs.OpenMode.CREATE);
fs.writeSync(file.fd,'uploadfiletestbyAPI9');
fs.closeSync(file);
}

aboutToDisappear(){
this.uploadTask.off("complete")
}

uploadFile(){

//上传任务配置项
letuploadConfig={
url:'http://111.114.238.134:8740/file/upload',
header:{key1:'Content-Type',key2:'multipart/form-data'},
method:'POST',
files:[
{filename:'test.txt',name:'test',uri:'internal://cache/test.txt',type:'txt'}
],
data:[
{name:'fileId',value:'FP000008'}
]
}

//将本地应用文件上传至网络服务器
try{
this.btnLabel='文件上传中...'
request.uploadFile(context,uploadConfig)
.then((data)=>{
this.btnLabel='文件上传成功'
this.uploadTask=data
this.uploadTask.on('complete',(taskStates)=>{
for(leti=0;i< taskStates.length; i++) {
              console.info(`xx upload complete taskState: ${JSON.stringify(taskStates[i])}`);
            }
          });
        })
        .catch((err) =>{
this.btnLabel='文件上传失败'
console.error(`xxInvokeuploadFilefailed,codeis${err.code},messageis${err.message}`);
})
}catch(err){
this.btnLabel='文件上传失败'
console.error(`xxInvokeuploadFilefailed,codeis${err.code},messageis${err.message}`);
}
}

build(){
Column({space:30}){
Text('上传文件实例:')
.width('100%')
.height(50)
.fontSize(24)
.textAlign(TextAlign.Center)
Button(this.btnLabel)
.onClick(()=>{
this.uploadFile()
})
.width('80%')
.height(50)
.fontSize(24)
}
.width('100%').height('100%')
.justifyContent(FlexAlign.Center)
.alignItems(HorizontalAlign.Center)
}
}
SpringBoot 和 Thymeleaf(后端)
后端首先列出 pom.xml 文件,里面包含项目依赖jar配置,比如 web、thymeleaf 依赖。
内容如下:
4.0.0

org.springframework.boot
spring-boot-starter-parent
2.3.1.RELEASE


com.army
file-manage
0.0.1-SNAPSHOT
file-manage
DemoprojectforSpringBoot

8


org.springframework.boot
spring-boot-starter-thymeleaf


org.springframework.boot
spring-boot-starter-web


org.projectlombok
lombok
true


org.springframework.boot
spring-boot-starter-test
test


commons-io
commons-io
2.6


org.springframework.boot
spring-boot-maven-plugin


org.projectlombok
lombok
前端调用接口文件 Controller 代码如下:
@RestController
@RequestMapping("/file")
@Slf4j
publicclassFileController{
@Autowired
FileServicefileService;

@PostMapping("/upload")
publicStandardResponseupload(StringfileId,MultipartHttpServletRequestmultiPartRequest){
log.info("**UploadFileController!");

FileCriteriacriteria=newFileCriteria();
criteria.setFileId(fileId);

try{
//uploadfile
Iteratoritr=multiPartRequest.getFileNames();
MultipartFilempf=null;

while(itr.hasNext()){
mpf=multiPartRequest.getFile(itr.next());
break;
}
byte[]fileByteArr=null;
if(null!=mpf&&!mpf.isEmpty()){
StringoriginalFileName=mpf.getOriginalFilename();
log.info(originalFileName);
criteria.setFileName("");
StringfileExtension=FilenameUtils.getExtension(originalFileName);
criteria.setFileExtension(fileExtension);
fileByteArr=mpf.getBytes();
criteria.setFileByteArray(fileByteArr);

criteria.setFileName(originalFileName);
}
}catch(IOExceptione){
e.printStackTrace();
log.error(e.getMessage());
}

returnfileService.uploadFile(criteria);
}

}
后端业务逻辑代码,也就是文件上传处理逻辑 Service 代码如下:
业务接口:
publicinterfaceFileService{
StandardResponseuploadFile(FileCriteriacriteria);

StringsaveFile(FileCriteriacriteria);
}
业务实现类:
@Service
@Slf4j
publicclassFileServiceImplimplementsFileService{
@Value("${project.root.path}")
privateStringrootPath="rootPath";
@Value("${project.baseUrl}")
privateStringbaseUrl;

@Override
publicStandardResponseuploadFile(FileCriteriacriteria){
StringfilePath=this.saveFile(criteria);
StringimgPath=baseUrl+"filePath/"+filePath;

StandardResponsestandardResponse=newStandardResponse();
standardResponse.setSuccess(true);
standardResponse.setStatusCode("100");
standardResponse.setStatusDesc("上传成功");
standardResponse.setData(imgPath);
returnstandardResponse;
}

@Override
publicStringsaveFile(FileCriteriacriteria){
log.info("上传文件开始!");
StringpictureId=IdUtils.getId("FP");
StringfileName=pictureId+"."+criteria.getFileExtension();
criteria.setFileName(fileName);


StringfilePath=sourceFile(criteria);
log.info("FilePath:"+filePath);
log.info("上传文件结束!");
returnfilePath;
}

privateStringsourceFile(FileCriteriacriteria){
byte[]attachmentFileByteArray=criteria.getFileByteArray();
if(null!=attachmentFileByteArray){

log.info("1.1.创建根目录.");
StringbasePath=rootPath+this.genDatePath();
FilebasePathFolder=newFile(basePath);
if(!basePathFolder.exists())basePathFolder.mkdirs();
log.info("根目录:"+basePath);

Filefile=newFile(basePath+File.separator+criteria.getFileName());
log.info("1.2.保存源文件-绝对路径:"+file.getAbsolutePath());

try{
FileCopyUtils.copy(attachmentFileByteArray,file);
log.info("1.3.1.保存源文件-保存成功!!!");

StringrelativePath=this.genDatePath()+File.separator+criteria.getFileName();

returnrelativePath;
}catch(IOExceptione){
log.info("1.3.2.保存源文件-保存失败!!!");
file.deleteOnExit();
return"";
}
}
return"";
}

privateStringgenDatePath(){
SimpleDateFormatsdf=newSimpleDateFormat("yyyyMMdd");
StringyyyyMMdd=sdf.format(newDate());

returnyyyyMMdd;
}
}
配置文件:
server:
port:8740

project:
root:
path:/var/tomcat/file-manage/filePath/
baseUrl:http://111.114.238.134:8740/
访问域名或 IP 加端口访问到 Thymeleaf 页面,要添加一个 Controller 跳转。
@Controller
publicclassIndexController{

@GetMapping("/")
publicStringIndex(){
return"index";
}
}
在 templates 目录下创建 index.htm 页面文件,这里的 index 名要和上面 Controller 返回“index”名一致,才能跳转过去。
index.html 代码如下:
单文件上传
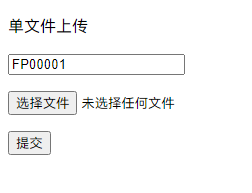
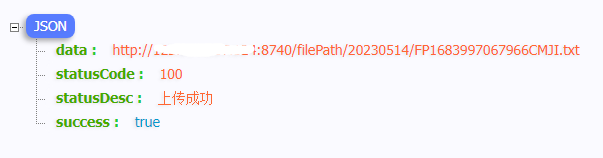
上面图片就是 Thymeleaf 页面,上传文件成功后效果。
总结
通过此贴学习到文件上传 3.0 与 3.1 的不同处,同时也学习到了后端开发流程。 其实写这个贴子之前,是一个小伙伴问到我关于文件上传问题,由于之前我写的实例里,也没有用到文件上传功能,于是我就用最新 API9 也就是 Stage 模式写了一个 Demo 给他参考,然后他通过参考我的 Demo,学会了。 可惜他现在开发的项目是用 API8 的,由于开发模式不一样,他遇到了问题,于是我在用 API8 写了一个 Demo 给他参考,最后他的项目也实现了文件上传。
审核编辑:汤梓红
-
接口
+关注
关注
33文章
9591浏览量
157598 -
API
+关注
关注
2文章
2469浏览量
66998 -
开发者
+关注
关注
1文章
779浏览量
18061 -
鸿蒙
+关注
关注
60文章
3016浏览量
46163 -
HarmonyOS
+关注
关注
80文章
2157浏览量
36280
原文标题:鸿蒙上实现“文件上传”功能
文章出处:【微信号:gh_834c4b3d87fe,微信公众号:OpenHarmony技术社区】欢迎添加关注!文章转载请注明出处。
发布评论请先 登录
鸿蒙原生应用元服务开发-Web上传文件
如何在openmv中实现图传功能?
这个CMS系统可以同时选择多个文件上传,是怎么实现的?
如何使用DGUS II的数据自动上传功能
利用java语言实现文件上传功能
基于Iframe内联框架的异步文件上传与删除


Verizon宣布在所有5G市场开启5G上传功能
在鸿蒙上使用Python进行物联网编程

如何使用DGUS II的数据自动上传功能


评论