 电子发烧友App


 创作
创作 发文章
发文章 发帖
发帖  提问
提问  发资料
发资料 发视频
发视频资料介绍
描述
嘿大家!
这是一个关于如何创建我的混色器版本的教程。
操纵杆是该项目中的主要控制形式。它控制条带的 RGB 值,这决定了条带上 LED 的颜色强度。OLED 显示这些值。
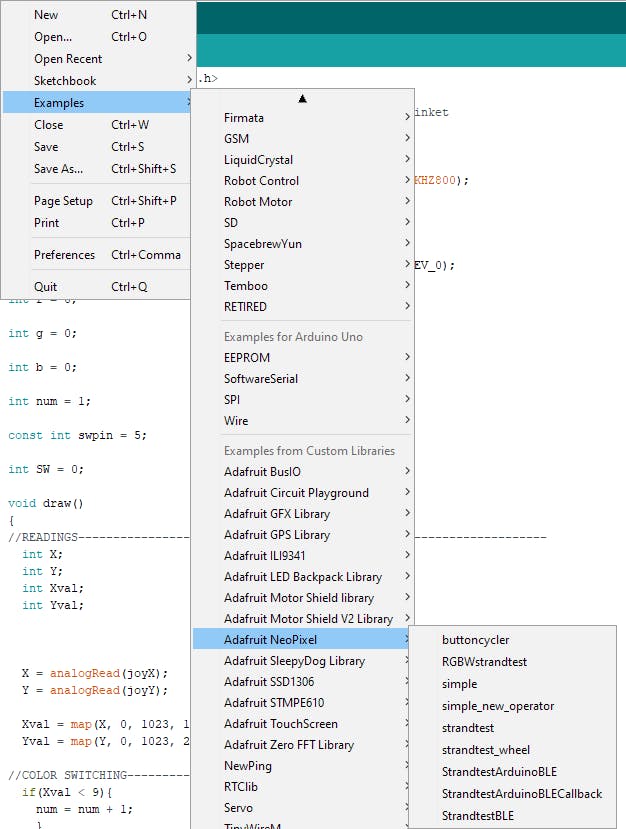
您可以选择包含自己的按钮并对其进行编码以显示某些模式(您可以在 NeoPixel 库示例文件夹中找到一些简洁的模式)。
I2C
I2c 代表内部集成电路。它是一种总线接口连接协议,存在于需要短距离串行通信的设备中。
I2C 设备被赋予一个以十六进制(或十六进制)编写的地址。我将使用的 OLED 使用 I2C 协议,地址为 0x3C。
注意:地址中的“0x”仅将其标识为十六进制值。
在 Arduino 板中,I2C 引脚有所不同:
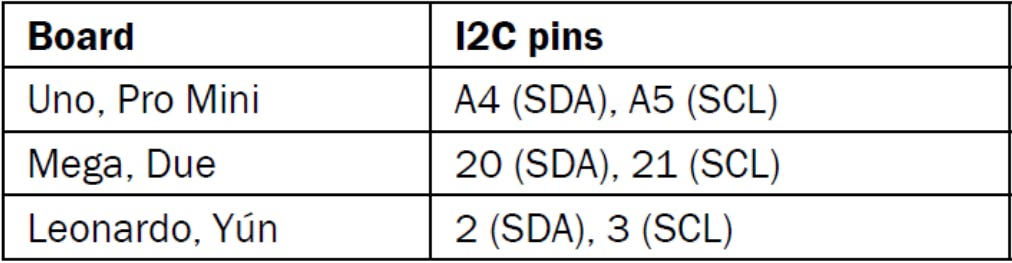
设置
在将我的组件连接到 UNO 之前,我移除了操纵杆上的接头并焊接了新的接头,因为我对它在面包板上的方向感到不舒服。
前:
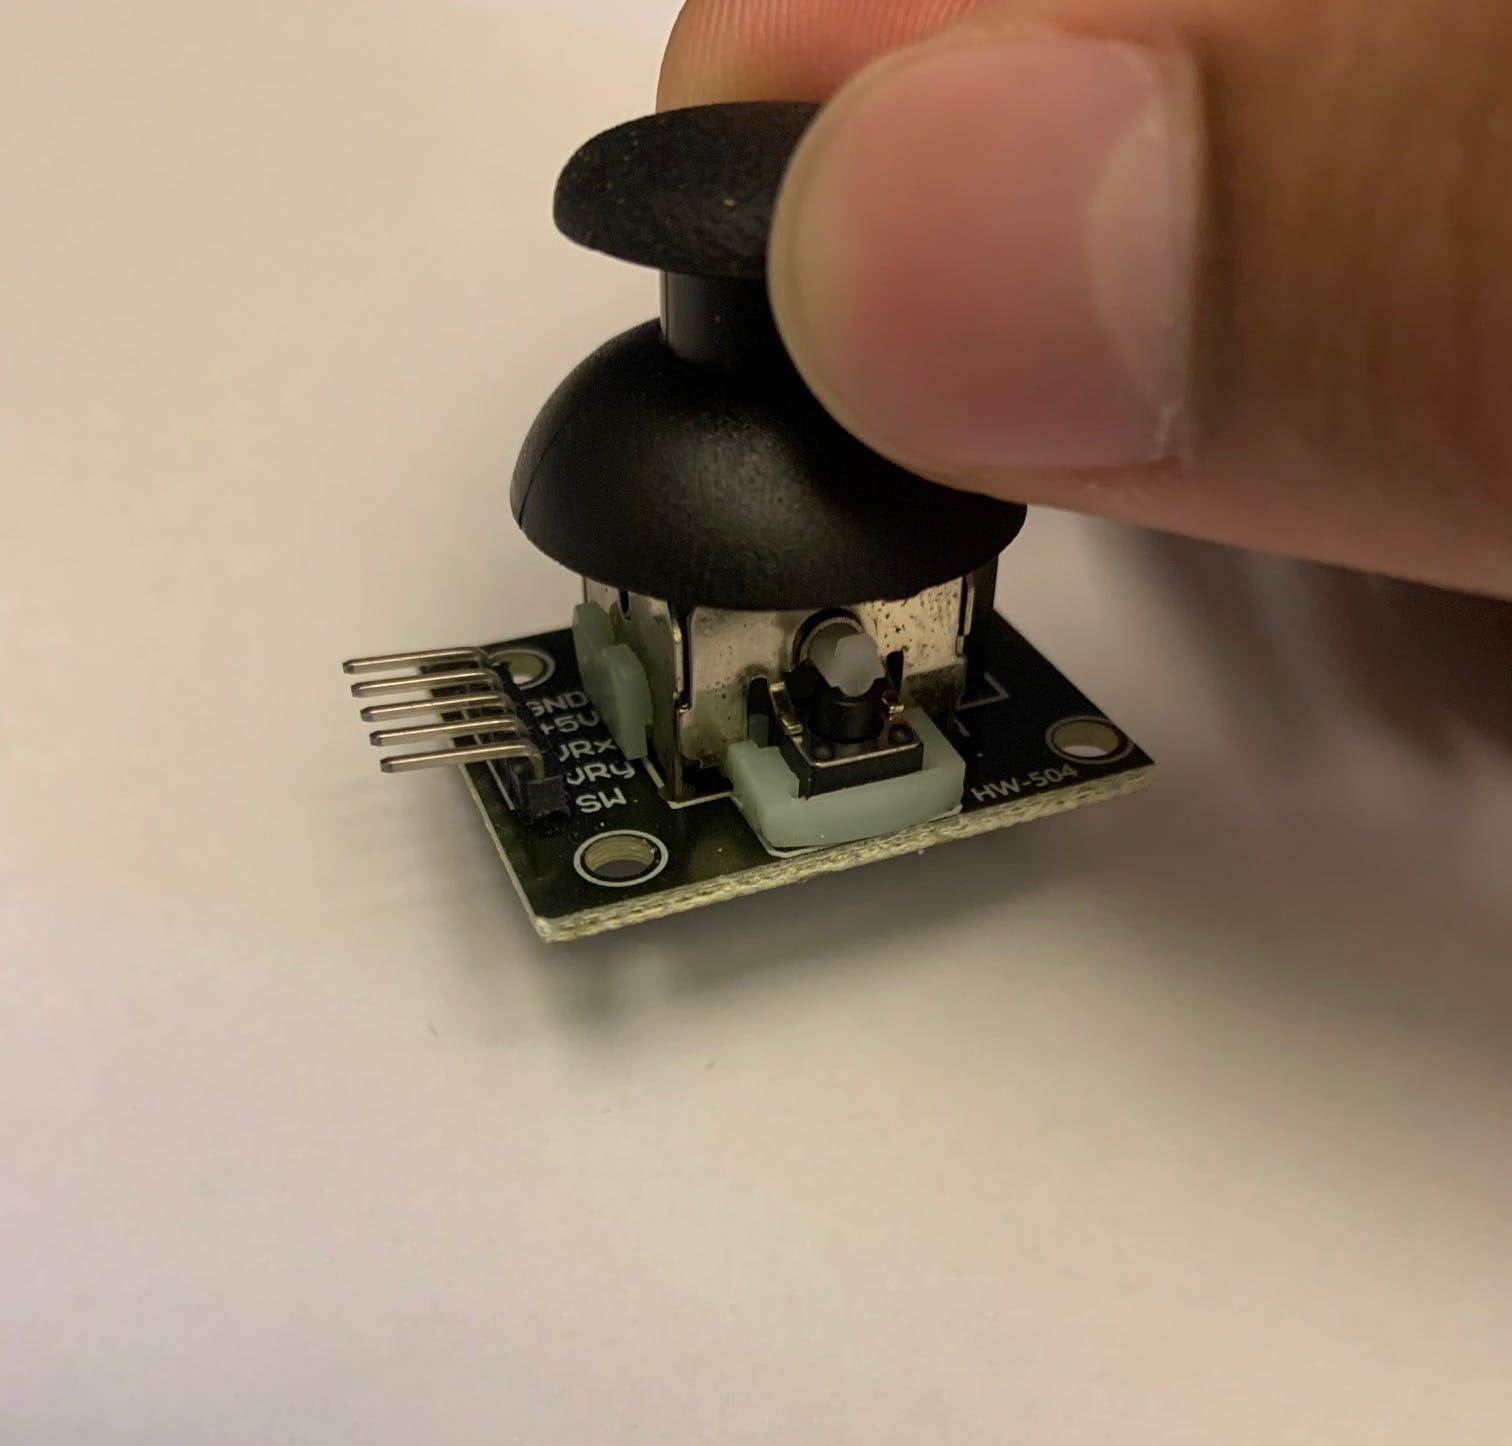
后:
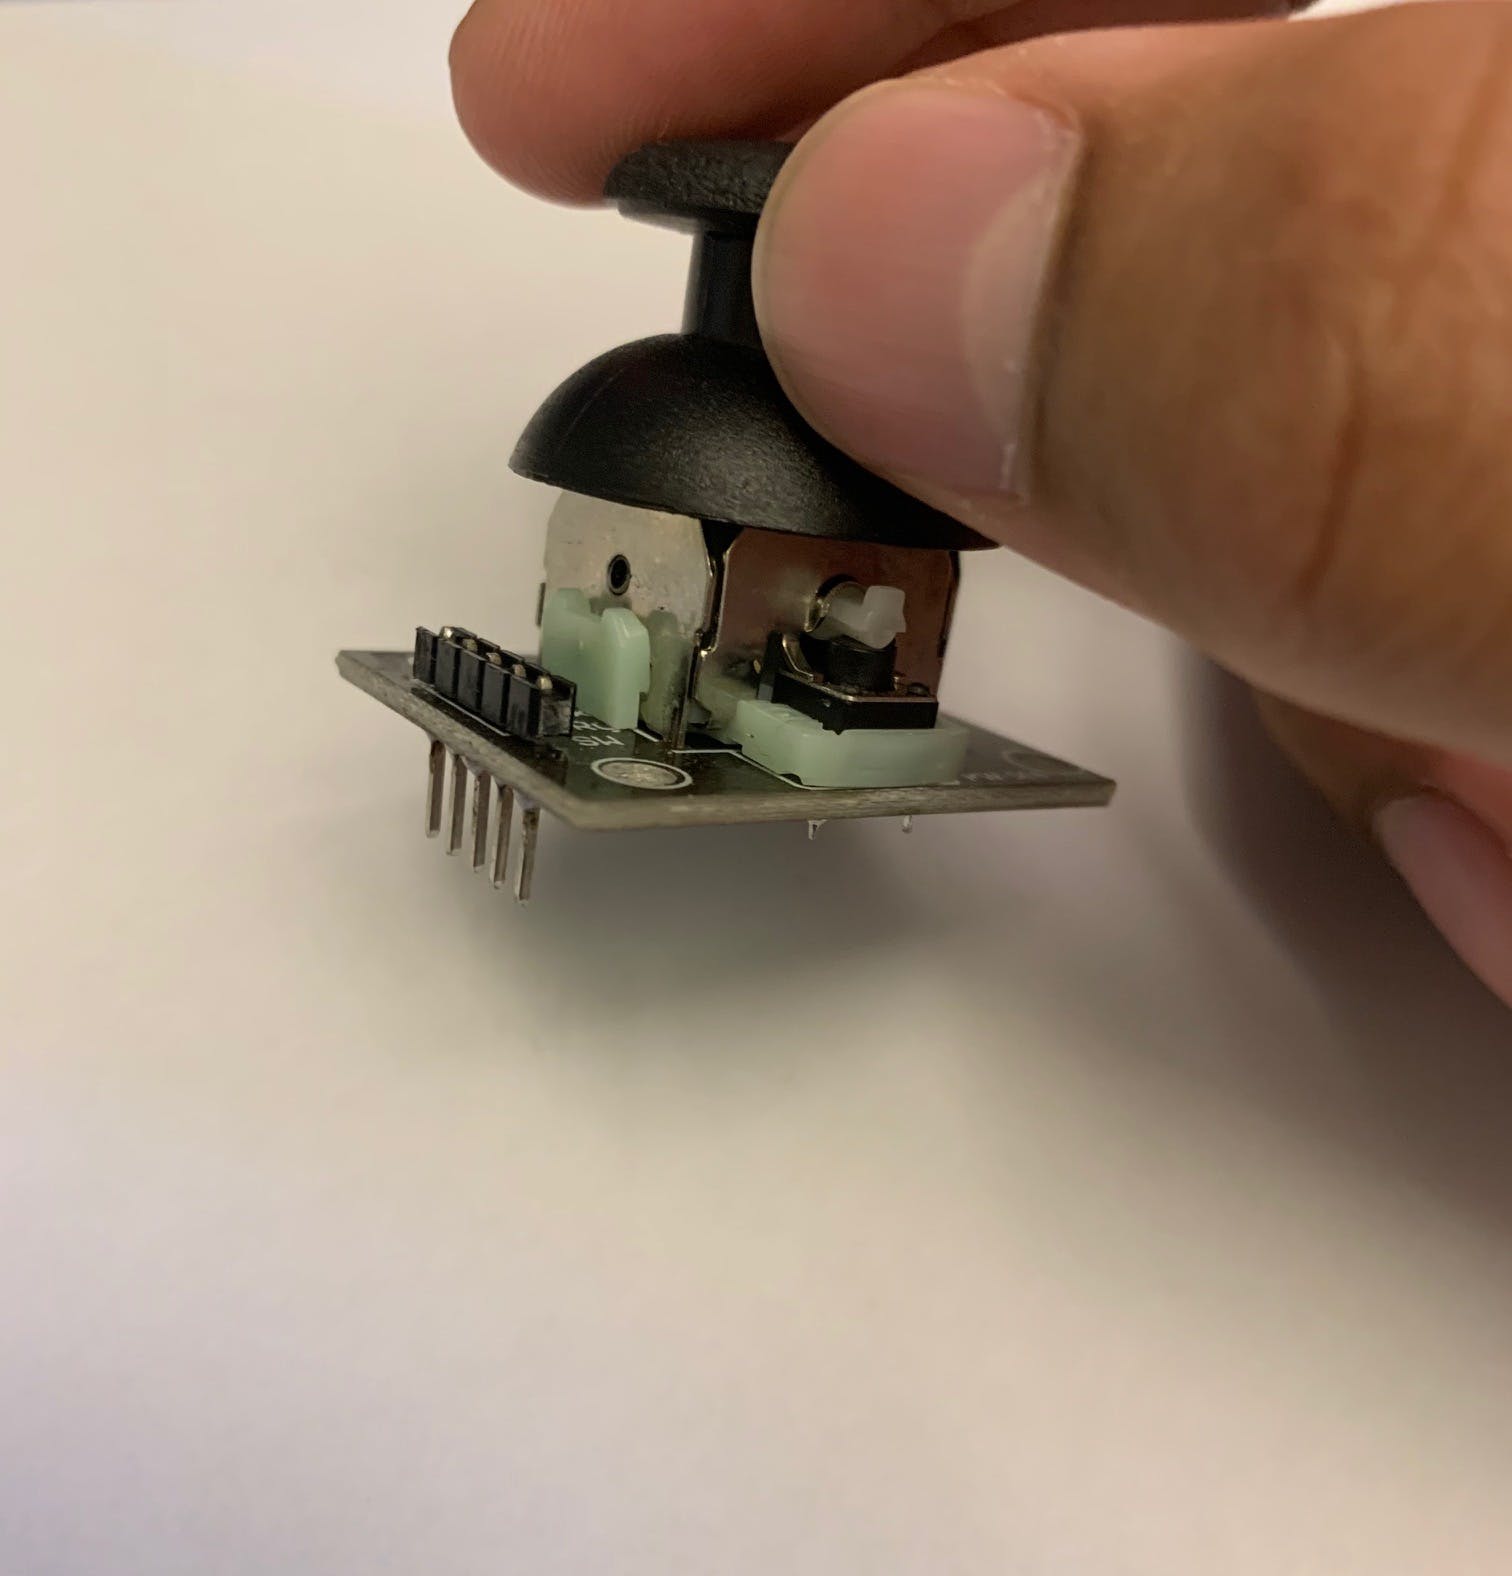
然后我开始将组件连接到我的 UNO 以测试它们。我使用的连接是:
操纵杆
地 - 地
VCC - +5V
VRx - A2
VRy - A1
西南 - D5
`
OLED (我用的是 UNO)
地 - 地
VCC - +5V
SCL/SCK - A5 (SCL)
SDA - A4 (SDA)
测试代码
 //JOYSTICK TEST
#define joyX A2
#define joyY A1
const int SW_pin = 5; // digital pin connected to switch output
void setup() {
 Serial.begin(9600);
 pinMode(SW_pin, INPUT);
 digitalWrite(SW_pin, HIGH);
 Serial.begin(9600);
}
void loop() {
 int X;
 int Y;
 int Xval;
 int Yval;
 X = analogRead(joyX);
 Y = analogRead(joyY);
 Xval = map(X, 0, 1023, 0, 255);
 Yval = map(Y, 0, 1023, 0, 255);
 Serial.print(Xval);
 Serial.print("|");
 delay(50);
 Serial.print(Yval);
 Serial.print("|")
 delay(50);
 Serial.print("Switch:  ");
 Serial.print(digitalRead(SW_pin));
 Serial.println("");
 delay(200);
}
注意:对于此代码,您可以更改映射值或将其完全删除,因为它只是一个测试代码。
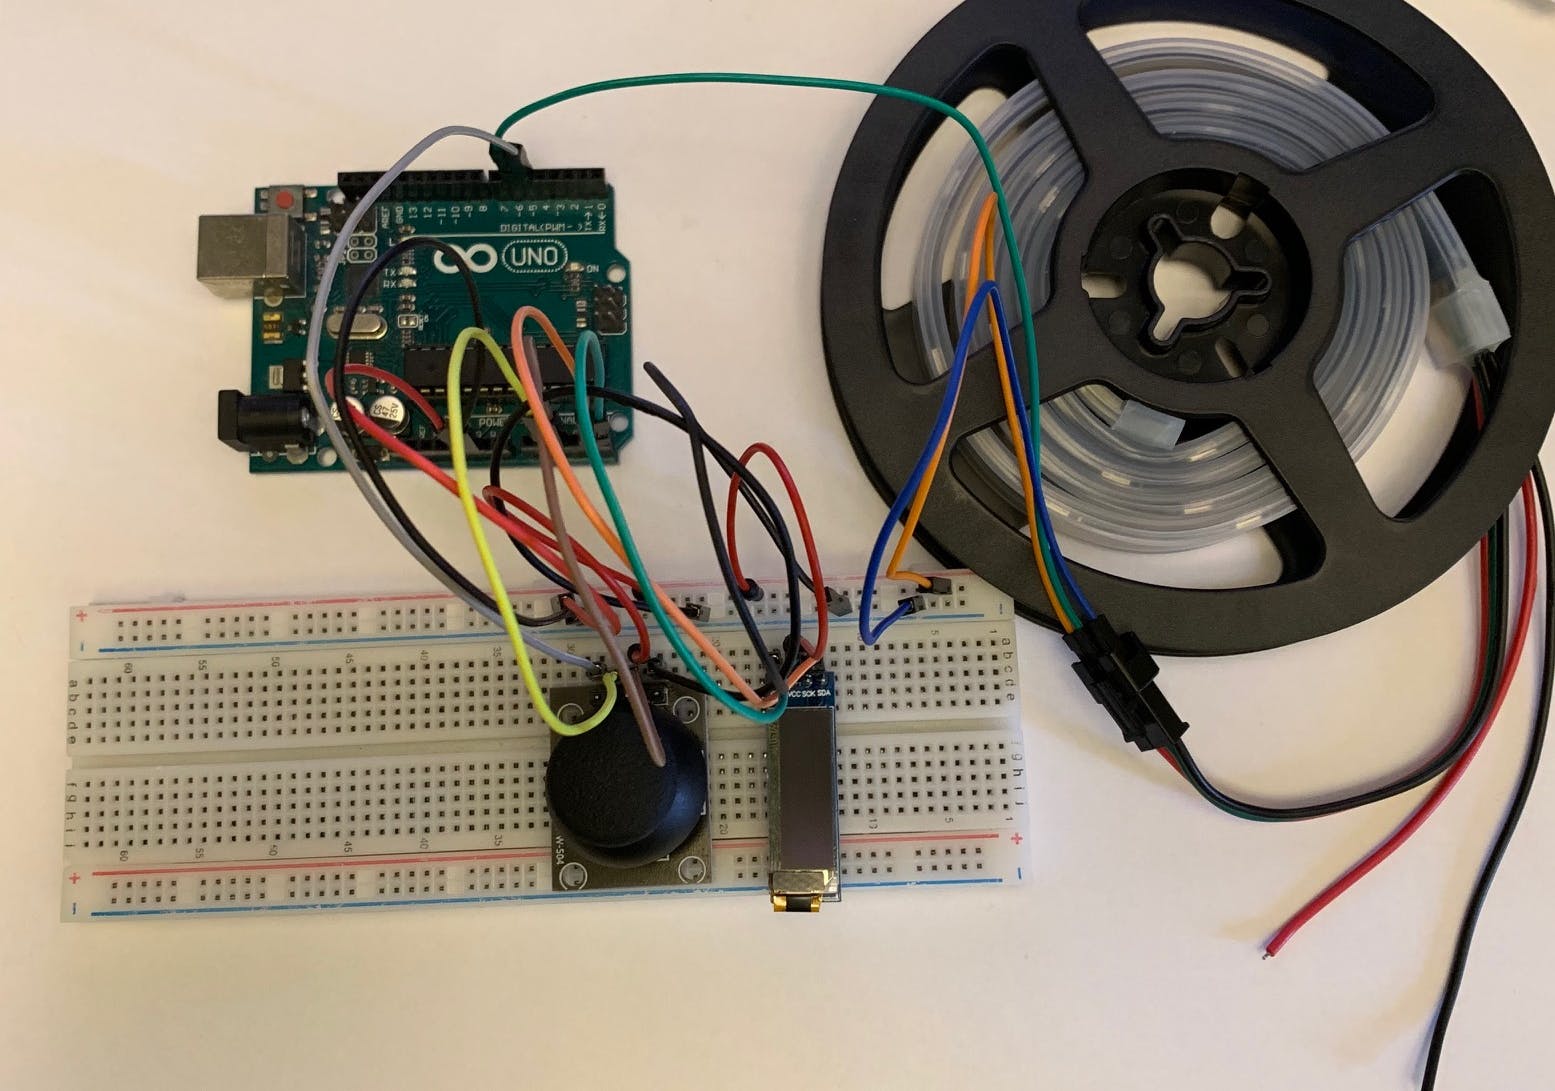
把它们放在一起
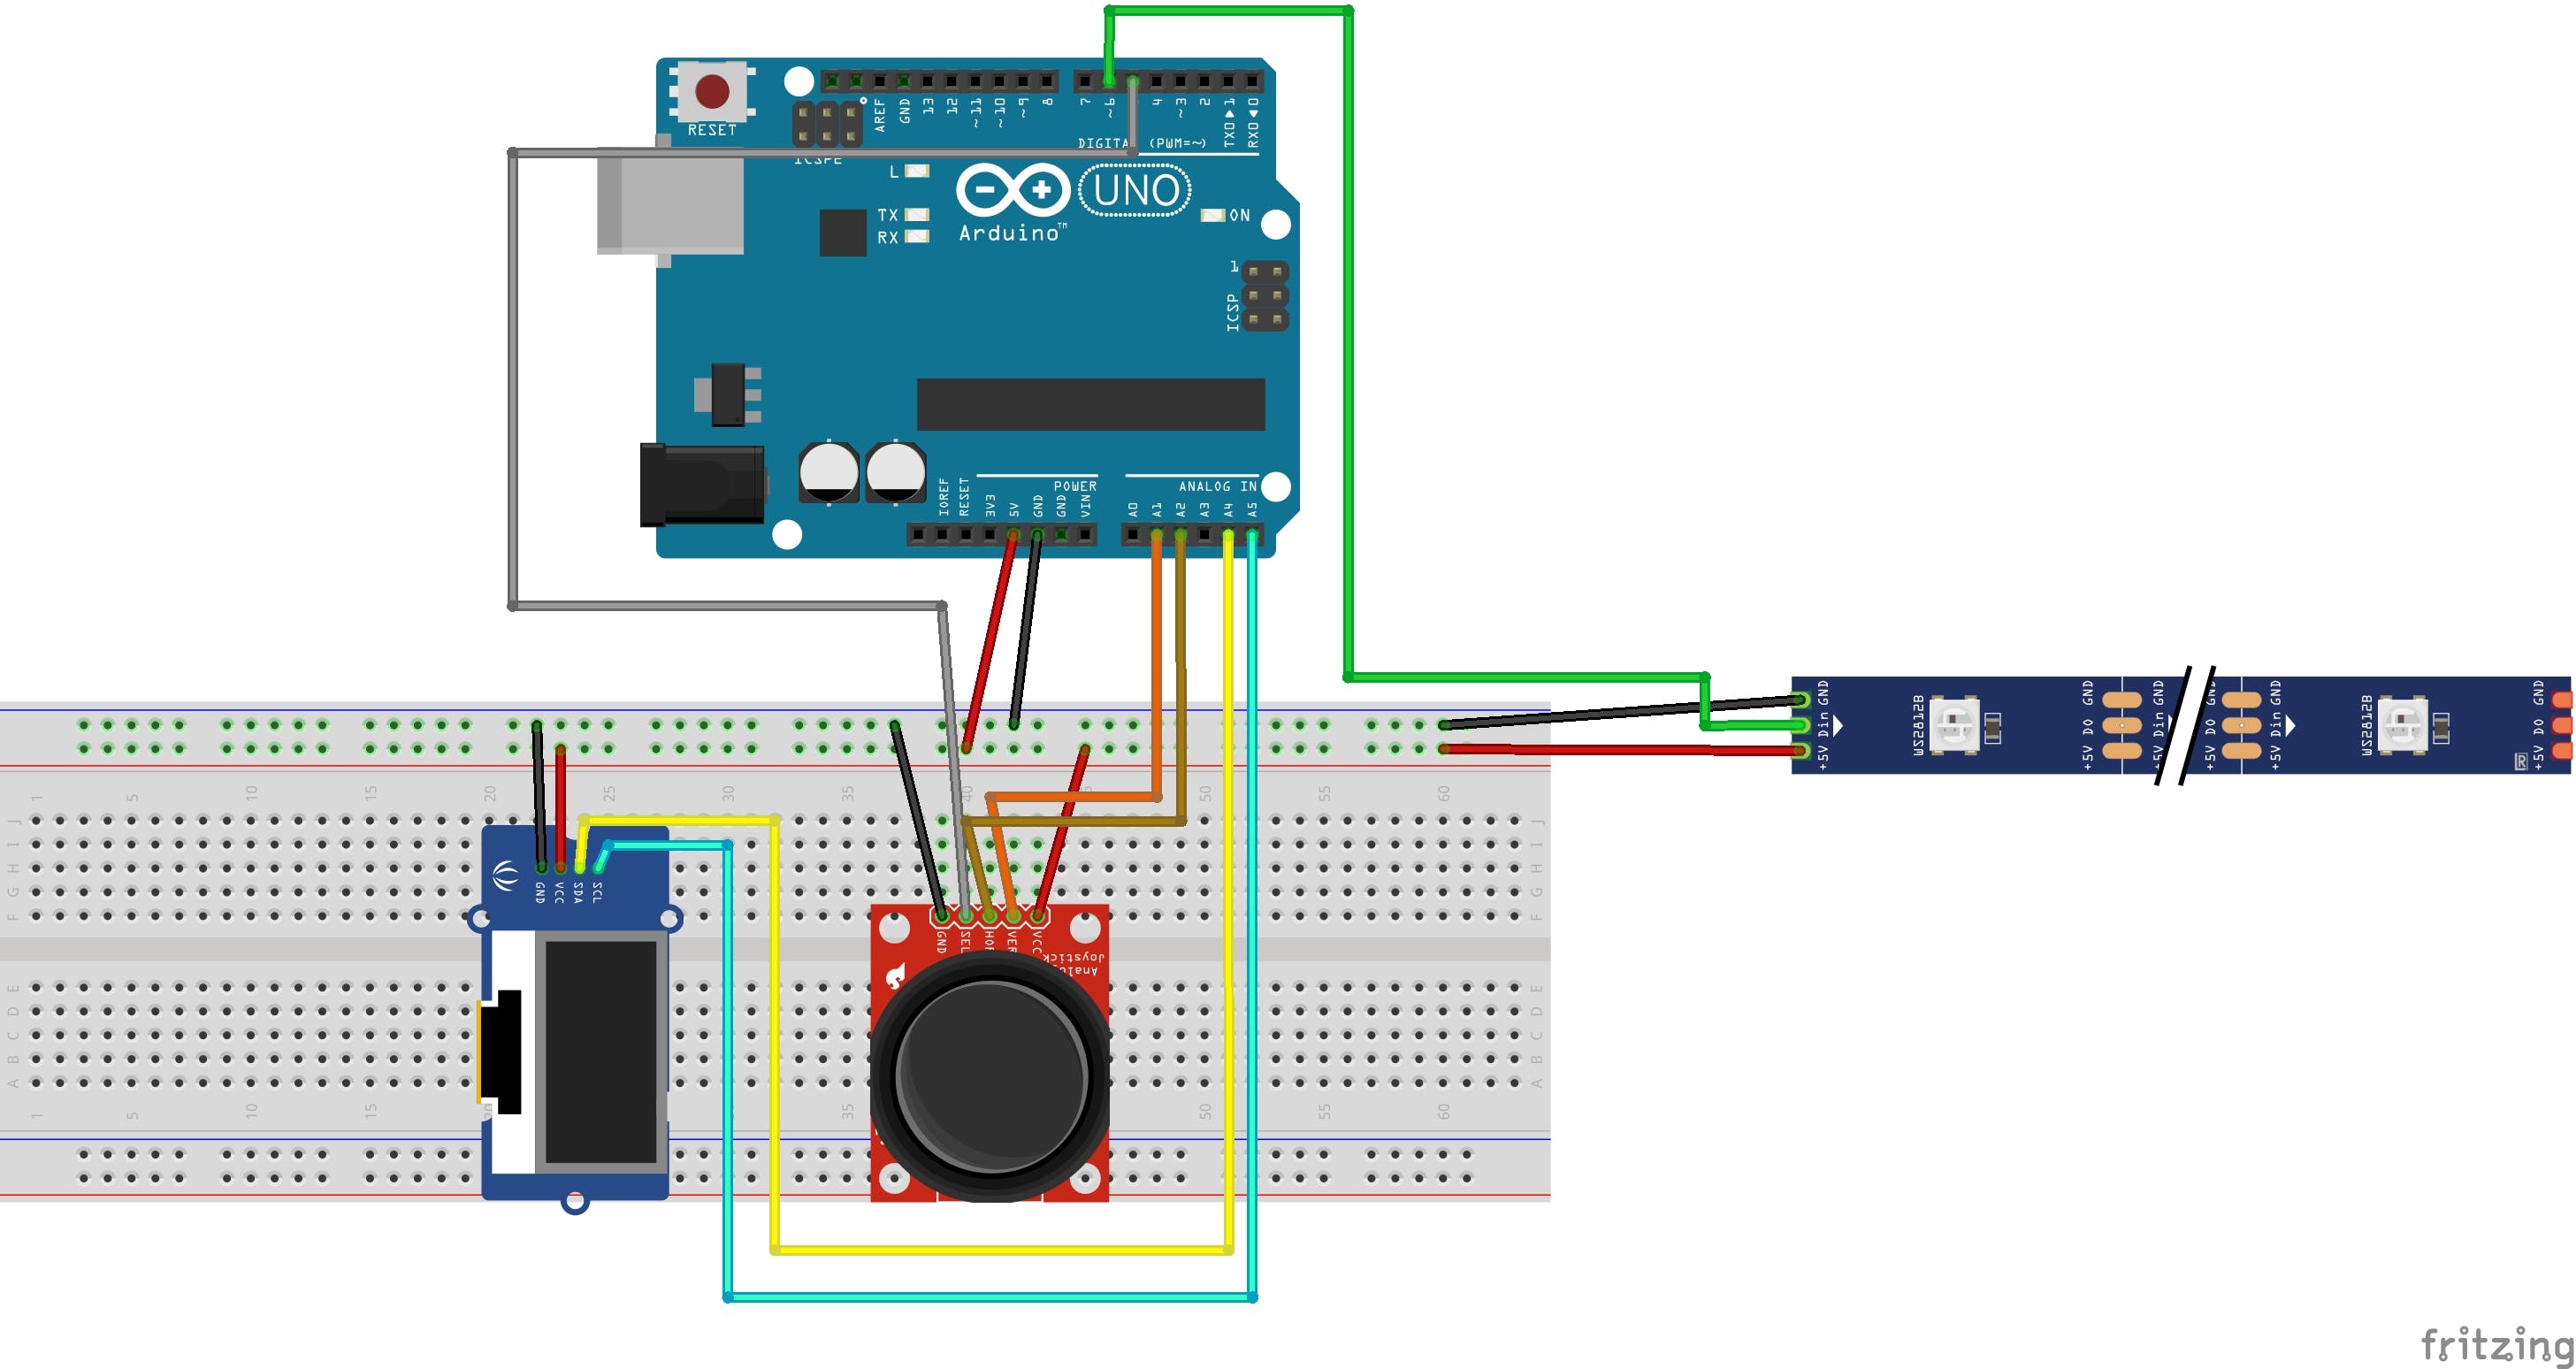
在测试完所有组件后,我使用面包板将所有组件立即连接到 UNO。
注意:当我使用 Nano 时,LED 灯条非常不稳定。我鼓励您使用 MEGA 或 UNO 等电路板,以使电路保持稳定。
连接是相同的,除了这里,我已经包括了 LED 灯条。
操纵杆
地 - 地
VCC - +5V
VRx - A2
VRy - A1
西南 - D5
`
OLED (我用的是 UNO)
地 - 地
VCC - +5V
SCL/SCK - A5 (SCL)
SDA - A4 (SDA)
`
新像素地带
地 - 地
VCC - +5V
数据 - D6
编码
以下代码是为 1 米长的 30 LED/米 Adafruit Neopixel 条和0.91英寸OLED创建的。
注意:LED的最大值为255 ,最小值为0 ;_ _ _ 高于或低于这些限制可能不会对颜色强度产生影响。_
#include
#define LED_PIN    6
#define LED_COUNT 30
Adafruit_NeoPixel strip(LED_COUNT, LED_PIN, NEO_GRB + NEO_KHZ800);
#define joyX A2
#define joyY A1
#include "U8glib.h"
U8GLIB_SSD1306_128X32 u8g(U8G_I2C_OPT_NONE | U8G_I2C_OPT_DEV_0); //Initialize OLED display
int r = 0;
int g = 0;
int b = 0;//These three variables determine RGB values
int num = 1; //This variable helps switch between colors.
const int swpin = 5; //Defining switch button pin
int SW = 0;
void draw()
{
//READINGS-------------------------------------------------------------------
 int X;
 int Y;
 int Xval;
 int Yval;
 X = analogRead(joyX); //Reading off of VRx
 Y = analogRead(joyY); //Reading off of VRy
 Xval = map(X, 0, 1023, 10, 0);
 Yval = map(Y, 0, 1023, 255, 0); //mapping values
//COLOR SWITCHING-----------------------------------------------------------
 if(Xval < 9){   //This bit of code helps us switch between R, G and B.
   num = num + 1;
   }
 if(Xval > 1){
   num = num - 1;
   }
//LIMITS-------------------------------------------------------------------
 if(num > 3){ //This bit creates a cycle between colors
   num = 1;
 }
 if(num < 1){
   num = 3;
 }
//Red-value-----------------------------------------------------------------
char buf[8]; //Define buffer
if(r < 0){
 r = 255;
}
                  //Cycles red value
 if(r > 255){
 r = 0;
}
//Write text. (x, y, text)
u8g.drawStr(1, 16, "R-");
u8g.drawStr(20, 16, itoa(r, buf, 10)); //itoa(int1, buffer, int2) converts int1(base int2) to ASCII format. Buffer stores this data.
//Green-value---------------------------------------------------------------
if(g < 0){
 g = 255;
}
             //Cycles green value
 if(g > 255){
 g = 0;
}
u8g.drawStr(64, 16, "G-");
u8g.drawStr(84, 16, itoa(g, buf, 10));
//Blue-value----------------------------------------------------------------
if(b < 0){
 b = 255;
}
              //Cycles blue value
if (b > 255){
 b = 0;
}
u8g.drawStr(1, 32, "B-");
u8g.drawStr(20, 32, itoa(b, buf, 10));
//LINE (x1, y1, x2, y2)(This is optional)-----------------------------------
u8g.drawLine(1, 17, 128, 17);
//draw a line (x1, y1, x2, y2)
//SET COLOR-----------------------------------------------------------------
u8g.drawStr(64, 32, "Color-");
 switch(num) {
   /*This function converts the num values to R, G and B strings according to the current color being edited.
     This code makes sure that when editing value intensity, the 'Color' field actually switches to the correct color(R, G or B).*/
   case 1  :
       u8g.drawStr(115, 32, "R");
         if(Yval > 230){
             r = r+1;
         }
         if(Yval < 20){
             r = r-1;
         }
       break;
   case 2  :
       u8g.drawStr(115, 32, "G");
         if(Yval > 230){
            g = g+1;
           }
         if(Yval < 20){
            g = g-1;
           }
       break;
   case 3  :
       u8g.drawStr(115, 32, "B");
         if(Yval > 230){
            b = b+1;
             }
             if(Yval < 20){
             b = b-1;
             }
       break;
 }
}
void setup() {
 u8g.setFont(u8g_font_unifont); //Set text font
 pinMode(swpin, INPUT_PULLUP); //Define the pin mode for the switch button
 strip.begin();   //Initiate LED strip
 strip.show();    //Update Strip
 strip.setBrightness(50); //Set the brightness of each NeoPixel
}
void loop() {
 u8g.firstPage();
 do {draw();
 } while (u8g.nextPage()); //Draw loop (OLED)
 delay(10); //Delay before each loop begins
 if(SW < 1){ //Ensures that the strip stays on at all times; you can use the int SW and link it to input swpin to assign a different function to it.
    colorWipe(strip.Color(r,   g,   b), 5);//The variables r g and b are linked to the values you will see on the OLED. The number '5' defines the number of seconds it takes to fill up the entire strip (Neopixels turn on one at a time in this function).
   }
}
void colorWipe(uint32_t color, int wait) { //Defining a new function to display the color.
 for(int i=0; i// For each pixel in strip:
   strip.setPixelColor(i, color);         //  Set pixel's color
   strip.show();                          //  Update strip to match
   delay(wait);                           //  Pause for a moment
 }
}
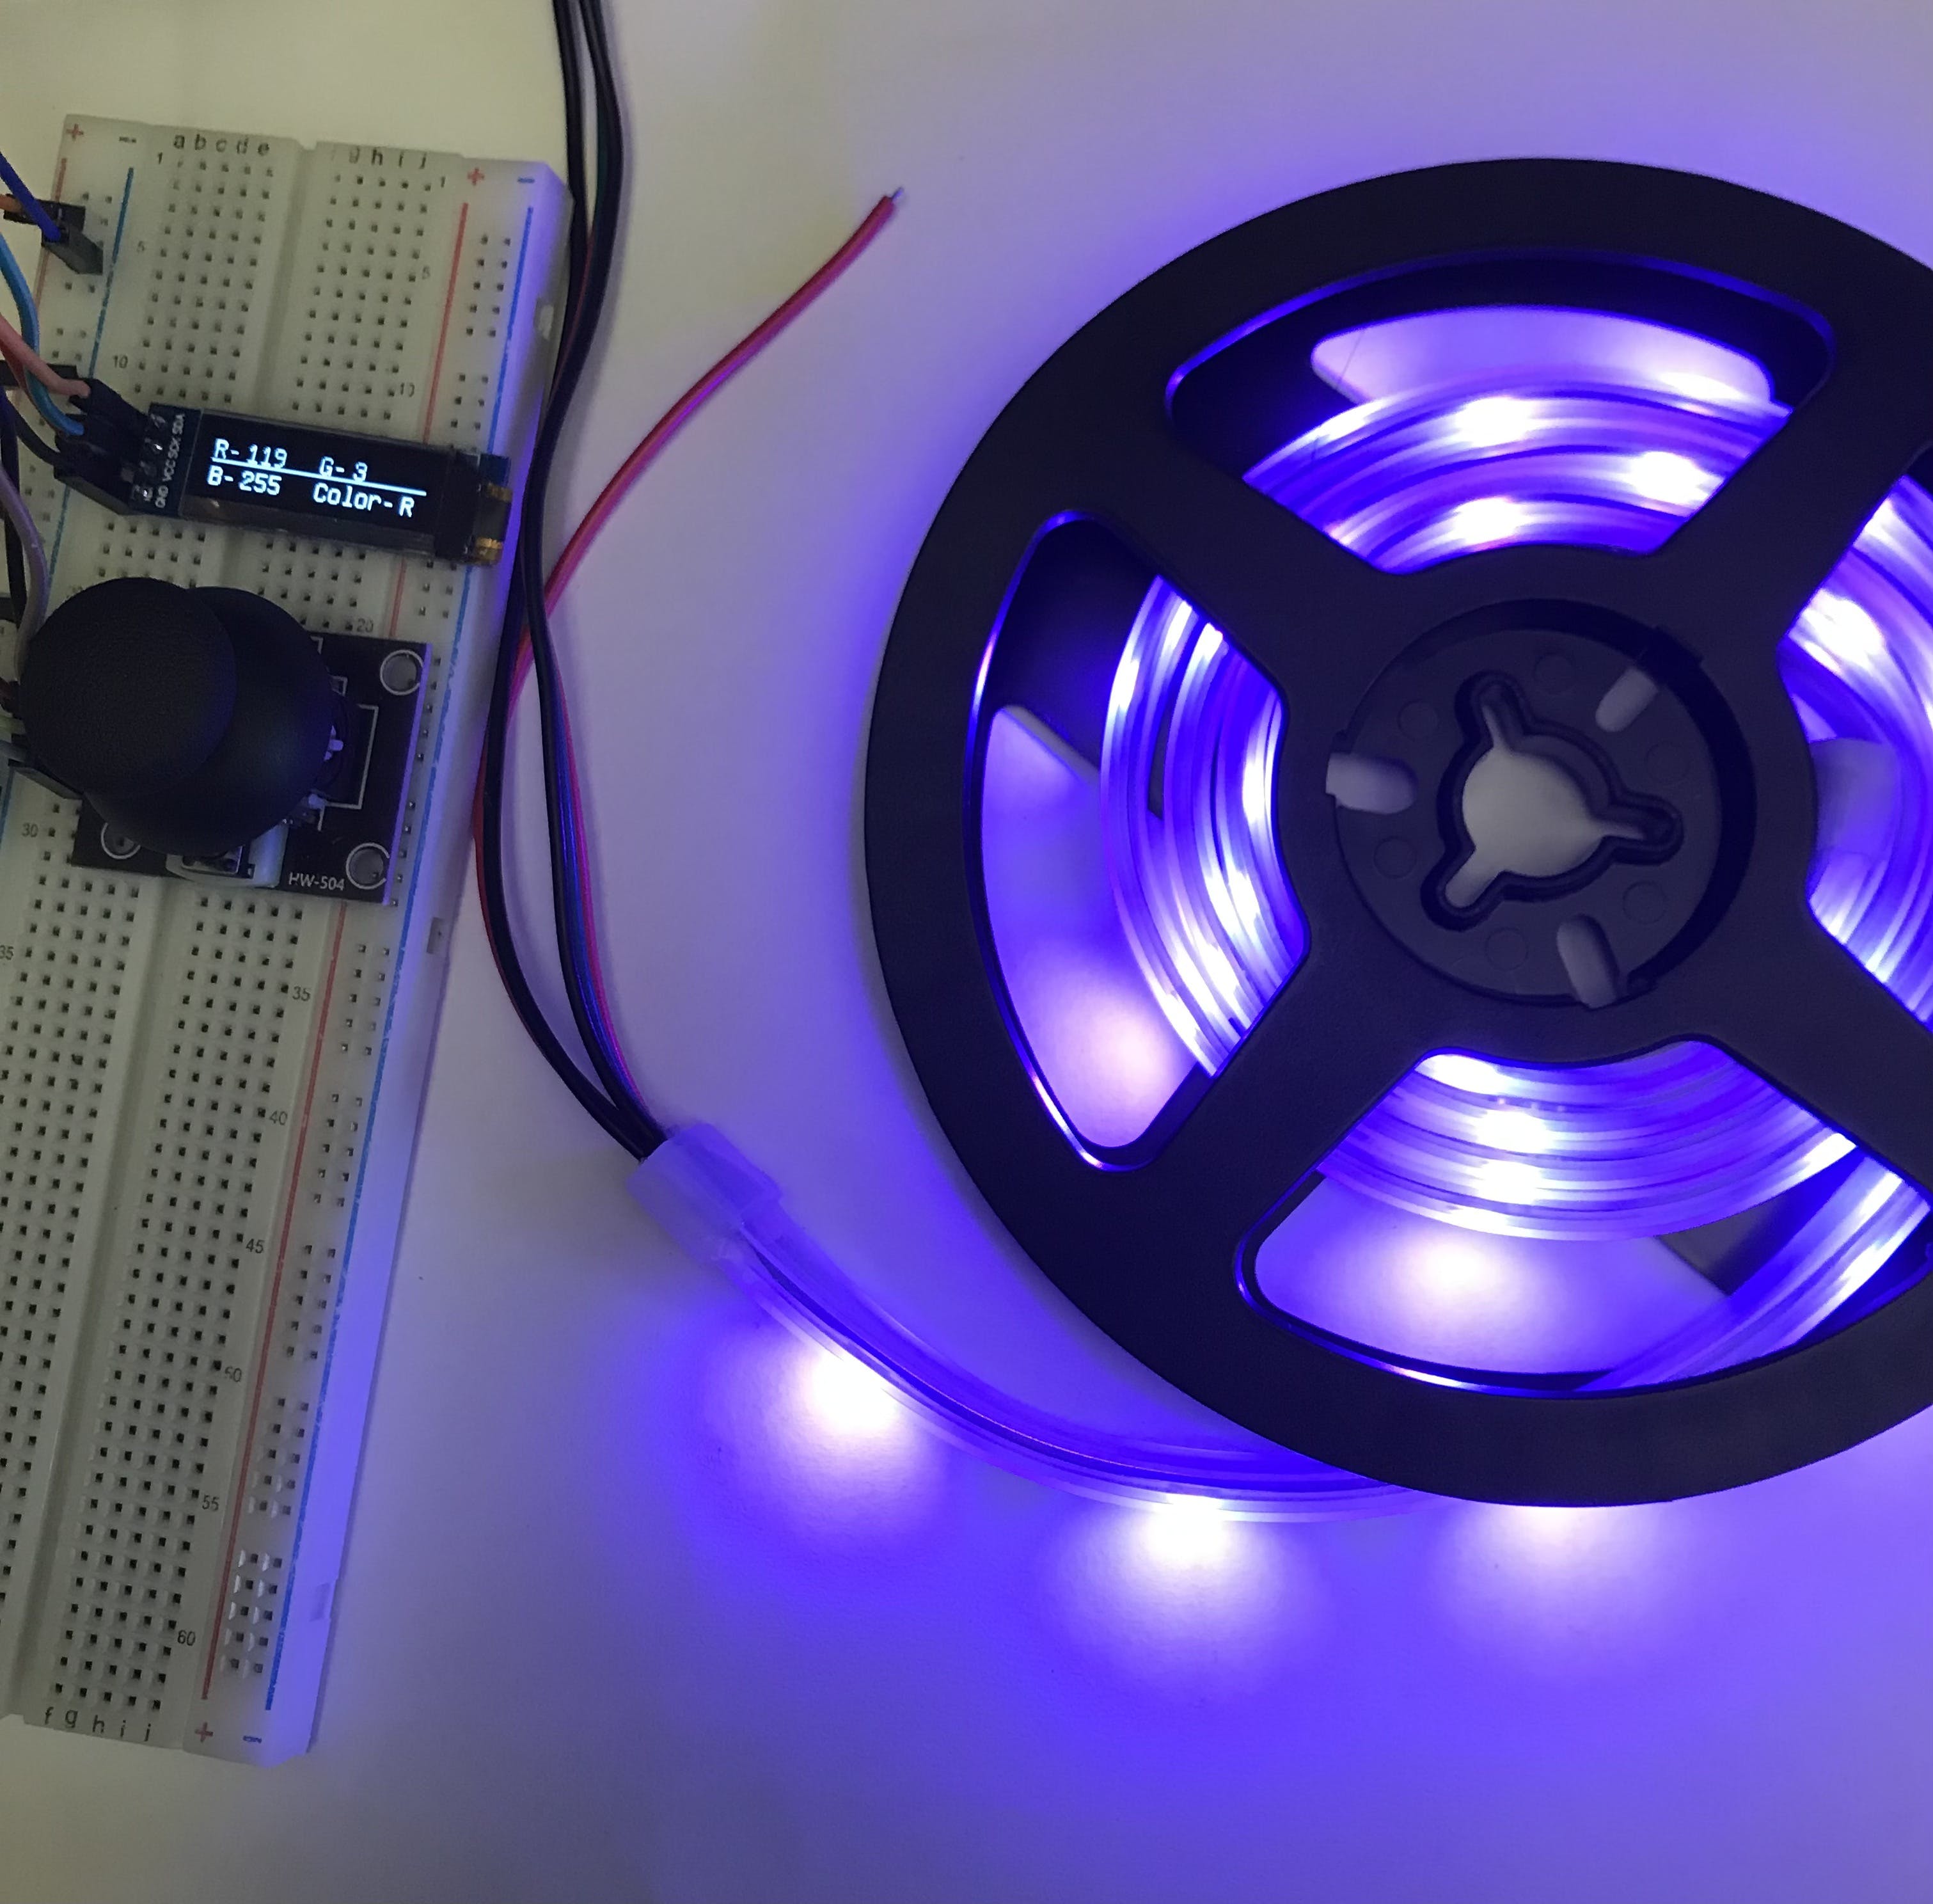
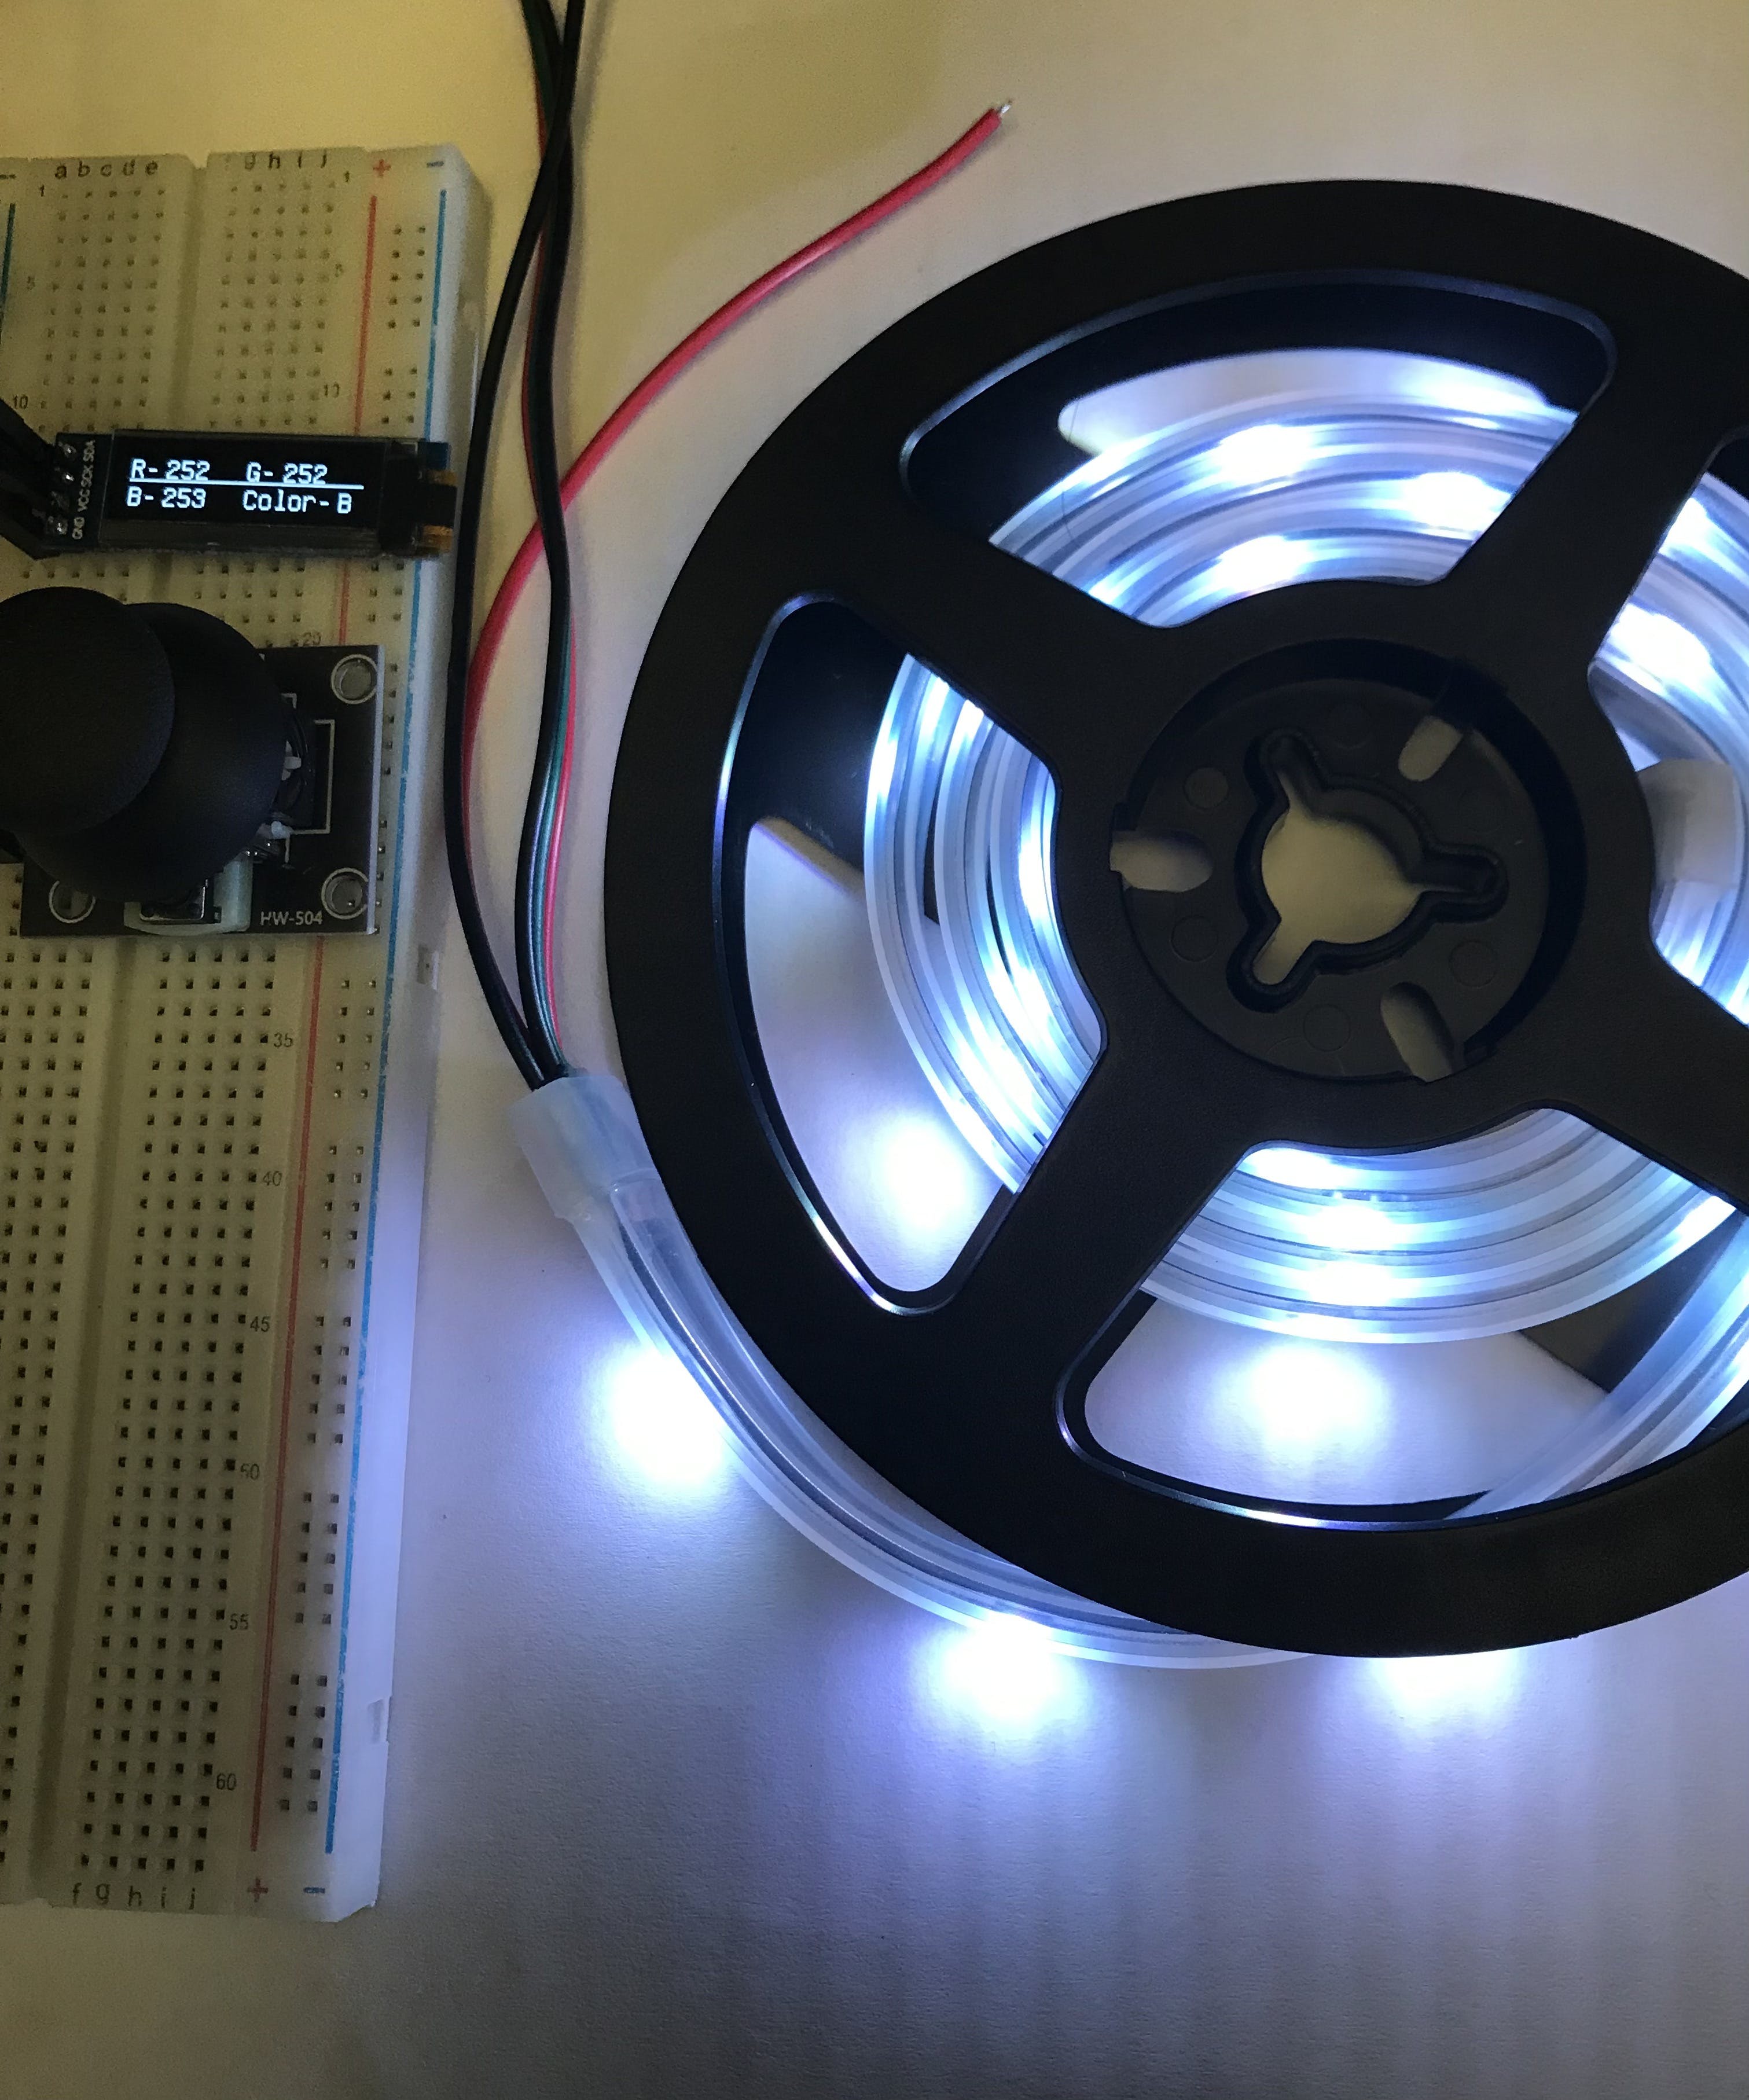
结果
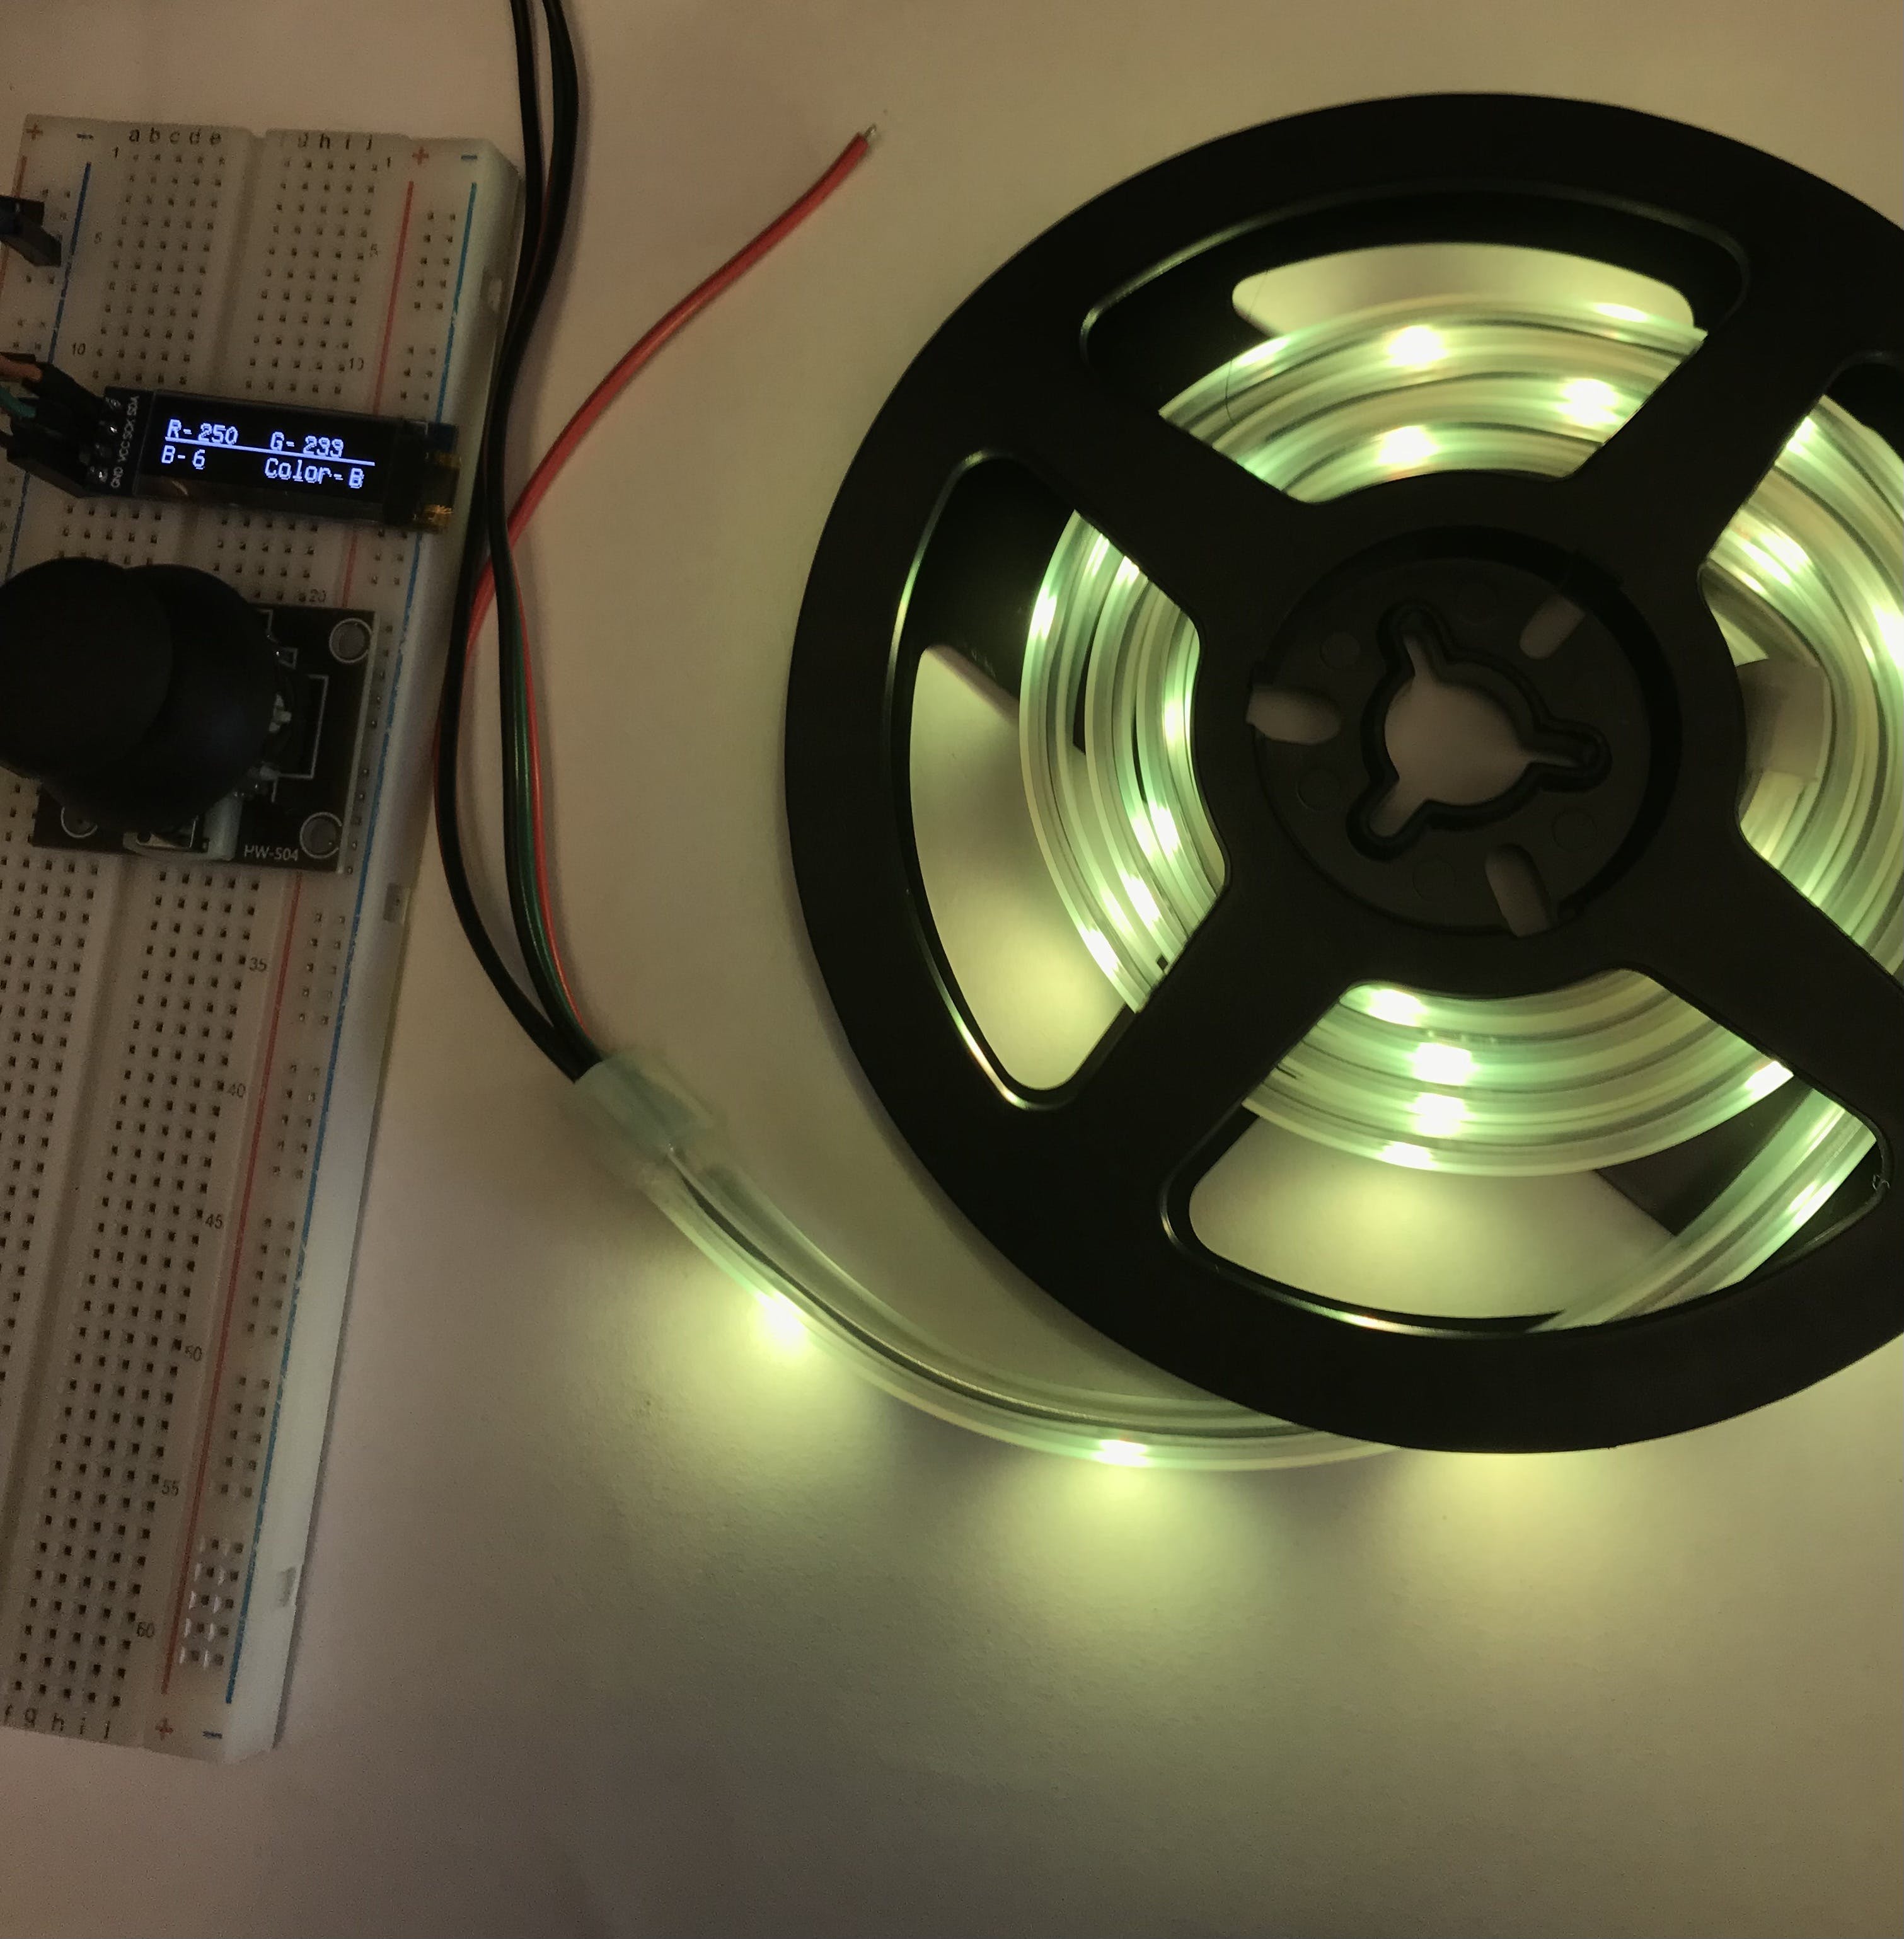
如果你的连接和代码都正确,你的混色器就完成了!在垂直方向移动操纵杆可增加/减少每种原色的强度,水平移动可在原色之间切换。您可以将所有东西附加到 PCB 或添加分配给按钮的酷图案,使其成为一个更加自定义的项目!
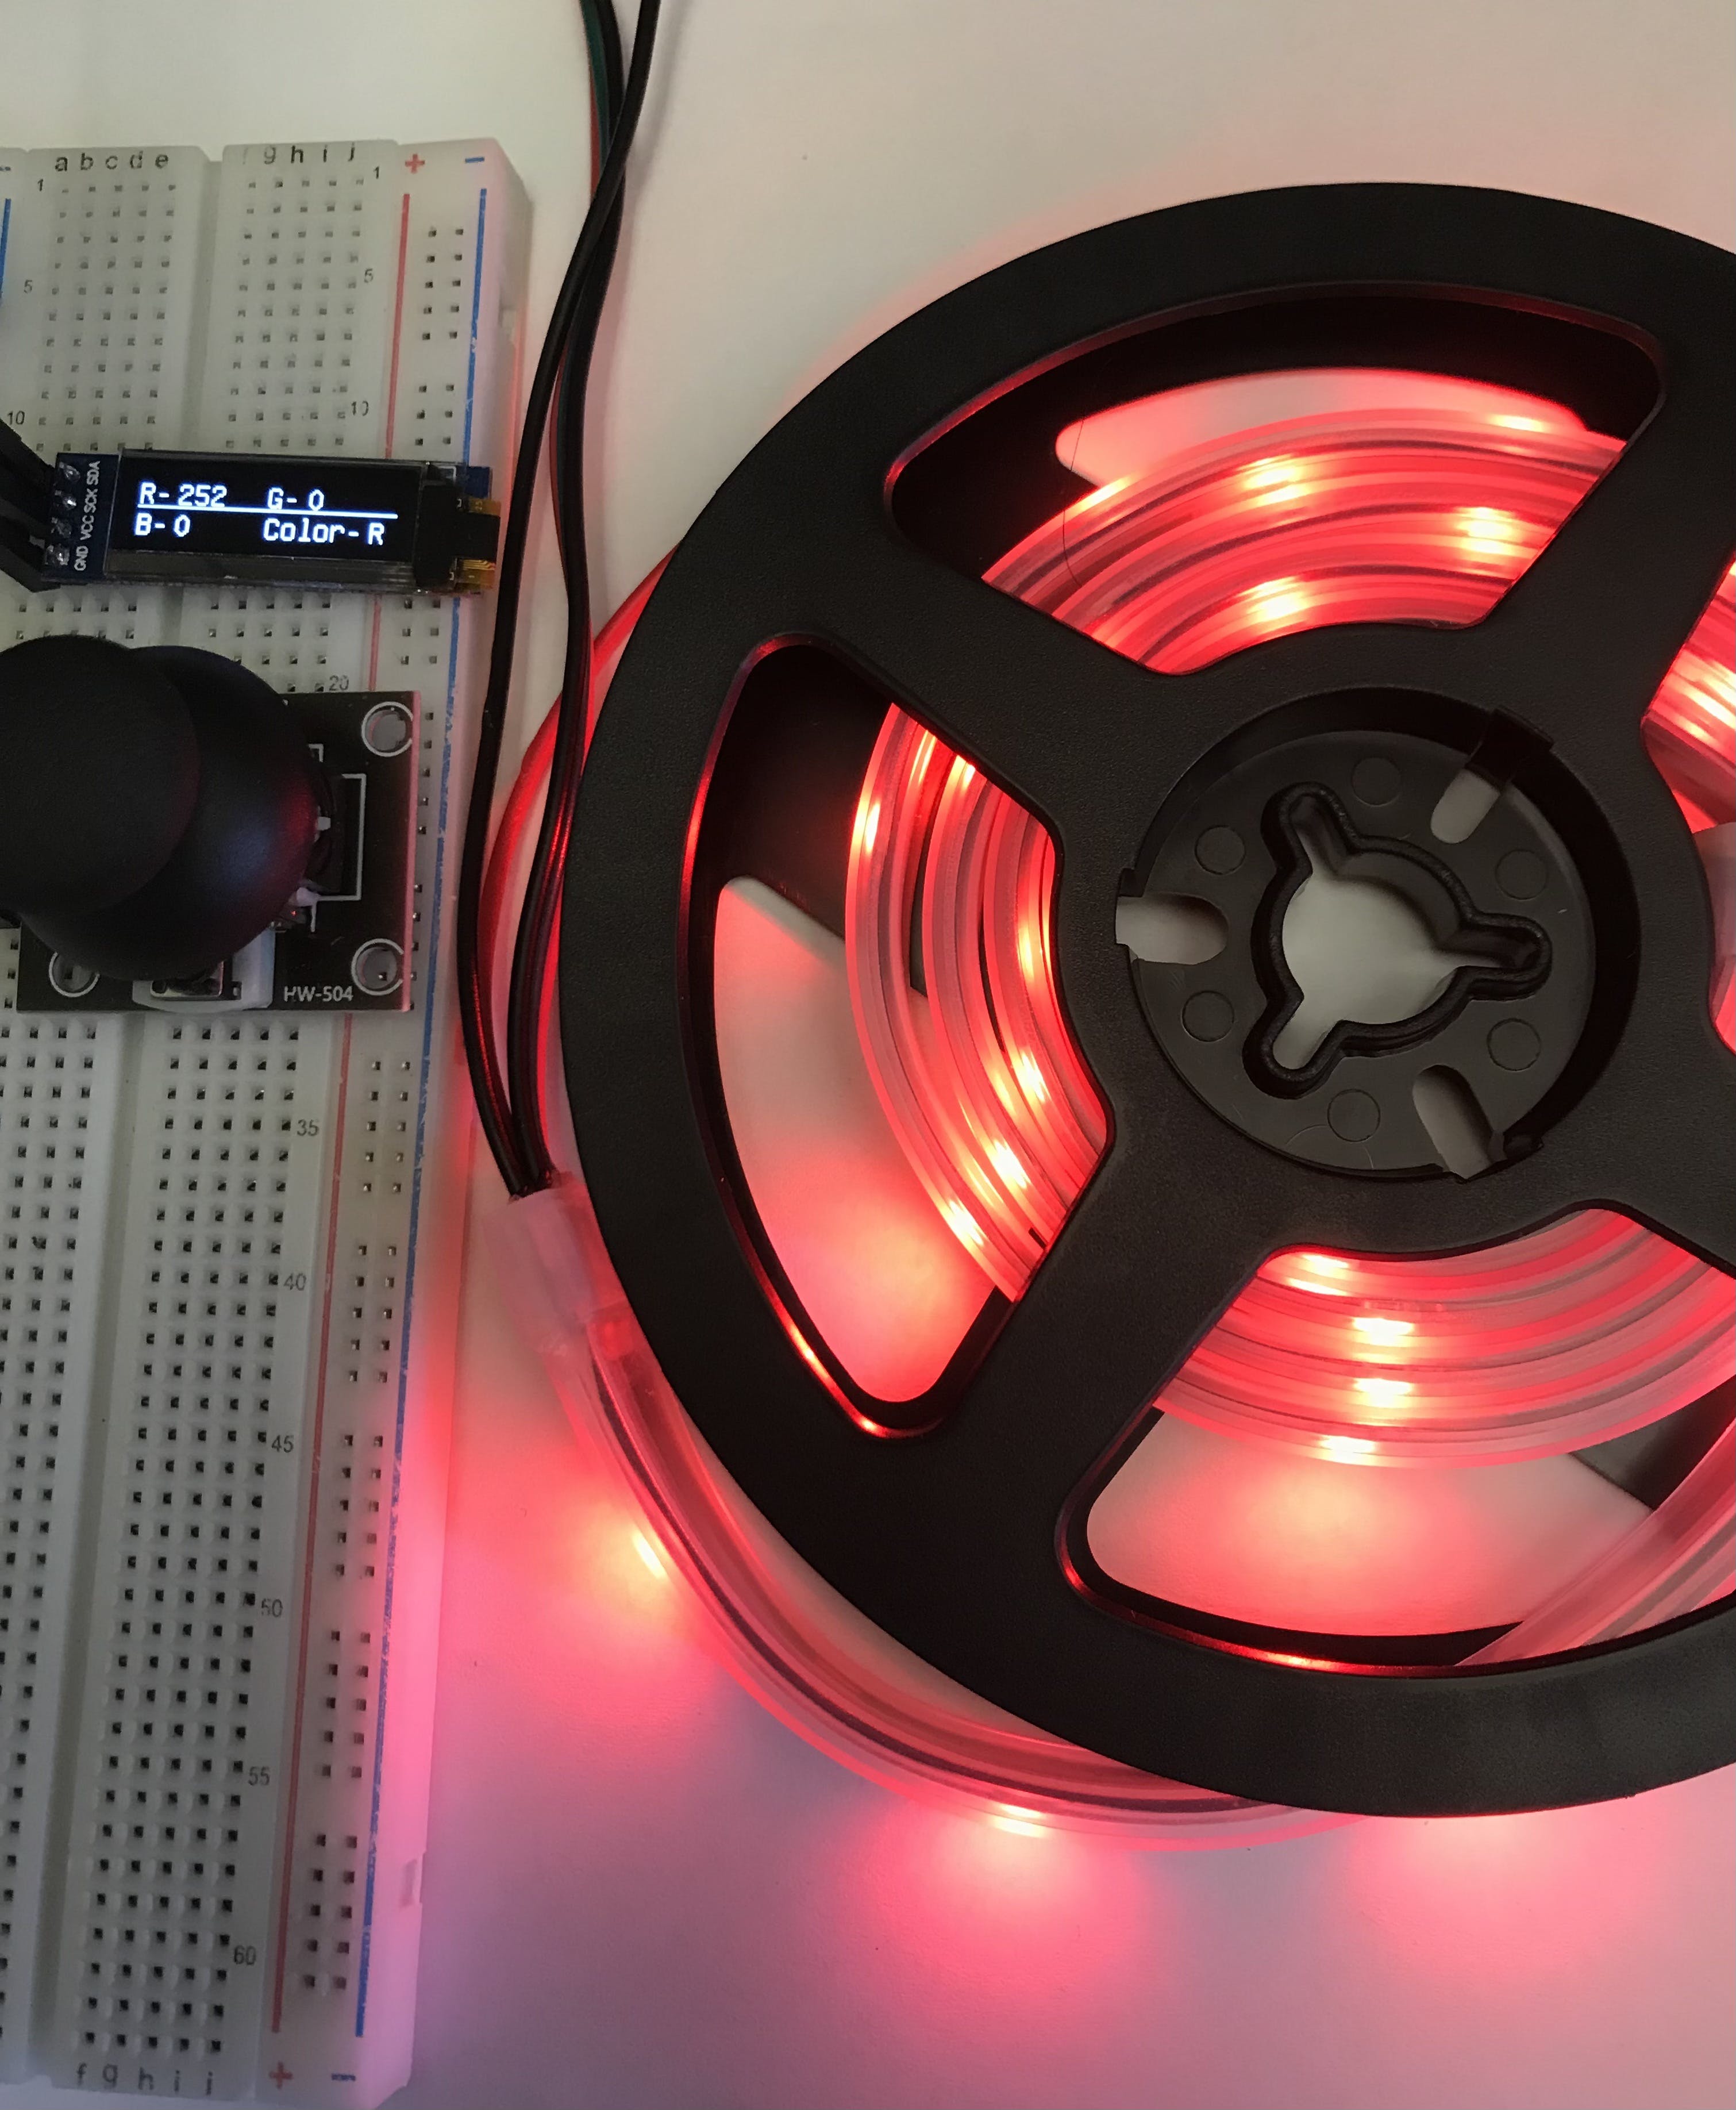
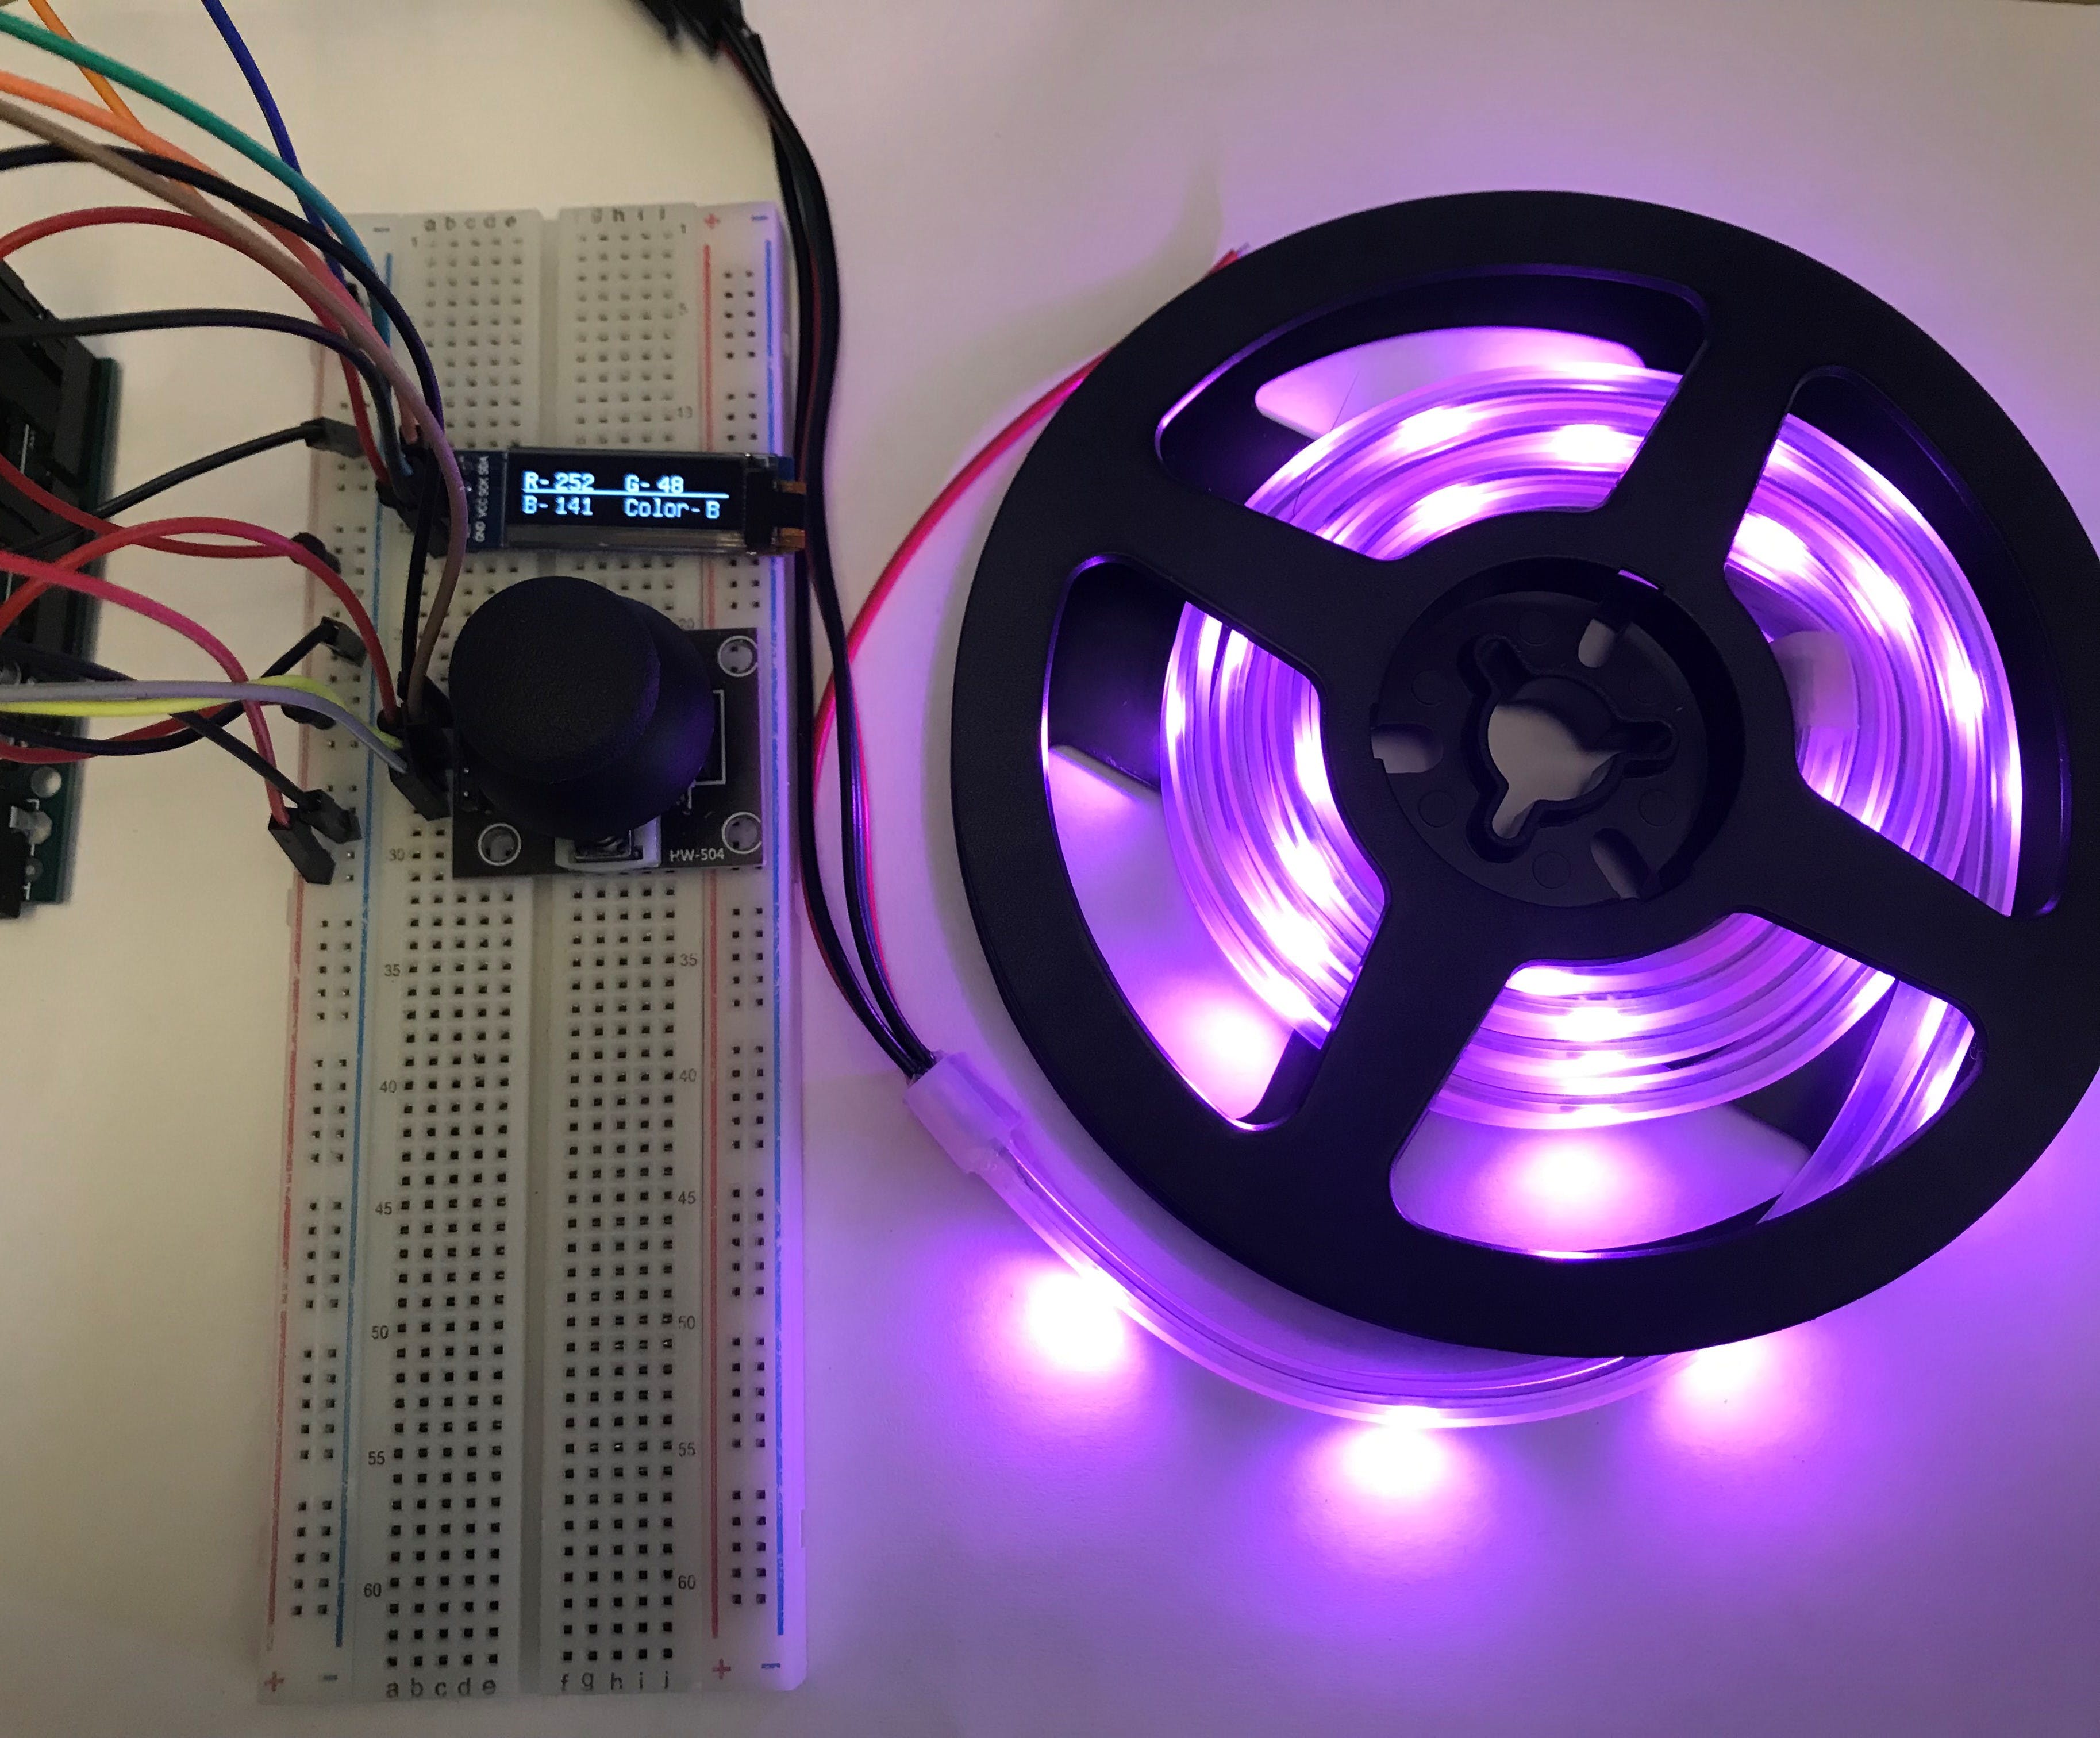
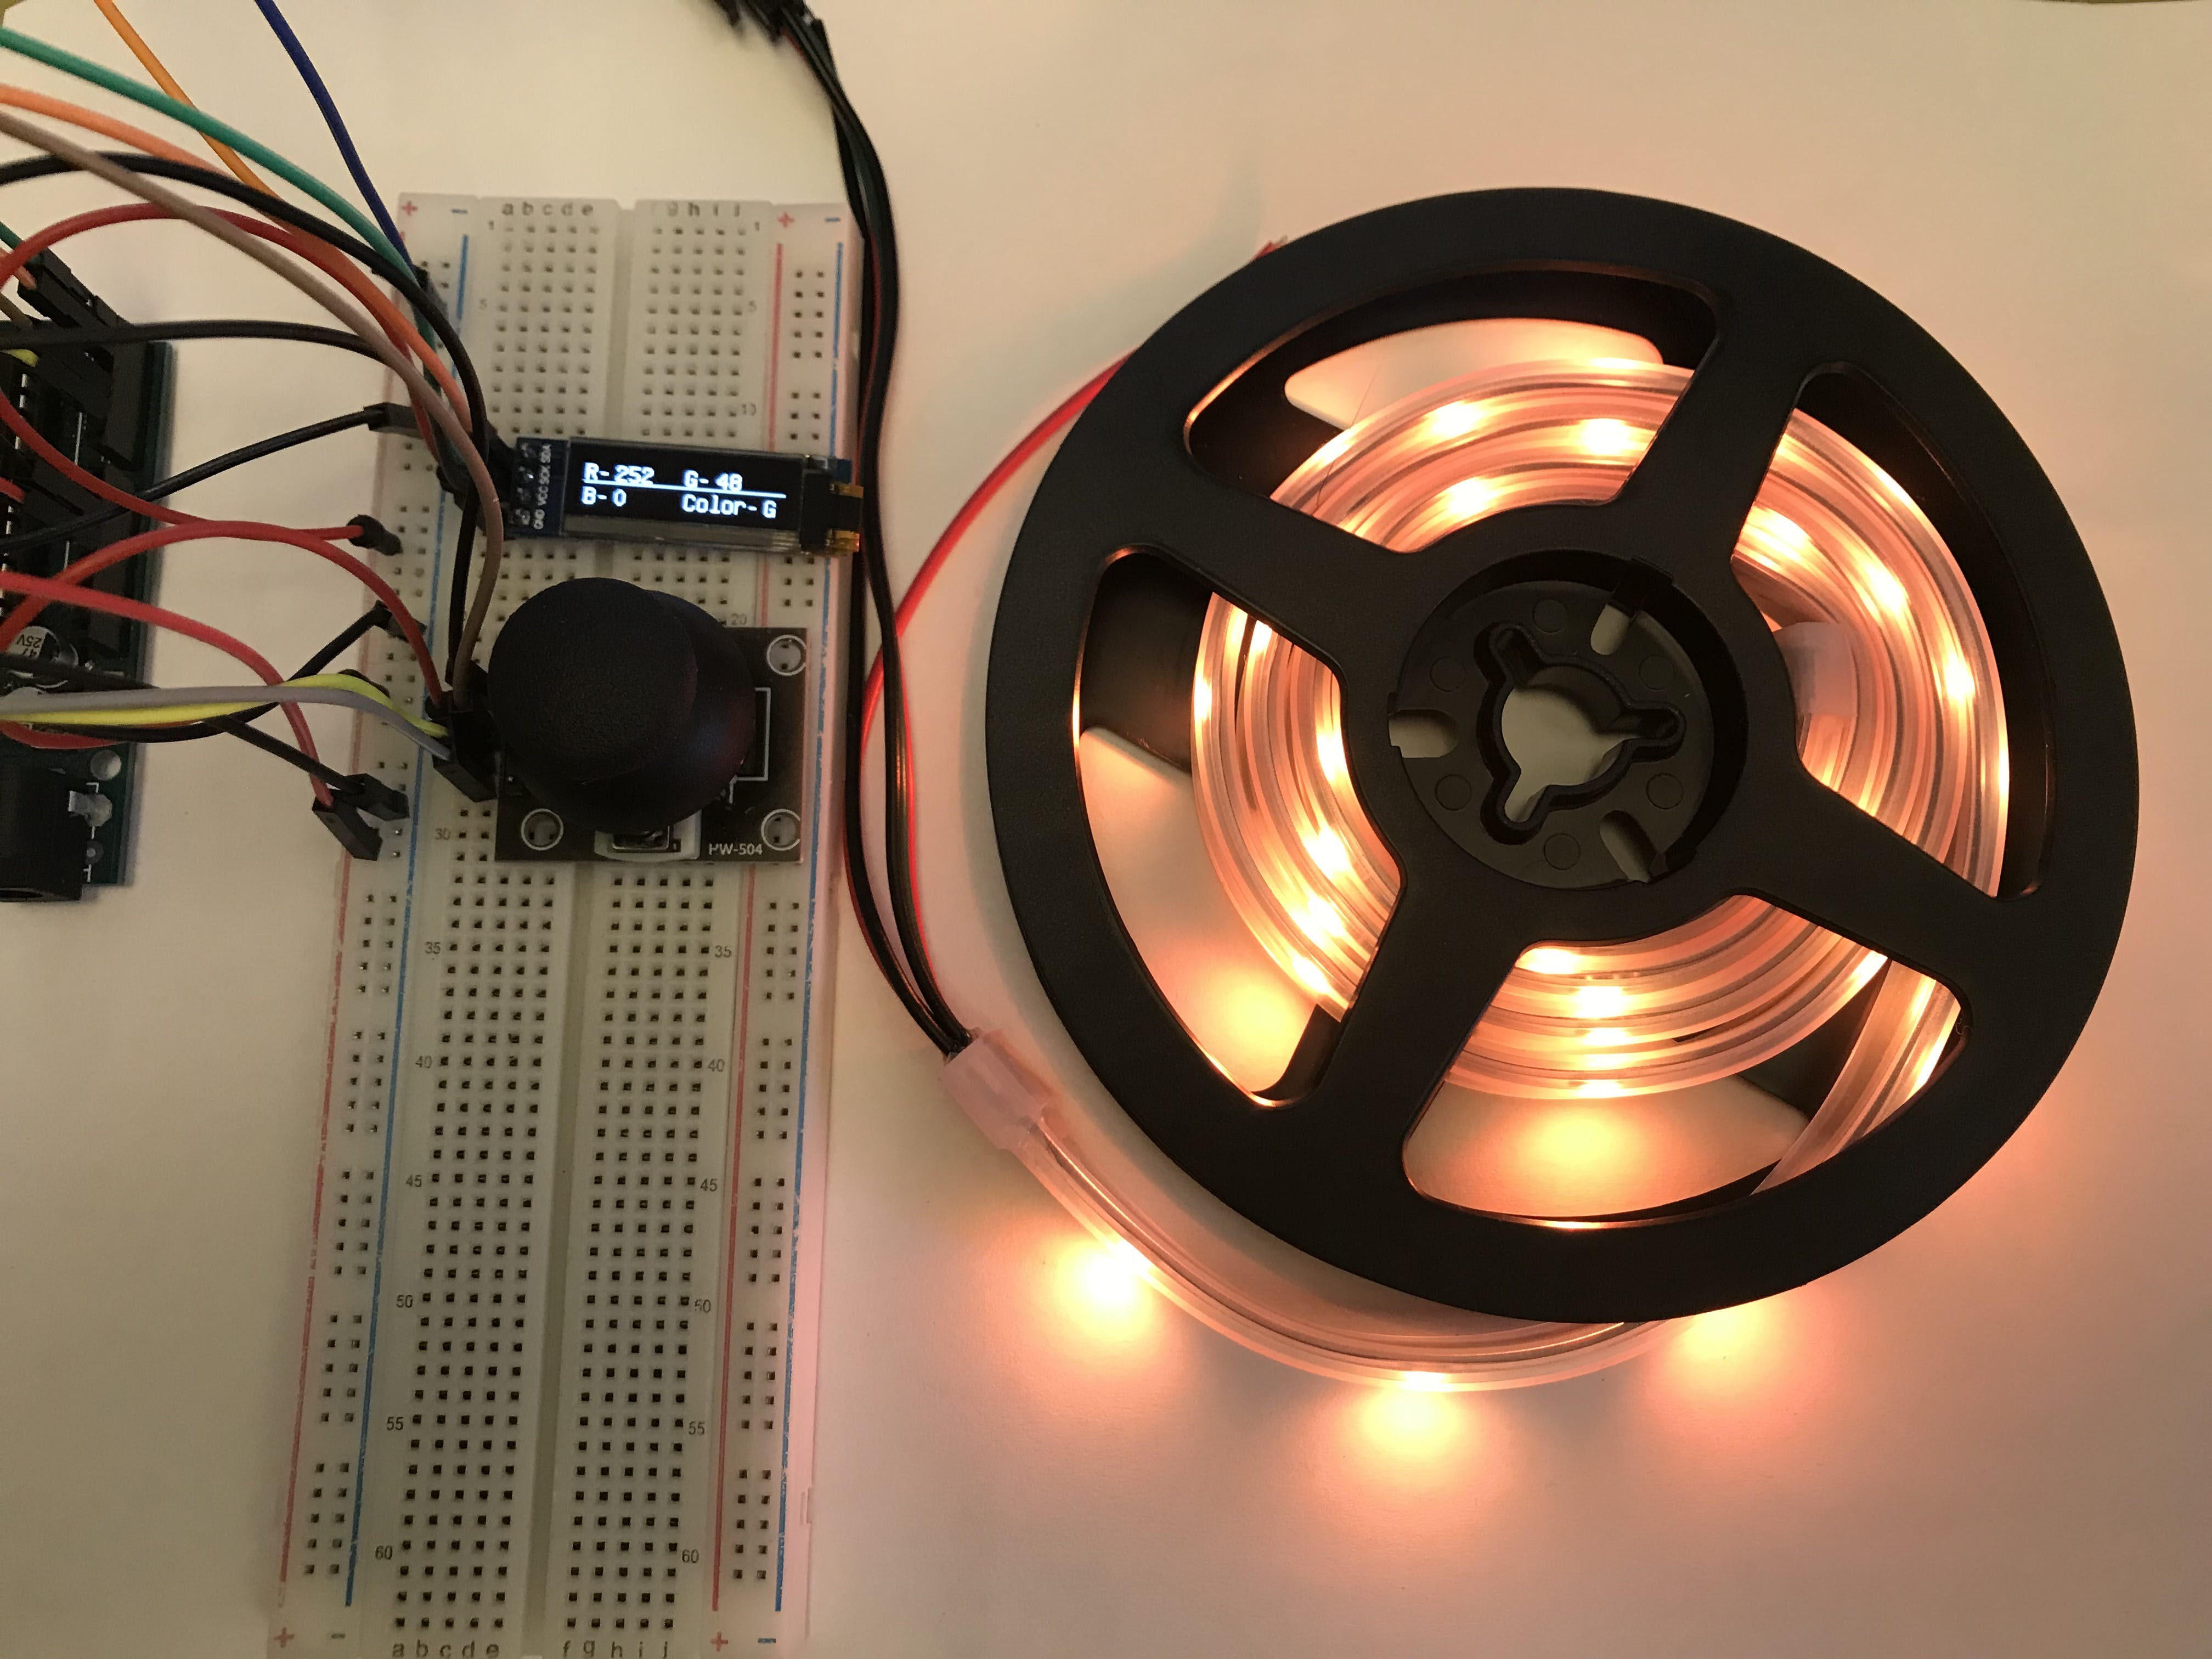
以下是一些结果图片:
- LCD、OLED液晶显示屏完整中文资料合集 90次下载
- 16*16点阵LED显示屏原理图下载 209次下载
- IIC通信小OLED显示屏模块资料汇总 81次下载
- 4×4键盘矩阵控制条形LED显示的仿真电路图合集免费下载 17次下载
- 两个4×4键盘矩阵控制条形LED显示的电路原理图免费下载 30次下载
- 1.3OLED显示屏IIC接口电路原理图免费下载 135次下载
- 1.3寸OLED模块的6PIN SPI显示屏电路原理图免费下载 54次下载
- LED和OLED显示技术概念原理发展背景和应用领域与发展概述 32次下载
- 0.96寸的OLED显示屏数据手册资料免费下载 361次下载
- 小间距LED显示屏应该如何解决详细方法说明 37次下载
- LED显示屏教程之LED显示屏的详细资料大全 87次下载
- 最新最全面的LED显示屏制作方法分享.pdf 54次下载
- LED显示屏控制电路的解析 53次下载
- 0.96_OLED显示屏_PCB_prints 0次下载
- 0.96_OLED显示屏_原理图 319次下载
- LED显示屏是什么材质 led显示屏参数设置 530次阅读
- LED显示屏技术方案 1482次阅读
- LED显示屏的基础知识 1142次阅读
- OLED显示屏的驱动设计与实现 4999次阅读
- LED灯珠对LED显示屏有什么样的影响 2961次阅读
- 基于一种超长的LED显示屏控制卡电路设计 1723次阅读
- LED灯珠对LED显示屏的影响有哪些 1141次阅读
- 基于多端口串行Flash存储器的LED显示屏控制设计 914次阅读
- PdigilentRGB OLED显示屏简介 1508次阅读
- LED显示屏通讯不上因素的有哪些 4368次阅读
- LED显示屏控制卡有哪些分类_如何选择LED显示屏控制卡? 1.8w次阅读
- LED显示屏如何区分好坏?区分LED显示屏好坏的九大方法 1.9w次阅读
- led显示屏控制软件有哪些_九个led显示屏控制软件介绍 19.7w次阅读
- LED显示屏技术的四大问题分析 1479次阅读
- 教你如何对LED显示屏砍价 872次阅读

 上传资料赚积分
下载排行
本周
- 1储能电源市场分析
- 7.99 MB | 7次下载 | 免费
- 2储能电源市场分析报告
- 2.61 MB | 6次下载 | 免费
- 3磁环电感定制时应该注意什么
- 0.32 MB | 2次下载 | 免费
- 4具有DCS-Control™ 功能的 3V 到 17V 0.5A 降压转换器TPS6217x-Q1数据表
- 3.17MB | 1次下载 | 免费
- 5labview文档教程资料(一)
- 24.29 MB | 1次下载 | 免费
- 6集成电流镜的 TPS61391 85VOUT 升压转换器数据表
- 1.54MB | 次下载 | 免费
- 7NCV7755 简单评估板数据手册
- 1.43 MB | 次下载 | 免费
- 8低纹波开关电容降压调节器LM2772数据表
- 2.08MB | 次下载 | 免费
本月
- 1ES9038PRO解码芯片的电路原理图介绍
- 0.25 MB | 35次下载 | 5 积分
- 2UHD智能显示SoC VS680产品简介
- 0.46 MB | 11次下载 | 免费
- 3STM32国内外发展现状
- 1.15 MB | 11次下载 | 免费
- 4ATmega8芯片中文手册
- 2.45 MB | 8次下载 | 1 积分
- 5TDK电容器产品指南
- 11.88 MB | 7次下载 | 1 积分
- 6储能电源市场分析
- 7.99 MB | 7次下载 | 免费
- 7传感芯片选型指南
- 3.60 MB | 6次下载 | 免费
- 8储能电源市场分析报告
- 2.61 MB | 6次下载 | 免费
总榜
- 1matlab软件下载入口
- 未知 | 935086次下载 | 免费
- 2开源硬件-PMP21529.1-4 开关降压/升压双向直流/直流转换器 PCB layout 设计
- 1.48MB | 420050次下载 | 免费
- 3Altium DXP2002下载入口
- 未知 | 233068次下载 | 免费
- 4电路仿真软件multisim 10.0免费下载
- 340992 | 191316次下载 | 免费
- 5十天学会AVR单片机与C语言视频教程 下载
- 158M | 183316次下载 | 免费
- 6labview8.5下载
- 未知 | 81567次下载 | 免费
- 7Keil工具MDK-Arm免费下载
- 0.02 MB | 73786次下载 | 免费
- 8NI LabVIEW中实现3D视觉的工具和技术
- 未知 | 70088次下载 | 免费


 工商网监
工商网监
评论